Table of Contents
Advertisement
Quick Links
Chapter 1: Introduction
Read this chapter before use.
This chapter gives you an overview of the RICOH GR III.
Chapter 2: Getting Started
Read this chapter before using the RICOH GR III for the first time.
This chapter explains about basic operations such as turning the camera on,
performing shooting, and playing back images.
Chapters 3 and Later
Read these chapters when you want to learn more about the different
camera functions.
These chapters explain about shooting and playback functions, as well as
how to customize the camera settings and use it with a computer.
Operating Manual
The serial number is located on the bottom of the camera.
Model: R02010
Advertisement
Table of Contents

Related Manuals for Ricoh R02010


Summary of Contents for Ricoh R02010
- Page 1 This chapter gives you an overview of the RICOH GR III. Chapter 2: Getting Started Read this chapter before using the RICOH GR III for the first time. This chapter explains about basic operations such as turning the camera on, performing shooting, and playing back images.
- Page 2 Regarding User Registration Thank you for purchasing a RICOH IMAGING product. In order to provide you with the best customer support and service experi- ence for the product you have purchased, we ask you to complete the user registration. Visit the following website to complete the user registration.
-
Page 3: Introduction
© RICOH IMAGING COMPANY, LTD. 2022 RICOH IMAGING COMPANY reserves the right to change the contents of this manual at any time without prior notice. Every effort has been made to ensure the accuracy of the information in this manual. Should you nevertheless notice any errors or omissions, we would be grateful if you would notify us at the address listed on the back cover of this manual. - Page 4 • HDMI, the HDMI logo, and High-Definition Multimedia Interface are trademarks or registered trademarks of HDMI Licensing, LLC in the United States and/or other countries. All other trademarks are the property of their respective owners. • This product uses the RICOH RT font designed by Ricoh Company Ltd.
- Page 5 “oss_license” folder in the “Software License” folder, and open the text file to read the license terms. The source codes of OSS used in this product are disclosed under the license terms of GPL, LGPL, etc. If you need the source codes, access the following URL. https://www.ricoh-imaging.co.jp/english/products/oss/...
-
Page 6: Safety Precautions
Safety Precautions Warning Symbols Various symbols are used throughout this Operating Manual and on the product to prevent physical harm to you or other people and damage to property. The symbols and their meanings are explained below. This symbol indicates matters that may lead to imminent risk of Danger death or serious injury if ignored or incorrectly handled. - Page 7 Use the camera or battery charger BJ-11 to charge the battery. Do not use the battery with any camera except the cameras compatible with the DB-110. Stop using the camera immediately in the event of abnormalities such as smoke, unusual odors, or excessive heat being emitted. Contact your near- est dealer or service center for repair.
- Page 8 Follow these precautions to prevent the battery from leaking, overheat- ing, igniting, or exploding. • Do not use a battery other than those specifically recommended for the camera. • Do not carry or store the battery together with metal objects such as ball- point pens, necklaces, coins, and hairpins.
- Page 9 Do not use the battery charger or AC adapter with commercially available electronic transformers when traveling abroad. Failure to observe this pre- caution could result in fire, electric shocks, or product malfunction. Use only the indicated power supply voltage. Failure to observe this pre- caution could result in fire or electric shocks.
- Page 10 Caution Contact with fluid leaking from a battery can lead to burns. If part of your body comes in contact with a damaged battery, rinse the area with water immediately. (Do not use soap.) If a battery starts to leak, remove it immediately from the camera and wipe the battery chamber thoroughly before replacing it with a new battery.
-
Page 11: Table Of Contents
Contents Introduction ........................... 1 Safety Precautions ........................ 4 Introduction Checking the Contents of the Package ..............13 Names and Functions of the Working Parts ..............14 Operating Controls ...........................16 Indicators on the Monitor ....................18 Shooting Screen ..........................18 Playback Screen ..........................19 Changing the Screen Display ......................20 Using the Touch Panel........................ - Page 12 Setting the Focus ........................57 Setting the Focus Mode ........................57 Shooting Close-ups (Macro) ......................61 Shooting with a Single Press of the Shutter Release Button (Full Press Snap) .... 62 Setting the Exposure ......................63 Selecting a Metering Method .......................63 Setting the ISO Sensitivity ......................64 Using a Flash ............................65 Reducing Noise ..........................67 Setting the White Balance ....................69...
- Page 13 Editing and Processing Images ...................100 Developing RAW Images ......................100 Changing the Image Size ......................102 Correcting Highlight/Shadow Areas (Levels Adjustment) ..........103 Correcting the White Balance .....................105 Correcting Color Moiré ........................106 Adjusting the Image Quality .......................107 Editing Movies ..........................108 Sharing Images Using the Camera with a Computer ................110 Using the Camera with a Communication Device..........111 Connecting to a Communication Device via Bluetooth®...
- Page 14 Appendix Attaching Optional Accessories ..................139 Conversion Lens/Lens Adapter ....................139 AC Adapter ............................140 Troubleshooting .......................141 Power Supply ............................141 Shooting .............................142 Playback/Deletion ...........................144 Others ..............................145 Error Messages ..........................145 Main Specifications ......................147 Camera ..............................147 USB Power Adapter AC-U1/AC-U2 .....................150 Rechargeable Battery DB-110 .....................150 Image Storage Capacity ........................151 Operating Environment ........................152 Using the Camera Abroad .....................153...
-
Page 15: Introduction
Introduction Checking the Contents of the Package Before using your digital camera, confirm that the package contains the items listed below. RICOH GR III Hot shoe cover Rechargeable USB power battery adapter (Installed on the cam- (DB-110) (AC-U1 or era) -
Page 16: Names And Functions Of The Working Parts
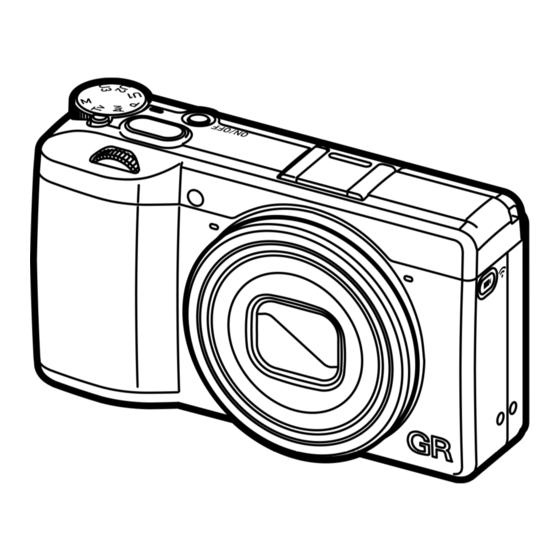
Names and Functions of the Working Parts Power button lamp AF assist light/ self-timer lamp Hot shoe Strap eyelet Microphone Microphone Lens Status lamp Strap eyelet Monitor Terminal cover USB terminal (USB Type-C) - Page 17 Speaker Ring cap Strap eyelet Tripod screw hole Battery/card cover Release lever...
-
Page 18: Operating Controls
Operating Controls This section explains about operating controls. The icons in parentheses are used in the descriptions of this manual. 1 2 3 4 5 11 12 Front e-dial (p) Mode dial Rotate the dial to change values for camera set- Changes the exposure mode. - Page 19 Power button 11 White balance/Down button (t/b) Turns the power on or off. (p.40) Displays the white balance setting screen. Movie/Wireless button (k/m) (p.70) Moves the cursor down when an item is se- Switches between still image mode and movie lected.
-
Page 20: Indicators On The Monitor
Indicators on the Monitor Shooting Screen 1 2 3 4 5 11 13 14 15 99999 0:58 58˝ G1B1 1.5m G1B1 1.5m Press & Hold 1/400 F5.6 102400 EV-2.0 EV-2.0 30 31 20 32 35 36 37 Still image mode Movie mode Drive (p.74) 21 Exposure mode (p.48) -
Page 21: Playback Screen
Playback Screen 99998 99999 02/02/2019 10:00 02/02/2019 10:00 9998/9999 100-0630 999-9999 00´ 20˝ 1/2400 F5.6 EV+0.7 10 11 15 16 Still image mode Movie mode Shooting date and time 11 Image transfer status (p.99) Protect (p.97) 12 Shutter speed GPS information (p.116) 13 Aperture Value Bluetooth®... -
Page 22: Changing The Screen Display
Changing the Screen Display You can switch the information displayed on the screen by pressing j. Shooting Mode The information displayed on the shooting screen can be switched. Standard Info. Display Displays all the information. Simplified Info. Display Displays only the information regarding the exposure, AE lock, autofocus frame, and MF operation guide. -
Page 23: Using The Touch Panel
Playback Mode You can switch the screen display among [Standard Info. Display], [Detailed Info. Display], and [No Information Display] in the single image display. Use ab to switch the page in [Detailed Info. Display]. 02/02/2019 10:00 99998 99999 02/02/2019 10:00 99998 99999 +0.3 6000x4000... -
Page 24: How To Change Function Settings
How to Change Function Settings Using the Button/Lever Using the Direct Keys Quick settings are possible by pressing abcd in the shooting mode. The following functions can be activated. a (s) Macro Mode (p.61) b (t) White Balance (p.69) c (u) ISO Setting (p.63) d (v) Drive Mode (p.74) - Page 25 Using the ADJ. Lever The assigned functions can be easily recalled by pressing n in the shoot- ing mode. Press n in the shooting mode. The mode switches to the ADJ. mode and the icons for the assigned functions appear. Use cd to select a function.
- Page 26 Using the Fn Button The assigned function can be activated by pressing h in the shooting mode. By default, [AF+AE Lock] is assigned. Memo --------------------------------------------------------------------------------------------------------- • The function of h can be changed in [Fn Button Setting] of the D2 menu. [ISO Button] (c), [Drive Button] (d), and [Movie/Wireless Button] (k) can also be set in [Fn Button Setting].
-
Page 27: Setting From The Menus
AF.C Setting When changing the menu type, press Setup c twice, and then use ab to select Format Create New Folder a type. RICOH Folder Name File Name Sequential Numbering Reset Numbering Copyright Information Still Image Settings menus (p.27) Movie Settings menus (p.30) Playback Settings menus (p.32) - Page 28 Find a function to set, and press d. Indicator Lamps Power Button Lamp The settings for the selected setting item are Count Down displayed. Sound E ects Volume Bluetooth Setting Wireless LAN Setting Smartphone Link Use ab to select a setting, and Power Button Lamp press e.
-
Page 29: Menu List
Menu List The following menus are available. (The underlined settings and the square- bracketed settings are the default settings.) A Still Image Settings Menus Still Image Settings Focus Face Detection AF Assist Light Snap Focus Distance 2.5m Full Press Snap Focus Peaking AF.C Setting A1 Focus Settings... - Page 30 Program Line Normal, Max Aperture Priority p.51 ND Filter Auto, On, Off p.86 Auto EV Compensation On, Off p.49 Link AE and AF Point On, Off p.63 A3 White Balance Settings White Balance Auto White Balance, Multi Auto White Balance, Daylight, p.69 Shade, Cloudy, Fl.
- Page 31 A7 Shooting Assist Shake Reduction On, Off p.90 Auto SR Off Enable Auto SR Off, Disable Auto SR Off p.90...
-
Page 32: B Movie Settings Menus
B Movie Settings Menus Movie Settings Focus Snap Focus Distance 2.5m Focus Peaking MF Auto Magnification AE Metering ND Filter White Balance B1 Focus Settings Focus AF, MF, Snap, p.57 Snap Focus Distance 1m, 1.5m, 2m, 2.5m, 5m, p.57 Focus Peaking Highlight Edge, Extract Edge, Off p.58 MF Auto Magnification... - Page 33 B6 Image Process Settings Image Control Standard, Vivid, Monotone, Hard Monotone, Hi-Contrast B&W, p.87 Positive Film, Bleach Bypass, Retro, Custom1, Custom2 Peripheral Illumin. Corr. On, Off p.89 D-Range Correction Highlight Correction: Auto, Off p.84 Shadow Correction: Auto, Low, Medium, High, Off B7 Shooting Assist Movie SR On, Off...
-
Page 34: C Playback Settings Menus
C Playback Settings Menus Playback Settings Delete Protect Image Rotation Image Copy File Transfer RAW Development Resize C1 File Management Delete Delete 1 Image, Delete All Images p.96 Protect Protect 1 Image, Protect All Images p.97 Image Rotation 90° (counterclockwise), 180°, 90° (clockwise) p.94 Image Copy —... -
Page 35: D Customize Settings Menus
D Customize Settings Menus Customize Settings Save Settings Rename Recall Delete Settings M Mode Dial Setting ADJ Mode Setting Fn Button Setting D1 User Mode Save Settings — p.117 Rename — p.118 Recall — p.119 Delete Settings — p.118 D2 Customize Controls M Mode Dial Setting Custom1, Custom2 p.52... - Page 36 Shutter Button Setting AF+AE Lock, AE Lock p.125 4-way Controller Direct Key Priority, AF point change Priority p.59 Shutter Btn. Confirmation On, Off p.125 LCD Touch Operation On, Off p.21 Touch AF AF Point, AF Point+Focus, AF Point+Focus+Shoot, Off p.50 D3 Display Customization Shooting Info.
-
Page 37: E Setup Menus
— p.133 Folder Name Folder Name: Date, Optional p.134 A freely defined string of characters [RICOH] File Name Still Image: A freely defined string of two characters [R0] p.136 Movie: A freely defined string of two characters [R0] Sequential Numbering Folder &... - Page 38 E6 Wireless Connection Bluetooth Setting Action Mode: On anytime, On when power is on, Disable p.112 Pairing Communication Info. Wireless LAN Setting Action Mode: On, Off p.114 Communication Info. Smartphone Link Store Location Info.: On, Off p.113 Auto Image Transfer: On, Off Image Transfer while Off: On, Off E7 Power Supply Settings Auto Power Off...
-
Page 39: Getting Started
Getting Started Setting the Battery and a Memory Card Inserting the Battery and a Memory Card SD memory cards, SDHC memory cards, and SDXC memory cards can be used with this camera. “Memory card” refers to these memory cards in this manual. -
Page 40: Charging The Battery
Data Storage Location Images taken and movies recorded with this camera are saved in the internal memory or a memory card. Memo --------------------------------------------------------------------------------------------------------- • You can copy all data stored in the internal memory to a memory card. (p.98) • The storage capacity varies depending on the memory card. (p.151) Charging the Battery Charge the rechargeable battery DB-110 using the provided USB cable I-USB166, USB power adapter AC-U1/AC-U2, and power plug before use. - Page 41 Connect the USB cable to the USB power adapter. Plug the USB power adapter into a power outlet. The status lamp of the camera turns on and charging starts. Depending on the battery level, the charg- ing time differs. An exhausted battery will be fully recharged in about 2.5 hours (at 25°C (77°F)).
-
Page 42: Initial Settings
Initial Settings Turn the camera on and make the initial settings. Turning the Camera On Press the power button. The power button lamp lights, and then the status lamp blinks for several seconds. The first time the camera is turned on after purchase, the [Language/H] screen ap- pears. -
Page 43: Setting The Language And The Date And Time
Setting the Language and the Date and Time You can set the display language for menus and the date and time. Use ab to select a language, and press e. The selected language is set and the [Date Adjustment] screen appears. Set the display format and the date Date Adjustment and time. -
Page 44: Formatting A Memory Card
Press f. The menu appears. Press c twice, and then use ab to Setup select E. Format Create New Folder Folder Name RICOH File Name Sequential Numbering Reset Numbering Copyright Information Press d twice, select [Format], and File Setting press d. - Page 45 • Do not remove the memory card while formatting, or the card may be damaged. • Formatting deletes all data, both protected and unprotected. Memo --------------------------------------------------------------------------------------------------------- • When a memory card is formatted, the volume label “RICOH GR” is assigned to the card.
-
Page 46: Basic Shooting Operation
Basic Shooting Operation Shooting in the Program Mode Set the mode dial to J while pressing the lock button. The exposure mode is set to [Program AE] and the Live View is displayed. Press z halfway. Focus is adjusted, and exposure is set. The distance is measured from up to 25 points and the green focus frame appears for the area in focus. - Page 47 Magnifying Live View image ----------------------------------------------------------------------------- • The Live View image can be magnified. The following operations are available. Press and hold j Magnifies the Live View image. Switches the magnification between [x4] and [x16]. Moves the magnified area. abcd/Slide Resets to the entire image display. • The image cannot be magnified during recording in B mode.
-
Page 48: Viewing The Captured Images
Viewing the Captured Images Review the captured image on the monitor. Press g. The camera switches to the playback mode and the last image you took is displayed. (Single image display) View an image. 02/02/2019 10:00 1 1 / 100-0001 1/2400 F5.6 The following operations are available. - Page 49 Memo --------------------------------------------------------------------------------------------------------- • If [Focus Magnification] is set to [On] (default setting) in the D3 menu, the image is magnified centering on the AF point set in shooting. • Movies cannot be magnified. • If the image is switched to the previous or next image by flicking on the touch panel, animation is displayed.
-
Page 50: Taking Pictures
Taking Pictures Taking Still Images Setting the Exposure Mode Set an aperture value or shutter speed for shooting. The following settings can be set. 2: Available #: Conditionally available Exposure Mode Aperture Value Shutter Speed Sensitivity Program AE Automatically set Aperture Priority AE Automatically set Shutter Priority AE... - Page 51 Turn p or n to change a value. The following settings can be changed. Exposure Mode Turn n to the Left or Right (q) Program shift Exposure compensation Aperture value Exposure compensation Shutter speed Exposure compensation Aperture value Shutter speed In N mode, the exposure indicator is dis- played.
- Page 52 Caution ------------------------------------------------------------------------------------------------------- • Images are not displayed on the monitor during shooting. AE Lock -------------------------------------------------------------------------------------------------------- • The exposure value is locked while z is pressed halfway, and the lock is canceled when the button is released. • [AF+AE Lock] or [AE Lock] can be registered to [Fn Button Setting] in the D2 menu to use the func- tion with h.
- Page 53 Program Line ------------------------------------------------------------------------------------------------ • You can set the program line for J mode to [Max Aperture Priority] in [Program Line] of the A2 menu. Bulb, Time, and Bulb Timer ------------------------------------------------------------------------------- • If the sensitivity is fixed at a certain sensitivity in N mode, [B], [T], or [BT] can be set for the shutter speed.
- Page 54 Preview ------------------------------------------------------------------------------------------------------- • When [Hold Movie/Wireless Btn.] is set to [Preview] in [Fn Button Setting] of the D2 menu, the Preview is available. (p.123) If you press and hold k, the aperture is adjusted to the set aperture value, and you can check the depth of field. It is canceled when k is released. • When [Hold Movie/Wireless Btn.] is set to [Wireless LAN Setting] (default setting), k works as the switch to turn on/off the wireless LAN function.
-
Page 55: Using Exposure Compensation
Using Exposure Compensation Press n (o) to the left or right. The value will be plus (+) when the button is pressed to the right, and minus (-) when it is pressed to the left. In N mode, turn r. Settings can be made in the range of ±5.0 EV (±2.0 EV in B mode) in increments of 1/3 EV steps. -
Page 56: Recording Movies
Recording Movies Press k. The camera enters B mode. 1:00 00˝ You can switch the camera to the movie mode also from [Still/Movie] of the A4/B4 menu. Focus on the subject. When [Focus] is set to [AF], press z halfway. Press z fully. - Page 57 Memo --------------------------------------------------------------------------------------------------------- • Movies are recorded in J mode regardless of the mode dial setting. Exposure compensation is pos- sible. • When [Touch AF] is activated in the D2 menu, autofocus can be performed using the touch panel even while recording movies. • You can record a movie continuously up to 4 GB or 25 minutes.
-
Page 58: Playing Back Movies
Playing Back Movies Press g. An image is displayed in the single image display of playback mode. Use cd to select a movie to play back. The first frame of the movie is displayed as a still image. Play back a movie. 02/02/2019 10:00 10/9999... -
Page 59: Setting The Focus
Setting the Focus Setting the Focus Mode Measures the distances from 5 × 5 AF areas and focuses to the optimum AF area. (Default setting) Auto-area AF Focuses to the selected AF areas. (p.59) Select AF Focuses on a smaller area than [Select AF]. (p.59) Pinpoint AF Tracks the subject and continually focuses. - Page 60 Select [Focus] in the A1/B1 menu, and press d. Use ab to select a setting. Focus Auto-area AF In B mode, select from [AF], [MF], [Snap], Select AF and [Z]. Pinpoint AF Tracking AF Continuous AF Cancel Press e. Press f. The focus mode icon appears on the shoot- ing screen.
- Page 61 Selecting the Desired AF Point Set [Select AF], [Pinpoint AF], [Tracking AF], or [Continuous AF] in [Focus] of the A1 menu. Press e on the shooting screen. The AF point can be changed. Use abcd to set an AF point. Press and hold e to reset the AF point to the center.
- Page 62 Focusing Manually (Manual Focus) If the camera fails to focus automatically, you can focus manually. The manual focus enables shooting at a fixed distance. Set [MF] in [Focus] of the A1/B1 menu. The focus bar appears on the shooting screen. Press a.
-
Page 63: Shooting Close-Ups (Macro)
Shooting Close-ups (Macro) The camera focuses to the range of 6 to 12 cm from the front edge of the lens. Press a (s) in the shooting mode. The camera enters the macro mode and the macro icon appears on the shooting screen. 1/400 F5.6 Shoot. -
Page 64: Shooting With A Single Press Of The Shutter Release Button (Full Press Snap)
Shooting with a Single Press of the Shutter Release But- ton (Full Press Snap) While pressing z halfway operates autofocus, pressing z fully quickly performs shooting at the set focal distance. This function is called “Full Press Snap”. The camera focuses at the distance set in [Snap Focus Dis- tance] of the A1/B1 menu. -
Page 65: Setting The Exposure
Setting the Exposure Selecting a Metering Method Set the metering method in [AE Metering] of AE Metering the A2/B2 menu. Multi-segment Center-weighted Spot Highlight-weighted Cancel Cancel Meters exposure in multiple areas of the frame. Multi-segment Meters exposure with emphasis on the center. Center-weighted Meters exposure within a narrow range. -
Page 66: Setting The Iso Sensitivity
Setting the ISO Sensitivity Press c (u). Use r to change the value. Values from ISO 100 to ISO 102400 can be set. Press h to reset to ISO AUTO. Press h again to reset to the value set last. ISO AUTO 1/400 F5.6... -
Page 67: Using A Flash
Using a Flash When a flash unit (optional) is connected to the camera, you can discharge a flash for shooting. The following flash units can be used. • PENTAX AF540FGZ, PENTAX AF540FGZ II • PENTAX AF360FGZ, PENTAX AF360FGZ II • PENTAX AF201FG Connecting a Flash Unit Remove the hot shoe cover from the camera. - Page 68 Setting the Flash Mode Always fires the flash. (Default setting) Flash On Forces the flash to fire while reducing the red-eye phenomenon. Flash On+Red-eye Fires the flash with the shutter speed slowed. Use when taking nightscape pictures that include people. Use of a tripod is recommended to prevent blur. Slow-speed Sync Fires the flash with the shutter speed slowed while reducing the red-eye phenom- enon.
-
Page 69: Reducing Noise
Reducing Noise Slow Shutter Speed Noise Reduction Using a long shutter speed results in a noisy Slow Shutter Speed NR image. When [Slow Shutter Speed NR] is set in Auto the A6 menu, noise reduction processing is carried out. Cancel Cancel Auto Applies the noise reduction according to the shutter speed, sensitivity, and internal... - Page 70 Auto Automatically reduces noises according to the ISO sensitivity. Low, Medium, High Applies Noise Reduction at constant chosen level throughout ISO range. Custom The Noise Reduction level can be set for each ISO setting. Does not apply Noise Reduction at any ISO setting. The [Noise Reduction] screen appears.
-
Page 71: Setting The White Balance
Setting the White Balance Make adjustments to the white balance so that white subjects will appear white under any kind of light. If the white balance is not how you thought it would be when shooting an object of a single color or when shooting under multiple light sources, change the setting. - Page 72 Set the white balance manually. (p.72) Manual White Balance Set the color temperature between 2500 to 10000 K. (p.73) Color Temperature Press t (b) in the shooting mode. The [White Balance] screen appears. Use ab to select a setting. White Balance Settings Multi Auto White Balance If no compensation is required, proceed to Step 6.
- Page 73 Press e. The white balance icon appears on the shoot- G1B1 ing screen. 1/400 F5.6 Memo --------------------------------------------------------------------------------------------------------- • The white balance can also be set in [White Balance] of the A3/B3 menu. • When [Composite Mode] is set to [Average] in [Multi-exposure] of [Drive Mode] (p.77), [Auto White Balance] is applied even if [Multi Auto White Balance] is set.
-
Page 74: Setting The White Balance Manually
Setting the White Balance Manually Select [Manual White Balance] in Step 2 on p.70. Aim the camera at a white subject, such as a sheet of paper, under the light for shooting. Press j. An image to be used for white balance adjustment is taken. Use abcd to adjust the point. -
Page 75: Setting The Color Temperature
Setting the Color Temperature Select [Color Temperature] in Step 2 on p.70, and press d. The [Color Temperature] screen appears. Use ab to set a value. Color Temperature 5000K The color temperature can be set between 2500 to 10000 K in increments of 10 K. Press j to fine-tune the color. -
Page 76: Setting The Drive Mode
Setting the Drive Mode Press v (d) in the shooting mode. The [Drive Mode] screen appears. Press d. Drive Mode Single Frame Shooting The [Drive] screen appears. For [Self-timer], refer to p.83. Use ab to select a drive mode. Drive Single Frame Shooting Cancel Takes a single picture per shooting. -
Page 77: Shooting Continuously (Continuous Shooting)
Press e. The drive mode icon appears on the shoot- ing screen. 1/400 F5.6 Memo --------------------------------------------------------------------------------------------------------- • The drive mode can also be set in [Drive Mode] of the A4 menu. Shooting Continuously (Continuous Shooting) Select [Continuous Shooting] in Step 3 on p.74. Press and hold z on the shooting screen. -
Page 78: Shooting With Varied Exposure Values (Bracketing)
Shooting with Varied Exposure Values (Bracketing) Select [Bracketing] in Step 3 on Drive Bracketing p.74, and press h. The detailed setting screen appears. Cancel Use abcd to change the setting. Bracketing Bracket Value ±0.3 Bracketing Order 0−+ Bracket Value Sets the range in which to change the exposure from ±0.3 to ±5.0. Bracketing Order Sets the order of 3 images to be taken from [0 - +], [- 0 +], [+ 0 -], and [0 + -]. -
Page 79: Shooting While Merging Images Together (Multi-Exposure)
Shooting While Merging Images Together (Multi-expo- sure) Select [Multi-exposure] in Step 3 on Drive Multi-exposure p.74, and press h. The detailed setting screen appears. Composite Mode Average Save Interim Images Cancel Use abcd to change the setting. Multi-exposure Composite Mode Average Save Interim Images Composite Mode... - Page 80 To take the next image, select [Next shot], and then press e. To retake the image, select [Retake shot]. Next shot Next shot Retake shot Complete Execute Take the next image. Repeat Steps 6 and 7. To return to the previous merged image, select [Retake shot]. Select [Complete] to end shooting.
-
Page 81: Shooting Automatically At Set Intervals (Interval Shooting)
Shooting Automatically at Set Intervals (Interval Shoot- ing) The camera takes pictures automatically at fixed intervals. Select [Interval Shooting] in Step 3 on Drive Interval Shooting p.74, and press h. The detailed setting screen appears. Interval 00´00˝ Number of Shots Start Interval Start Time 00:00... - Page 82 Caution ------------------------------------------------------------------------------------------------------- • Depending on the shooting settings, the time until the next picture is taken may be longer than the time set for interval shooting. • When the shooting interval is short, the exposure for the first image may be used for the second and later images.
-
Page 83: Recording Star Trails (Interval Composite)
Recording Star Trails (Interval Composite) Mount the camera on a tripod, and take a test shot. Set the exposure, focus mode, and white balance, and then check the com- position. Images are merged with this exposure setting. Select [Interval Composite] in Step 3 Drive Interval Composite on p.74, and press h. - Page 84 Take the first image. Images are taken continuously at the shortest interval. To check the images being merged, press z halfway. If z is pressed fully, the images merged up to that point are saved as they are, and the interval composite shooting starts with a new image. To cancel shooting, press e.
-
Page 85: Using The Self-Timer
Using the Self-timer In the drive modes other than [Continuous Self-timer 10sec. Shooting], [Self-timer] can be used. The self-timer can be set to [10sec.] or [2sec.]. The AF assist light blinks during the count- down for self-timer shooting. Cancel Memo --------------------------------------------------------------------------------------------------------- • The self-timer can only be used for the first image in [Interval Shooting] and [Interval Composite]. -
Page 86: Configuring The Capture Settings
Configuring the Capture Settings Image Capture Settings Set the file format for still images in [Image Image Capture Settings Capture Settings] of the A5 menu. File Format Aspect Ratio Crop JPEG Recorded Pixels Color Space Image Control Peripheral Illumin. Corr. File Format [JPEG] [RAW]: Records a RAW image (DNG format). -
Page 87: Movie Capture Settings
Crop ----------------------------------------------------------------------------------------------------------- • When [Crop] is set to [35mm] or [50mm], the 35 mm equivalent angle of view is changed from de- fault 28 mm to 35 mm or 50 mm, and the image display is also changed. • When [Crop] is set, a restriction is applied to [JPEG Recorded Pixels]. Crop JPEG Recorded Pixels 35mm... -
Page 88: Setting The Image Finishing Tone And Correction
Setting the Image Finishing Tone and Cor- rection Using the ND Filter With [ND Filter] in the A2/B2 menu, you can ND Filter set whether or not to always use the camera’s Auto internal ND filter. Cancel Cancel Auto The camera determines whether to turn the function on or off according to conditions. The ND filter is used if the icon is displayed on the shooting screen when z is pressed halfway. -
Page 89: Setting The Image Atmosphere (Image Control)
Setting the Image Atmosphere (Image Control) Images with varied saturation and contrast can be taken. The settings such as the hue can be changed to take distinctive images. Takes images with normal image quality. Standard Takes images with sharp and vivid colors. Vivid Takes a black and white image. - Page 90 Select [Image Control] in the A6/B6 menu, and press d. The [Image Control] screen appears. Use ab to select an image. Image Control Standard Proceed to Step 6 if you do not need to change the parameters. Cancel Press h. The detailed setting screen appears.
-
Page 91: Correcting The Peripheral Illumination
Correcting the Peripheral Illumination With [Peripheral Illumin. Corr.] of the A6/B6 Peripheral Illumin. Corr. menu, you can reduce peripheral light fall-off occurring due to lens properties. Cancel Cancel Correcting a Range of Tones (D-Range Correction) With [D-Range Correction] of the A6/B6 D-Range Correction menu, you can expand an image gradation to Highlight Correction... -
Page 92: Reducing Blurring Of Images
Reducing Blurring of Images To automatically reduce blurring of images, set the following functions. By default, both settings are set to [On]. Still image mode [Shake Reduction] of the A7 menu Movie mode [Movie SR] of the B7 menu Memo --------------------------------------------------------------------------------------------------------- • If [Shake Reduction] is set to [Fn Button Setting] in the D2 menu, the Shake Reduction function can be turned on and off with button operation only. -
Page 93: Playback Functions
Playback Functions Using the Playback Functions You can set the playback functions from the C menu or on the playback functions setting screen. Press k in the playback mode to display the Delete playback functions setting screen. The C1/ C2 menu settings can be set on the playback functions setting screen. -
Page 94: Changing The Playback Method
Changing the Playback Method Displaying Multiple Images You can display multiple images in the thumbnail view. Turn p to the left once in the single 02/02/2019 10:00 100 99999 image display of playback mode. Multiple images are displayed. 100-0630 1/2400 F5.6 6400 EV+0.7 The following operations are available. - Page 95 Selecting and Deleting Multiple Images Press i on the screen in Step 1 of “Displaying Multiple Images” (p.92). Select images in multi-image display. 02/02/2019 10:00 100 99999 Execute 100-0100 Moves the selection frame. abcd Selects/Deselects an image. Selects the starting or ending point for image selection range. Press h.
-
Page 96: Displaying Rotated Images
Displaying Rotated Images You can change image rotation information. Select [Image Rotation] in the C1 menu or on the playback functions setting screen, and press d. Select the rotation direction, and Image Rotation press e. Cancel Memo --------------------------------------------------------------------------------------------------------- • In the playback mode, the displayed image is rotated according to the camera’s orientation. When [Auto Image Rotation] is set to [Off] in the C3 menu, the image display orientation is fixed regard- less of the [Image Rotation] setting. -
Page 97: Connecting The Camera To An Av Device
Connecting the Camera to an AV Device Connect the camera to an AV device such as TVs to display Live View images while shooting or to play back images. Prepare a commercially available conversion cable that is suitable for the de- vice connected to the camera. -
Page 98: Organizing Files
Organizing Files Deleting Files Select [Delete] in the C1 menu or on the playback functions setting screen. Select [Delete 1 image] or [Delete All Images]. When [Delete 1 image] is selected, use cd to select an image. For images taken with [File Format] set to 02/02/2019 10:00 1 100... -
Page 99: Protecting Images From Deletion
Protecting Images from Deletion You can protect images to prevent them from being deleted accidentally. Select [Protect] in the C1 menu or on the playback functions setting screen. Select [Protect 1 Image] or [Protect 02/02/2019 10:00 1 100 All Images]. When [Protect 1 Image] is selected, use cd to select an image. -
Page 100: Copying Images And Movies In The Internal Memory To A Memory Card
Copying Images and Movies in the Internal Memory to a Memory Card You can copy the still images and movies stored in the internal memory to a memory card. Insert a memory card. Select [Image Copy] in the C1 menu or on the playback functions setting screen, and press d. -
Page 101: Transferring Images
Transferring Images Select images to transfer to a communication device and set the transfer reservation. When the camera is connected to a communication device via wireless LAN, the file transfer automatically starts. Select [File Transfer] in the C1 menu or on the playback functions setting screen. -
Page 102: Editing And Processing Images
Editing and Processing Images You can edit and process taken images and then save them as new images. Caution ------------------------------------------------------------------------------------------------------- • Only JPEG images taken with this camera can be edited and processed (only RAW images in [RAW De- velopment]). Still images saved from movies cannot be edited and processed. If you edit and process images repeatedly, image quality will deteriorate. - Page 103 Press d. The detailed setting screen appears. Use ab to select a setting. JPEG Recorded Pixels 6000x4000 The detailed setting screen appears when h is pressed for [White Balance] or [Image Control]. Cancel Press e. The parameter setting screen reappears. When you have finished configuring all of the settings, press A new JPEG image is saved.
-
Page 104: Changing The Image Size
Changing the Image Size Changing the Number of Recorded Pixels (Resize) In [Resize] of the C2 menu, JPEG files can be Resize 4800x3200 reduced in size. The smaller size than the [JPEG Recorded Pixels] setting for shooting can be selected. Cancel Cropping Images You can crop a part of JPEG images and then save the images. -
Page 105: Correcting Highlight/Shadow Areas (Levels Adjustment)
Correcting Highlight/Shadow Areas (Levels Adjustment) You can correct the brightness and contrast of the highlight, mid-tone, and shadow areas in JPEG images. Select [Levels Adjustment] in the C2 menu or on the playback functions setting screen, and press d. The [Levels Adjustment] screen appears. Adjust the value. - Page 106 How to Perform Corrections ------------------------------------------------------------------------------ • Slide the center thumb to the right or left to adjust the overall image brightness. Sliding the thumb to the left makes the image brighter. Sliding the thumb to the right makes the image darker. • For overexposed images, slide the left thumb to the right until it reaches the left end of the histogram.
-
Page 107: Correcting The White Balance
Correcting the White Balance You can correct the white balance of JPEG images. Select [WB Adjustment] in the C2 menu or on the playback functions setting screen, and press d. The [WB Adjustment] screen appears. Adjust the value. WB Adjustment Cancel Preview Moves the adjustment points. -
Page 108: Correcting Color Moiré
Correcting Color Moiré You can correct color moiré in images. Select [Color Moiré Correction] in the C2 menu or on the playback functions setting screen, and press d. The [Color Moiré Correction] screen appears. Adjust the value. Color Moiré Correction Medium High Cancel... -
Page 109: Adjusting The Image Quality
Adjusting the Image Quality You can adjust the quality level of JPEG images. Select [Base Parameter Adj] in the C2 menu or on the playback functions setting screen, and press d. The [Base Parameter Adj] screen appears. Adjust the value. Base Parameter Adj Brightness Cancel... -
Page 110: Editing Movies
Editing Movies You can clip or divide a movie file into multiple segments and save as new files. Select [Movie Edit] in the C2 menu or on the playback functions setting screen, and press d. The [Movie Edit] screen appears. Select [Cut] or [Divide], and press e. - Page 111 The following operations are also available. Press n [Cut]: Switches between the starting and ending points. [Cut]: Moves the starting or ending point. [Divide]: Moves the division point. [Cut]: Moves the starting or ending point to the playback point. [Divide]: Moves the division point to the playback point. Displays the preview.
-
Page 112: Sharing Images
Memo --------------------------------------------------------------------------------------------------------- • When the camera is connected to a computer, it is recognized as a device with the name “RICOH GR III”. • The battery is charged when the camera is connected to the computer and the camera is turned off. -
Page 113: Using The Camera With A Communication Device
Using the Camera with a Communication Device The camera can be operated from a communication device and the images saved in the camera can be displayed on/imported to the communication device by connecting both the devices via Bluetooth® or wireless LAN and using the dedicated app “Image Sync”. -
Page 114: Connecting To A Communication Device Via Bluetooth
Connecting to a Communication Device via Bluetooth® Turn on the Bluetooth® function of the communication device. Select [Bluetooth Setting] in the E6 menu, and press d. The [Bluetooth Setting] screen appears. Select [Action Mode], and press d. Select [On anytime] or [On when Action Mode power is on], and press e. - Page 115 Caution ------------------------------------------------------------------------------------------------------- • When the OS of the communication device is iOS, connect it to the camera using the Image Sync. For details on the Image Sync, refer to “Operating the Camera with a Communication Device” (p.116). • Note that when [On when power is on] is selected in Step 4, the camera emits radio waves even if its power is off.
-
Page 116: Enabling The Wireless Lan Function
Enabling the Wireless LAN Function The wireless LAN function is off when the camera is turned on. Turn on the function using one of the following methods. • Setting from the menus (p.114) • Pressing and holding k (m) (p.115) • Pressing and holding g (p.115) Memo --------------------------------------------------------------------------------------------------------- • When the wireless LAN function is turned on, the icon... - Page 117 Pressing and Holding the Movie/Wireless Button Press and hold k. A beep sounds and the wireless LAN icon ap- pears on the shooting screen. Press and hold k again to turn off the wire- less LAN function. Pressing and Holding the Playback Button The wireless LAN function can be turned on in the playback mode from the power-off state of the camera.
-
Page 118: Operating The Camera With A Communication Device
• For how to connect the camera to a communication device and details on the Image Sync, refer to the following website. https://www.ricoh-imaging.co.jp/english/products/app/image-sync2/ • You can use the Image Sync installed on the communication device to operate the camera and adjust the camera’s date and time. -
Page 119: Changing The Settings
Changing the Settings Saving Frequently Used Settings You can save up to six frequently used settings and assign the settings to the mode dial P, Q, and R so that you can easily recall the settings for shooting. The following settings can be saved. • Exposure mode • D2 menu settings and the [Grid Style] • Exposure compensation... - Page 120 Select whether to enter a Box name, and press e. When [Cancel] is selected, proceed to Step 7. When [Enter Name] is selected, the text-entry screen appears. Enter a Box name. Up to 32 single-byte alphanumeric charac- ters and symbols can be entered. Cancel The following operations are available.
-
Page 121: Assigning Settings To The Mode Dial
Assigning Settings to the Mode Dial You can assign the saved settings to the mode dial. Select [Recall] in the D1 menu, and press d. The [Recall] screen appears. Select the mode dial to assign the Recall saved setting to from USER1 (P), Assign settings saved in User Mode Box USER2 (Q), or USER3 (R), and... -
Page 122: Using The Saved User Mode
Using the Saved User Mode Set the mode dial to P, Q, or R in the shooting mode. The user mode guide appears on the shoot- ing screen. USERMODE_NAME_XXXXXX AF+AE Lock ISO Setting Drive Mode Still/Movie 1/400 F5.6 Change the setting as necessary. To change the exposure mode, set [Exposure Exposure Mode Mode] in the A2 menu. -
Page 123: Customizing The Button Functions
Customizing the Button Functions Registering Functions to the ADJ. Mode You can change the settings for “ADJ. mode” of which functions can be easily used by pressing n. Five functions in the following shooting functions can be registered. (The functions indicated with a square-bracketed item are the default settings for the item.) • Off • Flash Mode... - Page 124 Caution ------------------------------------------------------------------------------------------------------- • The settings changed in [ADJ Mode Setting] are enabled in the still image mode only. [Image Control], [Focus], [AE Metering], [Framerate], and [Outdoor View Setting] are registered for the B mode, and they cannot be changed. Memo --------------------------------------------------------------------------------------------------------- • Refer to “Using the ADJ.
-
Page 125: Changing The Functions Of The Fn Button
Changing the Functions of the Fn Button You can change the functions for when h, c, d, or k is pressed. The following functions can be assigned to each button. (The functions in- dicated with a square-bracketed item are the default settings for the item.) Pressing h, c, d, or k • Off • Framerate... - Page 126 Select [Fn Button Setting] in the D2 menu, and press d. The [Fn Button Setting] screen appears. Select the button to change the Fn Button Setting setting of, and press d. Fn Button ISO Button Drive Button Select the function to assign, and Fn Button press e.
-
Page 127: Setting The Function Of The Shutter Release Button
Setting the Function of the Shutter Release Button You can set the function for when z is pressed in the D2 menu. Shutter Button Setting Sets whether to perform autofocus and AE Lock, or only AE lock when z is pressed halfway. Shutter Btn. -
Page 128: Display And Sound Settings
Display and Sound Settings Setting the Information Displayed During Shooting/ Playback You can set the information displayed when the display is switched using j in the shooting mode or playback mode. Select [Shooting Info. Display] or [Playback Info. Display] in the D3 menu, and press d. -
Page 129: Setting The Instant Review Display
[Playback Info. Display] Playback Info. Display Histogram Grid Guide Highlight Alert Cancel Cancel Histogram Displays a histogram for the image. Grid Guide Displays grid lines. Highlight Alert Blinks overexposed areas in red. Press e. Setting the Instant Review Display You can set the information displayed in “In- Instant Review stant Review”... -
Page 130: Setting The Live View Display
Setting the Live View Display You can set the following settings for the Live Display Customization View display in the D3 menu. Playback Info. Display Instant Review 0.5sec. Quick Zoom 100% Focus Magnification Grid Style Electronic Level Type Flicker Reduction 50Hz Grid Style Select the grid style from [3x3 Grid] or [4x4 Grid]. -
Page 131: Setting The Lamp
Outdoor View Setting If the monitor display is difficult to see when Outdoor View Setting you take pictures outdoors or in other situa- tions, adjust the brightness of the monitor in [Outdoor View Setting] of the E3 menu. Cancel Cancel Memo --------------------------------------------------------------------------------------------------------- • This function can be registered to [ADJ Mode Setting] of the D2 menu. -
Page 132: Setting The Sound Effects
Setting the Sound Effects You can set the sound effects in the E5 menu. Sound E ects Setting Sound E ects Volume Bluetooth Setting Wireless LAN Setting Smartphone Link 1min. Auto Power O Sleep Mode 1min. Sound Effects [All]: Outputs shutter sound, in-focus sound, timer countdown sound, and switching sound of turning the wireless LAN on and off. -
Page 133: Power Saving Settings
Power Saving Settings Automatically Turning the Power Off The camera turns off automatically if no op- Auto Power O erations are made for a certain period of time. 1min. 3min. You can set [1min.], [3min.], [5min.], [10min.], 5min. [30min.], or [Off ] in [Auto Power Off ] in the 10min. -
Page 134: Dimming The Display
Dimming the Display The camera dims the display automatically if Power Supply Settings no operations are performed during the set Auto Power O 1min. Sleep Mode 1min. time. The following settings can be set in the LCD Auto Dim E7 menu. About This Device Certification Marks Pixel Mapping... -
Page 135: File Management Settings
File Management Settings Specifying the Folder/File Settings By default, files and folders are automatically named as follows. File Name R0000001.JPG to R0999999.JPG Folder Name 100 to 999 When the file number exceeds R0 9999, the next folder is created and the ... - Page 136 Example) 101_0125: Images taken on January 25th Optional Assigns a freely defined string of five characters after the folder number. (Default: RICOH) Example) 101RICOH Proceed to Step 6 if you select [Date] or do not need to change the character string.
- Page 137 The following operations are available. Moves the text selection cursor. abcd Moves the text selection cursor up and down. Moves the text selection cursor to the right and left. Enters a character selected with the text selection cursor. You can use the touch panel for the operations. After entering the text, move the text selection cursor to 1, and press e.
- Page 138 File Name For still images, one of the following string of characters is used as the file name prefix depending on the [Color Space] (p.84) setting of the A5 menu. Color Space File Name sRGB .JPG AdobeRGB .JPG You can change the first two characters of file names from “R0”.
- Page 139 Sequential Numbering In [Sequential Numbering] of the E1 menu, Sequential Numbering you can set whether to continue the sequen- Folder & File File tial numbering for folder and file names even when a new folder is created or memory cards are replaced.
-
Page 140: Setting The Copyright Information
Setting the Copyright Information You can set the copyright information embedded in the Exif data. Select [Copyright Information] in the E1 menu, and press d. The [Copyright Information] screen appears. Select [On] or [Off] in [Embed Copyright Information Copyright Data], and press e. Embed Copyright Data Copyright Holder XXXXXXXXXXXXXXX... -
Page 141: Appendix
Appendix Attaching Optional Accessories Conversion Lens/Lens Adapter Remove the ring cap before using the wide conversion lens (GW-4) and lens adapter (GA-1). For details on handling the wide conversion lens and lens adapter, refer to the User’s Manual provided with the products. Removing the Ring Cap Turn the camera off and rotate the cap counterclockwise until it can be... -
Page 142: Ac Adapter
AC Adapter If you intend to use the camera continuously for a long period, the use of the AC adapter (D-AC166) is recommended. Make sure that the camera is turned off, and open the terminal cover. Connect the USB cable (Type-C) of the AC adapter to the USB terminal of the camera. -
Page 143: Troubleshooting
Troubleshooting Power Supply Problem Cause Solution Page The camera does not The battery is not inserted. Charge the battery and correctly p.38 turn on. insert it into the camera. The battery is exhausted. The battery is not inserted in the correct orientation. -
Page 144: Shooting
Shooting Problem Cause Solution Page Shooting cannot be The battery is exhausted. Charge the battery. p.38 performed by pressing The camera is turned off or not in Turn the camera on or press z p.40 the shooting mode. to switch the camera to the shooting mode. - Page 145 Problem Cause Solution Page The flash does not The subject is dark. Adjust the flash output. p.66 illuminate the subject. Flash output is not appropriate. Images are too bright. Flash output is not appropriate. Adjust the flash output, move away p.66 from the subject, or use a different light source.
-
Page 146: Playback/Deletion
Playback/Deletion Problem Cause Solution Page Shooting information is Information display is set to [No Press j to switch the information p.20 not displayed. Information Display]. displayed on the screen. Dust or dirt particles The sensor is dirty or dusty. Perform [Dust Removal] in the —... -
Page 147: Others
Others Problem Cause Solution Page The memory card The card is not in the correct Insert the memory card in the p.37 cannot be inserted. orientation. correct orientation. Camera controls have The battery is exhausted. Charge the battery. p.38 no effect. The camera is malfunctioning. - Page 148 Error Message Description Cannot use this card. A memory card not compatible with this camera is inserted. This image cannot be You are trying to magnify an image that cannot be magnified. magnified. Not enough battery power These messages appear if you try to perform the pixel mapping or firmware remaining to activate Pixel update when the battery level is insufficient.
-
Page 149: Main Specifications
Main Specifications Camera Lens Lens Construction 6 elements in 4 groups (2 aspherical lens elements) Focal Length / 18.3 mm (approx. 28 mm in 35 mm equivalent focal length) / Aperture F2.8 to F16 Image Capture Image Sensor Type: Primary color filter CMOS Unit Size: 23.5 mm ×... - Page 150 Exposure Exposure Mode Program AE, Aperture Priority AE, Shutter Priority AE, Manual Control Exposure Metering Mode Multi-segment, Center-weighted, Spot, Highlight-weighted Shutter Speed 1/4000 to 30 seconds (limitation by the aperture: 1/2500 seconds at F2.8; 1/4000 seconds at F5.6 or greater) Bulb timer (10 seconds to 20 minutes), Bulb, Time EV Compensation Still image: ±5 EV (1/3 EV steps), Movie: ±2 EV (1/3 EV steps)
- Page 151 Playback Playback View Single image display, Multiple image display (20 thumbnails, Functions 48 thumbnails), Display magnification (up to 16×, 100% view and Quick Zoom view available), Histogram (Y histogram, RGB histogram), Grid display (3×3 Grid, 4×4 Grid), Highlight Alert, Auto Image Rotation Base Parameter Brightness, Saturation, Hue, Contrast, Sharpness Adjustment...
-
Page 152: Usb Power Adapter Ac-U1/Ac-U2
Dimensions Dimensions Approx. 109.4 mm (W) × 61.9 mm (H) × 33.2 mm (D) (excluding and Weight operating controls and protrusions) Weight Approx. 257 g (including the dedicated battery and an SD memory card) Approx. 227 g (body only) Included Accessories Rechargeable battery DB-110, USB power adapter, Power plug, USB cable I-USB166, Hand strap Language... -
Page 153: Image Storage Capacity
Image Storage Capacity The following table shows the approximate number of images and record- ing time (in seconds) of movies that can be saved in the internal memory and a memory card in various formats. File Format/JPEG Number of Recorded Internal Memory Card Aspect Ratio... -
Page 154: Operating Environment
Operating Environment It is confirmed that a USB connection can be established between the cam- era and the following OSs. Windows® Windows® 10 (FCU, CU) (32-bit, 64-bit), Windows® 8.1 (32-bit, 64-bit), Windows® 8 (32-bit, 64-bit), or Windows® 7 (32-bit, 64-bit) macOS 10.14 Mojave, macOS 10.13 High Sierra, macOS 10.12 Sierra, OS X 10.11 El Capitan, OS X 10.10 Yosemite... -
Page 155: Using The Camera Abroad
Using the Camera Abroad USB Power Adapter (AC-U1/AC-U2), AC Adapter (D-AC166), and Battery Charger (BJ-11) These products are for use with currents of 100 to 240 V and 50 or 60 Hz. Before traveling, purchase a travel adapter for connection to the type of out- lets used at your destination. -
Page 156: Precautions For Use
Precautions for Use Camera • Do not drop the camera or subject it to physical shocks. • When carrying the camera, be careful that it does not strike other objects. Particular care is required to protect the lens and monitor. • Battery may become hot with extended use. - Page 157 • If the battery usage time becomes very short even when fully charged, the battery has reached the end of its service life. Replace with a new battery. Be sure to use a replacement battery recommended by RICOH IMAGING. • The charging time with the AC-U1/AC-U2 is approximately 2.5 hours (at 25°C (77°F)).
-
Page 158: Camera Care And Storage
Camera Care and Storage Caring for the Camera • Image quality can be affected by fingerprints and other foreign matter on the lens. Avoid touching the lens with your fingers. • Remove dust or lint on the lens with a commercially available blower, or gently clean the lens with a soft, dry cloth. -
Page 159: Warranty Policy
Warranty Policy All our cameras purchased through authorized bona fide photographic distribution channels are guaranteed against defects of material or workmanship for a period of twelve months from the date of your purchase. Service will be rendered, and defective parts will be replaced without cost to you within that period, provided the camera does not show evidence of impact, sand or liquid damage, mishandling, tampering, battery or chemical corrosion, operation contrary to operating instructions, or modification by an unauthorized repair shop. -
Page 160: Regulatory Compliance Statements
R02010 has been tested and found to comply with FCC radia- tion exposure limits set forth for an uncontrolled environment and meets the FCC radio... - Page 161 Declaration of Conformity According to 47CFR, Parts 2 and 15 for Class B Personal Computers and Peripherals RICOH IMAGING AMERICAS CORPORATION Located at: 5 Dedrick Place, West Caldwell, New Jersey 07006, U.S.A. Phone: 800-877-0155 FAX: 973-882-2008 Declare under sole responsibility that the product identified herein complies with 47CFR Parts 2 and 15 of the FCC rules as a Class B digital device.
- Page 162 For Customers in Canada Innovation, Science and Economic Development Canada (ISED) Regulatory Compliance Notice This Class B digital apparatus complies with Canadian ICES-003 (B). This device complies with Innovation, Science and Economic Development Canada li- cence-exempt RSS standard(s). Operation is subject to the following two conditions: (1) this device may not cause interference, and (2) this device must accept any interference, including interference that may cause undesired operation of the device.
- Page 163 For Customers in Europe Information for Users on Collection and Disposal of Old Equip- ment and Used Batteries 1. In the European Union These symbols on the products, packaging and/or accompanying docu- ments mean that used electrical and electronic equipment and batteries should not be mixed with general household waste.
- Page 164 Operating frequency band: 2400 MHz - 2483.5 MHz Maximum radio-frequency power: 9.15 dBm EIRP European importer: RICOH IMAGING EUROPE S.A.S. Parc Tertiaire SILIC 7-9, avenue Robert Schuman - B.P. 70102, 94513 Rungis Cedex, FRANCE Manufacturer: RICOH IMAGING COMPANY, LTD.
- Page 165 For Customers in Thai This telecommunication equipment conforms to the technical standards or require- ments of NBTC.
-
Page 166: Index
Cloudy (White Balance) ......69 Index Color Moiré Correction ......106 Color Space ............ 84 Numerics Color Temperature (White Balance) ..73 Communication device ......111 4-way Controller .......... 59 Connection to a computer ....110 Continuous AF (Focus)....... 57 Continuous Shooting ......... - Page 167 Flash On (Flash) ..........66 Flash On+Red-eye (Flash) ......66 JPEG Recorded Pixels ......... 84 Flicker Reduction ........128 Fluorescent (White Balance) ....69 Fn button ............24 Keep AE Lock ..........124 Fn Button Setting ........123 Focus ............44, 58 Focus bar ............
- Page 168 Shadow Correction ........89 Shake Reduction .......... 90 One Push AE in M Mode....52, 124 Sharing ............110 Operating environment ......152 Shooting close-ups ........61 Outdoor View Setting ......129 Shooting Information Display ..... 126 Shutter Button Confirmation ....125 Shutter Button Setting ......
- Page 169 Warranty Policy ......... 157 White Balance ..........69 White Balance Adjustment ....105 Wide conversion lens ......139 Wireless LAN ..........114...
- Page 170 RICOH IMAGING COMPANY, LTD. 1-3-6, Nakamagome, Ohta-ku, Tokyo 143-8555, JAPAN (https://www.ricoh-imaging.co.jp) RICOH IMAGING EUROPE Parc Tertiaire SILIC 7-9, avenue Robert Schuman - S.A.S. B.P. 70102, 94513 Rungis Cedex, FRANCE (https://www.ricoh-imaging.eu) RICOH IMAGING 2 Gatehall Drive Suite 204, Parsippany, New Jersey AMERICAS CORPORATION 07054, U.S.A.
Need help?
Do you have a question about the R02010 and is the answer not in the manual?
Questions and answers