Table of Contents
Advertisement
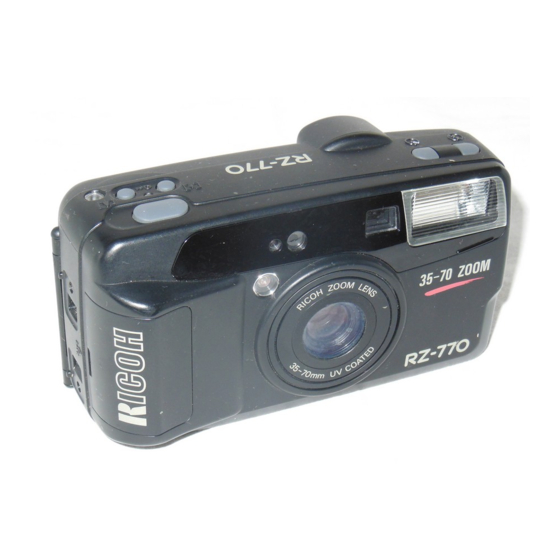
Ricoh RZ-770
This camera manual library is for reference and historical purposes, all rights reserved.
This page is copyright by
, M. Butkus, NJ.
This page may not be sold or distributed without the expressed permission of the producer
I have no connection with Chinon Co., Japan
On-line camera manual library
This is the full text and images from the manual. This may take 3 full minutes for all images to appear.
If they do not all appear. Try clicking the browser "refresh" or "reload button" or right click on the image, choose "view image" then go back. It should now appear.
To print, try printing only 3 or 4 pages at a time.
Back to main on-line manual page
If you find this manual useful, how about a donation of $3 to:
M. Butkus, 29 Lake Ave., High Bridge, NJ 08829-1701
This will allow me to continue to buy new manuals and pay their shipping costs.
It'll make you feel better, won't it?
If you use Pay Pal, use the link below. Use the above address for a check, M.O. or cash.
www.PayPal.me/butkus
CONTENTS
Advertisement
Table of Contents

Subscribe to Our Youtube Channel
Related Manuals for Ricoh RZ-770


Summary of Contents for Ricoh RZ-770
- Page 1 Ricoh RZ-770 This camera manual library is for reference and historical purposes, all rights reserved. This page is copyright by , M. Butkus, NJ. This page may not be sold or distributed without the expressed permission of the producer I have no connection with Chinon Co., Japan On-line camera manual library This is the full text and images from the manual.
-
Page 2: Table Of Contents
Proper care of your camera ......20 Viewfinder ..........14 Major specifications ........21 Zooming the lens ........14 We are most gratified that you have selected a RICOH camera. Before using your camera, please be sure to read these instructions carefully. -
Page 3: Locating The Controls
LOCATING THE CONTROLS (6) Shutter Release Button (1) Photocell (7) Strap Holder (2) Self-timer LED (8) Battery Compartment Cover 4www.butkus.org (3) Zoom Button (4) Film Counter (5) Manual Film Rewind Button... - Page 4 (9) Red-eye Reduction Lamp (15) Power Switch (10) Self-timer Button (16) AF/Flash Monitor (11) Flash-off Button (17) Viewfinder (12) Built-in Flash (18)Back Cover Latch (13) Viewfinder Window (19) Film Loaded Window 4www.butkus.org (14) Lens (20) Back Cover (21) Tripod Socket Images for figures 1- 64 and examples 1- 8 Click and print each individual page if needed...
-
Page 5: Main Features
--If the built-in flash does not operate, do not touch the internal parts of the camera, as it contains a high voltage circuit. Take the camera to the shop where it was purchased, or to your nearest Ricoh service center. -
Page 6: Attaching The Strap
ATTACHING THE STRAP 1. Run the strap through the camera's strap holder. (Fig. 1) 2. Pass the strap through the buckle as in Fig. 2. INSERTING THE BATTERY The camera will not operate unless the battery is installed. It is important to make sure that the battery is installed correctly. -
Page 7: Loading The Film
Recommended. Replacement 3 V Lithium Batteries Include: Lithium battery (3V) Panasonic CR-1 23A Duracell XL DL-123A POWER SWITCH & CHECKING THE BATTERY POWER SWITCH Each time you slide the Power Switch in the direction of the arrow, it switches from OFF, ON, and vice versa. (Fig. - Page 8 * If there is any dust on the inside lens surface, use a blower to blow the dust away. 3. Make sure the film stays within the Film Guides and lies flat. (Fig. 10,11) 4. Press the Back Cover shut so that the Back Cover Latch returns to its original position. The film is automatically advanced until number "1"...
-
Page 9: Setting The Film Speed
SETTING THE FILM SPEED DX-coded film cassettes have black-and-silver patterns corresponding to film speeds that the camera reads and automatically sets. Your camera accepts DX films with speeds ranging from ISO 100 or 400. (Fig. 14) * To increase flash shooting range, use higher speed film such as ISO 400. 4www.butkus.org When using DX-coded films, setting the film speed is not necessary. -
Page 10: Viewfinder
VIEWFINDER (Fig. 18) (1) Field of View Frame The subject (such as people or scenery) you wish to photograph should be contained within this frame. (2) Parallax Correction Marks When taking a picture of a subject that is between 1.2 m-1.5 m (4 ft.-4.9 ft.) away from your camera the subject should be positioned within these marks. -
Page 11: Auto-Focus Shooting
To zoom the lens, just press either of the zoom buttons (Fig. 19) until your subject is framed properly. * When zooming the lens, keep your fingers away from the moving lens components. AUTO-FOCUS SHOOTING 1. Set the subject you wish to take within the AutoFocus Mark in center of the Viewfinder. (Fig. 20) 2. -
Page 12: Auto Film Rewinding
Shutter Release Button. (Fig. 23) 4www.butkus.org 3. Now return the camera to its original position so that your main subjects are in the Field of View Frame again, and press the Shutter Release Button fully to take the picture. (Fig. 24) When the subject is difficult focus on: 1. -
Page 13: Red Eye Reduction Mode
(ISO 400) Wide-angle: 1.2 m-about 7.8 m (4.0 ft.-25.7 fl.) Telephoto: 1.2 m-about 4.2 m (4.0 ft.-13.8 ft.) * To increase shooting range, use higher speed film such as ISO 400. 4www.butkus.org 2. When the Flash is still charging, the Green AF/ Flash Monitor will blink fast and the shutter will be locked. Wait until the Green AF/Flash Monitor turns on in order to use the flash. -
Page 14: Flash-Off Mode
1. Slide the Power Switch to the Red-eye Reduction mode, then press the Shutter button gently. (Fig. 27) The Red- eye Reduction Lamp will light. After a brief delay, the flash will fire, and the shutter will be released. The entire sequence will take about one second. -
Page 15: (Optional) Databack Settings
Using the Self-timer without flash If you wish to shoot without the flash, keep both the Flash OFF button and the Self-timer button pressed when pressing the Shutter Release Button. (OPTIONAL) DATABACK SETTINGS Nomenclature of the date imprinting feature (Fig. 30) (1) Display panel (2) Month indication (3) Imprint mark... - Page 16 After shooting, the imprint mark "PRINT" blinks in the display panel for a few seconds for correct imprinting. The mark and the letter "M" are not imprinted on the picture. 4www.butkus.org Resenting the date and time 1. Press and hold the Mode/Select Bunon for more than 2 seconds until the year digits flash. (Fig. 32) 2.
-
Page 17: Battery Replacement
Battery Replacement 1. Open the back cover. 2. Remove the screw from the databack battery compartment cover with a small (+) screwdriver. (Fig. 36) * Use a pointed instrument to slide the battery in the direction of the arrow to the dotted line position, to push it out. -
Page 18: Proper Care Of Your Camera
Exposure Adjustment: Programmed AE with CdS cell Coupling range EV8.0-15.0 (ISO 100) Film Speed: ISO 100, 400. Compatible with DX code system. Flim Load/Wind/Rewinding: Ricoh auto-load system. Automatic 1st frame set. Automatic film rewind at the end of film. Mid-roll rewind is possible. - Page 19 Exposure Counter: Mechanical, Additive Built-in Flash: Electronic flash automatically activates in dim light Flash off possible Red eye reduction by lamp Flash Range: ISO 100 Negative film (Wide) 1.2 m-3.9 m (4 fl.-12.9 fl.) (Tele) 1.2 m-2.1 m (4 ft.-6.9 ft.) ISO 400 Negative film (Wide) 1.2 m-7.8 m (4 ft.-25.7 ft.) (Tele) 1.2 m-4.2 m (4 fl.-13.8 fl.)
Need help?
Do you have a question about the RZ-770 and is the answer not in the manual?
Questions and answers