Table of Contents
Advertisement
Quick Links
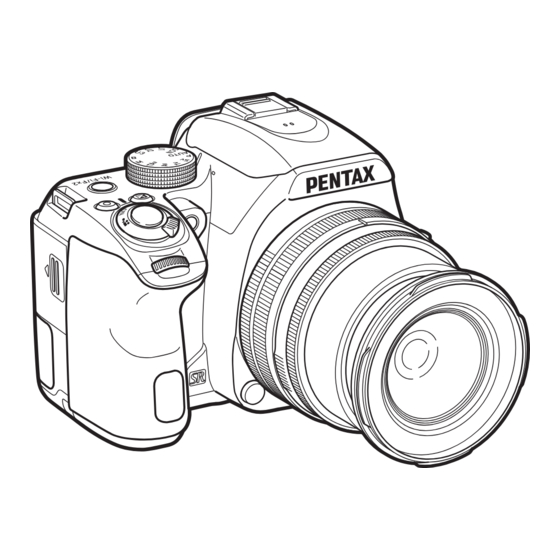
SLR Digital Camera
Start Guide
Model No. R06010
Thank you for purchasing the PENTAX KF digital
camera.
This Start Guide provides information on how to
get your PENTAX KF ready for use and its basic
operations. To ensure proper operation, please
read this Start Guide before using the camera.
For details on how to use the various shooting
methods and settings, please refer to the
Operating Manual (PDF) posted on our website.
Refer to p.70 for details on the Operating Manual.
Advertisement
Table of Contents

Related Manuals for Ricoh R06010


Summary of Contents for Ricoh R06010
- Page 1 Start Guide before using the camera. For details on how to use the various shooting methods and settings, please refer to the Operating Manual (PDF) posted on our website. Model No. R06010 Refer to p.70 for details on the Operating Manual.
- Page 2 • Should the monitor be damaged, be careful of glass fragments. Also, be careful not to allow the liquid crystal to get on your skin or in your eyes For Using Your Camera Safely or mouth. • Depending on your individual factors or physical condition, the use of the camera may cause itching, rashes or blisters.
- Page 3 Caution • Do not touch or short-circuit the terminal area of the AC plug cord while the cord is plugged in. • Only use the specified battery with this camera. Use of other batteries • Do not handle the power plug with wet hands. This can cause an electric may cause an explosion or fire.
-
Page 4: Checking The Contents Of The Package
Checking the Contents of the Package Hot shoe cover F Eyecup F Body mount cover Rechargeable lithium-ion (Installed on camera) (Installed on camera) (Installed on camera) battery D-LI109 Battery charger USB power adapter Power plug USB cable D-BC186 AC-U1 or AC-U2* I-USB166 * Differs depending on the region. -
Page 5: Table Of Contents
Contents Checking the Contents of the Package ....2 Compensating the Exposure ........38 Recording Movies ............38 Names and Functions of the Working Parts ..5 Using the Built-in Flash ..........39 Operating Controls ............6 Setting the Drive Mode ..........40 Monitor ................ - Page 6 • In this manual, the generic term “computer(s)” refers to the user registration on our website. either a Windows PC or a Macintosh. Thank you for your cooperation. • In this manual, the term “battery(ies)” refers to any type of https://www.ricoh-imaging.com/registration/ batteries used for this camera and its accessories.
-
Page 7: Names And Functions Of The Working Parts
Names and Functions of the Working Parts Hot shoe Speaker Built-in flash Microphone Image plane indicator AF assist light Strap lug Mirror Lens mount index Microphone/cable release terminal Remote control receiver AF coupler Microphone Lens unlock button Lens information contacts Strap lug Card access lamp Diopter adjustment lever... -
Page 8: Operating Controls
1 EV Compensation button (J) Operating Controls Press to change the exposure compensation value. (p.38) In playback mode, press to save the last JPEG image taken also in RAW format. 2 Green button (M) Resets the value being adjusted. 3 Shutter release button (0) Press to capture images. - Page 9 9 Live View/Delete button (K/L) g OK button (E) Displays the Live View image. (p.34) When a menu or the control panel is displayed, press this In playback mode, press to delete images. (p.42) button to confirm the selected item. Press and hold this button when [AF Active Area] is set to 0 Rear e-dial (R) 9 or 8, or to 0 or h to switch the function of the arrow...
-
Page 10: Monitor
99999 99999 Monitor Outdoor View Setting Outdoor View Setting Outdoor View Setting AUTO AUTO Capture Mode 99999 99999 07/07/2022 07/07/2022 10:23 10:23 With this camera, you can take pictures while looking through Standby mode Control panel the viewfinder or while viewing the image on the monitor. (Status screen) When using the viewfinder, you can take pictures while checking the status screen displayed on the monitor and looking... - Page 11 Status Screen Live View 1 2 3 4 5 6 4 5 6 7 8 9 10 2 5 0 2 5 0 5 1 2 0 0 5 1 2 0 0 +1.0 +1.0 G1A1 G1A1 18 20 21 +1.7 +1.7 2526...
- Page 12 29 Destination 30 Operation guide for the Control Panel control panel customization A mode 99999 99999 Custom Image Custom Image Custom Image Bright Bright Bright Playback Mode The captured image and shooting information are displayed in single image display of the playback mode. Press G to change the type of information displayed in 07/07/2022 07/07/2022...
-
Page 13: Viewfinder
t Memo Viewfinder • You can adjust the viewfinder image sharpness using the diopter adjustment lever. If it is difficult to move the diopter adjustment lever, lift up and remove the eyecup. Adjust the diopter setting until the AF frame in the viewfinder looks sharp and clear. -
Page 14: How To Change Function Settings
Using the Control Panel How to Change Function Settings Press G in standby mode. Use ABCD to select an item. Using the Direct Keys 99999 99999 File Format File Format File Format Press ABCD in standby mode. Sensitivity p.37 White Balance p.41 Flash Mode p.39... - Page 15 Customizing the Control Panel Press J. The control panel reappears. The functions displayed on the control panel can be customized. Press F. Some functions in the A, C, and D menus can be saved on The camera returns to standby mode. the control panel.
-
Page 16: Using The Menus
Using the Menus Use Q to change the menu category. Custom Image Custom Image AF with Viewfinder AF with Viewfinder AF with Live View AF with Live View Use AB to select an item. AF Assist Light AF Assist Light AE Metering AE Metering Menu tabs... -
Page 17: Menu List
Menu List Rec. Mode Menus Menu Item Function Default Setting Sets the image finishing tone such as color and contrast before *1 *2 Custom Image Bright shooting an image. *1 *3 Scene Mode Selects the scene mode that best suits the situation. (S mode) Portrait AF Mode Selects the AF mode for shooting with the viewfinder. - Page 18 Menu Item Function Default Setting File Format Sets the file format of images. JPEG JPEG Recorded Sets the recording size of JPEG images. Image Pixels Capture JPEG Quality Sets the quality of JPEG images. Settings RAW File Format Sets the RAW file format. Color Space Sets the color space to use.
- Page 19 Menu Item Function Default Setting Applies a low-pass filter effect using the Shake Reduction AA Filter Simulator mechanism. Shake Reduction Activates the Shake Reduction function. Horizon Correction Corrects horizontal tilt when in A mode. Distortion Reduces distortions occurring due to lens properties. Correction Peripheral Illumin.
- Page 20 Menu Item Function Default Setting Display Time Sets the Instant Review display time. 1sec. Zoom Review Displays the magnified image during Instant Review. Save RAW Data Saves the RAW data during Instant Review. Instant Review Delete Deletes the displayed image during Instant Review. Histogram Display Displays the histogram during Instant Review.
- Page 21 Menu Item Function Default Setting Sensitivity EV Compensation Flash Mode Flash Exposure Comp. Drive Mode White Balance Custom Image Clarity Memory Determines which settings to save when the power is turned off. Skin Tone Digital Filter HDR Capture Pixel Shift Resolution Shooting Info Display Playback Info Display Outdoor View Setting...
-
Page 22: Movie Menus
Movie Menus Menu Item Function Default Setting Sets the image finishing tone such as color and contrast before Custom Image Bright shooting an image. AF Mode Selects the AF mode for movie recording. AF with AF Active Area Selects the area to adjust the focus for movie recording. Multiple AF Points Live View Emphasizes the outline of the subject in focus and makes it easier... -
Page 23: Playback Menu
Menu Item Function Default Setting AF/AE-L Button Sets the function for when f is pressed. Enable AF1 –, –, – –, J, GLINE Button Sets the Q / R / M operation for each exposure mode. E-Dial Customi- I, J, GLINE Program- zation I, J, GLINE... -
Page 24: Set-Up Menus
Set-up Menus Menu Item Function Default Setting Language/W Changes the display language. English Date Adjustment Sets the date and time and the display format. 01/01/2022 Switches between the date and time display of your hometown city World Time Hometown and that of a specified city. Text Size Magnifies the text size when selecting a menu item. - Page 25 Menu Item Function Default Setting Sets the brightness, saturation, and color adjustment of the LCD Display Settings monitor. Outdoor View Setting Adjusts the brightness of the monitor for outdoor shooting. Changes the monitor display color to red for shooting in a dark Night Vision LCD Display place such as night-time shooting.
- Page 26 Menu Item Function Default Setting Create New Folder Creates a new folder on the memory card. – Folder Name Sets the folder name in which images are stored. Date File Name Sets the file name assigned to an image. IMGP, _IMG Sequential Continues the sequential numbering for the file name when a new Numbering...
-
Page 27: Custom Setting Menus
Custom Setting Menus Menu Item Function Default Setting 1 EV Steps Sets the adjustment steps for the exposure. 1/3 EV Steps 2 Sensitivity Steps Sets the adjustment steps for the ISO sensitivity. 1 EV Step 3 Meter Operating Time Sets the meter operating time. 10sec. - Page 28 Menu Item Function Default Setting Sets the tungsten light color tone when the white balance is set to 15 AWB in Tungsten Light Strong Correction [Auto White Balance]. Auto White 16 WB When Using Flash Sets the white balance setting when using a flash. Balance Sets the adjustment steps for the Color Temperature option of the 17 Color Temperature Steps...
-
Page 29: Getting Your Camera Ready For Use
Getting Your Camera Ready for Use Align the lens mount indexes (red dots: 3) on the camera and the lens, and secure by turning the Attaching the Strap lens clockwise until it clicks. Pass the end of the strap through the strap lug and secure it on the inside of the clasp. -
Page 30: Charging The Battery
Charging the Battery Set the battery to the battery charger while Insert the power plug to aligning the + and - the USB power adapter terminals of each. until it clicks. Connect the USB cable to the USB terminal. The indicator lamp lights while charging and turns off when the battery is fully charged. -
Page 31: Inserting/Removing The Battery
Inserting/Removing the Battery Inserting/Removing a Memory Card Open the battery cover. Make sure that the camera is turned off. Slide the battery cover unlock lever (1) before opening the Slide the memory card cover. cover in the direction of 1 and then rotate it to open as shown by 2. -
Page 32: Opening The Monitor
Opening the Monitor Setting the Display Language and Date/Time Open and rotate the Turn the main switch to monitor 180° to the left [ON]. while holding the top and The lamp lights up in green. The [Language/W] screen bottom of it. appears. - Page 33 Press E. Press B, and then press D. The camera returns to the [Initial Setting] screen. The frame moves to the month if the date format is set to [mm/dd/yy]. Press B to select [Text Size] and press D. Use AB to set the Date Adjustment Date Adjustment Use AB to select [Std.] or...
-
Page 34: Formatting A Memory Card
Formatting a Memory Card Basic Shooting Operation Press F. The A1 menu appears. Shooting with the Viewfinder Use Q or R to display D4 menu. Remove the front lens cap by pushing the top and Use AB to select [Format] and press D. bottom portions as The [Format] screen appears. - Page 35 Turn the mode dial and Position the subject inside align the dial indicator to the AF frame and press 0 halfway. Focus indicator Press 0 fully. The captured image is displayed on the monitor (Instant Review). Available operations during Instant Review Deletes the image.
-
Page 36: Shooting While Viewing The Live View Image
Shooting while Viewing the Live View Image Capture Modes for Still Pictures Press K in Step 5 of Capture Mode Function Page “Shooting with the Automatically selects the optimal Viewfinder” (p.32). capture mode from a The Live View image is displayed (Standard), b (Portrait), c on the monitor. - Page 37 Night Scene Modes Used for shooting at night. Scene Takes three consecutive images at Set the mode dial to S. Night three different exposure levels (-1, ±0, The scene mode selection screen appears. Scene HDR +1) to create a single composite image from them.
- Page 38 Exposure Modes Set the mode dial to the desired exposure mode. Q or R appears on the × x: Available #: Restricted : Not available status screen for the value that Change Change can be changed. Change Mode Shutter Aperture Compen- Sensitivity Speed...
-
Page 39: Setting The Sensitivity
Bulb Exposure Setting the Sensitivity Set the mode dial to M. Press A in standby mode. Use R to set the Use AB to select an item. F5.6 F5.6 aperture value. Sets the range to be 3200 3200 1600 1600 adjusted automatically. -
Page 40: Compensating The Exposure
Compensating the Exposure Recording Movies Press J, and then turn Turn the main switch to The indicator lamp lights red and Sound the Live View image is displayed. 99'99" 99'99" Recordable Time e and the compensation value 2 5 0 2 5 0 are displayed on the status Set the mode dial to the desired capture mode. -
Page 41: Using The Built-In Flash
Using the Built-in Flash Press 0 fully. Movie recording starts. Press C in standby mode. In the upper left area of the monitor, “REC” blinks. Press 0 fully again. Select a flash mode. Auto Flash Discharge Auto Flash Discharge Movie recording stops. Return the main switch to the [ON] position to exit C mode. -
Page 42: Setting The Drive Mode
Discharges a flash immediately Setting the Drive Mode before closing the shutter. Trailing Sets to a slow shutter speed. Curtain Sync Press D in standby mode. Captures moving objects as if they Single Frame Shooting Single Frame Shooting are leaving a light trail behind them. Manual Sets the amount of flash discharge Flash... -
Page 43: Setting The White Balance
Setting the White Balance Press E. The camera returns to standby mode. Press B in standby mode. u Caution • There are restrictions on some drive modes when used in Select the desired white Auto White Balance Auto White Balance some capture modes or in combination with some other balance setting. -
Page 44: Reviewing Images
Reviewing Images Review the captured image. Available operations Press 3. C/Q to the left Displays the previous image. D/Q to the right Displays the next image. Deletes the image. R to the right Magnifies the image (up to 16×). The camera enters playback 100-0001 100-0001 Use ABCD to change... -
Page 45: Playing Back Movies
Playing Back Movies Playback Mode Palette Playback functions can be set from Display the movie to play Image Rotation Image Rotation 100-0001 100-0001 the playback mode palette as well as back in single image the B1 menu. display of the playback Press B in single image display Rotates captured images. -
Page 46: Sharing Images
Item Function Sharing Images Develops RAW images into JPEG Development images and saves them as new files. Divides a movie or deletes unwanted l Movie Edit Enabling the Wi-Fi Function segments. Not available when a movie is displayed. The Wi-Fi function is disabled when the camera is turned on. Not available when a RAW image is displayed. -
Page 47: Operating The Camera With A Communication Device
u Caution • By default, you can turn the Wi-Fi function on and off by pressing and holding Y. If the Y button function is changed in [Button Customization] of the A5 menu, you cannot turn the Wi-Fi function on and off with Y. Operating the Camera with a Communication Device The following functions can be used by connecting the camera to... -
Page 48: Restrictions On Each Capture Mode
Restrictions on Each Capture Mode × #: Restricted : Not available Capture Mode Function × × × Sensitivity × × × × Flash Continuous × × × Shooting × × × Self-timer × × Remote Control × × × × ×... - Page 49 Capture Mode Function File Format × RAW/RAW+ White Balance × × × × × × × × × × Custom Image × Clarity/Skin Tone × Digital Filter × × × × × HDR Capture × × × × × Pixel Shift Resolution ×...
-
Page 50: Restrictions On The Combinations Of Special Functions
Restrictions on the Combinations of Special Functions × #: Restricted : Not available Distortion Clarity/ Pixel Shift ASTRO- AA Filter Correction/ Save RAW Skin Tone/ Capture Resolution TRACER Simulator Diffraction Data Digital Filter Correction × × Flash Continuous × × ×... -
Page 51: Functions Available With Various Lenses
Lenses with a maximum aperture of F2.8 or faster. Only available at the 9 position. Functions Available with Various Lenses with a maximum aperture of F5.6 or faster. Lenses Available when using the built-in flash, AF540FGZ, AF540FGZ II, AF360FGZ, AF360FGZ II, AF201FG, AF200FG, or AF160FC. Only available with compatible lenses. -
Page 52: Main Specifications
Folder Name: Date (100_1018, 101_1019...) or Storage Folder Main Specifications user-assigned name (default: PENTX) File Name: user-assigned name (default: Storage File IMGP) Model Description File No.: Sequential Numbering, Reset TTL autofocus, auto-exposure SLR digital camera Type Viewfinder with a built-in retractable P-TTL flash PENTAX KAF2 bayonet mount (AF coupler, lens Type Pentaprism Finder... - Page 53 Outdoor View Auto Picture (R) modes: Standard, Portrait, ±2 steps Setting Landscape, Macro, Moving Object, Night Scene Portrait, Sunset, Blue Sky, Forest Night Vision LCD On, Off Scene (S) modes: Portrait, Landscape, Macro, Display Moving Object, Night Scene Portrait, Sunset, Blue Capture Modes Sky, Forest, Night Scene, Night Scene HDR, Night White Balance...
- Page 54 Max. approx. 6.0 fps, JPEG (q: m at Auto Flash Discharge (Auto Picture, Scene Mode), Continuous H): up to approx. 40 frames, RAW: up to Auto Flash + Red-eye Reduction (Auto Picture, approx. 10 frames, RAW+: up to approx. 8 frames Scene Mode), Flash On, Flash On + Red-eye Flash Modes Continuous...
- Page 55 Playback Functions Displayed in viewfinder (horizontal direction only); displayed Electronic Level on monitor (horizontal direction and vertical direction) Single image, Multi-image display (6, 12, 20, 35, and 80 thumbnails), Image magnification (Up to 16× and Movie quick zoom), Grid Display (4×4 Grid, Golden Section, Scale, Square 1, Square 2, Grid Color: Black, White), Recording Format MPEG-4 AVC/H.264 (MOV) Rotated image display, Histogram (Y histogram, RGB...
- Page 56 Interfaces X/Y button: One Push File Format, Wi-Fi, Outdoor View Setting, Night Vision LCD Display, USB 2.0 (micro B), HDMI output terminal (Type D), Preview, Electronic Level, Change AF Area Connection Port stereo microphone/cable release input terminal Button f button: Enable AF1, Enable AF2, Cancel AF, (ø3.5 mm connector) Customization AE Lock...
- Page 57 USB Power Adapter AC-U2 Approximate Image Storage Capacity and Power Supply 100 to 240 VAC (50/60 Hz), 0.2 A Playback Time Output 5.0 VDC, 1000 mA, 5.0 W Average Active (When using the fully charged battery) Efficiency Flash Photography No-Load Power 70 mW Tempe- Normal...
-
Page 58: Operating Environment For Usb Connection And Provided Software
Operating Environment for USB Connection and Provided Software macOS 12 Monterey, macOS 11 Big Sur, macOS With the provided software “Digital Camera Utility 5”, you can 10.15 Catalina develop RAW images, make color adjustments, or check ® Intel Core™ i5 or higher shooting information on a computer. -
Page 59: Index
Index Symbols AF frame....33, 34 Communication device ..45 Flash........ 39 Aperture Priority Automatic Control panel ..... 10, 12 Flash compensation ..40 A menus ......15 Exposure ......36 n........ 41 Flash On ......39 C menus ......20 Aperture value .... - Page 60 Menu ....... 14 Playback menu ....21 Shutter Priority Automatic Meter Operating Time ..25 Playback mode ....42 Exposure ......36 Image plane indicator ..5 Microphone......5 Playback mode palette ..43 Shutter speed ....36 Image storage capacity Microphone/cable release Portrait (S) ....
- Page 61 Viewfinder......11 Viewfinder Overlay ..17 Volume ......22 WARRANTY POLICY..65 White Balance ....41 Wi-Fi ........ 44 ® Windows ......56 Zoom Review ....42...
-
Page 62: Care To Be Taken During Handling
• Avoid contact with garbage, mud, sand, dust, water, toxic gases, or salt. These could cause the camera to breakdown. Wipe the camera to dry Care to be Taken During Handling off any rain or water drops immediately. • Do not attach or remove a lens when there are any rain or water drops on the camera. - Page 63 About SD Memory Cards About the Wireless LAN Function • The SD Memory Card is • Do not use the camera in a place where electrical products, AV/OA equipped with a write-protect devices, and so on generate magnetic fields and electromagnetic switch.
- Page 64 Cet appareil photo est conforme aux normes techniques en vertu de la loi À propos de la fonction de réseau local sans fil sur la radio et de la loi sur les télécommunications et la certification de conformité aux normes techniques peut être affichée sur l'écran. •...
- Page 65 Additional information may be obtained from MPEG LA, L.L.C. See http://www.mpegla.com. • This product uses the RICOH RT font designed by Ricoh Company Ltd. • This product supports PRINT Image Matching III. PRINT Image Matching enabled digital still cameras, printers and software help photographers to produce images more faithful to their intentions.
- Page 66 Announcement on the Use of BSD-Licensed Software This product includes software licensed under the BSD License. BSD license is a form of license which permits the redistribution of the software provided that it is clearly stated that use is unwarranted, and a copyright notice and a list of licensing conditions are provided.
-
Page 67: Warranty Policy
camera will be returned to you upon completion of servicing. If the camera is not covered by warranty, regular charges of the WARRANTY POLICY manufacturer or of its representatives will apply. Shipping charges are to be borne by the owner. If your camera was All our cameras purchased through authorized bona fide purchased outside of the country where you wish to have it photographic distribution channels are guaranteed against... - Page 68 Class B Personal Computers and Peripherals subject to the following two conditions: (1) This device may not cause harmful interference, and (2) this device must accept any interference RICOH IMAGING AMERICAS received, including interference that may cause undesired operation. CORPORATION Changes or modifications not expressly approved by the party responsible for compliance could void the user’s authority to...
- Page 69 à faible puissance émettent une énergie fréquence been confirmed by additional research. The R06010 has been radioélectrique (RF) très faible dans le spectre des micro-ondes tested and found to comply with ISED radiation exposure limits...
- Page 70 These symbols on the products, packaging and/ ces résultats n’ont pas été confirmés par des recherches or accompanying documents mean that used supplémentaires. Le R06010 a été testé et jugé conforme aux electrical and electronic equipment and batteries limites d’exposition aux rayonnements ISDE énoncées pour un should not be mixed with general household environnement non contrôlé...
- Page 71 Operating frequency band: 2400 MHz - 2483.5 MHz Maximum radio-frequency power: 8.16 dBm EIRP Importer (CE marking): RICOH IMAGING EUROPE S.A.S. Parc Tertiaire SILIC 7-9, avenue Robert Schuman - B.P. 70102, 94513 Rungis Cedex, FRANCE Manufacturer: RICOH IMAGING COMPANY, LTD.
-
Page 72: Information On The Operating Manual
Information on the Operating Manual An Operating Manual (PDF) containing information on how to use this camera is available. Please download it from our website. Operating Manual Download: https://www.ricoh-imaging.com/ manuals/... - Page 73 Memo...
- Page 74 Memo...
- Page 75 Memo...
- Page 76 This contact information may change without notice. Please check the latest information on our websites. 4RFHZ030+ • Specifications and external dimensions are subject to change without notice. 53642 Copyright © RICOH IMAGING COMPANY, LTD. 2022 R01DTG22 Printed in Philippines...
Need help?
Do you have a question about the R06010 and is the answer not in the manual?
Questions and answers