Table of Contents
Advertisement
Quick Links
United Kingdom
en
Installation and Service Manual
High Efficiency Wall Hung Condensing Gas Boiler
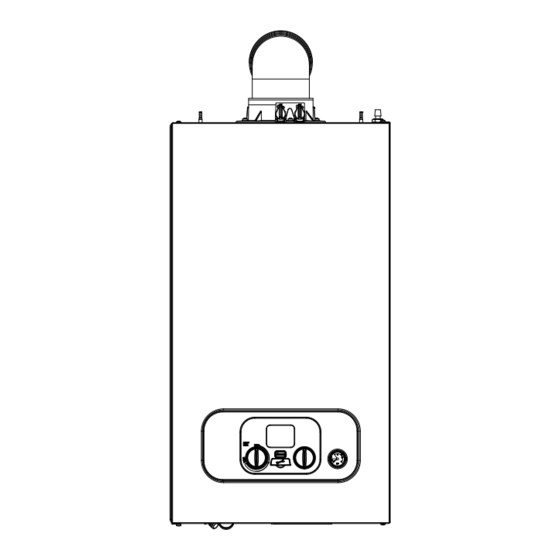
Main Eco Compact System
15 — 18
These instructions include the Benchmark Commissioning Checklist and should be left with the
user for safe keeping. They must be read in conjunction with the Flue Installation Guide.
Advertisement
Table of Contents

Related Manuals for Main Eco Compact System 15


Summary of Contents for Main Eco Compact System 15
- Page 1 United Kingdom Installation and Service Manual High Efficiency Wall Hung Condensing Gas Boiler Main Eco Compact System 15 — 18 These instructions include the Benchmark Commissioning Checklist and should be left with the user for safe keeping. They must be read in conjunction with the Flue Installation Guide.
- Page 2 Dear Customer, Thank you very much for buying this appliance. Please read through the manual carefully before using the product, and keep it in a safe place for later reference. In order to ensure continued safe and efficient operation we recommend that the product is serviced regularly. Our service and customer service organisation can assist with this.
-
Page 3: Table Of Contents
Main components ........ - Page 4 Contents 5.3.1 Location of the boiler ..............26 5.3.2 Bath and shower rooms .
- Page 5 Contents 9.3.5 Pressure Gauge ...............52 9.3.6 Safety pressure relief valve .
-
Page 6: Safety
1 Safety Safety Benchmark 1.1.1 Building Regulations and the Benchmark Commissioning Checklist Building Regulations (England & Wales) require notification of the installation of a heating appliance to the relevant Local Authority Building Control Department. This can be achieved via a Competent Persons Self Certification Scheme as an option to notifying the Local Authority directly. -
Page 7: Installer Notification Guidelines
1 Safety 1.1.3 Installer Notification Guidelines Fig.2 Installer Notification Guidelines Choose Building Regulations Notification Route Competent Person's Building Control Self Certification Scheme Contact your relevant Local Install and Commission this Authority Building Control appliance to manufacturer's (LABC) who will arrange instructions an inspection or contact a government approved... -
Page 8: General Safety Instructions
If the mains lead is damaged, it must be replaced by the original manufacturer, the manufacturer's dealer or another suitably skilled person to prevent hazardous situations from arising. Warning Always disconnect the mains supply and close the main gas tap when working on the boiler. -
Page 9: Specific Safety Instructions
The boiler must be installed in a frost-free area. In the case of a fixed connection to the power cord, you must always install a main bipolar switch with an opening gap of at least 3 mm (EN 60335-1). Drain the boiler and central heating system if you are not going to use your home for a long time and there is a chance of frost. -
Page 10: Liabilities
1 Safety Always grip the boiler firmly, and before lifting feel where the weight is concentrated to establish the centre of gravity, repositioning yourself as necessary. See the "Installation" section of these instructions for recommended lift points. Remember The circumstances of each installation are different. Always assess the risks associated with handling and lifting according to the individual conditions. -
Page 11: About This Manual
2 About this manual About this manual General This manual is intended for the installer of a Main Eco Compact System boiler. Additional documentation These Installation & Service Instructions must be read in conjunction with the Flue Accessories Fitting Guide supplied in the Literature Pack. -
Page 12: Technical Specifications
3 Technical specifications Technical specifications Homologations 3.1.1 Safety, Performance & Quality This boiler has been assessed by an appropriate Notified Body and shown to meet the requirements of all Directives and Regulations as applicable. These Directives and Regulations lay down requirements for the safety and efficiency of the appliance, together with its design, construction and use of materials. -
Page 13: Technical Data
Technical information Important All data in these sections are nominal and subject to normal production tolerances. Tab.5 General Main Eco Compact System Gas council numbers 41 467 30 41 467 31 Nominal heat input — central heating — Net (Qn Hi) 15.5... - Page 14 3 Technical specifications Tab.7 Characteristics of combustion Main Eco Compact Combi Natural gas rate (G20) Qmax 1.64 1.96 Natural gas rate (G20) Qmin 0.49 0.49 Important Dynamic (nominal) inlet pressure (Natural gas — G20) 20mbar with a CV of 37.78 MJ/m Tab.8...
-
Page 15: Technical Parameters
3 Technical specifications 3.2.2 Technical parameters Tab.13 Technical parameters for boiler space heaters Main Eco Compact Combi Condensing boiler Low-temperature boiler B1 boiler Cogeneration space heater Combination heater Rated heat output Prated Useful heat output at rated heat output and high tem... -
Page 16: Dimensions And Connections/Clearances
3 Technical specifications Dimensions and connections/clearances Fig.3 Dimensions and connections / clearances The clearances shown in the diagram are minimum requirements to allow for case removal, spanner access and air movement. These should be observed at all times and kept clear of obstructions. PN-0000624 Condensate trap sump Condensate drain... -
Page 17: Electrical Diagram
3 Technical specifications Electrical diagram Fig.5 Electrical wiring diagram br bk PN-0000342 bk — black br — brown b — blue g — green r — red w — while g/y — green/ yellow Description Description Gas valve Pump Flue sensor Terminal strip Hydraulic pressure switch Heating return sensor... -
Page 18: Description Of The Product
4 Description of the product Description of the product General description The Main Eco Compact System range are fully automatic gas fired wall mounted condensing boilers. They are room sealed and fan assisted and will serve central heating and mains fed domestic hot water. -
Page 19: Heating And Domestic Hot Water Production
With a demand for heating the pump circulates water through the primary circuit. Once the main burner ignites the fan speed controls the gas rate to maintain the heating temperature measured by the temperature sensor. When the flow temperature exceeds the set temperature, a 3 minute delay occurs before the burner relights automatically (anti-cycling). -
Page 20: Main Components
4 Description of the product Main components 4.3.1 List of components Fig.8 Component descriptions PN-0000262 Fig.9 Hydraulic layout PN-0000387 Tab.15 Component descriptions Description Description Description Expansion vessel Flue sensor Flue adaptor Expansion vessel valve Spark ignition electrode Heating flow sensor... -
Page 21: Control Panel Description
4 Description of the product Control panel description 4.4.1 Description of the control panel Fig.10 Control panel Display Reset button Central heating temperature control Service diagnostic port System water pressure gauge Reset PN-0000335 Fig.11 Display screen Display description The following symbols may be seen on the display OFF (frost protection still enabled) Indicates errors that prevent the burner from starting Error —... -
Page 22: Accessories And Options
4 Description of the product Accessories and options 4.6.1 Optional accessories The table shows the accessories available for this boiler range. Tab.16 Optional accessories Part number Accessory 7211473 EP2 programmer 7212443 Twin channel timer wired 720971601 Wired room thermostat 720648301 Multifit condensate &... -
Page 23: Before Installation
5 Before installation Before installation Installation regulations Warning Installation, repair and maintenance must only be carried out by a competent person. This document is intended for use by competent persons. Installation must be carried out in accordance with the prevailing regulations, the code of practice and the recommendations in these instructions. -
Page 24: Hard Water Area
5 Before installation Important Any wiring to the boiler, from either the mains or an external control, MUST be cable of the following specification:- 0.75mm 3183/4/5Y (depending on installation) multi strand flexible cable conforming to BS 50525-2-11. Cable of the above specification is sufficiently flexible to withstand normal regular opening and closing of the facia/ control box as expected during routine servicing and other maintenance work. -
Page 25: Showers
5 Before installation It is important to check the inhibitor concentration after installation, system modification and at every service in accordance with the inhibitor manufacturer. (Test kits are available from inhibitor stockists.) For information or advice regarding any of the above contact Baxi Customer Support 0344 871 1545. -
Page 26: Choice Of The Location
5 Before installation Choice of the location 5.3.1 Location of the boiler The boiler may be fitted to any suitable wall with the flue passing through an outside wall or roof and discharging to atmosphere in a position permitting satisfactory removal of combustion products and providing an adequate air supply. -
Page 27: Ventilation
5 Before installation 5.3.3 Ventilation Where the appliance is installed in a cupboard or compartment, no air vents are required. BS 5440: Part 2 refers to room sealed appliances installed in compartments. The appliance will run sufficiently cool without ventilation. 5.3.4 Condensate drain Fig.14... - Page 28 5 Before installation Fig.15 Methods of termination continued Important Failure to install the condensate discharge pipework correctly will affect the reliable operation of the boiler. Careful consideration must be given to the possibility of the pipework being subject to freezing conditions and appropriate measures taken to prevent blockage.
-
Page 29: Clearances
5 Before installation The fitting of a "Trace Heating" Element is NOT a substitute for correct installation of the condensate drain. ALL requirements in this section must still be adhered to. 5.3.5 Clearances A flat vertical area is required for the installation of the boiler and it should be capable of bearing the weight of the boiler when full of water. - Page 30 5 Before installation Description Description Below gutters, soil pipes or drain pipes 25 (75) Vertically from a terminal on the same 1500 wall Below eaves 25 (200) Horizontally from a terminal on the same wall Below balconies or car port roof 25 (200) From adjacent wall to flue (vertical on...
-
Page 31: Horizontal Flue/Chimney Systems
5 Before installation 5.3.7 Horizontal flue/chimney systems Fig.19 Horizontal flues 315mm to 500mm Flue trims This bend is equivalent to 1 metre Total equivalent length = A+B+C+2x90° bends Important Horizontal flue extensions should always be installed with a fall of at least 1.5°... -
Page 32: Terminal Guard
5 Before installation 5.3.9 Terminal guard Fig.21 Terminal guard ENSURE THAT NO PART OF THE WHITE OUTER CHIMNEY DUCT IS VISIBLE. When codes of practice dictate the use of terminal guards Multifit accessory part no. 720627901 can be used Important This guard is not compatible with Flue Deflector referred to below. -
Page 33: Unpacking & Initial Preparation
5 Before installation Unpacking & initial preparation 5.5.1 Unpacking Fig.23 Unpacking the boiler Caution RISK ASSESSMENT - Before commencing the installation it is recommended that the "Five Steps to Risk Assessment" document published by the HSE is consulted, and an assessment performed as described. - Page 34 5 Before installation for IE: the current edition of I.S. 813 Domestic Gas Installations. The sealed primary circuits may be filled or replenished by means of a temporary connection between the circuit and a supply pipe, provided a "Listed" double check valve or some other no less effective backflow prevention device is permanently connected at the inlet to the circuit and the temporary connection is removed after use.
-
Page 35: Installation
6 Installation Installation General Fig.25 Mounting the boiler Installation must be carried out in accordance with the prevailing regulations, codes of practice and the recommendations in this manual. Danger If the boiler is installed in a compartment do not use it for storage purposes. -
Page 36: Connecting The Condensate Drain
6 Installation 6.2.2 Connecting the condensate drain Fig.28 Pour 300ml of water into flue spigot 1. Remove the blanking cap, and using the elbow supplied, connect the condensate drain pipework to the boiler condensate trap outlet pipe. Ensure the discharge of condensate complies with any national or local regulations in force (see HHIC recommendations). - Page 37 6 Installation Fig.31 Flue dimension Y 5. To dimension " X" add 40mm. This dimension to be known as "Y" . TOP label Sealing tape Securing screw Peak to be uppermost 6. Adjust the two telescopic sections to dimension "Y" and seal the joint with the tape provided.
-
Page 38: Electrical Connections
6 Installation Electrical connections Electrical supply, page 23 for details of the electrical supply. Warning Check that the total nominal consumption of the accessories connected to the appliance is less than 1 amp. If it is higher, a relay must be installed between the accessories and the electronic board. - Page 39 6 Installation Fig.34 Typical electrical connections 230V 230V 230V PN-0000396 5. Connect the earth, permanent live and neutral wires to the terminal block. Important Both the permanent live and neutral connections are fused. Description Description Fused Spur Blue Room Thermostat Black External Clock Brown...
-
Page 40: Filling The Installation
6 Installation Filling the installation 6.5.1 Flushing the system Flush thoroughly and treat the system according to guidance given in BS 7593. 6.5.2 Fill the installation A filling point connection on the central heating return pipework must be provided to facilitate initial filling and pressurising and also any subsequent water loss replacement/refilling. -
Page 41: Commissioning
7 Commissioning Commissioning General Reference should be made to BS:EN 12828, 12831 & 14336 when commissioning the boiler. Ensure that the condensate drain trap has been primed. At the time of commissioning, complete all relevant sections of the Benchmark Checklist at the rear of this publication. Open the mains water supply to the boiler and all hot water taps to purge the DHW system. -
Page 42: Commissioning Procedure
7 Commissioning Commissioning procedure 7.3.1 De-Aeration function Fig.35 Setting de-aeration Before turning on the power to the boiler, rotate the CH control knob ( fully anticlockwise. The purpose of the function is to remove as much air as possible from the heating system. -
Page 43: Checking Combustion - Chimney Sweep Mode
7 Commissioning Fig.37 Gas inlet test point 1. With the boiler operating in the maximum rate condition check that the operational (working) gas pressure at the inlet gas pressure test point is in accordance with BS 6798 & BS 6891. This must be AT LEAST 18mb ! 2. - Page 44 7 Commissioning Warning Ensure that both flue test point plugs are in place after checking combustion. Fig.39 Setting chimney sweep mode Setting maximum and minimum output 1. Turn both control knobs fully anticlockwise and leave for 10 seconds. 2. Turn the right hand knob turn twice in quick succession (within 2 seconds).
- Page 45 7 Commissioning Fig.40 Combustion procedure Set Boiler to Maximum Rate Allow the combustion to stabilise. Do not insert probe to avoid ‘flooding’ the analyser. Perform Flue Integrity Combustion Check Insert the analyser probe into Verify Flue Integrity the air inlet test point, allowing Indication that products of Check CO &...
-
Page 46: Configuring The System
7 Commissioning Configuring the system 7.5.1 System draining If at any time after installation it is necessary to drain and refill the central heating system (e.g. when replacing a radiator) the De-Aeration function must be activated to avoid air being trapped in the system. De-Aeration function, page 42. -
Page 47: Operation
8 Operation Operation Use of the control panel 8.1.1 Control panel The controls are operated by the control knobs and a reset button. Fig.42 Control panel Display screen Reset button CH temperature control knob Service diagnostic port System water pressure gauge Important Reset When an OpenTherm controller is connected adjustment of the... -
Page 48: Maintenance
9 Maintenance Maintenance General Warning When changing components ensure that both the gas and electrical supplies to the boiler are isolated before any work is started. When the component has been changed recommission the boiler. Always examine any seals or gaskets, replacing where necessary. The case front panel MUST seal effectively against the boiler side panels. -
Page 49: Standard Inspection And Maintenance Operations
9 Maintenance Fig.43 Flue adaptor test points Remove the plug from the combustion test point, insert the analyser probe and obtain the CO/CO ratio. This must be less than 0.004. If the combustion reading (CO/CO ratio) is greater than this, and the integrity of the complete flue system and combustion circuit seals has been verified, and the inlet gas pressure and gas rate are satisfactory either:- Perform the "Standard Inspection and Maintenance"... -
Page 50: Checking The Water Pressure
9 Maintenance 11. Carefully examine all seals and gaskets, replacing if necessary. Look for any evidence of leaks or corrosion and if found determine and rectify the cause. 12. Reassemble in reverse order. 13. Complete the relevant Service Interval Record section of the Benchmark Commissioning Checklist at the rear of this publication and then hand it back to the user. -
Page 51: Specific Maintenance Instructions
9 Maintenance Specific maintenance instructions Warning When changing components ensure that both the gas and electrical supplies to the boiler are isolated before any work is started. When the component has been changed recommission the boiler. Always examine any seals or gaskets, replacing where necessary. -
Page 52: Safety Overheat Thermostat
9 Maintenance 9.3.4 Safety overheat thermostat Fig.50 Removing safety overheat 1. Pull the two spade connections off the safety overheat thermostat. thermostat 2. Remove the screws securing the thermostat to the mounting plate on the flow pipe and remove it. 3. -
Page 53: Expansion Vessel
1 bar. 9.3.8 Gas valve Tab.22 Characteristics of combustion Main Eco Compact System % (maximum) 9.0 + 0.3 – 0.2 9.0 + 0.3 – 0.2 % (minimum) 8.5 + 0.1 – 0.4 8.5 + 0.1 – 0.4 Diameter of coaxial discharge pipes 60/100 &... - Page 54 Throttle Adjustment Screw Offset Adjustment Screw 5. Remove the plug from the flue sampling test point. Insert the analyser probe and allow sufficient time for the reading to settle. Main Eco Compact % (maximum) 9.0 + 0.3 – 0.2 9.0 + 0.3 – 0.2 6.
-
Page 55: Pump - Head Only
9 Maintenance Warning Ensure that both flue test point plugs are in place after checking combustion. 9.3.9 Pump - head only Fig.55 Remove pump head only To remove the pump head only. 1. Drain the boiler primary circuit and disconnect the electrical plug from the pump 2. -
Page 56: 10 Troubleshooting
10 Troubleshooting 10 Troubleshooting 10.1 Error codes 10.1.1 Initial error fault finding checks Check that gas, water and electrical supplies are available at the boiler. Electrical supply = 230V ~ 50 Hz. The minimum gas pressure at the meter is 19mb. Carry out electrical system checks, i.e. -
Page 57: Fault Finding
10 Troubleshooting 10.2 Fault finding 10.2.1 Central heating Fig.58 Central heating — Follow operational sequence Turn on mains power 09, 15, 110 or 384 is flashing or re-occurs Go to section ‘A’ The display illuminates regularly, check all PCB connections. If this has no effect replace the PCB. -
Page 58: Fault Finding Solutions Sections A To E
10 Troubleshooting 10.2.2 Fault finding solutions sections A to E Fig.59 Solutions sections A to E Is there 230V at: Main terminals L and N Check electrical supply Connection OK at X41 Main terminal fuse Replace fuse Check wiring PCB - X10 connector... -
Page 59: Fault Finding Solutions Sections F To H
10 Troubleshooting 10.2.3 Fault finding solutions sections F to H Fig.60 Solutions sections F to H Check and correct if necessary 1. Ignition electrode and lead Check wiring - see Electrical Replace PCB 2. Electrode connection Wiring Diagram page 18 3. -
Page 60: Fault Finding Solutions Sections I To M
10 Troubleshooting 10.2.4 Fault finding solutions sections I to M Fig.61 Solutions sections I to M CH system pressure less than Restore system pressure 0.5 bar Check wiring and PCB - X22 Replace hydraulic pressure switch connector for approx. 5V DC between green &... -
Page 61: 11 Decommissioning
11 Decommissioning 11 Decommissioning 11.1 Decommissioning procedure Disconnect the gas & electric supplies and isolate them. Drain the primary circuit and disconnect the filling device. Dismantle the chimney system and remove the boiler from the wall mounting frame. -
Page 62: 12 Disposal
12 Disposal 12 Disposal 12.1 Disposal and recycling Caution Removal and disposal of the boiler must be carried out by a qualified person in accordance with local and national regulations. -
Page 63: 13 Spare Parts
13 Spare parts 13 Spare parts 13.1 Short parts list The following spares are available: Fig.62 Spare parts Tab.23 Part number and description of spare parts Key No. Description Manufacturer’s Spare Part No. Safety thermostat 720653 Detection / spark ignition electrode 7686344 Flow sensor and return sensor 7207471... -
Page 64: 14 Appendix
14 Appendix 14 Appendix 14.1 Benchmark commissioning checklist Warning After servicing or performing any maintenance on the boiler ensure that This Commissioning Checklist is to be completed in full by the competent person who commissioned the boiler as a means of demonstrating compliance with the appropriate Building Regulations and then handed to the customer to keep for future reference. -
Page 65: Service Records
14 Appendix ALL INSTALLATIONS At max. rate: ppm AND CO/CO ² Ratio Record the following: At min. rate: (where possible) ppm AND CO/CO ² Ratio The heating and hot water system complies with the appropriate Building Regul The boiler and associated products have been installed and commissioned in accordance with the manufacturer’s The operation of the boiler and system controls have been demonstrated to and understood by the The manufacturer’s literature, including Benchmark Checklist and Service Record, has been explained and left with the Commissioning Engineer’s Signature... - Page 66 14 Appendix SERVICE 07 SERVICE 08 Date: Date: Engineer name: Engineer name: Company name: Company name: Telephone No: Telephone No: Gas safe register No: Gas safe register No: At max. rate: ppm AND CO ² % At max. rate: ppm AND CO ²...
- Page 67 © Copyright All technical and technological information contained in these technical instructions, as well as any drawings and technical descriptions supplied, remain our property and shall not be multiplied without our prior consent in writing. Subject to alterations.
- Page 68 Baxi Customer Support 0344 871 1545 Opening hours Monday - Friday, 8.00am-6.00pm Weekends and Bank Holidays, 8.30am-2.00pm Please note calls may be recorded for training and monitoring purposes baxi.co.uk Register now to activate your warranty: www.baxi.co.uk/registration For the warranty to be maintained, please make sure... Benchmark checklist is completed Warranty is registered within 30 days The boiler has an annual service...
Need help?
Do you have a question about the Eco Compact System 15 and is the answer not in the manual?
Questions and answers