
Related Manuals for Shure MXA902


Summary of Contents for Shure MXA902
- Page 1 MXA902 Integrated Conferencing Ceiling Array User guide for Shure MXA902 integrated ceiling array microphone, loudspeaker, and IntelliMix DSP. Learn how to install and get great audio in small/medium rooms Version: 0.1 (2023-E)
-
Page 2: Table Of Contents
How to Update Firmware Using Designer Dante Flows for Shure Devices MXA902 Coverage AES67 How Much Space Does the MXA902 Cover? Sending Audio from a Shure Device Receiving Audio from a Device Using a Different Audio Adjust Microphone and Loudspeaker Levels... - Page 3 Shure Incorporated Additional Resources IMPORTANT SAFETY INSTRUCTIONS Specifications Important Product Information MXA902 Microphone Frequency Response Information to the user Dimensions Certifications 3/38...
-
Page 4: Mxa902 Integrated Conferencing Ceiling Array
Connect the computer running Designer to the same network. Open Designer. Check that you’re connected to the correct network in Settings. Go to Online devices. To identify devices, click the product icon to flash the lights on a device. Find the MXA902 in the list. - Page 5 Shure Incorporated Select Optimize. Designer sends the microphone signal to the ANIUSB-MATRIX, sets the MXA902's loudspeaker as the AEC reference, and makes other DSP changes. You can also route audio manually in Designer or Dante Controller. Check the audio routes and settings to make sure they fit your needs.
-
Page 6: Mxa902 Web Application Setup
MXA902 Web Application Setup Out of the box, the MXA902 has a 20 x 20-foot (6.1 x 6.1 m) coverage area for microphone pickup and speech reproduction. You can shift the microphone coverage up to 4 feet (1.2 m) in any direction using Designer or the web application. After com... -
Page 7: General Description
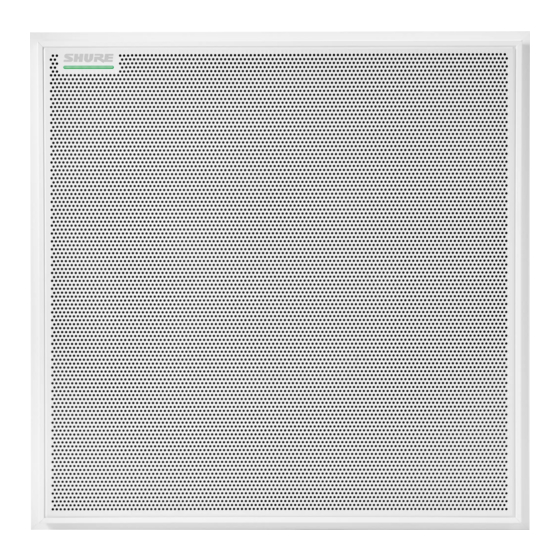
General Description ® ™ The Microflex Advance MXA902 Integrated Conferencing Ceiling Array delivers premium audio capture and reproduction for small to mediumsized meeting spaces—with virtually no setup required. It combines an advanced array microphone with an ™ integrated loudspeaker for natural sounding speech reproduction. Features Single-Zone Automatic Coverage technology to capture audio from a 20 by 20-foot (6 by 6 meter) area and onboard IntelliMix DSP for echo- and noise-free audio. -
Page 8: Mxa902 Parts
Shure Incorporated MXA902 Parts Mute status LED The device mute button in Designer or the web application changes the mute status LED. Customize LED color and behavior in Designer: Device configuration > Settings > Lights. Mute Status LED Default Settings Microphone Status... -
Page 9: Power Over Ethernet Plus (Poe+)
A PoE+ injector device (must be a gigabit device) Note: When connected to a PoE source, the MXA902 works as a microphone but not as a loudspeaker. The red error LED also flashes. To dismiss, connect to a PoE+ source to turn on the loudspeaker or go to Settings > Lights to clear the error. -
Page 10: What's In The Box
Reset Modes • Network reset (press for 4-8 seconds): Resets all Shure control and audio network IP settings to factory defaults. Red LED along bar. • Full factory reset (press for more than 8 seconds): Resets all network and configuration settings to the factory defaults. -
Page 11: Controlling Devices With Shure Designer Software
Online devices during an update. Don't close Designer while updating firmware. MXA902 Coverage The MXA902 uses Single-Zone Automatic Coverage technology. There is one 20 x 20-foot (6.1 x 6.1 m) coverage area that captures every talker in it with minimal configuration. The MXA902's integrated loudspeaker provides natural-sounding speech reproduction for the entire coverage area. -
Page 12: How Much Space Does The Mxa902 Cover
Shure Incorporated The MXA902 provides 1 automixed output with IntelliMix DSP for the far end. For most rooms, all you need to do is install the microphone above the coverage area and route the audio signal using Shure Designer software Dante Controller. -
Page 13: Mute The Mxa902
If needed, use the signal generator to help with EQ adjustments. The signal generator is pre-EQ. Mute the MXA902 The MXA902 has multiple mute points for controlling the microphone, the loudspeaker, or both: IntelliMix output mute: Mutes the microphone's Dante output channel... -
Page 14: Use Designer's Optimize Workflow
Shure Incorporated Use Designer's Optimize Workflow Designer's optimize workflow speeds up the process of connecting systems with at least 1 microphone and 1 audio processor. Optimize also creates mute control routes in rooms with MXA network mute buttons. When you select Optimize in a room, De... -
Page 15: How To Install The Mxa902
MXA902 with Designer 4.7.25 and certain Shure device firmware. How to Install the MXA902 There are many ways to install the MXA902 to get great coverage in small- to medium-sized meeting rooms. Installation Best Practices •... - Page 16 Shure Incorporated Route the Ethernet cable above the ceiling grid and through the opening in the ceiling. Plug the Ethernet cable into the microphone. Attach the safety tether between the building structure and one of the tie-off points on the back of the microphone using braided metal cable or other high-strength wire (not included).
- Page 17 Notice The MXA902S60CM is not designed or intended to be installed within a 24” ceiling grid, which is the standard grid size in North America. Mounting in such a grid in the above-shown configuration is unsafe and may cause damage to the product and/ or injury to those below.
-
Page 18: Vesa Standardized Mounting
Shure Incorporated Align the junction box with the screw holes. If possible, plug the network cable into the microphone before securing the junction box. Reinstall the 4 screws to secure the junction box to the microphone. VESA Standardized Mounting The rear plate has 4 threaded holes for attaching the microphone to a VESA mounting device. The mounting holes follow the VESA MIS-D standard: •... -
Page 19: Suspending From The Ceiling
The 2 input channels are summed and sent to the loudspeaker's output. These input channels are useful if you need to send a far-end signal and program audio to the loudspeaker. The MXA902's AEC reference is the same signal sent to the integrated loudspeaker and can't be changed. 19/38... -
Page 20: Intellimix Dsp
ERLE meter generally corresponds to the reference meter. Reference The MXA902's reference signal is set to the builtin loudspeaker, which is the sum of the 2 Dante inputs. When the loud speaker is on, the reference signal is post-DSP. Non-Linear Processing The primary component of the acoustic echo canceller is an adaptive filter. -
Page 21: Noise Reduction
The level of the MXA902's loudspeaker can also affect how well the AEC removes the reference signal from the mic's signal. Experiment with using a higher NLP setting when the loudspeaker level is higher. -
Page 22: Parametric Equalizer
Shure Incorporated Threshold When the audio signal exceeds the threshold value, the level is attenuated to prevent unwanted spikes in the output sig nal. The amount of attenuation is determined by the ratio value. Perform a soundcheck and set the threshold 3-6 dB above average talker levels, so the compressor only attenuates unexpected loud sounds. - Page 23 Shure Incorporated Copy, Paste, Import, and Export Equalizer Channel Settings These features make it simple to use effective equalizer settings from a previous installation, or simply accelerate configuration time. Copy and Paste Use to quickly apply the same PEQ setting across multiple channels.
-
Page 24: Encryption
Audio is encrypted with the Advanced Encryption Standard (AES-256), as specified by the US Government National Institute of Standards and Technology (NIST) publication FIPS-197. Shure devices that support encryption require a passphrase to make a connection. Encryption is not supported with third-party devices. -
Page 25: Networking Best Practices
For more information, see our FAQ about switches to avoid. Device IP Configuration This Shure device uses 2 IP addresses: one for Shure control, and one for Dante audio and control. • Shure control ◦ Carries data for Shure control software, firmware updates, and third-party control systems (such as AMX or Crestron) •... -
Page 26: Qos (Quality Of Service) Settings
Shure Incorporated These latency values should be used as a starting point. To determine the exact latency to use for your setup, deploy the set up, send Dante audio between your devices, and measure the actual latency in your system using Audinate's Dante Controller software. -
Page 27: Ip Ports And Protocols
Required for inter-device communication Open 64000 Telnet Required for Shure firmware update Open *These ports must be open on the PC or control system to access the device through a firewall. † These protocols require multicast. Ensure multicast has been correctly configured for your network. -
Page 28: Compatibility With Dante Domain Manager
Considerations for Shure devices controlled by DDM: • When you add Shure devices to a Dante domain, set the local controller access to Read Write. Otherwise, you won't be able to access Dante settings, perform a factory reset, or update device firmware. -
Page 29: Sending Audio From A Shure Device
AES67 flow, the AES67 session ID and IP address are required. Shure devices: The transmitting device must support SAP. In Dante Controller, a transmit device (appears as an IP address) can be routed like any other Dante device. -
Page 30: Step 2: Mask And Paint
Shure Incorporated Carefully lift the assembly out of the frame. Remove the gray plastic LED lightpipe. Leave the black plastic guide in place. Remove all 4 recessed screws from one side of the frame. Remove that side of the frame. -
Page 31: Step 3: Reassembly
Shure Incorporated Use masking tape to cover the hook-and-loop fastener strips on the grille. Paint the frame and grille. Let them dry completely before reassembling. Do not paint any part of the main assembly. Step 3: Reassembly Attach the foam piece to the grille with the hook-and-loop fastener strips. -
Page 32: Troubleshooting
Verify that output channel isn't muted. Check that output levels are not set too low. Check that MXA902 is plugged in to a PoE+ source. The MXA902 powers on when connected to PoE, but the loud speaker does not work. -
Page 33: Additional Resources
Additional Resources • Shure Knowledge Base FAQs • Command strings for Shure devices • Shure Enterprise Networking Troubleshooting Checklist • Training from the Shure Audio Institute • Shure Systems YouTube channel Download Shure Software • Shure Designer • Shure Update Utility •... - Page 34 Shure Incorporated Operating Temperature Range −6.7°C (20°F) to 40°C (104°F) Storage Temperature Range −29°C (−20°F) to 74°C (165°F) Microphone Frequency Response 125 Hz to 20 kHz AES67 or Dante Digital Output Channel Count 1 output channel Sampling Rate 48 kHz...
-
Page 35: Dimensions
Digital Signal Processing Delay, compressor, signal generator, equalizer (4-band parametric) Latency Not including Dante latency 6.3 ms MXA902 Microphone Frequency Response Frequency response measured directly on-axis from a distance of 6 feet (1.83 m). Dimensions MXA902-S: • A (Flange): 0.41 in. (10.5 mm) -
Page 36: Important Safety Instructions
• A (Edge to edge): 23.38 in. (593.8 mm) • B (Height): 2.2 in. (56.04 mm) Weight • MXA902-S or MXA902-S-60CM: 12.7 lb. (5.8 kg) IMPORTANT SAFETY INSTRUCTIONS READ these instructions. KEEP these instructions. HEED all warnings. FOLLOW all instructions. -
Page 37: Important Product Information
REACH (Registration, Evaluation, Authorization of Chemicals) is the European Union (EU) and the United Kingdom (UK) chemical substances regulatory framework. Information on substances of very high concern contained in Shure products in a concentration above 0.1% weight over weight (w/w) is available upon request. -
Page 38: Certifications
Certifications CE Notice: Hereby, Shure Incorporated declares that this product with CE Marking has been determined to be in compliance with Euro pean Union requirements. The full text of the EU declaration of conformity is available at the following site: https:// www.shure.com/en-EU/support/declarations-of-conformity.
Need help?
Do you have a question about the MXA902 and is the answer not in the manual?
Questions and answers