Table of Contents
Advertisement
Quick Links
Advertisement
Table of Contents

Related Manuals for Electrolux EVE8P21X


Summary of Contents for Electrolux EVE8P21X
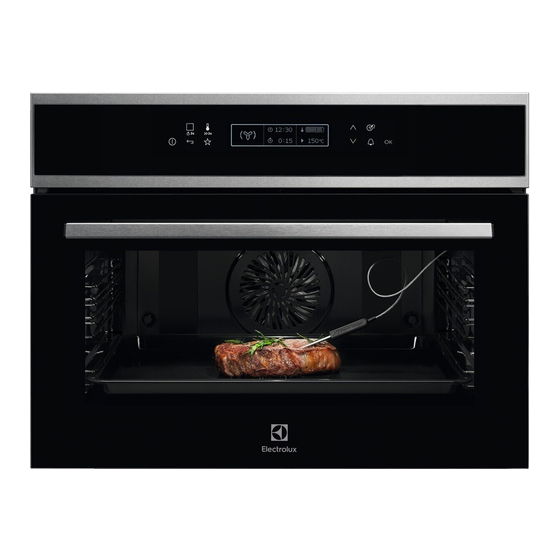
- Page 1 User Manual Oven EVE8P21X KVEBP21X electrolux.com/register...
-
Page 2: Table Of Contents
WE’RE THINKING OF YOU Thank you for purchasing an Electrolux appliance. You’ve chosen a product that brings with it decades of professional experience and innovation. Ingenious and stylish, it has been designed with you in mind. So whenever you use it, you can be safe in the knowledge that you’ll get great results every time. -
Page 3: Safety Information
SAFETY INFORMATION Before the installation and use of the appliance, carefully read the supplied instructions. The manufacturer is not responsible for any injuries or damages that are the result of incorrect installation or usage. Always keep the instructions in a safe and accessible location for future reference. -
Page 4: Safety Instructions
Always use oven gloves to remove or put in accessories or • ovenware. Before carrying out any maintenance, disconnect the • appliance from the power supply. Ensure that the appliance is switched off before replacing • the lamp to avoid the possibility of electric shock. Do not use a steam cleaner to clean the appliance. - Page 5 • Make sure not to cause damage to the • Open the appliance door carefully. The mains plug and to the mains cable. use of ingredients with alcohol can cause Should the mains cable need to be a mixture of alcohol and air. replaced, this must be carried out by our •...
- Page 6 • Before maintenance, deactivate the – provide good ventilation during and appliance and disconnect the mains plug after the first use at maximum from the mains socket. temperature operation. • Make sure the appliance is cold. There is • Unlike all humans, some birds and the risk that the glass panels can break.
-
Page 7: Product Description
• Disconnect the appliance from the mains • Remove the door catch to prevent supply. children or pets from becoming trapped in • Cut off the mains electrical cable close to the appliance. the appliance and dispose of it. 3. PRODUCT DESCRIPTION 3.1 General overview Control panel Electronic programmer... -
Page 8: Control Panel
4. CONTROL PANEL 4.1 Electronic programmer 9 10 Use the sensor fields to operate the appliance. Sensor Function Comment field ON / OFF To activate and deactivate the appliance. Heating Functions or Touch the sensor field once to choose a heating function or the Assisted Cooking menu: Assisted Cooking. -
Page 9: Before First Use
4.2 Display A. Heating function B. Time of day C. Heat-up indicator D. Temperature E. Duration time or end time of a function Other indicators of the display: Symbol Function Minute Minder The function works. Time of day The display shows the current time. Duration The display shows the necessary time for cook‐... -
Page 10: Daily Use
6. DAILY USE Submenu for: Basic Settings WARNING! Refer to Safety chapters. Symbol / Menu Description item 6.1 Navigating the menus Sets the current time on the clock. 1. Turn on the oven. Set Time of Day 2. Press to select the menu When ON, the display shows option. - Page 11 Symbol / Menu Description Heating function Application item This function is designed to save energy during cooking. Shows the software version For the cooking instructions and configuration. Service Moist Fan Baking refer to "Hints and tips" chap‐ ter, Moist Fan Baking. The Resets all settings to factory oven door should be closed settings.
- Page 12 Food Category: Meat Heating function Application Dish To speed up the rising of the yeast dough. It prevents Braised meat Beef dough surface from drying Meat Loaf Dough Proving and keeps the dough elastic. Rare To prepare tender, succulent roasts. Rare Slow Cooking Medium...
- Page 13 Dish Dish Hare Cheese Cake, Tin • Leg of Hare Brioche • Saddle of Hare Madeira Cake Venison • Haunch of Venison Tarte Game • Saddle of Venison Swiss Tarte, sweet Roast Game Almond Cake Muffins Loin of Game Pastry Food Category: Oven Dishes Pastry Stripes Dish...
-
Page 14: Clock Functions
4. Select a heating function. Dish 5. Press to confirm. 6. Set the temperature. Ciabatta 7. Press to confirm. Bread Crown 6.7 Heat-up indicator Bread Yeast Plait When you turn on a heating function, the bar Unleavened Bread on the display comes on. The bar shows that Food Category: Side Dishes the temperature increases. -
Page 15: Automatic Programmes
• The set temperature is more than 80 °C. If you use the clock functions: • The function: Duration is set. Duration, End Time, the oven The function: Heat + Hold keeps prepared turns off the heating elements food warm at 80 °C for 30 minutes. It turns after 90 % of the set time. -
Page 16: Using The Accessories
8.1 Recipes online 1. Turn on the oven. 2. Select the menu: Recipes. Press You can find the recipes for the confirm. automatic programmes specified 3. Select the category and dish. Press for this oven on our website. To to confirm. find the proper Recipe Book 4. - Page 17 sensor should be stabilized in one place during baking. Use a solid ingredient to achieve that. Use the rim of the baking dish to support the silicone handle of the food sensor. The tip of the food sensor should not touch the bottom of a baking dish.
-
Page 18: Additional Functions
Wire shelf and baking tray / deep pan WARNING! together: There is a risk of burns as the food sensor becomes hot. Be Push the baking tray / deep pan between the careful when you unplug it and guide bars of the shelf support and the wire remove it from the food. - Page 19 6. Enter the name of the programme. 4. Press to confirm. The first letter flashes. If the Pyrolysis function works, 7. Press to change the letter. the door is locked and the 8. Press symbol of a key comes on in the The next letter flashes.
-
Page 20: Hints And Tips
– when the oven is turned on. – if you touch a symbol during the night Temperature (°C) Switch-off time (h) brightness (apart from ON / OFF), the 120 - 195 display goes back to the day brightness mode for the next 10 200 - 245 seconds. - Page 21 • You can extend baking times by 10 – 15 an unequal browning occurs. The minutes if you bake cakes on more than differences equalize during baking. one shelf position. • Trays in the oven can twist during baking. • Cakes and pastries at different heights do When the trays become cold again, the not always brown equally.
- Page 22 Food Function Tempera‐ Time (min) Shelf position ture (°C) Apple pie / Apple pie (2 tins Ø Conventional Cook‐ 70 - 90 20 cm, diagonally off set) Conventional Cook‐ 160 - 170 70 - 90 Cheesecake, tray 1) Preheat the oven. 2) Use a deep pan.
- Page 23 Biscuits Food Function Tempera‐ Time (min) Shelf position ture (°C) Short pastry biscuits True Fan Cooking 150 - 160 10 - 20 Short bread / Short bread / True Fan Cooking 20 - 35 Pastry Stripes Short bread / Short bread / Conventional Cook‐...
- Page 24 11.8 Moist Fan Baking Food Temperature Time (min) Shelf position (°C) Pasta gratin 200 - 220 45 - 60 Potato gratin 180 - 200 70 - 85 Moussaka 180 - 200 75 - 90 Lasagne 180 - 200 70 - 90 Cannelloni 180 - 200 65 - 80...
- Page 25 1. Sear the meat in a pan on the hob on a WARNING! very high setting for 1 - 2 minutes on Refer to “Hints and tips” chapter. each side. 2. Put the meat together with the hot In the first 10 minutes you can set an oven roasting pan on the wire shelf in the temperature between 80 °C and 150 °C.
- Page 26 11.12 Roasting To keep meat more succulent: • roast lean meat in the roasting tin with the Use heat-resistant ovenware. lid or use roasting bag. • roast meat and fish in large pieces (1 kg Roast large roasting joints directly in the tray or more).
- Page 27 Lamb Food Function Quantity Tempera‐ Time (min) Shelf posi‐ ture (°C) tion Leg of lamb, roast Turbo Grill‐ 1 - 1.5 kg 150 - 180 100 - 120 lamb Saddle of lamb Turbo Grill‐ 1 - 1.5 kg 160 - 180 40 - 60 Game Food...
- Page 28 Grill Food Temperature (°C) Grilling time (min) Shelf position 1st side 2nd side Roast beef, medium 210 - 230 30 - 40 30 - 40 Filet of beef, medium 230 20 - 30 20 - 30 Back of pork 210 - 230 30 - 40 30 - 40 Back of veal...
- Page 29 Food Function Tempera‐ Time (min) Shelf position ture (°C) Baguettes Conventional Cooking as per manu‐ as per manufacturer's facturer's in‐ instructions structions Fruit cake Conventional Cooking as per manu‐ as per manufacturer's facturer's in‐ instructions structions 1) Turn chips 2 or 3 times during cooking. 11.16 Defrost •...
- Page 30 Soft fruit Food Temperature (°C) Cooking time until Continue to cook at simmering (min) 100 °C (min) Strawberries / Blueber‐ 160 - 170 35 - 45 ries / Raspberries / Ripe gooseberries Stone fruit Food Temperature (°C) Cooking time until Continue to cook at simmering (min) 100 °C (min)
- Page 31 Food Temperature (°C) Time (min) Shelf position White Bread 180 - 200 40 - 60 Baguette 200 - 220 35 - 45 Brioche 160 - 180 40 - 60 Ciabatta 200 - 220 35 - 45 Rye Bread 180 - 200 50 - 70 Dark Bread 180 - 200...
- Page 32 Mutton / lamb Food core temperature (°C) Less Medium More Leg of lamb, Roast lamb Game Food core temperature (°C) Less Medium More Saddle of hare, Saddle of venison Leg of hare, Whole hare, Leg of venison Poultry Food core temperature (°C) Less Medium More...
-
Page 33: Care And Cleaning
Casseroles - Sweet Food core temperature (°C) Less Medium More White bread casserole with / without fruits, Rice porridge casserole with / without fruits, Sweet noodle casserole 12. CARE AND CLEANING WARNING! Refer to Safety chapters. 12.1 Notes on cleaning Clean the front of the oven with a soft cloth with warm water and a mild cleaning agent. - Page 34 1. Clean the inner side of the door with hot water, so that the residues do not burn from the hot air. 2. Turn on the oven and select from the main menu the function: Cleaning. Press to confirm. 3. Set the duration of the cleaning procedure: 3.
-
Page 35: Troubleshooting
12.5 Replacing the lamp WARNING! Risk of electric shock. The lamp can be hot. 1. Turn off the oven. Wait until the oven is cooled down. 2. Clean the glass cover. 2. Disconnect the oven from the mains. 3. Replace the lamp with a suitable 300 °C 3. -
Page 36: Energy Efficiency
......... Serial number (S.N.) ......... 14. ENERGY EFFICIENCY 14.1 Product Fiche and information according to EU 65-66/2014 Supplier's name Electrolux EVE8P21X Model identification KVEBP21X Energy Efficiency Index 80.8 Energy efficiency class Energy consumption with a standard load, conventional mode 0.89 kWh/cycle Energy consumption with a standard load, fan-forced mode 0.59 kWh/cycle... -
Page 37: Environmental Concerns
EVE8P21X 31.6 kg Mass KVEBP21X 31.6 kg EN 60350-1 - Household electric cooking Cooking with fan appliances - Part 1: Ranges, ovens, steam When possible, use the cooking functions ovens and grills - Methods for measuring with fan to save energy. - Page 40 electrolux.com...
Need help?
Do you have a question about the EVE8P21X and is the answer not in the manual?
Questions and answers