
Related Manuals for illy Y3.3


Summary of Contents for illy Y3.3
- Page 1 INSTRUCTION MANUAL - MANUEL D’UTILISATION INSTRUCCIONES DE USO - MANUALE DI ISTRUZIONI...
- Page 3 INSTRUCTION MANUAL ..................4 MANUEL D’UTILISATION .................. 20 INSTRUCCIONES DE USO .................. 36 ISTRUZIONI D’USO ..................25...
- Page 4 IMPORTANT SAFETY MEASURES Installation of the appliance • Read the instructions carefully. When using electrical appliances, the following safety measures must always be • Do not install the machine in an area where the temperature may reach 5°C/32°F or lower (if water freezes, the appliance may be damaged) or higher than followed.
- Page 5 Improper use of the appliance Using the short cable • This appliance is intended for household use only. Any other use is considered 1. The machine is equipped with a short power cable to avoid the risk of entangle- improper and therefore dangerous. ment or tripping due to a long cable.
-
Page 6: Table Of Contents
ONLY USE IPERESPRESSO CAPSULES WITH THIS MACHINE. GENERAL MACHINE OPERATING DISCOVER AND BUY ILLY IPERESPRESSO CAPSULES AT SHOP.ILLY.COM, AT THE SHOPS OR AUTHORISED ILLY CAFÉS OR CALL THE FREEPHONE RULES NUMBER 800-821021 (ONLY FROM ITALY). Read the instruction manual and the warranty limitations carefully. -
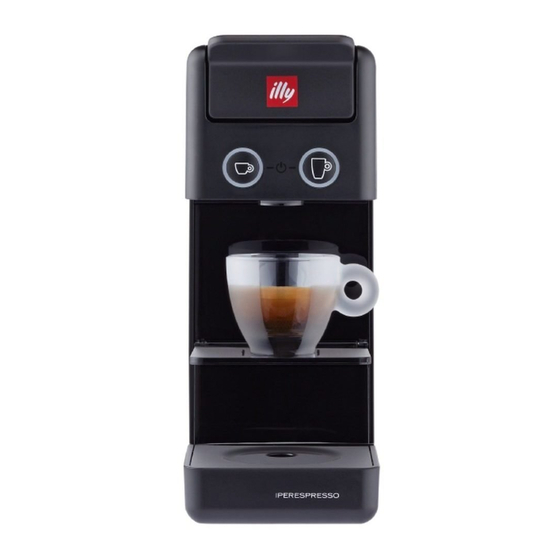
Page 7: Machine Parts
MACHINE PARTS CAPSULE COMPARTMENT OPENING/CLOSING LEVER BREW BUTTONS: > ESPRESSO COFFEE > BREWED COFFEE COFFEE DISPENSING SPOUT MUG HOLDER SURFACE REMOVABLE USED CAPSULE TRAY POWER CORD WATER TANK ESPRESSO CUP HOLDER SURFACE IPERESPRESSO CAPSULES: > FOR ESPRESSO COFFEE > FOR BREWED COFFEE DATA PLATE(UNDER BASE) 1-2 sec. -
Page 8: Machine Installation And Start-Up
MACHINE INSTALLATION AND START-UP When used for the first time, or if the machine has been turned off for a long period of time, wash the tank before filling it. Furthermore it is recommended to dispense at least 3 mugs of water to rinse the internal machine circuits, proceeding as follows. Remove the tank, pushing it downwards. - Page 9 1 min. After approx. 1 minute, they will turn on fixed Place an empty mug below the dispenser. Press the button and wait until the and the machine is ready to be used. water stops dispensing. The machine is rinsed when at least 3 mugs of water have been dis- pensed.
-
Page 10: Making An Espresso
MAKING AN ESPRESSO Use the illy capsules shown in the figure. Slowly lift (to the stop) the lever that opens/ Insert the capsule as shown in the figure. Close the lever completely. closes the capsule compartment. Lower the cup support grid. Fill the tank with Place an espresso cup below the dispenser. -
Page 11: Making Brewed Coffee
MAKING BREWED COFFEE Use the illy capsules shown in the figure. Slowly lift (to the stop) the lever that opens/ Insert the capsule as shown in the figure. Close the lever completely. closes the capsule compartment. Move the cup support grid to the vertical Place a large cup or mug below the dispenser. -
Page 12: Programming The Quantities
PROGRAMMING THE QUANTITIES Put a capsule in the provided space. Close the lever completely. Programming espresso: Programming brewed coffee: Use the capsule shown in the figure. Press and Use the capsule shown in the figure. hold the button, the machine will start to Press and hold the button. -
Page 13: Programming The Temperature
PROGRAMMING THE TEMPERATURE 1-2 sec. With the lever open, turn on the machine by Press the button 5 times within 15 seconds Press the button to increase the tempera- Press the button to decrease the tempera- pressing one of the two coffee buttons for 1-2 of turning on the machine. -
Page 14: Cleaning And Maintenance
CLEANING AND MAINTENANCE 2 sec. Switch off the machine by pressing the two Remove the capsule holder. The capsule holder Empty the capsule holder and rinse it. Rinse the components under running water coffee keys simultaneously for 2 can contain a maximum of 7 capsules. There- Clean the tray and grid of residual water and and dry them. -
Page 15: Descaling
DESCALING If the dispensing buttons flash alternately, the machine must be descaled. Read all instructions carefully before performing the descaling in order to familiarise yourself with the process. The cycle lasts about 8 minutes. N.B.: If the operations are not carried out according to the indicated time, the machine will not start the descaling process. In this case, turn off the machine and repeat the steps from the beginning. - Page 16 5 sec. Turn on the machine by pressing the button Place a container of at least 0.75 litre capacity button flashes. At the end of the descaling cycle, the button for 5 seconds. under the dispensing spout. Press the button to start the descaling cycle.
-
Page 17: Warranty Limitations
DESCALING - PROBLEM - CAUSE - SOLUTION PROBLEM CAUSE SOLUTION Power failure. When the power is restored, the cycle resumes automatically after the interruption. The descaling/rinsing cycle is interrupted. The machine has been accidentally turned off. Turn the machine on again: the cycle resumes automatically after the interruption. Opening the lever when the cycle has already Close the lever: the cycle resumes automatically after the interruption. -
Page 18: Machine Status Warnings
WARNINGS - STATUS - MACHINE Both buttons flash The machine has been turned on and is heating up. On fixed The machine has reached the correct temperature for dispensing. The espresso button is on fixed The machine is dispensing an espresso. The brewed coffee button is on fixed The machine is dispensing a brewed coffee. -
Page 19: Problem - Cause - Solution
PROBLEM - CAUSE - SOLUTION Problem Resolution If the problem persists Check the socket, the plug, the voltage and that you have pressed one of the two coffee buttons for 1-2 The machines does not turn on. seconds. The water tank is empty. Fill the water tank. Tank not inserted correctly. - Page 20 MESURES IMPORTANTES DE SÉCURITÉ ne fonctionne pas correctement ou si elle a subi un quelconque dommage. Porter l'appareil à un centre d'assistance agréé en vue d'un contrôle, d'une réparation ou d'une vérification de son bon fonctionnement. Lors de l'utilisation d'appareils électriques, il est nécessaire de toujours respecter les •...
- Page 21 En cas de panne de l'appareil la machine au centre d'assistance le plus proche si elle doit être contrôlée, réparée ou réglée. Ne pas utiliser l'appareil si le câble (6) ou la fiche est endommagée ou si l'appareil 7. L’utilisation d’accessoires non recommandés par le producteur de l'appareil peut présente des signes de dysfonctionnement ou a subi des dommages.
-
Page 22: Règles Générales Pour L'utilisation De La Machine
LISATION DE LA MACHINE N'UTILISER QUE DES CAPSULES IPERESPRESSO AVEC CETTE MACHINE. DÉCOUVREZ ET ACHETEZ LES CAPSULES IPERESPRESSO ILLY SUR SHOP. Lire attentivement le manuel d'instructions et les limitations de garantie. ILLY.COM, DANS LES MAGASINS, DANS BARS ILLY REVENDEURS AGRÉÉS La machine doit être branchée à... -
Page 23: Parties De La Machine
PARTIES DE LA MACHINE LEVIER D'OUVERTURE/FERMETURE COMPARTIMENT CAPSULES TOUCHES DE DISTRIBUTION : > CAFÉ EXPRESSO CAFÉ AMÉRICAIN DISTRIBUTEUR CAFÉ PLAN PORTE-TASSE MUG BAC DE RÉCUPÉRATION CAPSULE USAGÉES EXTRACTIBLE CÂBLE D'ALIMENTATION RÉSERVOIR D'EAU PLAN PORTE-TASSE EXPRESSO CAPSULES IPERESPRESSO : > POUR CAFÉ EXPRESSO POUR CAFÉ... -
Page 24: Installation Et Mise En Service De La Machine
INSTALLATION ET MISE EN SERVICE DE LA MACHINE Lors de la première utilisation, ou si la machine est restée éteinte pendant une période prolongée, laver le réservoir avant de le remplir, il est également conseillé de distribuer au moins 3 tasses d'eau, pour permettre le rinçage des circuits internes de la machine, en observant la procédure suivante. Extraire le réservoir en le poussant vers le bas. - Page 25 1 min. Au bout d'une minute environ, elles s'allument Placer une tasse vide sous le point de Appuyer sur la touche et attendre fixement et la machine est prête à l'emploi. distribution. l'arrêt de la distribution d'eau. La machine est rincée lorsqu'au moins 3 tasses d'eau ont été...
-
Page 26: Préparation Du Café Expresso
PRÉPARATION DU CAFÉ EXPRESSO Utiliser les capsules illy illustrées dans la figure. Soulever lentement (jusqu'à l’arrêt) le levier Introduire la capsule comme illustré dans la Refermer entièrement le levier. d'ouverture/fermeture du compartiment à figure. capsules. Abaisser la grille repose-tasses. Remplir le ré- Placer une tasse expresso sous le distributeur. -
Page 27: Préparation Du Café Américain
PRÉPARATION DU CAFÉ AMÉRICAIN Utiliser les capsules illy illustrées dans la figure. Soulever lentement (jusqu'à l’arrêt) le levier Introduire la capsule comme illustré dans la Refermer entièrement le levier. d'ouverture/fermeture du compartiment à figure. capsules. Porter la grille repose-tasses en position verti- Positionner une grande tasse ou un mug sous le Pour éjecter la capsule usagée, soulever lente-... -
Page 28: Programmation Des Volumes
PROGRAMMATION DES VOLUMES Introduire une capsule dans l'espace prévu à Refermer entièrement le levier. Programmation expresso : Programmation café américain : cet effet. Utiliser la capsule illustrée dans la figure. Tenir Utiliser la capsule illustrée dans la figure. enfoncée la touche , la machine commence Tenir enfoncée la touche . -
Page 29: Programmation De La Température
PROGRAMMATION DE LA TEMPÉRATURE 1-2 sec. Avec le levier ouvert, appuyer pendant 1-2 sec Appuyer 5 fois sur la touche dans les Appuyer sur la touche pour augmen- Appuyer sur la touche pour diminuer sur l'une des deux touches café pour allumer la 15 secondes suivant l'allumage. -
Page 30: Nettoyage Et Entretien
NETTOYAGE ET ENTRETIEN 2 sec. Éteindre la machine en appuyant simulta- Extraire le bac de récupération de capsules. Vider le bac de récupération de capsules et Rincer les composants à l'eau courante et les nément sur les deux touches café Le bac de récupération de capsules compte rincer. -
Page 31: Détartrage
DÉTARTRAGE Si les touches clignotent en alternance, la machine a besoin d'être détartrée. Lire attentivement toutes les instructions avant le détartrage pour se familiariser avec le procédé. La durée totale du cycle est d'environ 8 minutes. N.B. : Si les opérations ne sont pas effectuées dans les délais indiqués, la machine ne lance pas le processus de détartrage. Il est donc nécessaire d'éteindre la machine et de répéter les opérations. - Page 32 5 sec. Allumer la machine en appuyant sur la touche Positionner un récipient d'au moins 0,75 l sous La touche clignote. Au terme du cycle de détartrage, la touche pendant 5 secondes. le distributeur. Appuyer sur la touche pour démarrer le cycle s'allume de manière fixe, tandis que la touche Après 5 secondes la touche commence à...
-
Page 33: Limitations De Garantie
DÉTARTRAGE - PROBLÈME - CAUSE - SOLUTION PROBLÈME CAUSE SOLUTION Coupure de courant. Le cycle reprend automatiquement à partir de l'interruption une fois le courant rétabli. Le cycle de détartrage/rinçage est interrompu. La machina est éteinte accidentellement. Rallumer la machine : le cycle reprend automatiquement à partir de l'interruption. Ouverture du levier à... -
Page 34: Notifications État Machine
NOTIFICATIONS - ÉTAT - MACHINE Les deux touches clignotent La machine a été allumée et est en phase de chauffage. Allumées fixement La machine a atteint la bonne température de distribution. La touche expresso est allumée fixement La machine distribue un expresso. La touche café... -
Page 35: Problème - Cause - Solution
PROBLÈME - CAUSE - SOLUTION Problème Résolution Si le problème persiste Contrôler la prise, la fiche, la tension et d'avoir appuyé sur l'une des deux touches café pendant 1 à 2 La machine ne s'allume pas. secondes. Le réservoir d'eau est vide. – Remplir le réservoir d'eau. Réservoir inséré... - Page 36 NORMAS DE SEGURIDAD IMPOR- aparato al centro de asistencia técnica autorizado más cercano para que lo revisen, lo reparen o comprueben que funciona correctamente. TANTES • No utilice cables de extensión ni enchufes múltiples. En caso de incendio utilizar extintores de anhídrido carbónico (CO2). No utilizar agua o extintores de polvo. •...
- Page 37 técnico. En caso de fallo o de mal funcionamiento del aparato, apagarlo y no tratar de 10. No coloque la máquina sobre o cerca de estufas de gas o eléctricas o dentro de repararlo. Para eventuales reparaciones dirigirse solamente a un centro de asistencia un horno.
-
Page 38: Reglas Generales De Uso De La Máquina
DESCUBRA Y COMPRE LAS CÁPSULAS ILLY IPERESPRESSO EN SHOP.ILLY. LA MÁQUINA COM, EN LAS TIENDAS, EN LOS BARES ILLY QUE SON DISTRIBUIDORES AUTORIZADOS O LLAME AL NÚMERO GRATUITO 800-821021 (SOLO Leer atentamente el manual de instrucciones y las limitaciones de la garantía. -
Page 39: Partes De La Máquina
PARTES DE LA MÁQUINA PALANCA DE APERTURA/CIERRE DEL COMPARTIMENTO DE CÁPSULAS TECLAS DE SUMINISTRO: CAFÉ EXPRESO, CAFÉ AMERICANO DISPENSADOR DE CAFÉ BANDEJA PARA TAZAS MUG RECIPIENTE COLECTOR EXTRAÍBLE DE CÁPSULAS USADAS CABLE DE ALIMENTACIÓN DEPÓSITO DE AGUA BASE PARA TAZA DE ESPRESSO CÁPSULAS IPERESPRESSO: >... -
Page 40: Instalación Y Funcionamiento De La Máquina
INSTALACIÓN Y FUNCIONAMIENTO DE LA MÁQUINA Al usarse por primera vez, o si la máquina se ha apagado durante un periodo prolongado, lave el depósito antes de llenarlo, también se recomienda dispensar al menos 3 tazas de agua, para que los circuitos internos de la máquina puedan enjuagarse, utilizando el siguiente procedimiento. Saque el depósito empujándolo hacia abajo. - Page 41 1 min. Después de 1 minuto aproximadamente se Coloque una taza vacía bajo el punto de Presione un tecla y espere hasta que encenderán de forma constante y la máquina suministro. el dispensador de agua se detenga. La máquina podrá utilizarse. se enjuaga cuando se han dispensado al menos 3 tazas de agua.
-
Page 42: Preparación Del Café Expreso
PREPARACIÓN DEL CAFÉ EXPRESO Use las cápsulas de Illy que se muestran en la Levante lentamente (hasta el tope) la palanca Introduzca la cápsula como se muestra en la Cierre la palanca completamente. figura. de apertura y cierre del compartimiento de las figura. -
Page 43: Preparación Del Café Americano
PREPARACIÓN DEL CAFÉ AMERICANO Use las cápsulas de Illy que se muestran en la Levante lentamente (hasta el tope) la palanca Introduzca la cápsula como se muestra en la Cierre la palanca completamente. figura. de apertura y cierre del compartimiento de las figura. -
Page 44: Programación De Los Volúmenes
PROGRAMACIÓN DE LOS VOLÚMENES Introduzca una cápsula en el espacio Cierre la palanca completamente. Programación del expreso: Programación del café americano: correspondiente. Utilice la cápsula que se muestra en la figura. Utilice la cápsula que se muestra en la figura. Mantenga pulsada la tecla y la máquina Pulse y mantenga pulsada la tecla (A). -
Page 45: Programación De La Temperatura
PROGRAMACIÓN DE LA TEMPERATURA 1-2 sec. Encienda la máquina pulsando una de las dos Presione la tecla 5 veces en los 15 segundos si- Presione la tecla para aumentar la tempe- Presione la tecla para disminuir la tempe- . Ambas teclas parpa- teclas del café... -
Page 46: Limpieza Y Mantenimiento
LIMPIEZA Y MANTENIMIENTO 2 sec. Apague la máquina pulsando simultáneamen- Extraiga el portacápsulas. El portacápsulas Vacíe el portacápsulas y enjuáguelo. Enjuague los componentes bajo agua corrien- te durante 2 segundos los dos botones del café puede contener como máximo 7 cápsulas, así Limpie la bandeja y la rejilla de los residuos de te y séquelos. -
Page 47: Descalcificación
DESCALCIFICACIÓN Si los botones parpadean alternativamente, hay que descalcificar la máquina. Lea atentamente todas las instrucciones antes de descalcificar la máquina para familiarizarse con el proceso. La duración total del ciclo es de 8 minutos aproximadamente. Nota: Si las operaciones no se realizan dentro del tiempo especificado, la máquina no emprenderá el proceso de descalcificación. Por lo tanto, habrá que apagar la máquina y repetir las operaciones desde el principio. - Page 48 5 sec. Al finalizar el ciclo de descalcificación, el botón Coloque un recipiente de al menos 0,75 litros Encienda la máquina pulsando el botón la tecla parpadea. se enciende permanentemente, mientras debajo del tubo de salida. durante 5 segundos. Pulse el botón para iniciar el ciclo de des- que el botón parpadea.
-
Page 49: Limitaciones De La Garantía
DESCALCIFICACIÓN - PROBLEMA - CAUSA - SOLUCIÓN PROBLEMA CAUSA SOLUCIÓN Cuando se restablece la energía, el ciclo se reanuda automáticamente en caso de Fallo de corriente. interrupción. El ciclo de descalcificación/enjuague se Vuelva a encender la máquina: el ciclo se reanuda automáticamente en caso de La máquina se desconecta accidentalmente. -
Page 50: Señalizaciones Del Estado De La Máquina
SEÑALES - ESTADO - MÁQUINA Ambas teclas parpadean La máquina se ha encendido y se está calentando. Encendidas fijas La máquina ha alcanzado la temperatura correcta para dispensar. La tecla del expreso está permanentemente encendida La máquina está dispensando un expreso. La tecla del café... -
Page 51: Problema - Causa - Solución
PROBLEMA - CAUSA - SOLUCIÓN Problema Resolución Si el problema persiste Compruebe la toma, el enchufe, la tensión y que ha pulsado uno de los dos botones del café durante 1-2 La máquina no se enciende. segundos. El depósito de agua está vacío. – Llene el depósito de agua. El depósito no está... - Page 52 IMPORTANTI MISURE DI SICUREZZA anidride carbonica (CO2). Non utilizzare acqua o estintori a polvere. • Utilizzare l’apparecchio solo per l’uso a cui è destinato. Nell’utilizzo di apparecchiature elettriche devono essere sempre osservate le Installazione dell’apparecchio seguenti misure di sicurezza. • Leggere attentamente le istruzioni. Utilizzo dell’apparecchio •...
- Page 53 costruttore e richiedere l’utilizzo di ricambi originali. Il mancato rispetto di quanto né all’interno di un forno. sopra può compromettere la sicurezza dell’apparecchio e fare perdere il diritto alla 11. Per spegnere la macchina premere contemporaneamente per 2 secondi i due tasti caffè...
-
Page 54: Regole Generali Per L'uso Della Macchina
CON QUESTA MACCHINA UTILIZZARE SOLO LE CAPSULE IPERESPRESSO. REGOLE GENERALI PER L’USO SCOPRI E ACQUISTA LE CAPSULE ILLY IPERESPRESSO SU SHOP.ILLY.COM, NEGLI SHOP, NEI BAR ILLY RIVENDITORI AUTORIZZATI O TELEFONA AL DELLA MACCHINA NUMERO VERDE 800-821021 (SOLO DALL’ITALIA). Leggere attentamente il libretto di istruzioni e le limitazioni sulla garanzia. -
Page 55: Parti Della Macchina
PARTI DELLA MACCHINA LEVA APERTURA/CHIUSURA SCOMPARTIMENTO CAPSULE TASTI EROGAZIONE: > CAFFÈ ESPRESSO > CAFFÈ ALL’AMERICANA EROGATORE CAFFÈ PIANO POGGIA TAZZA MUG VASCHETTA RACCOLTA CAPSULE USATE ESTRAIBILE CAVO DI ALIMENTAZIONE SERBATOIO ACQUA PIANO POGGIA TAZZINA ESPRESSO CAPSULE IPERESPRESSO: > PER CAFFÈ ESPRESSO >... -
Page 56: Installazione E Messa In Funzione Della Macchina
INSTALLAZIONE E MESSA IN FUNZIONE DELLA MACCHINA Al primo utilizzo, oppure se la macchina è rimasta spenta per un periodo prolungato, lavare il serbatoio prima di riempirlo, é inoltre consigliato erogare almeno 3 tazze mug d’acqua, per consentire il risciacquo dei circuiti interni della macchina, tramite il seguente procedimento. Estrarre il serbatoio spingendolo verso il basso. - Page 57 1 min. Dopo circa 1 minuto si illuminano in modo fisso Posare una tazza mug vuota sotto il punto di Premere un tasto e attendere fino e la macchina è pronta per l’utilizzo. erogazione. all’arresto dell’ e rogazine di acqua. La macchina è...
-
Page 58: Preparazione Del Caffè Espresso
PREPARAZIONE DEL CAFFÈ ESPRESSO Usare le capsule illy mostrate in figura. Sollevare lentamente (fino all’arresto) la leva Inserire la capsula come mostrato in figura. Richiudere completamente la leva. apertura/chiusura scomparto capsule. Abbassare la griglia poggia tazza. Riempire il Posizionare una tazzina espresso sotto l’ e rogatore. Premere e rilasciare il tasto . -
Page 59: Preparazione Del Caffè All'americana
PREPARAZIONE DEL CAFFÈ ALL’AMERICANA Usare le capsule illy mostrate in figura. Sollevare lentamente (fino all’arresto) la leva Inserire la capsula come mostrato in figura. Richiudere completamente la leva. apertura/chiusura scomparto capsule. Portare la griglia poggia tazza in posizione Posizionare una tazza grande o mug sotto... -
Page 60: Programmazione Dei Volumi
PROGRAMMAZIONE DEI VOLUMI Inserire una capsula nell’apposito spazio. Richiudere completamente la leva. Programmazione espresso: Programmazione caffe’ all’americana: Utilizzare la capsula mostrata in figura. Utilizzare la capsula mostrata in figura. Premere e tenere premuto il tasto , la Premere e tenere premuto il tasto . -
Page 61: Programmazione Della Temperatura
PROGRAMMAZIONE DELLA TEMPERATURA 1-2 sec. Con leva aperta, accendere la macchina Entro 15 secondi dall’accensione premere 5 Premere il tasto per aumentare la tem- Premere il tasto per diminuire la tempe- premendo per 1-2 sec uno dei due tasti caffè. volte il tasto . -
Page 62: Pulizia E Manutenzione
PULIZIA E MANUTENZIONE 2 sec. Spegnere la macchina premendo contempora- Estrarre il porta capsule. Il porta capsule può Svuotare il porta capsule e risciacquare. Risciacquare i componenti sotto acqua corrente neamente, per 2 sec, i due tasti caffè contenere al massimo 7 capsule, è quindi op- Pulire la vaschetta e la griglia dai residui di e asciugarli. -
Page 63: Decalcificazione
DECALCIFICAZIONE Se i tasti lampeggiano alternati, la macchina necessita di essere decalcificata. Leggere attentamente tutte le istruzioni prima d’eseguire la decalcificazione per prendere confidenza con il processo. La durata totale del ciclo è di ca. 8 minuti. N.B.: Se le operazioni non vengono eseguite nei tempi indicati, la macchina non avvia il processo di decalcificazione. È necessario quindi spegnere la macchina e ripetere le operazioni dall’inizio. - Page 64 5 sec. Terminato il ciclo di decalcificazione, il tasto Posizionare un contenitore di almeno 0,75 litri Accendere la macchina premendo il tasto Il tasto lampeggia. è acceso in modo fisso, mentre il tasto sotto l’ e rogatore. per 5 secondi. Premere il tasto per avviare il ciclo di decal- lampeggia.
-
Page 65: Limitazioni Sulla Garanzia
DECALCIFICAZIONE - PROBLEMA - CAUSA - SOLUZIONE PROBLEMA CAUSA SOLUZIONE Mancanza di corrente elettrica. A corrente ripristinata il ciclo riprende automaticamente dall’interruzione. Il ciclo di decalcificazione/risciacquo viene La macchina viene spenta accidentalmente. Riaccendere la macchina: il ciclo riprende automaticamente dall’interruzione. interrotto. -
Page 66: Segnalazioni Stato Macchina
SEGNALAZIONI - STATO - MACCHINA Entrambi i tasti lampeggiano La macchina è stata accesa ed è in fase di riscaldamento. Accesi fissi La macchina ha raggiunto la temperatura corretta per l’ e rogazione. Il tasto espresso è acceso fisso La macchina sta erogando un espresso. Il tasto caffè... -
Page 67: Problema - Causa - Soluzione
PROBLEMA - CAUSA - SOLUZIONE Problema Risoluzione Se il problema persiste La macchina non si accende. Controllare la presa, la spina, la tensione e di aver premuto per 1-2 sec. uno dei due tasti caffè. Il serbatoio dell’acqua è vuoto. – Riempire il serbatoio dell’acqua. Serbatoio non inserito correttamente. - Page 68 S.p.A. - Via Flavia 110 - 34147 Trieste - Italy - www.illy.com...
Need help?
Do you have a question about the Y3.3 and is the answer not in the manual?
Questions and answers