
Related Manuals for LELY ASTRONAUT


Summary of Contents for LELY ASTRONAUT
- Page 1 M-HE.002.1003 LELY INDUSTRIES N.V. DAIRY EQUIPMENT ASTRONAUT MILKING ROBOT Operator’s manual www.lely.com...
- Page 3 Lely, Lely Center, Astronaut, Atlantis, Astri, Astrodata, Calm, Compedes, Cosmix, E-link, Gravitor, Grazeway, Hubble, Lelywash, Luna, Shuttle, T4C, Viseo and Discovery are registered trademarks of the Lely Group. The right of exclusive use belongs to the companies of the LELY Group.
-
Page 4: List Of Incorporated Changes
List of incorporated changes List of incorporated changes Change Date (mm/yy) Chapter(s) Remarks Basic 02/01 Change 1 01/02 Chapters 1 and 2 Revised chapters (introduction and safety), due to local regulations. Milking system type number designation and software version number update. Chapter 3 Revised robot control box panel information, due to software improvements... -
Page 5: Preface
Properly store it in the supplied binder when not in use. Certification requirements (Lely service providers) Every technician working on an Astronaut robotic milking system on behalf of Lely has to be certified by Lely Industries N.V. There are four different certification levels i.e.: •... -
Page 6: Table Of Contents
Separation/Colostrum (9) indication (yellow)............ 2-3 2.1.10 End of milking (10) indication (green)............... 2-3 2.1.11 Data change keys (11) ..................2-3 START-UP OF ASTRONAUT MILKING ROBOT ............... 2-4 MILKING ..........................2-4 DATA FUNCTIONS ......................2-5 2.4.1 Changing of cow data..................2-8 2.4.2... - Page 7 3.4.3 Set Cleaning..................... 3-5 3.4.4 Adjust ....................... 3-6 3.4.5 Cleaning ......................3-14 3.4.6 AlarmReset ...................... 3-14 3.4.7 Cleanlaser ......................3-14 3.4.8 Cow data ......................3-15 3.4.9 Sampling ......................3-16 3.4.10 Set arm......................3-18 3.4.11 Set clock......................3-18 3.4.12 Cleaning list...................... 3-19 3.4.13 Connect list ......................
- Page 8 MILK DELIVERY LINE AND TANK AREA................4-23 4.8.1 Milk delivery line ....................4-23 ALARM OVERVIEW ......................4-24 4.10 CRS+ SETTINGS ....................... 4-26 OPERATING THE MILKING ROBOT ..............5-1 MINIMUM COW REQUIREMENTS..................5-1 5.1.1 Cow dimensions ....................5-1 5.1.2 Udder and tail shaving..................5-2 FIRST MILKING........................
- Page 9 7.1.10 No air pressure....................7-5 7.1.11 Arm does not turn in or out................7-5 7.1.12 Sampling ......................7-5 7.1.13 Increased bacterial count ................. 7-5 7.1.14 Slow increase ....................7-5 7.1.15 Sudden increase ....................7-6 7.1.16 Increased cell count ..................7-6 LIGHTNING STRIKE ARRESTER ..................
-
Page 10: List Of Illustrations
Figure No. Description Page General view LH model (typical)................... xxv Robotic milking system components ..................1-1 ASTRONAUT main components ..................1-1 Multiple function control box controls..................2-1 Control function keys (B) ...................... 2-2 Data function keys (G) ......................2-2 Multiple function control box controls..................2-3 Multiple function control box controls.................. - Page 11 List of illustrations 5.13 Menu "Milking" (T4C)......................5-17 5.14 Menu "Attentions" (X-pert) ....................5-18 5.15 Menu "Attentions" (T4C) ....................... 5-18 Milk filter assy ........................6-2 Cleaning brushes (new models) ................... 6-3 Air pressure indication ......................6-3 Laser screen (old models) ....................6-4 TDS screen (new models) ....................
- Page 12 List of tables List of tables Table No. Description Page Part and serial number of your system ................. xxvi Part numbers for which this manual is applicable..............xxvi Cleaning list .......................... 3-20 Twin filter messages ......................4-10 Synchronizing of main cleaning .................... 4-13 Alarm overview ........................
-
Page 13: Safety
ATTENTION! BECOME ALERT! OUR SAFETY IS INVOLVED! The safety alert symbol identifies important safety messages on your ASTRONAUT robotic milking system and in the manual. When you see this symbol, be alert to the possibility of personal injury or death. Follow the instruction of the safety message. - Page 14 Do not risk injury or death by ignoring good safety practices. • ASTRONAUT owner's must give operating instructions to operator’s or employees before allowing them to operate the robotic milking system, and at least annually thereafter. •...
- Page 15 Do not look directly into laser light. Keep others away. • Keep the working area clean and as dry as possible. • Contact your nearest Lely service provider if you have any questions. • Review safety related items with all operator’s frequently (annually). INSTALLATION SAFETY •...
-
Page 16: Safety Decals
Safety decals Safety decal maintenance: Safety decals located on the ASTRONAUT milking robot contain important and useful information that will help you operate your machine/equipment safely. To assure that all decals remain in place and in good condition, follow these instructions: •... - Page 17 Operator’s manual ASTRONAUT NO ADMITTANCE FOR UNAUTHORIZED PERSONS (p/n 9.1185.0205.6) • The most important safety device on this equipment is a SAFE operator. It is the operator’s responsibility to read and understand ALL safety and operating instructions in the manual and to follow these. Most accidents can be avoided.
- Page 18 Safety decals CHEMICAL (INGEST/BURN) HAZARDS North American destinations only (p/n 9.1170.0584) All other destinations (p/n 9.1170.0506.0) • Cause serious burns to finger or hand. • Do not get the cleaning agent on your skin or in your eyes. • Put on safety goggles, gloves and protective clothing. In case the cleaning agent comes in contact with the eyes, rinse intensively with water and seek medical advice.
- Page 19 Operator’s manual ASTRONAUT LASER LIGHT HAZARD North American destinations only (p/n 9.1170.0582.6) All other destinations (where fitted) (p/n 9.1170.0505.6) All other destinations (where fitted) (p/n 9.1170.0542.1) (available thru vendor - where fitted) • Class 1 laser product. Laser radiation when open.
- Page 20 Safety decals DANGER OF PINCHING North American destinations only (p/n 9.1170.0580.4) All other destinations (p/n 9.1170.0504.5) • Danger of getting pinched by moving parts. • Keep out of reach of all parts as long as they have not yet been blocked, or are otherwise prevented from moving.
- Page 21 Operator’s manual ASTRONAUT CONTAMINATION HAZARD (where fitted) (p/n 9.1170.0616.5) • Avoid ingress of foreign objects and liquids through the vacuum pump inlet. A contaminated pump inlet may lead to blockage and as a result severe pump damage. Page xix...
- Page 22 Safety decals ELECTROCUTION HAZARD North American destinations only (p/n 9.1170.0583.0) All other destinations (available thru vendor) • Stop machine, turn power off at master panel and lock-out, and wait for all moving parts to stop before servicing, adjusting or repairing. •...
- Page 23 Operator’s manual ASTRONAUT TEMPERATURE HAZARD North American destinations only (p/n 9.1170.0581.5) North American destinations only (p/n 9.1170.0581.5) All other destinations (where fitted) upper decal = old situation lower decal = new situation (p/n 9.1170.0462.5) • Do not touch the robotic milking system components until they are cool.
- Page 24 Safety decals PRESSURE INDICATION (p/n 9.1170.0500.1) (p/n 9.1170.0499.0) • Do not exceed the pressure(s) as indicated. A too high pressure can cause injury to persons and/or damage to equipment. Page xxii...
- Page 25 Operator’s manual ASTRONAUT ELECTRICAL FUSES (p/n 9.1170.0503.4) Fuses are arranged (from left to right) as follows: • Electronics • Vacuum pump • Milk pump • Heating element • Earth leak switch Page xxiii...
-
Page 26: Introduction
Introduction Introduction Congratulations on your choice of a LELY ASTRONAUT robotic milking system. This equipment is designed and manufactured to meet the needs of a discriminating buyer in the dairy industry for the robotic milking of dairy industry for the robotic milking system of dairy cows. -
Page 27: General View
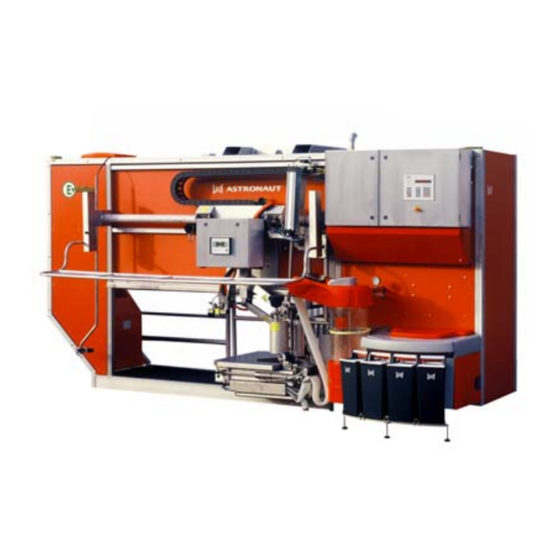
Operator’s manual ASTRONAUT General view Figure 1 General view LH model (typical) Page xxv... -
Page 28: Registration
Table 1 Part and serial number of your system Type number Serial number The table below shows the ASTRONAUT robotic milking system type numbers for which this manual is applicable: Table 2 Part numbers for which this manual is applicable ASTRONAUT MODEL... - Page 29 Operator’s manual ASTRONAUT This page intentionally left blank Page xxvii...
- Page 30 Registration Page xxviii...
-
Page 31: General
Operator’s manual ASTRONAUT General This manual covers the instructions for the ASTRONAUT milking robotic system and should be used in conjunction with the manuals for the other major systems/ components. The robotic milking system consists of (figure 1.1): • ASTRONAUT milking robot (A) •... -
Page 32: System Description
General SYSTEM DESCRIPTION The entire system is monitored, controlled and recorded by the central memory VCPC (Cattle Code Process Controller) and the T4C /NEDAP X-pert management system. Each cow is recognized from the responder that is located in the cows collar. After the cow has entered the box, the robot checks if the cow is eligible for milking. -
Page 33: System Controls
The robot arm will drop the moment the milking robot is started up again. To start up the robot again, turn the switch clockwise (button will pop out again) and then press the RESET button. The information shown in the display (5) is explained in section 2.2 ’START-UP OF ASTRONAUT MILKING ROBOT’. -
Page 34: Power Lamp (2)
System controls Use the STOP-button (10) only in case of an emergency.If power supply to the robot should be switched off, e.g. for maintenance, use the "ON/OFF" switch located behind the multiple function control box (B, figure 6.16). 2.1.2 POWER lamp (2) This lamp indicates if the robot is being supplied with power. -
Page 35: Temperature/Calendar (7) Indication (Orange)
Operator’s manual ASTRONAUT When pressing a function key, the relevant screen is shown for a few seconds , after which the milk yield is displayed again. By pressing the same key again within this time, the underlying screens are displayed. If another function key is pressed in the meantime, the first screen underneath this key is displayed. -
Page 36: Start-Up Of Astronaut Milking Robot
As soon as a cow enters the box, the transmitter-receiver registers the data. If the transmitter-receiver recognises the cow, the data is transmitted from the VCPC to the ASTRONAUT milking robot (provided that the cow meets the conditions for being milked). -
Page 37: Data Functions
Operator’s manual ASTRONAUT DATA FUNCTIONS Milk yield and conductivity measures can be displayed in the control room during milking. The display can also show a number of other cow data. The data are available if the cow number or the milk yield is displayed on the display. - Page 38 System controls Key (G1) Milk data MILK ### actual milk yield (kg): this screen is displayed as standard if the yield exceeds 2,5 kg (5.5 lb.). MILKT ### milk test value: the minimum milk yield calculated by X-pert, which is expected from the cow.
- Page 39 Operator’s manual ASTRONAUT Key (G4) Disease codes LL xxyy disease code ##, treatment type yy. A total of five disease codes with treatments can be programmed. To scroll through the codes press the key more than once. To change or enter a new code, press the C(Clear)- key.
-
Page 40: Changing Of Cow Data
System controls Key (G7) Temperature data TEMP ### maximum measured milk temperature of the cow. TEMPT ### temperature test value is a calculated value for the maximum temperature allowed for the milk. Key (G8) Reset If an incorrect field was opened with the C(Clear)-button, press the reset button (G8) to close the field again and save the original data. -
Page 41: Control Function Keys
Operator’s manual ASTRONAUT 2.4.2 Control function keys By means of the function keys (B1 - B8) on the control panel, a number of milking robot functions are controlled. (B1) Pipeline blowing (B2) Milk separation (B3) Feeding (B4) Reset (B5) Milk pump... - Page 42 System controls Key (B6) Cleaning of separation line When this key is pressed, the indicator light of the key illuminates ensuring that the next main cleaning also includes the separation line. The procedure is cancelled with the control panel of the robot box i.e. option "Testmenu > Cleaning > Lamp cleaning separation line lamp".
-
Page 43: Robot Control Box
Operator’s manual ASTRONAUT Robot control box Robot control box panel The carriage of the robot arm is fitted with a special control box, the so-called robot control box. The functions of this control box are mainly used for operating and servicing of the milking robot. -
Page 44: E-Link Control Panel (Optional)
Robot control box E-LINK CONTROL PANEL (optional) The E-link control panel (figure 3.3) can be used to operate the robot from the cow side. The E-link control panel user interface consists of a LCD display including 9 keys. The following keys are used for operating the milking robot. -
Page 45: Robot Control Box Panel Operation
Operator’s manual ASTRONAUT ROBOT CONTROL BOX PANEL OPERATION The following menus can be selected with the keys (figure 3.4) and (5) on the display: • Attentions • Milking/Out-of-operation • Set cleaning • Adjust • Cleaning • AlarmReset • Clean laser •... -
Page 46: Robot Control Box Menus
By selecting this option a short alarm list is displayed on the MRCP (Milking Robot Control Panel). n case more than one ASTRONAUT milking robot is installed on the same farm, a separate attention list can be retrieved from each milking robot. The cows are only placed on the attention list of the robot they visited lastly. -
Page 47: Milking
Operator’s manual ASTRONAUT A communication error may occur. Check the plant, for instance, voltage Communication failure supply to the VCPC (Cattle Code Process Controller). The lamp POWER should be on continuously. 3.4.2 Milking This option is usually selected to monitor the milking process of the robot. -
Page 48: Adjust
Robot control box 3.4.4 Adjust The settings of the milking robot can be changed in the menu "Adjust". Think carefully about the consequences before changing anything. The service mechanic is the most appropriate person to adjust the settings, since he has the most experience with the machine. - Page 49 Operator’s manual ASTRONAUT Time during which the valve remains in an open position to fill the cleaning Afterfill time tank tank after having reached the maximum level. This prevents the valve from being closed off by a wave before the tank has been filled with enough water.
- Page 50 Robot control box ® The adjusted time indicates how long water containing Astri -L brush Time for blowing out (Astri-L) cleaning agent should be blown across the cleaning brushes, after pre- treatment of a cow. 3 sec ® The number of times required for blowing empty the Astri -L brush cleaning Empty Astri-L tank pulses...
- Page 51 Operator’s manual ASTRONAUT There is a possibility for generating an alarm if an insufficient amount of cleaning agent is measured. This is determined by the MC or MQC system. Alarm no It is strongly recommended to always opt for "yes" in this screen.
- Page 52 Robot control box After activation of this option the rear gate remains open until the cow has been identified. This means that each cow should have entered the box Close entry gate completely before the rear gate is closed. If "no" is adjusted, the rear gate if cow recognised will close as soon as the infrared sensor detects a cow in the box.
- Page 53 Operator’s manual ASTRONAUT The number of milk pulses measured when a milk column passes within a Removal pre-set time without the teat cups being removed, should exceed the if <= 0 pulses in adjusted value (except for MC and MQC models).
- Page 54 Robot control box In this screen the connection mode can be adjusted. If a another value than Connecting method 1 "1" is entered, the teat cups will be lifted and transported to the centre. Standard The search method is used to search the teats. The following options are Search method available: standard...
- Page 55 Operator’s manual ASTRONAUT The cleaning height in respect of the teat depends on the height of the teat Cleaning height cup as well as the average udder pattern. A floppier udder tends to be drawn under tip height farther between the rollers. Not too high a pre-treatment will be more convenient to the cow in such a situation.
-
Page 56: Cleaning
Robot control box The vacuum level during milking can be adjusted in this screen. Milking vacuum 42.5 In this screen the vacuum level during cleaning can be adjusted. During Cleaning vacuum cleaning operations the vacuum level is reduced to extract less heat from the 25.0 cleaning water. -
Page 57: Cow Data
Operator’s manual ASTRONAUT 3.4.8 Cow data The cow data menu is of no immediate use for management of the herd and Resp: 723 T=299 is primarily convenient to the service technician for servicing operations. 6/12 13:10 Milktank Position known Supervision Data on milking times, responder, milk destination and milking methods. -
Page 58: Sampling
Robot control box 3.4.9 Sampling The following sampling menus are available (see figure 3.5); Figure 3.5 Flowchart sampling procedure Description of sampling menus: • Fill time sample bottle: The time in which the valve remains open (to fill the spoon) is determined by the preset fill time. •... - Page 59 Sampling valve Valve sample open/closed In order to connect the SHUTTLE sampling system to the ASTRONAUT milking robot, the valve of the sampling unit should be opened to enable insertion of the milk tube. Monstername set (sampling definitions) (figure 3.5) •...
-
Page 60: Set Arm
Robot control box Sampling procedure (figure 3.5): After having selected a specific "sampling type" (1 sample, 2 sample or Patience optimal), the milking robot must communicate with VCPC (Cattle Code Sampling type Process Controller) because of the pre-adjusted settings. 0 nr. Check in Xpert system If something went wrong with making the settings you will get the error Entry failed... -
Page 61: Cleaning List
Operator’s manual ASTRONAUT 3.4.12 Cleaning list 15:02 Set clock The "Cleaning list" features the cleaning data including date and time of Cleaning list cleaning. The last 127 reports are stored here. The cleaning list below Connect list indicates the progress of different cleanings. -
Page 62: Connect List
Robot control box Table 3.1 Cleaning list Message in screen Cleaning list Explanation Cleaning laser The laser cleaning at a certain time interval - Active - (End) Cleaning rinse K After 10 cows being milked by the robot. The robot has performed a short cleaning with cold water. -
Page 63: Report List
Operator’s manual ASTRONAUT 3.4.14 Report list The "Report list" displays all other remarks of the robotic milking system e.g. 15:02 Connect list if sampling has been switched on or off. The following messages are Report list available: Error list Test menu... -
Page 64: Testmenu
Robot control box 3.4.16 Testmenu 15: 02 Connect list The function of the "Test menu" is to control the basic functions of the robot Report list in case of maintenance or failures. Error list Testmenu • While running a test, extra attention should be paid to your own safety and that of your cows. The "Test menu"... - Page 65 Operator’s manual ASTRONAUT Movement inductor on or off. As soon as you end this option, the inductor (where fitted) is switched off. Power supply continues, contrary to operation Shock on after milking. Always test the voltage of the expelling shock with a tester and never with a multimeter.
- Page 66 Robot control box Service technician information. 2Get responder ALARM "on" or "off". If the alarm signal of this robot is switched on, the Alarm CRS should respond. When you leave the screen, the alarm is switched off. Testmenu > Robot •...
- Page 67 Operator’s manual ASTRONAUT Milkcup left front (LF) fixed or loose. Milkcup release: Not in use. Test Disinfectant valve "on" (open) or "off" (closed). Disinfection Rotation of cleaning brushes for testing of the motor. Operate cleaning rolls To turn in or out the cleaning brushes.
- Page 68 Robot control box Pulsator "on" or "off". Pulsator Valve of milk tube left front (LF) "open" or "closed". open Clamp milk closed Valve of milk tube left rear (LR) "open" or "closed". open Clamp milk closed Valve of milk tube right rear (RR) "open" or "closed". open Clamp milk closed...
- Page 69 Operator’s manual ASTRONAUT Three-way valve milk separation thru MQC. NFP[6] Three way valve Color Not activ Three-way valve directs the milk to the separation line. NFP[2] Three way valve Separation line Three-way valve directs the milk to the milk line or drain. This valve is NFP[3] superseded on milking robots equipped with two three-way valves.
- Page 70 Robot control box This display indicates if the liquid level of the milk receiver jar is lower than 5 kg (11 lb.). Milk quantity > 5 kg (5 kg=1180) Testmenu > Cleaning Warm water valve "open" or "closed". open Valve warm- water closed Cold water valve "open"...
- Page 71 Operator’s manual ASTRONAUT Valve between cleaning tank and Astri-L buffer tank "on" or "off". Valve buffer Valve of rinsing line to the top of the milk jar "open" or "closed". open Valve rinse milk jar: closed Blow the milk delivery line to the tank empty.
- Page 72 Robot control box The purpose of this function is to reset the cleaning of the separation pipeline Lamp cleaning and to switch off the lamp underneath the corresponding button. Separation line lamp Message indicating whether or not the separation pipeline will be cleaned during the next main cleaning.
- Page 73 Operator’s manual ASTRONAUT By selecting "on", the sponge for cleaning of the laser screen is pressed against the laser. Laser sponge cyl. In this screen the sponge for the cleaning of the laser screen can be moistened by spraying water on the sponge.
- Page 74 Robot control box Testmenu > TestPOS When the POS card is connected, the version number is displayed here. Version POS: Check the connections if a message is displayed stating that the POS card POS 4 is not connected. The status of the switches which could effect positioning is displayed here. Reset switch: Fault stepmoto.
- Page 75 Operator’s manual ASTRONAUT Display of the actual height. Both the required and the actual values are Current height displayed. The required position can be established with the arrows on the ADC=0 400 mm right-hand side. Required height ADC=0 400 mm The "Updown"...
- Page 76 Robot control box Testmenu > Check Laser This screen shows which "Version-LIA" is installed in the robot. Version LIA: LIA 3 By turning the laser, you can check if the reset switch turns on and off. Reset switch: When the laser motor is turning also check for step failure. Fault motor: The distance from the centre of the laser to an object is displayed here.
- Page 77 Operator’s manual ASTRONAUT This display determines the position of the teat cups in respect of the zero line (calibration). Appoint position The following screens display the measured values of the phony teats. degr Lmm Sc Zmm c x 21 •...
- Page 78 Robot control box An adjustment in the "Y" direction means that the teat cup is connected more Compensation value forward or backward in respect of the position indicated by the laser. If a Y LR value above 20 is entered, the value is automatically set at "0". The compensation values for the RR, LF and RF positions can be also adjusted in the next screens.
- Page 79 Operator’s manual ASTRONAUT In this screen you can adjust the room the cow should be guided to after a Summer failed milking, if the condition for "Summer Failed" has been met in the X- Failed pert programme. In this screen you can adjust the room the cow should be guided to after a Winter failed milking, if the condition for "Winter Failed"...
- Page 80 Robot control box In this screen you can adjust the room the cow should be guided to after a Winter successful milking, if the condition for "Winter successful" has been met. successful In this screen you can adjust the room the cow should be guided to if the Summer+grazing conditions for "Summer+grazing refuse 0..70% + Separation"...
- Page 81 Operator’s manual ASTRONAUT Summer and refused by the robot. Summer refuse Winter and refused by the robot. Winter refuse In this screen the M4use (optional) actuator arm can be positioned above the M4use actuator buckets (4x) and above the sewer (1x). When milk needs to be separated, Sewer first bucket 1 is filled.
-
Page 82: Quality
Robot control box 3.4.17 Quality MQC - "MILK separation" selection. MQC - MILK separation MQC - Conductivity MQC - Temperature MQC - Colour Which responder number is milked at what time and which bucket is used to Cow 100 02:00 separate the milk in. - Page 83 Operator’s manual ASTRONAUT MQC - "Weight" selection. MQC - MILK separation MQC - Conductivity MQC - Temperature MQC - Weight Measured weight of the cow being milked at that time. Weight 542 kg MQC - "Quantity" selection. MQC - MILK separation...
-
Page 84: Operational
Robot control box MQC - "Free" selection (not used). MQC - MILK separation MQC - Conductivity MQC - Temperature MQC - Free Not used. Free 3.4.18 Operational The robot is put in or out-of-operation by means of this menu STOP >> action wait for actionerat. -
Page 85: Cleaning Synchronization And Remote Alarm System (Crs+)
Operator’s manual ASTRONAUT Cleaning synchronization and Remote alarm System (CRS+) CRS+ offers the following functions: • Taking all milking robots of the relevant cluster out of operation • Blowing empty the entire milk delivery line CLEANING R E M O T E... -
Page 86: System Structure
Cleaning synchronization and Remote alarm System (CRS+) SYSTEM STRUCTURE The functions mentioned before are contained in modules, which in turn form an integral part of the CRS+ control panel. These modules consist of: • Cleaning Synchronizer (CS) including the following functions: Synchronizing of cleanings by several milking robots (≥... -
Page 87: General Description Of The Crs
Because of these functions, the CRS+ will generally be installed in the so-called tank area. Figure 4.3 Robotic milking system cluster Alarms of the ASTRONAUT milking robot(s) are rendered by the CRS+ through alarm LED’s/display text as well as being forwarded audibly (buzzer and telephone call). -
Page 88: Description Of Crs+ Menu Structure
Cleaning synchronization and Remote alarm System (CRS+) DESCRIPTION OF CRS+ MENU STRUCTURE During start-up of CRS+ the message "INIT/COM" (short for communication) is displayed, in combination with a blinking power LED under "System check" (see example 1). Once the system start-up is complete, the screen displays the following: Example 1: Software version: 02.01... -
Page 89: Menu Option "Alarm System
Operator’s manual ASTRONAUT 4.4.1 Menu option "Alarm system" Alarm system → Cleaning system → Settings → Tests → Event history → The following submenus are displayed under the main menu option "Alarm system" (figure 4.20): List of active alarms →... -
Page 90: Menu Option "Settings
Cleaning synchronization and Remote alarm System (CRS+) • Blow empty milk line Cluster operation → (in oper./going out/out oper./going in) Open milk tank valve → (open/closed) Blow empty milk line → (sent) Blowing empty of the milk delivery line. 4.4.3 Menu option "Settings"... - Page 91 Input of day and night time settings. NOTE • The settings as described below will influence the cleaning system procedure. Before altering any of these settings contact your Lely service provider. • Cleaning system settings. Any of the following options can be selected here (figure 4.22): Alarm system settings →...
-
Page 92: Menu Option "Tests
Set display language Setting the display language. Set speech language Setting the speech language (telephone message). Set ASTRONAUT name Setting the ASTRONAUT milking robot name. Set CRS+ address Setting the CRS+ address (network address). Set CRS+ name Setting the CRS+ name. -
Page 93: Menu Option "Event History
Operator’s manual ASTRONAUT 4.4.5 Menu option "Event history" The "Event history" menu (figure 4.24) shows historic data of the following events: • Cleaning Cleaning Astri-cid (cluster number, start (date/time), End (date/time), approved and disapproved • Tank driver Empty milk tank (cluster number, end (date/time), approved and disapproved •... -
Page 94: Twin Filter System (Optional)
Cleaning synchronization and Remote alarm System (CRS+) 4.4.6 Twin filter system (optional) General Currently on each milking robot a milk filter element is installed. According to EU (hygienic) regulations the filter element must be changed before a main cleaning. This prevents that a main cleaning is performed with a dirty filter element. - Page 95 Operator’s manual ASTRONAUT If the relevant filter element is clogged or must be frequently changed, the following procedure must be followed: Take the relevant milking robot(s) out of operation Blow empty milk line Change relevant filter element and clean filter housing Put milking robot(s) back in operation via CRS+.
-
Page 96: Description Of Various Functions Of The Cleaning Synchronizer (Cs)
Cleaning synchronization and Remote alarm System (CRS+) DESCRIPTION OF VARIOUS FUNCTIONS OF THE CLEANING SYNCHRONIZER (CS) 4.5.1 Taking milking robots out of operation All milking robots of the defined cluster can be put into and out of operation by means of the menu option "Cleaning system >... -
Page 97: Control Of The Milk Tank Three-Way Valve
Operator’s manual ASTRONAUT Alarm system settings → Cleaning system settings → General settings → Post cooltime for pre-cooler → 30 sec. (0 - 90 sec.) Milk tank configuration → (1 t auto) Blow milk l. at tank driver pr. → (yes/no) Twin filter present →... -
Page 98: Interaction With Milk Tank Control
Wait HUBBLE Waiting for release of HUBBLE (currently not used) Start oper. Start putting ASTRONAUT milking robots into operation Wait in op. Waiting for ASTRONAUT milking robots being put into operation End clean. End of cleaning Fin. clean. Finishing of cleaning 4.5.7... -
Page 99: Emptying The Milk Tank
Operator’s manual ASTRONAUT 4.5.8 Emptying the milk tank The following configurations are possible (figure 4.8): • 1 tank man. start In case of a "1 tank man. start" system, the milking robots will be put out of operation through activation of the hotkey "Emptying the milk tank". -
Page 100: Interaction With Hubble Tank And Cleaning Guard
Cleaning synchronization and Remote alarm System (CRS+) • 2 tank and buffer tank If a "2 tank and buffer tank" system is being used, switching (by means of the hotkey) is necessary between the main tank and buffer tank (figure 4.8). If the milk delivery line is connected to the buffer tank, the hotkey LED (green) will be permanently on (main tank can be emptied). -
Page 101: Cleaning Reporting User Interface (Crui)
Operator’s manual ASTRONAUT CLEANING REPORTING USER INTERFACE (CRUI) CRUI comprises the following functions (figure 4.9): PROG hotkey Hotkey "Emptying USER hotkey • A 4 line display (max. 40 characters/line) the milk tank" Display RESET hotkey • Navigation keys for menus •... - Page 102 Cleaning synchronization and Remote alarm System (CRS+) • Hotkey "PROG" Figure 4.13 Hotkey "PROG" The hotkey "PROG" (figure 4.13) will be used to operate the twin filter (optional). Alarm system settings → Cleaning system settings → General settings → • Hotkey "USER"...
-
Page 103: Remote Alarm System (Ras)
Operator’s manual ASTRONAUT REMOTE ALARM SYSTEM (RAS) RAS comprises the following functions: Alarm RESET button/ Display Alarm LED • Collecting active alarm messages (interaction with the milking robot) • Making alarms audible and visible • Visualising of alarms CLEANING R E M O T E... -
Page 104: Planning Telephone Calls
Cleaning synchronization and Remote alarm System (CRS+) 4.7.6 Planning telephone calls. If an alarm persists for a certain period of time and if a priority was set, a telephone call will be generated. At least 2 telephone numbers should be set, which will be called in a certain order. Generating of telephone calls within a preset time frame (day or night time) can be set for each alarm. -
Page 105: Confirming Of Alarms
Operator’s manual ASTRONAUT 27/7/04 11:18 Phonecall to nr. : 1 No response Number of messages This screen shows which number was called, if the alarm was confirmed during the call and how many messages were confirmed. 27/7/04 11:10 Start 1601 Power failure 27/7/04 11:18 Reset Phone nr. -
Page 106: Temporary Suppression Of Alarms
Cleaning synchronization and Remote alarm System (CRS+) • Modem country code Applies to analogous modem installations. Certain countries require different modem settings. • Dial method Applies to analogous modem installations. To select for tone or pulse network. 4.7.12 Temporary suppression of alarms The temporary (60 min.) suppression of the alarm can be set by means of the menu shown below. -
Page 107: Milk Delivery Line And Tank Area
Operator’s manual ASTRONAUT MILK DELIVERY LINE AND TANK AREA 4.8.1 Milk delivery line A milk delivery line is fitted (figure 4.18) between the milking robot and the milk tank. The milk delivery line consists of a pressure pipeline, which is why it should be made out of one piece whenever possible. -
Page 108: Alarm Overview
Cleaning synchronization and Remote alarm System (CRS+) ALARM OVERVIEW Table 4.3 Alarm overview Alarm description Alarm source Default setting Attachment failure Astronaut A++ T++ Cow needs assistance Astronaut A+ - T- - Arm does not turn Astronaut A++ T++ Arm position failure... - Page 109 Operator’s manual ASTRONAUT Table 4.3 Alarm overview Alarm description Alarm source Default setting Test alarm Astronaut A++ T++ Out of operation during cleaning A++ T++ CRS+ Time-out buffer vessel A++ T++ CRS+ Milk line cleaning not approved A++ T++ CRS+...
-
Page 110: Crs+ Settings
Set time hrs.: min. Set display language English Nederlands/English/Français etc. Set speech language English Set ASTRONAUT name Set CRS+ address xx01 xx01 xx03 Set CRS+ name Set CRS+ cluster ID (for robot) Set CRS+ cluster name Modem country code Australia/Austria/Belgium/ ... - Page 111 Operator’s manual ASTRONAUT Figure 4.20 Menu structure "Alarm system and cleaning system" Chapter 4 - page 27...
- Page 112 Cleaning synchronization and Remote alarm System (CRS+) Figure 4.21 Menu structure "Settings > Alarm system settings" Chapter 4 - page 28...
- Page 113 Operator’s manual ASTRONAUT Figure 4.22 Menu structure "Settings > Cleaning system settings & general settings" Chapter 4 - page 29...
- Page 114 Cleaning synchronization and Remote alarm System (CRS+) Figure 4.23 Menu structure "Tests" Chapter 4 - page 30...
- Page 115 Operator’s manual ASTRONAUT Figure 4.24 Menu structure "Event history" Chapter 4 - page 31...
- Page 116 Cleaning synchronization and Remote alarm System (CRS+) This page intentionally left blank Chapter 4 - page 32...
-
Page 117: Operating The Milking Robot
Operator’s manual ASTRONAUT Operating the milking robot In order to ensure that the robot is used to its full capacity, it is imperative that the system gains an animal- friendly and familiar position within the herd. The cows must come to the robot of their own accord to be milked and to take their ration of concentrates. -
Page 118: Udder And Tail Shaving
Operating the milking robot In addition to the above, cow dimensions are important 190 - 250 cm (figure 5.2). The total length including the cows head should be approx. 190 cm (74.80 in.) as a minimum and approx. 250 cm (98.42 in.) as a maximum. -
Page 119: Attachment Of Cow Responder/Respactor
Be aware of unexpected cow movements. A cow may convey substantial powers beyond your control to (moving) parts of the Astronaut milking robot. It is recommended to immediately close the rear fence upon identification in the beginning of the training period. -
Page 120: First Time In The Box
5.2.5 First time in the box ® The cow is now identified as being a first time visitor to the ASTRONAUT . After having replied to a number of ® inquiries displayed on the control panel of the robot module or E-LINK control panel (more user friendly). - Page 121 Operator’s manual ASTRONAUT This screen shows the following; LF teat in Left Front position RF teat in Right Front position LR teat in Left Rear position RR teat in Left Right rear position The settings can be changed by pressing the "previous screen" button (2, figure 3.2). For more information refer to section 3.1 ’ROBOT CONTROL BOX PANEL (figure 3.2)’.
-
Page 122: Future Milkings
NOTE • By entering a different answer in the ASTRONAUT milking robot, the setting in the T4C /X-pert system can be adjusted. The answers to the questions do not only apply to the first milking. After the first milking, these settings are transmitted to the T4C/X-pert system. -
Page 123: Milking
Operator’s manual ASTRONAUT We recommend you to work with milking times in the first week and to have all the cows immediately milked by the robot. After a period of time allow the cows to visit the robot of their own accord, for instance, by keeping the gate open after all the cows have been milked. -
Page 124: Interruption Of Milking
Operating the milking robot • Opening of front gate • Transmission of data for the management programme • Detection of cow leaving the box via an infra-red sensor • Closing of front gate • Opening of rear gate As soon as another cow enters the box, the cycle is repeated. If the robot remains empty for a certain amount of time, rinsing of the milking installation is started or otherwise a main cleaning depending on the preset values and the time lapsed since the last main cleaning. - Page 125 Operator’s manual ASTRONAUT Figure 5.6 Interruption of milking (flowchart cont’d) Deviating milk, such as colostrum and the milk of cows which are treated for a disease, is not allowed into the tank and, hence, should be separated. The T4C /X-pert system enables you to separate milk up to a certain date. Another option is to separate the milk for a number of milk sessions.
-
Page 126: Colostrum (X-Pert System)
Alarm list with the help of menu option "Milking > Lely ASTRONAUT > Shift F6". The list also includes the cows whose milk is separated and the three teated cows. Only applies to animals which were milked with the robot within the last three days. -
Page 127: Colostrum (T4C Farm Management)
Operator’s manual ASTRONAUT 5.3.5 Colostrum (T4C farm management) Figure 5.9 Menu option Attentions > Calendar (T4C) When a cow has recently calved, this information can be entered in T4C at "Attentions > Calendar > Overview" (figure 5.9). After selecting the cow, the action can be executed and information regarding the calving and born calves can be entered. -
Page 128: Other Milk Separations (T4C Farm Management)
Operating the milking robot 5.3.6 Other milk separations (T4C farm management) Figure 5.10 Menu option Farm > Health > Disease (T4C) At menu option "Farm > Health > Disease" a diagnose can be entered and one of the previous set treatments used for the cow. -
Page 129: M4Use Separation Arm (Optional)
Operator’s manual ASTRONAUT 5.3.7 M4USE separation arm (optional) The abbreviation M4USE stands for milk for use. Separation arm operation The separation arm is electronically controlled. It has 5 positions i.e. one sewer- and four bucket positions. Milk pump To milk tank When milk needs to be separated, first bucket 1 is filled (buckets are numbered starting from the sewer side). - Page 130 Operating the milking robot Resetting the M4USE (optional) When the buckets are emptied and cleaned, the separation arm must be reset. For this purpose, press the separation pipeline cleaning key (B6). For more detailed information see section 2.4.2 ’Control function keys’. This action deletes the data as indicated in the above screen and allows the arm, to start filling bucket 1 again with milk from the next separation cow.
-
Page 131: Cleaning
Operator’s manual ASTRONAUT CLEANING Just like any other milking installation, clean and hygienic operation is essential for the robot in order to produce high quality milk. The milking robot frequently starts an automatic cleaning, varying from rinsing of the teat cup tops to an acid based or detergent based cleaning. -
Page 132: Cleaning Of Separation Tube (Where Fitted)
Operating the milking robot As long as the correct water temperature of the main cleaning has not been reached, the robot continues milking operations. As soon as the water reaches the correct temperature, the robot stops milking and starts cleaning of the installation. -
Page 133: Attention List Check
You can retrieve the alarm list from the X-pert programme with menu "Milking > Lely Astronaut". Press Shift- F6 and then print the list by means of the F3 key (figure 5.12), Figure 5.12 Menu "Milking"... - Page 134 "Attentions" (see section 3.4.1 ’Attentions’). If several Astronaut milking robots are used, different attention lists will be available. A cow shows up on a robots attention list, in case of a failed milking or if there is too much time between a cows last milking and the next. If a group of cows is milked by several robots, the cow will be mentioned on the attention list of the robot which milked her last, or where the milking failed.
-
Page 135: Handling Alarms
Operator’s manual ASTRONAUT Always guide cows which do not visit the milking robot frequently enough or which experienced a failed connection through the robot yourself. In case of a failed connection, try to establish the cause of it (e.g. oblique teat position, too hairy udder etc.). - Page 136 Operating the milking robot This page intentionally left blank Chapter 5 - page 20...
-
Page 137: Service And Maintenance
Check the attention list three times a day. The attention list (figure 5.14 and 5.15) can be found: • In the X-pert programme under the menu option, "Milking > Lely Astronaut" • In the T4C farm management programme under menu option, "Reports > Milking > Lely Attentionlist Robot") Chapter 6 - page 1... - Page 138 Service and maintenance • On the display of the robot control box panel under menu options, "Attentions and Report list" (refer to section 3.3 ’ROBOT CONTROL BOX PANEL OPERATION’). NOTE • Cows with an interval in between milkings of over 10 hours should be guided into the robot; cows with a different conductivity, colour attention, feed intake or milk yield must be checked for (udder) health.
- Page 139 Operator’s manual ASTRONAUT If the filters are replaced three times a day, but remain filthy nevertheless, the following actions might improve the situation: • Check the condition of cleaning brushes. • Replacement of cleaning brushes (figure 6.2). We recommend to replace the brushes on a regular basis. If the Cleaning brushes are torn, they may not function properly.
- Page 140 Service and maintenance • Be sparing in the use of water in the immediate environment of electronic devices, such as the laser, the robot control box and the multiple function control box. If possible, use a soft wet towel. Small-sized electronic parts, such as movement inductor, infrared sensor, valve for blowing the milk delivery line empty, and so on, require little water when cleaning.
- Page 141 Operator’s manual ASTRONAUT • Check if the bleed air holes (figure 6.6) are still open. Blocked bleed air holes can be recognised by a milk column which moves up and down in the milk tube instead of being transported. Pierce the holes (use special bleed hole needle) if necessary.
- Page 142 Service and maintenance Replace the damaged tubes as follows: • Disengage the hose clamps. • For easy disassembly you should cut the tube lengthways near the hose column before removing it. • Align the hose clamps to the tube and slide the tube onto the hose column without torsion.
- Page 143 Operator’s manual ASTRONAUT Spraying agent: ® Check the stock of spraying agent (Astri -uc) in the container connected to the robot arm. The level can be read by means of the tube on the side of the container. If the level is too low, fill the container by means of the following procedures: •...
-
Page 144: Weekly Maintenance
Each teat cup liner can be used for a number of milkings, depending on the manufacturer and model type (type "Silicone 7500 milkings"). The menu Milking > Lely Astronaut of the X-pert programme (figure 5.12) displays the number of milkings per day. The menu option shown below (figure 6.11) represents the same in T4C. - Page 145 Operator’s manual ASTRONAUT Always replace the teat cup liners on time to avoid substantial differences. Worn liners may not always cause immediate problems where milk quality or milking operation itself are concerned. On the other hand, a substantial difference between...
-
Page 146: Monthly Maintenance
Service and maintenance Cleaning: Check the temperature of the cleaning water at the end of the milk delivery line (near the tank). To ensure optimum results the temperature should be at least 77°C (170°F). In case the robot cannot make use of the cleaning agent due to a blocked tube or because it has run out of stock, an alarm is generated (if adjusted). - Page 147 Operator’s manual ASTRONAUT Lubrication: • Lubricate the hinges (refer to section 6.1.1 ’Fluids and lubricants’) of the cow follower (A, figure 6.14). The easiest way to approach the grease nipples is to push the carriage of the robot arm forward. In this way the cow follower is pulled forward as well.
- Page 148 Service and maintenance Feed funnel: The feed deflector plates (figure 6.16) within the box, may be contaminated after a period of time. In order to avoid fungous and clogging, the plates should be cleaned on a regular basis. • While fitting the plates make sure that they align well avoiding feed to fall in-between. Also ensure that the deflector plates are fitted well into the fixating cam, so that the cows cannot push them loose.
-
Page 149: Yearly Maintenance
Operator’s manual ASTRONAUT Torque values: • Check if all bolts and nuts are correctly secured. • Tighten loose bolts / nuts with a torque listed below. • Always apply Molykote P37 lubricant to the thread of the stainless steel bolts and nuts which were disassembled. - Page 150 Service and maintenance This page intentionally left blank Chapter 6 - page 14...
-
Page 151: Failures
Operator’s manual ASTRONAUT Failures Depending on the nature of a failure, the user may be able to solve it himself or he may require the help of a service technician. Keep a record of the failures which you sorted out yourself in a logbook. -
Page 152: Cow Is Not Identified
Failures 7.1.1 Cow is not identified If a cow enters the box without being identified by the robot, milking is not carried out. Reasons for non-identification may be: • No cow data available. A cow carrying an unknown responder generates the message responder no. -
Page 153: The Cow Remains In The Box Too Long
NOTE • Changes are to be made in only in consultation with your Lely service technician or another Lely specialist. • The cow does not release her milk. Each change close to the milking robot may induce the cow to stop the milk flow. -
Page 154: Milk Receiver Jar Is Not Pumped Empty
Failures • Incorrect earthing of the robot may cause electric voltage (static) as a result of which the cows become anxious. • Flies are also capable of making cows very anxious, so try to keep them away from the animals, for instance by means of a fan which blows air underneath the cow to chase the flies away during milking procedure. -
Page 155: No Air Pressure
Operator’s manual ASTRONAUT 7.1.10 No air pressure Alarm message = Pressure alarm The lack of pressure on the air pipeline leads to malfunctioning of the robot or other pneumatic parts. The pressure indicator of the compressor should indicate a value of 800 - 950 kPa (8,0 - 9,5 bar). The indicators (from left to right) below the multiple functional control box should indicate a value of respectively 700 kPa (7,0 bar), 300 kPa (3,0 bar) and 0 kPa (0 bar). -
Page 156: Sudden Increase
Check if the pre-milking device is clean. • Check the performance of the moisture collector fitted to old ASTRONAUT milking robot models. • Once you have detected the source of contamination: clean the soiled parts and start an additional cleaning by hand. -
Page 157: Lightning Strike Arrester
NOTE • If there is still no progress, immediately warn your Lely service technician. If there are any problems with the cell count (exceeding 250,000), we recommend to dry off the cows with the highest cell count by means of antibiotics. - Page 158 LELY INDUSTRIES NV Weverskade 110 NL-3147 PA Maassluis +31(0)10 - 5996333 Fax +31(0)10 - 5996444...
Need help?
Do you have a question about the ASTRONAUT and is the answer not in the manual?
Questions and answers