Table of Contents
Advertisement
Quick Links
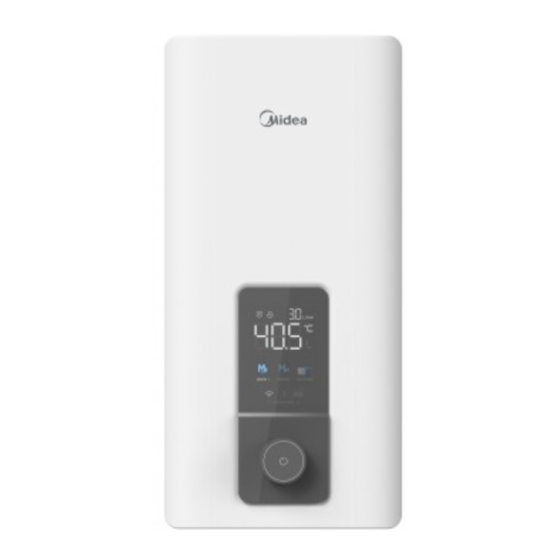
Instant Electric Water Heater
USER MANUAL
DFS180HK
Warning: All the contents of this Guide have been checked carefully. If there are any printing errors OR
misunderstanding, please contact Midea customer service team.
It will be compiled into the new version of the guide without any notice if there are any technical
improvements.
The diagram above is just for reference. Please treat the appearance of the actual product as final.
Advertisement
Table of Contents

Related Manuals for Midea DFS180HK


Summary of Contents for Midea DFS180HK
- Page 1 Warning: All the contents of this Guide have been checked carefully. If there are any printing errors OR misunderstanding, please contact Midea customer service team. It will be compiled into the new version of the guide without any notice if there are any technical improvements.
-
Page 2: Table Of Contents
Thank you for choosing Midea! Please read this user manual be carefully before using this new appliance to ensure that you have a better understanding of the product features, and know how to operate this product in a safe way. -
Page 3: Safety Instructions
Unintended use may cause hazards and loss of warranty claims. Please refer to the terms & conditions at the warranty card or Midea HK ocial website. Explanation of Symbols... - Page 4 Caution These instructions are precautions to prevent the risks of serious injury or death of the user, and any damages to property. Caution To prevent personal injury, injury to others and property damage, the instructions below must be followed. Incorrect operation due to failure to follow instructions will cause harm or damage.
- Page 5 Warning The water heater should be earthed before use. Please ensure that the resistance of household earth wire is<4Ω Using water heater without earthed is highly prohibited. Installation warning Important Installation Warning The product must be connected to a circuit breaker (RCBO). Otherwise, electric shock may occur when using.
- Page 6 The appliance is intended to be permanently connected to the water mains and not connected by a hose-set. The water inlet of this appliance shall not be connected to inlet water obtained from any other water heaing system. The appliance must be permanently connected to fixed wiring. Circuit breakers and products should be installed in a dry, no splash, principle of flammable objects or gases.
-
Page 7: Specifications
SPECIFICATIONS Product Model DFS180HK Electrical supply 380V-415V AC three-phase/50Hz Rated power input 16.2-19.4kW Max. current load 3x 27.3 A Recommended smallest wire size 4 x 4 mm Recommended circuit breaker specification 3x50 A Water pipe connector G1/2 Min. permissible pressure 0.1 MPa... -
Page 8: Product Overview
PRODUCT OVERVIEW Parts Identification back shell Power supply Front shell plate coveer Alternating Display panel current contactor Terminal of wiring ON/OFF konb Water pipe cover plate Holes for hanging screws Holes for hanging screws Heating element Water flow sensor Air filter net Holes for hanging screws Inlet pipe outlet pipe... - Page 9 Internal Wire Diagram 1. Terminal Block 2. AC contactor 3. Heating system Transfer 4. Power PCB 5. Control PCB 6. Outlet temperature flow sensor 7. Inlet temperature flow sensor 8. Water flow sensor. E. Earth P1. Live Phase 1 P2. Live Phase 2 P3.
-
Page 10: Quick Start Guide
QUICK START GUIDE Before First Use Warning Open and close all connected draw-off valves ≥ 60 s several times, until all air has been purged from the pipework and the appliance. Carry out a tightness check. Switch on the power supply. 1. -
Page 11: Product Installation
PRODUCT INSTALLATION Before Installation DO NOT install this product in a location where it may be subjected to freezing temperatures. If the water inside your tankless water heater freezes, it can cause severe and permanent damage that is not covered under your warranty. DO NOT locate the water heater in a location that is difficult to access. - Page 12 Open the product Remove the screw Open the front shell from Loosen the screw on the using a screw driver. the bottom. cover plate with a tool Hole drilling Step 1 Align the two holes on the paper Step 2 Use a pen to record the location of with the user's water pipe holes the two holes on the wall...
- Page 13 Step 5 Screw the iron plate to the wall Step 6 Hang the electric water heater on the screws and make sure that the water pipe holes are aligned Note If this product is installed in an open place indoors, it is recommended to install at the height of more than 1.6 meters to prevent children from playing with the temperature adjustment knob of the water heater(Figure 1) If the product is installed in a narrow or enclosed space, keep a small space to ensure...
- Page 14 Connection of bottom pipe outlet 1. Back pipe connection Step 1 Remove the connection tube from Step 2 Install the connecting copper pipe the product in the customer's water pipe hole Inlet Connecting copper pipe Outlet (G1/2) G1/2 Inlet Step 3 Connect the tee water pipe to the Step 4 Install the lid and screw it after...
- Page 15 Change the position of the Connect the threaded Remove the connection cap on the tee and install it tube from the product pipe to the tee pipe on the electric water heater G1/2 Use a tool to remove the A plastic pipe is connected Mounting the front reserved holes in the front to a threaded pipe...
- Page 16 Plumbing Connection The specification of this water heater pipe is G1/2。Rubber seal gasket must be added to the threaded end surface in order to avoid water leakage.It is also recom- mended to set up the pressure relief valve to the inlet of the main body, sealgasket with filter screen should be used in the joint position.
- Page 17 Connection of wire Confirm the water heater installation position, then reserve one water outlet and one water inlet accordingly. The distance between these two points is 10 cm. Connect the special copper core wire from the main power supply at home to the C40 air switch, reserve a certain length under the wall and connect it to the wire connector in the bathroom.
-
Page 18: Operation Instructions
OPERATION INSTRUCTIONS Function description On/Off: Turn on or turn off the machine. Water flow tesing function: Through signal sending from the water flow sensor, the PCB plate will test if the water flows into the water heater. The heating system only start when the water flow is higher than 2.5L/min. -
Page 19: Cleaning And Maintenance
CLEANING AND MAINTENANCE Maintenance The water heater should only be repaired and maintained by the Company’s recog- nized professional service staff. Improper repairing or maintenance may cause serious injury accident or property loss Before opening machine or repairing and maintaining machine, power must be cut off Before repairing, please refer to “Trouble Shooting”... -
Page 20: Troubleshooting
TROUBLESHOOTING Important information Please switch off power supply whenever the water heater needs repairs. Please contact Midea Customer Service Center in case of maintenance required. Please do not allow any other persons to open or repair the water heater. Symptom... -
Page 21: Trademarks, Copyrights And Legal Statement
Midea may constitute trademark infringement or unfair competition in violation of relevant laws. This manual is created by Midea and Midea reserves all copyrights thereof. No entity or individual may use, duplicate, modify, distribute in whole or in part this manual, or bundle or sell with other products without the prior written consent of Midea. - Page 22 European Economic Area. Further information are provided on request. You can contact our Data Protection Officer via MideaDPO@midea.com. To exercise your rights such as right to object your personal date being processed for direct marketing purposes, please contact us via...
- Page 23 www.mideahk.com MideaHK 2023 all rights reserved...
Need help?
Do you have a question about the DFS180HK and is the answer not in the manual?
Questions and answers