Leica IP S Operating Instructions Manual
Automated printing system for microscope slides
Hide thumbs
Also See for IP S:
- Instructions for use manual (70 pages) ,
- Instructions for use manual (78 pages) ,
- User instructions (2 pages)
Table of Contents
Advertisement
Quick Links
Advertisement
Table of Contents

Related Manuals for Leica IP S


Summary of Contents for Leica IP S
- Page 1 Leica IP S Automated printing system for microscope slides Operating Instructions Leica IP S V1.6 English - 07/2005 Always keep this manual together with the instrument. Read this instruction manual carefully before working with the instrument.
- Page 3 Leica reserves the right to change technical spe- ing thorough investigation in this field. cifications as well as manufacturing processes We are under no obligation to update the present without prior notice.
-
Page 4: Table Of Contents
Table of contents Important Notes ..............................5 Safety ................................. 6 Safety instructions ..................................6 Warnings ......................................6 Instrument components and specification ....................8 Overview - instrument ..................................8 Technical data ....................................10 Print specifications ..................................12 3.3.1 Requirements for microscope slides ............................12 3.3.2 Print specifications .................................. -
Page 5: Important Notes
Qualification of personnel Instrument type • The Leica IP S may be operated only by All information provided in this manual applies trained laboratory personnel. only to the instrument type indicated on the title page. -
Page 6: Safety
Safety Make sure to comply with the safety instructions and warnings in this chapter. Make sure to read these instructions, even if you are already familiar with the operation and use of other products. 2.1 Safety instructions This instruction manual includes important instruc- This instrument has been built and tested in ac- tions and information related to the operating safety cordance with the following safety regulations on... - Page 7 Warnings - Instrument operation • The Leica IP S may be operated by trained laboratory personnel only, according to its designated use and as per the present instruction manual. • In the event of an emergency, switch off the mains switch and unplug the instrument from mains.
-
Page 8: Instrument Components And Specification
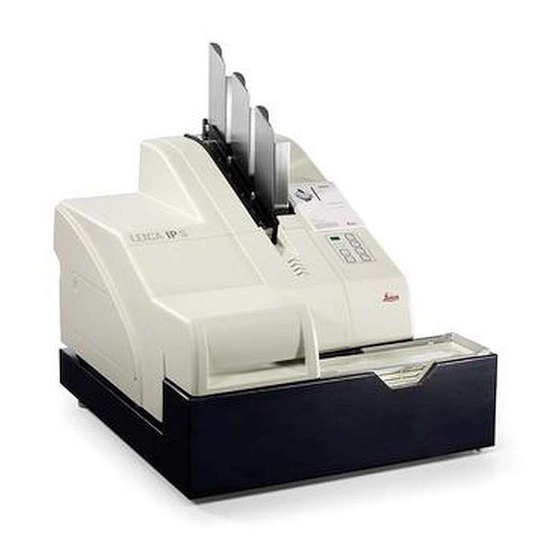
Instrument components and specification 3.1 Overview - instrument Instrument components 1 - Basic instrument 2 - Slide Magazines - Magazine no. 1 3 - Control panel 4 - Lid 5 - Cover - cartridge receptacle 6 - Unload station (manual) Fig. - Page 9 - Transfer point : chute - slide carrier This is the delivery state! - Location plate Prior to operation, the cleaning fluid - External alarm jack cartridge must be exchanged for an - Socket for printer cable ink cartridge - see chapter 4.9! Leica IP S...
-
Page 10: Technical Data
Instrument components and specification 3.2 Technical data General Admissions: all instrument-specific admission labels are located at the rear panel of the instrument, next to the name plate Nominal voltage: 100 V - 240 V 230 V - 240 V Nominal frequency: 50 to 60 Hz Maximum power draw at 100 - 120 V: 4.0 A... - Page 11 ) Average value - exact speed in each individual case depending on system configuration and software used. ) Average value - exact number of slides in each individual case depending on quantity being im- printed and on density of imprint. ) Measured in addressable dots per inch Leica IP S...
-
Page 12: Print Specifications
Printing directly onto the glass is not possible. The following slide sizes can be imprinted in the Leica IP S: 76 x 26 mm, max. 1.2 mm thickness. 3.3.1 Requirements for microscope slides • To reduce the amount of glass dust and the risk of mechanical failures, use only clipped corner slides (45°... - Page 13 3. Instrument components and specification Tested and recommended print media for the Leica IP S ink jet printer IMPORTANT! The use of other print media may result in unsatisfactory print quality and/or jamming of slides/cassettes during the printing process! If the slides/cassettes you are currently using are not listed above, please contact your local Leica Microsystems’...
-
Page 14: Print Specifications
Instrument components and specification 3.3.2 Print specifications Print resolution The print head of the instrument has a fixed reso- lution of 360 dpi in both directions (vertical and horizontal). Each printed line has a maximum height of 128 dots, corresponding to 9.03 mm. Therefore, a maximum of 2 lines can be printed on the slides. -
Page 15: Printing Bar Code
Data should never be printed as bar code only, but also as text (line of optical characters above or below the bar code), to en- sure that no information is lost for the above reasons. Leica IP S... - Page 16 • Number and types of characters required in the barcode • The quality and resolution capabilities of the bar code reader As always, using Leica recommended print media would produce the high- est quality print. However, it is highly recommended that any barcode solu- tion be tested prior to implementation.
-
Page 17: Resistance Against Reagents
All laboratories must perform their own tests to ensure that the ink is resistant against the various reagents the slides will subsequently be exposed to. A wide range of factors beyond Leica’s control can have negative effects on the results. The test conditions stated below can therefore only serve as an outline for individual laboratory test specifications. -
Page 18: Setup
The installation site must be well-ventilated. The instrument must not be operated in areas at risk of explosion. • The Leica IP C needs approx. 650 x 500 mm • Stable ambient temperature between +10 °C floor space. The printer needs approximately and +35 °C. -
Page 19: Standard Delivery - Packing List
4. Setup 4.3 Standard delivery - packing list The Leica IP S standard delivery consists of the following items: 1 Leica IP S, basic instrument without unload station 0601 33201 1 Storage fluid cartridge (in the instrument) 0601 35811 1 UV-Ink cartridge Leica 0601 42350 1 Entnahmestation (manuell), kpl. -
Page 20: Installing The Manual Unload System
Setup 4.4 Installing the manual unload system The unload system supplied consists of: 26 - Unload station 27 - Shielding cover 28 - Collar screws (3 pcs.) 29 - Slotted screws with washers (2 pcs.) Install as follows (see Fig. •... -
Page 21: Automated Unload Station (Optional)
• Place the stack of trays (37) onto the lifting table (36) of the unload station. See chapter 5.2, p. for details on the lifting table controls. Fig. 9 Leica IP S... -
Page 22: Installing/Exchanging The Flashtube
Setup 4.6 Installing/exchanging the flashtube Exchange - removing the flashtube Switch the instrument off and un- plug it from mains.Allow the flash- tube to cool before removing it. Do not handle the flash tube with bare hands. Use a glove or tissue. •... - Page 23 • Contact spring (43) must sit close to the prim- ing wire (44) of the lamp (see Fig. 17). • Swing the reflector downwards. Reinsert and retighten the screw (39). • Close lid (4) of the instrument again. Fig. 17 Leica IP S...
-
Page 24: Filling And Inserting The Magazines
Setup 4.7 Filling and inserting the magazines Fig. 18 • Fill one of the magazines (48) with slides (49). If you are using positively charged slides, please Make sure the print surface (50) is located on follow the recommendations below: the left and facing upwards. -
Page 25: Electrical Connection
• Connect the cable to one of the serial ports dance with EN 60950 and must sat- (COM 1, COM 2) of the computer running the isfy the requirements for SELV cir- control software. cuits. Leica IP S... -
Page 26: Exchanging The Cartridge
Setup 4.9 Exchanging the cartridge The printer is delivered with the storage fluid car- tridge inserted. To be able to print, the storage cartridge must be exchanged for an ink cartridge. To do so, proceed as follows: • Switch on the instrument mains switch located at the back panel (see (62) in Fig. - Page 27 Before installing the cartridge, you need to install the safety catch, in unbolted position. • If there is no safety catch in your printer nor is it included in the accessories kit, please con- Fig. 24 tact your sales representative. Leica IP S...
- Page 28 Setup • The sensor in the cartridge slot recognizes the presence of a new car- tridge. • The indicator LED “Ink Empty“ goes out, code ’88’ appears in the display. At this point, the instrument has to be ”told” which type of cartridge has been inserted.
-
Page 29: Installing The Printer Driver
5. Insert the CD containing the printer driver (part of standard delivery) into the CD-ROM drive and enter the following path in the input field: - click OK to confirm. X:\IP_Driver\IP_C\English ’ ’ is to be replaced by the letter corresponding to the drive containing the CD. Leica IP S... - Page 30 Setup 6. In the dialog box, select PRINTER IP-S (highlighted in blue color). If no (or other) selectable options are displayed, click on “DISK“ to return to the previous dialog box and repeat insertion of the path. 7. If the message shown left is displayed, the driver has already been in- stalled on your PC on a previous occasion (e.g.
- Page 31 5. Click on CONFIGURE PORT to open the PORTS dialog box. Select the corresponding port and click on SETTINGS. The SETTINGS FOR ... dia- log box opens up. Set BAUD RATE to 57600. Leave all other settings as shown in Fig. Leica IP S...
-
Page 32: Operation
Operation 5.1 Control panel functions The control panel • consists of a membrane keyboard with six pressure-sensitive keys (four of them with an LED), two LED displays and a two-figure seven-segment display. • controls the printer functions and the print jobs that are defined via the control software. - Page 33 (Or, e.g., that a magazine has been removed and replaced by an- other one containing slides of a different color). Pressing and holding LOADED for approx. 10 secs in off-line mode: Informs the printer that a cartridge has been exchanged. (see also chapter 4.9 ‘Exchanging the cartridge’). Leica IP S...
- Page 34 Operation ON-LINE Interrupting a print job in progress LED ‘On-line’ on: Printer is ready and waiting for new a print job. LED ‘On-line’ flashing: A data transmission is in progress or a print job is being carried out. • Pressing On-line while a print job is in progress interrupts printing (though the slide currently being imprinted will be finished before printing is interrupted).
- Page 35 • The printer switches to Off-line mode. • All steps are performed as described above. When operating continuously, the printer pauses regularly for intermediate print head cleans. Printing is interrupted for approximately 10 seconds, after which time the instrument automatically resumes operation. Leica IP S...
- Page 36 Operation TRAY LOAD Controls the movement of the lifting table of the automated unload station (optional) If your printer is not equipped with an automated unload station, no Place a stack of trays (37) onto the lifting table of function is assigned to this button! the unload station (Fig.
-
Page 37: Display Indications
6 minutes, ’43’ is displayed. Flash tube has reached is maximum life. The flash lamp has reached the end of its specified service life and must be replaced. If this message is ignored, the resistance of subsequent printouts can be affected. Leica IP S... - Page 38 Operation Prompt requesting maintenance If this message is displayed, the instrument will be due for maintenance within the next few weeks. Confirm the prompt pressing ERROR. After about 3 weeks the message will be displayed again and will not disappear from the screen when pressing ERROR. You can still continue printing but maintenance must be carried out urgently.
-
Page 39: Alarm Functions
5. Operation 5.3 Alarm functions The Leica IP S is equipped with two different alarm functions: Instrument alarm The printer has a beeper that emits acoustic signals indicating important in- strument states and functions. Button pressed: 1short beep Magazine empty/tray stack full: 2 short beeps... -
Page 40: Printer Driver Settings
Operation 5.4 Printer driver settings With the Leica IP S slide printer you can print slides from any Windows application al- lowing the user to individually configure the printing parameters. The description below refers to “Microsoft Wordpad“, a program that is part of any Win- dows installation and therefore available on all PCs supported by the printer driver. - Page 41 Click on PROPERTIES and ADVANCED to access the ADVANCED OPTIONS menu. There is no ADVANCED button under Windows NT 4.0. Clicking on PROPERTIES in Windows NT leads you directly into the AD- VANCED OPTIONS menu. Leica IP S...
- Page 42 Operation • In the PAPER SIZE menu you select the size ADVANCED OPTIONS menu of the imprintable zone of Clicking onto the individual menu items opens up the slide. SLIDE must be se- a pull-down menu to their right, where you can lected in this menu, other- select the desired parameters.
-
Page 43: Cleaning And Maintenance
During vacuuming, direct the air stream generated by the vacuum away from yourself or anyone in the area to avoid possible injury from glass particles. The IP S needs to be vacuum cleaned daily with heavy use or weekly with light use to remove any debris, especially glass. - Page 44 Cleaning and maintenance Slide guiding mechanisms • Drying-Station, Fig. 35 The chute must be clean. Caution! Sensitive electronics components are located in this area. Use no liquid in this area! Fig. 35 Drawer for broken glass • The drawer for broken glass (67) is located above the slot for the ink cartridge, behind the left cover.
- Page 45 • Clean the outer surfaces (including those of the automated slide unload station) with a mild detergent and subsequently dry with a slightly moist- ened cloth. Do not use any solvents for cleaning the outer surfaces and the lid! Leica IP S...
-
Page 46: Print Head Cleaning
Cleaning and maintenance 6.2 Print head cleaning Preparing the printer Once a week or if message“15“ is displayed, the print head must be cleaned manually. • Open the printer lid and then press buttons CLEAN and LOADED simultaneously. • The print head moves upward, to a position approx. -
Page 47: General Maintenance
6.3 General maintenance Only Leica service technicians are authorized to open the in- strument for maintenance and repair work. The instrument is virtually maintenance-free. To ensure smooth operation of the instrument over many years we do rec- ommend the following: •... -
Page 48: Troubleshooting
(back panel) and, after a short waiting period of approx. 30 secs, switch it back on. If this does not eliminate the problem either, call Leica Technical Service. Instruction manual V 1.6 – 07/2005... -
Page 49: Status Messages
Prompt requesting maintenance. – Print head cleaning – Intensive clean in progress Instrument is waiting for user intervention by pressing CLEAN. “Ink empty“ flashing Ink cartridge has been changed; instrument waiting for confirmation via ERROR, CLEAN, or LOADED button. Leica IP S... -
Page 50: Error Messages
The instrument remains disabled until the print head has cooled down to a temperature value within the permissi- ble range. Check ambient temperature. No or incorrect voltage at ink print head. Call Leica Technical Service. Instruction manual V 1.6 – 07/2005... - Page 51 Troubleshooting solution Source of error code Flash standby state not reached within the Call Leica Technical Service. prescribed time. Charging electronics defective. No flash or flash duration too short. Check whether flashtube works – to do so, Flash bulb dirty or defective.
- Page 52 Troubleshooting solution Source of error code Flash power supply: Call Leica Technical Service. overtemperature for more than 10 minutes. Faulty control data received (program bug) Carry out a RESET on the printer. Settings for the serial interface incorrect or the instru- Check cable connection to the PC.
-
Page 53: Changing The Flash Bulb
Fuse to be checked • Instrument not functioning. Fuse F1 • No display indication. • Instrument not working at normal speed. Fuse F2 • Printing a slide takes approx. 8 secs, even after the warm-up phase has been com- pleted. Leica IP S... -
Page 54: Replacing The Secondary Fuses
Troubleshooting 7.5 Replacing the secondary fuses Prior to exchanging a fuse, always switch the instrument off and unplug from mains. Defective fuses may be replaced only with the replacement fuses supplied together with the instrument. Replacing the fuses Fig. 41 Fig. -
Page 55: Warranty And Service
Leica Microsystems Nussloch GmbH guarantees that the contractual prod- uct delivered has been subjected to a comprehensive quality control proce- dure based on the Leica in-house testing standards, and that the product is faultless and complies with all technical specifications and/or agreed char- acteristics warranted. - Page 56 Notes Instruction manual V 1.6 – 07/2005...
Need help?
Do you have a question about the IP S and is the answer not in the manual?
Questions and answers