
Related Manuals for Sherman digitec DIGIMIG 2OO HIT


Summary of Contents for Sherman digitec DIGIMIG 2OO HIT
- Page 1 Machine Translated by Google V1.0 8/26/22 USER MANUAL WELDING SYNERGIC INVERTER RECTIFIER DIGIMIG 2OO HIT...
-
Page 2: General Notes
Machine Translated by Google ATTENTION! Please read this manual before installing and commissioning the device 1. GENERAL NOTES Start-up and operation of the device can only be carried out after reading these Operating Instructions carefully. Due to the continuous technical development of the device, some of its functions may be modified and their operation may differ in detail from the descriptions in the manual. - Page 3 Machine Translated by Google • Use protective curtains made of non-combustible materials and properly choose the colors of the walls absorbing harmful radiation. Prevention of poisoning by vapors and gases emitted during welding from the coating of electrodes and evaporation of metals: •...
-
Page 4: Technical Parameters
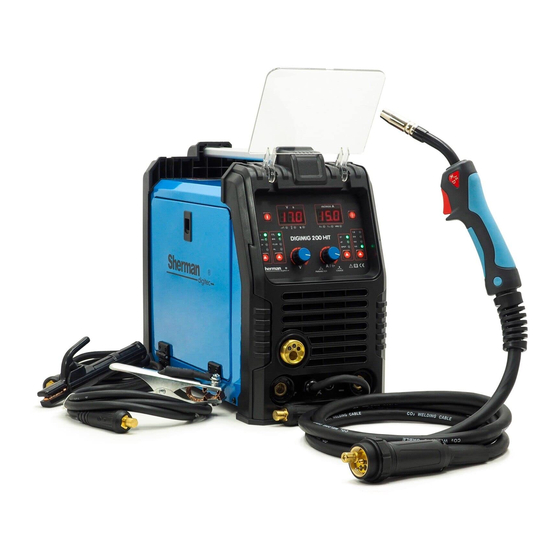
Machine Translated by Google 3. GENERAL DESCRIPTION The DIGIMIG 200 HIT synergic welder is used for manual welding of steel and non-ferrous metals. It enables welding with MMA (covered electrode), TIG and MIG/MAG methods. The MIG/MAG method can be used in manual and synergic modes, simplifying its operation and allowing the welder to be used by people with less experience and hobbyists. -
Page 5: Preparing The Device For Work
Machine Translated by Google 4.1.1 Parameter adjustment ranges MIG: 30 - 200A; MMA: 25 - 180A; TIG:15 - 200 A welding current: MIG: 15.5 - 24 V welding voltage: 2.5 - 15 m/min Wire feed speed: -10 - +10 Inductance: 0 - 3 s Spot welding time: 0 - 10... - Page 6 Machine Translated by Google 1. MIG gun socket 2. "+" socket 3. Polarity Change Plug 4. Spool Gun Socket 5. "-" Socket 6. Power Switch 7. Shielding Gas Connector 8. Ground Clamp 9. Fan 10. Power Cord 11. Wire Spool Pin 12. Wire Feeder 13.
- Page 7 Machine Translated by Google 5.1 Connecting the wires 5.1.1 MMA method The ends of the welding cables should be connected to the sockets (2) and (5) located on the front plate so that the correct pole for the given electrode is on the electrode holder. The polarity of the welding cables connection depends on the type of electrode used and is indicated on the packaging of the electrodes (negative polarity DCEN or positive polarity DCEP).
- Page 8 Machine Translated by Google The current clamp of the torch should be connected to the MIG torch socket (1). The gas line from the reducer should be led and fixed to the gas connector (7) located on the back wall of the device. Insert the polarity change plug (3) into the “+”...
- Page 9 Machine Translated by Google 5.2 Shielding gas connection 1. Secure the cylinder and prevent it from tipping over. 2. Open the cylinder valve for a moment to remove any impurities. 3. Install the regulator on the cylinder. 4. Connect the reducer hose with the gas connector (7) on the rear wall of the welder. 5.
- Page 10 Machine Translated by Google D100 spool D200 spool 5.5 Preparing the MIG gun for work Depending on the type of material to be welded and the diameter of the electrode wire, attach the appropriate contact tip and wire guide insert to the MIG gun. For steel welding, use steel contact tips and a steel insert.
-
Page 11: Operation
Machine Translated by Google 5.5.1 Fast Wire Inch The device has a quick wire feed function. Pressing the button (C) causes the wire to be ejected quickly, allowing it to be easily inserted into the holder. 6. OPERATION 6.1 Front panel A - Welding voltage display During MIG/MAG welding, the display shows the welding voltage and the symbols of adjustable functions and parameters as well as error codes. - Page 12 Machine Translated by Google B - Welding current display The display shows the welding current / wire feed speed and the values of adjustable functions and parameters. C - Fast wire feed button By pressing the button for a few seconds, the electrode wire is rapidly advanced. It can be used when setting up a spool of wire in order to quickly insert it into the welding gun.
- Page 13 Machine Translated by Google E - Source operation control button The button is active only during MIG/MAG welding in manual and synergic modes. Allows you to select the source control mode. The selection of the appropriate mode is signaled by the lighting of the appropriate diode.
- Page 14 Machine Translated by Google Spot welding. Pressing the welding torch button will ignite the arc. After the time SPt has elapsed, the arc will be extinguished. Releasing the gun button early will extinguish the arc immediately. F - Multifunction knob. The knob is used to adjust welding functions and parameters.
- Page 15 Machine Translated by Google Knob active only during MIG/MAG welding. In manual mode, it is used to adjust the welding voltage. In the synergic mode, it is used to correct the welding voltage selected by the synergic program. H - Welded material and shielding gas selection button Button active only during MIG/MAG welding Used to select the material to be welded.
-
Page 16: Parameter Settings
Machine Translated by Google The button is used to select the welding method. Selection of the appropriate mode is confirmed by lighting of the control diode. - MIG welding with manual selection of settings. SHUTTER SYNC - MIG/MAG welding with synergic settings. The device selects the welding parameters depending on the selected type and thickness of the material. - Page 17 Machine Translated by Google 7.2 TIG method After selecting the TIG method, it is only possible to adjust the welding current. 7.3 MIG AND SYN MIG During MIG welding, the device can operate in synergic (SYN MIG) and manual (MIG) modes. The synergic mode allows you to select welding parameters for less experienced users.
- Page 18 Machine Translated by Google Inductance adjustment Inductance adjustment enables optimization of the arc characteristics depending on the thickness of the workpiece and the welding method and conditions. The function is useful during MIG/MAG welding of thin elements, preventing their burn- through, and during braze welding of galvanized elements.
-
Page 19: Arc Initiation
Machine Translated by Google • Make sure the feed rolls are not too tight. Excessive wire tension can cause a feeding problem. • Make sure the handle is equipped with a Teflon guide insert designed for aluminum. Using steel components used to feed steel wire will cause feeding problems. •... - Page 20 Machine Translated by Google 2. Lightly touch the electrode to the workpiece, detach the electrode from the workpiece by tilting the handle so that the gas nozzle touches the workpiece. 3. After striking the arc, straighten the handle and start welding. 9.3 MIG method 1.
- Page 21 Machine Translated by Google inguinal Joint Sheet Wire Gas flow welding Welding Free electrode Welding current ÿL/ voltage speed outlet speed weldin diameter ÿmmÿ minÿ thickness(mmÿ (cm/min) (mm) (AND) 60ÿ80 16ÿ17 40ÿ50 0.8,0.9 80ÿ100 19ÿ20 40ÿ55 10ÿ15 0.8,0.9 120ÿ160 20ÿ22 35ÿ45 10ÿ15 10ÿ15...
- Page 22 Machine Translated by Google 11. CAUSES OF INCORRECT OPERATION Cause Procedure Symptoms No power supply, failure signal or No connection or loose plug inside the device Check and correct the connections of all faulty operation of the device electrical plugs inside the appliance Set the correct pressure Roller pressure too weak Incorrect groove diameter of the...
-
Page 23: Maintenance Instructions
Machine Translated by Google environment. Starting a cold welder under these conditions may damage it. It is recommended that if the welder is used outdoors, it should be placed under a roof to protect it from adverse weather conditions. The DIGIMIG 200 HIT device should be operated under the following conditions: - changes in the rms value of the supply voltage not greater than 10% - ambient temperature from -10°C to +40°C - atmospheric pressure 860 to 1060 hPa - relative humidity of... -
Page 24: Warranty
Machine Translated by Google 16. WARRANTY The guarantee is granted for a period of 12 months for entities conducting business activity, but excluding claims related to the warranty, or 24 months for consumers from the date of sale. The warranty will be respected after the claimant presents a proof of purchase (invoice or receipt) and a warranty card with the product name, serial number, date of sale and stamped point of sale. -
Page 25: Wiring Diagram
Machine Translated by Google 17. WIRING DIAGRAM... - Page 26 Machine Translated by Google DECLARATION OF CONFORMITY 01/DIGIMIG200HIT/2022 Manufacturer's authorized representative: TECWELD Piotr Polak 41-943 Piekary Slaskie ul. Emerald 21/3/6 branch: 41-909 Bytom ul. Krzyÿowa 1G POLAND We declare that the following product: Inverter welding machine Trade name: DIGIMIG 200 HIT MIG-200FG MCU Type: Manufacturer's trademark:...
Need help?
Do you have a question about the DIGIMIG 2OO HIT and is the answer not in the manual?
Questions and answers