
Related Manuals for Shure A310-FM


Summary of Contents for Shure A310-FM
- Page 1 A310-FM Installation Guide User guide for the A310-FM flush mount tray accessory for Shure MXA310 table array microphones. Version: 2.2 (2023-E)
- Page 2 Shure Incorporated Table of Contents Installation Process A310-FM Installation Guide Dimensions Installing the Flush Mount Certifications...
- Page 3 Shure Incorporated A310-FM Installation Guide Installing the Flush Mount The tube and wing nut required to install the rack tray are included with the MXA310 microphone. Refer to the MXA310 user guide for replacement part information. Tip: This process assumes that both ends of the network cable are accessible. If the other end of the network cable is not ac cessible, before installing the tube and plugging in the microphone (step 2), you must guide the cable through the hardware...
-
Page 4: Installation Process
Shure Incorporated Installation Process Remove the 3 screws located in the center on the bottom of the microphone. Plug a network cable into the microphone and guide it through the center exit path. When the cable is secured, guide it through the tube. - Page 5 Shure Incorporated 3. Align the tube into the recessed area in the center of the microphone. Install the 3 screws that you removed in step 1 to secure the tube.
- Page 6 Shure Incorporated 4. Drill a 143 mm (5 5/8 in.) hole through the table, and then place the tray into the hole.
- Page 7 Shure Incorporated Guide the cable through the hole in the center of the tray. Then, place the tube through the hole in the table and gently press the microphone into the tray. Align the Shure logo on the microphone with the Shure logo on the tray. The 4 rub ber feet on the bottom of the microphone fit into the 4 smaller holes in the tray.
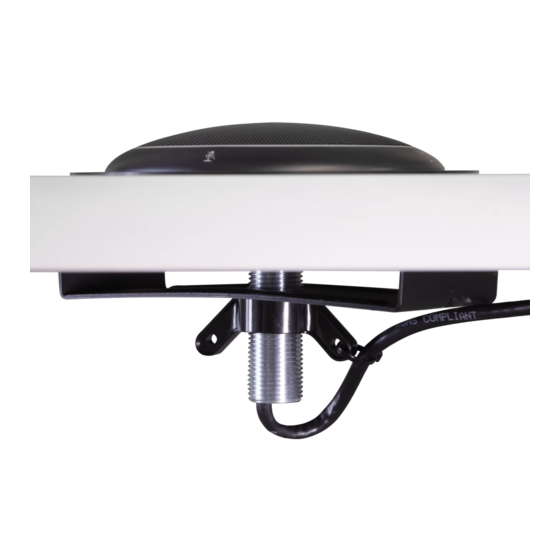
- Page 8 Shure Incorporated 7. Guide the cable through the wing nut, and attach the wing nut onto the tube from underneath the table. Then, hand tighten the wing nut to secure the bracket against the table. Do not overtighten or exceed this torque value: 12.5 kgf·cm.
- Page 9 Hereby, Shure Incorporated declares that this product with UKCA Marking has been determined to be in compliance with UK CA requirements. The full text of the UK declaration of conformity is available at the following site: https://www.shure.com/en- GB/support/declarations-of-conformity. Shure UK Limited - UK Importer Unit 2, The IO Centre, Lea Road, Waltham Abbey, Essex, EN9 1 AS, UK...
Need help?
Do you have a question about the A310-FM and is the answer not in the manual?
Questions and answers