Table of Contents
Advertisement
Quick Links
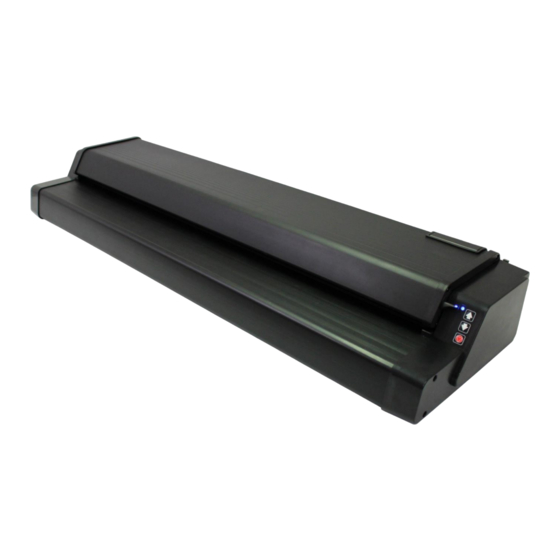
T36SM
Colortrac Ltd
Page 1 of 105
T Series Service Manual
Issue 3
Date: 15/08/18
This is a confidential controlled document and is the property of Colortrac Ltd.
It is not to be copied or reproduced in part or whole.
C
o
l
o
r
t
r
a
c
T
S
e
r
i
e
s
C
o
l
o
r
t
r
a
c
T
S
e
r
i
e
s
S
e
r
v
i
c
e
M
a
n
u
a
l
S
e
r
v
i
c
e
M
a
n
u
a
l
Advertisement
Table of Contents

Related Manuals for Colortrac T Series


Summary of Contents for Colortrac T Series
- Page 1 T36SM Colortrac Ltd Page 1 of 105 T Series Service Manual Issue 3 Date: 15/08/18 This is a confidential controlled document and is the property of Colortrac Ltd. It is not to be copied or reproduced in part or whole.
- Page 2 Technical Support, Colortrac Ltd. Colortrac Ltd shall not be liable for any damages, errors, issues or events that result from the use of the equipment or this manual. Page 2 of 105...
-
Page 3: Table Of Contents
CONTENTS Introduction ..........................5 Scanner Models ....................... 5 Tools Required ......................... 6 Obtaining Technical Support from Colortrac ................7 Creating an Account ......................7 User Profiles ........................7 Submitting Requests for Support ..................7 Asset Selection ........................ 7 Support Ticket Information ....................7 How to Contact Technical Support ................... - Page 4 T Series Service Manual 13.9 Pinch Roller Assembly ....................65 13.10 Power Switch ......................... 67 13.11 Power Socket ......................... 69 13.12 Microswitch ........................72 13.13 Motor ..........................79 13.14 Drive Cog Unit ........................ 82 13.15 Lid Unit Spring Hinge ..................... 86 Utilities Program .........................
-
Page 5: Introduction
T Series Service Manual Introduction Scanner Models This manual contains information for reference by qualified service engineers, trained in the repair of the T Series. There are 2 x T Series Models: Scan width of 25 inches Handles 27 inch media ... -
Page 6: Tools Required
T Series Service Manual Tools Required To maintain the T Series the tools listed below are required. The tools are generally available; they are not the responsibility of Colortrac to supply. 1. Pozi-drive Screwdriver 2. Torx Screwdriver. 3. Torx Screwdriver. -
Page 7: Obtaining Technical Support From Colortrac
Colortrac uses an online service desk facility called the Colortrac Global Help Desk to manage requests for technical support for the T Series. The URL for the Help Desk is www.colortrac-helpdesk.com. All requests for support for the T Series must be registered via the Help Desk. -
Page 8: How To Contact Technical Support
EMC Testing The T series model conforms to EMC and FCC (Part B). EMC testing is carried out to ensure the T Series does not emit signals that can interfere with other devices, and that no external interference signals will interfere with it. -
Page 9: Scanner Cautions
Some photos in this manual were taken during pre-production, and various stages of the T Series development. Some colours / backgrounds / designs shown may vary from the actual scanner being worked on. Some background panels may be shown in the photo to be removed when they actually don’t need to be;... -
Page 10: Warranty Period
T Series Service Manual Warranty Period The Colortrac warranty period varies by region – please ask your regional Business Manager. Consumables Parts that wear according to operator usage are deemed consumables and not replaced under warranty. Consumables can be purchased from Colortrac. Those T Series parts considered to be consumables are: ... -
Page 11: Cis Technology
T Series Service Manual CIS Technology A Contact Image Sensor (CIS) is an integrated module that comprises an illumination system, an optical system and a light-sensing system - all within a single compact component. The light-sensing system is the silicon surface which is divided up into (e.g. -
Page 12: Scanner Accessories
NOTE: Colortrac provides a USB 3.0 cable with each T Series. The use of a cable longer than 2m is at the customer’s discretion. Colortrac is not responsible for errors that may occur as a result. -
Page 13: External Power Supply
T Series Service Manual 10.2 External Power Supply AC I/P 100 – 240V ~ 1.5A 50 – 60 Hz DC O/P 19V 9.47A NOTE: ONLY USE THE CORRECT COLORTRAC SUPPLIED POWER SUPPLY WITH THE T SCANNER. Page 13 of 105... -
Page 14: Scanner Information
T Series Service Manual Scanner Information 11.1 Block Diagram Consists of: 1 x SingleSenor 2 x Paper Sensor 1 x Motor 1 x Power Socket 1 x Power Switch 1 x Main Board 1 x Microswitch 1 x Interface Board... -
Page 15: Scanner Operation
T Series Service Manual 11.2 Scanner Operation Left Hand Back Front Right Hand The diagram above shows the orientation of the scanner referred to in this manual. Centre Justified The scanner is only centre justified. Page 15 of 105... - Page 16 T Series Service Manual Insert Media FACE UP into the scanner. Page 16 of 105...
-
Page 17: Removing And Replacing Panelling
T Series Service Manual Removing and Replacing Panelling 12.1 Left End Cover 12.1.1 Safety Precautions Ensure that the power and USB cables are completely disconnected from the scanner unit. Ensure the scanner is positioned on a stable maintenance platform. - Page 18 T Series Service Manual 3. Remove the T9 countersunk screw from inside the scanner. 4. Gently remove the End Cover. It may be necessary to lift the scanner slightly to remove the End Cover. 5. To refit, gently position the...
- Page 19 T Series Service Manual 6. Replace the T9 countersunk screw. 7. Replace the 4 x T10 countersunk screw. Page 19 of 105...
-
Page 20: Right End Cover
T Series Service Manual 12.2 Right End Cover 12.2.1 Safety Precautions Ensure that the power and USB cables are completely disconnected from the scanner unit. Ensure the scanner is positioned on a stable maintenance platform. 12.2.2 Tools ... - Page 21 T Series Service Manual 3. Ensure the earth connector is released to allow the cable to move freely. 4. Use a Torx screwdriver to remove the 4 x T10 screws from the End Cover. 5. If not already done so, open...
- Page 22 T Series Service Manual 6. Remove the T9 countersunk screw from inside the scanner. 7. Remove the End Cover, but remember there are cables attached to the cover. 8. Remove the cables from the control board. 9. Remove the End Cover.
- Page 23 T Series Service Manual 10. To refit, position the end Cover next to the scanner, and reattached the cables to the Control Board. 11. Make sure the cables goes into the correct connector. 12. Carefully position the End Cover on of the scanner, making sure not to catch or damage any cables.
- Page 24 T Series Service Manual 14. Replace the 4 x T10 countersunk screw. 15. Gently pull the cable away from the end panel to remove any slack and align the earth connector to the screw hole. 16. Refit the Cable Tray.
-
Page 25: Top Lid Unit And Cover
T Series Service Manual 12.3 Top Lid Unit and Cover 12.3.1 Safety Precautions Ensure that the power and USB cables are completely disconnected from the scanner unit. Ensure the scanner is positioned on a stable maintenance platform. 12.3.2 Tools ... - Page 26 T Series Service Manual 4. Remove the 2 x T10 screws and the Y-shaped retaining Bracket. 5. Remove the 2 x T10 screws holding the plastic locating bracket. 6. It maybe necessary to use a flat screwdriver to help move...
- Page 27 T Series Service Manual 7. Remove the plastic locating bracket. 8. Carefully lift the right hand end of the Lid Unit out of the cut-out. 9. Slide to the right and fully remove the Lid Unit. 10. Remove the 3 x T15 Self- tapping screws.
- Page 28 T Series Service Manual 11. Remove the 2 x T20 screws. 12. Remove the Right Hand Lid Cover. 13. Remove the 3 x T15 Self- tapping screws. 14. Remove the 2 x T20 screws. Page 28 of 105...
- Page 29 T Series Service Manual 15. Remove the Left Hand Lid Cover. 16. Gently pull the edge of the Lid Cover away from the lip of the Lid Unit, all along the length of the scanner. 17. Completely remove the Lid Cover.
- Page 30 T Series Service Manual 19. Clip the lip at the rear of the Lid Cover into the Lid Unit to secure in place. 20. Refit the Right Hand Lid Cover, making sure the cables are all through the hole in the rear, and cannot be damaged.
- Page 31 T Series Service Manual 23. Make sure the Lid Catch has free movement, if not, slightly loosen the T15 screws either side of it, until it locates itself into its normal position (leave the screws in this position). 24. Refit the Left Hand Lid Cover.
- Page 32 T Series Service Manual 27. Make sure the Lid Catch has free movement, if not, slightly loosen the T15 screws either side of it, until it locates itself into its normal position (leave the screws in this position). 28. Refit the Lid Unit to the lower...
- Page 33 T Series Service Manual 31. Make sure the plastic locating bracket is pressed fully home. 32. Secure the plastic locating bracket with 2 x T10 screws. 33. Refit the Y-shaped retaining Bracket with the first T10 screw. 34. Refit the second T10 screw to apply pressure to the Y- shaped retaining Bracket.
- Page 34 T Series Service Manual 35. Reconnect the microswitch cable together. 36. Replace the Motor Cable into the cable clip. 37. Reconnect the Motor Cable together. 38. Refit the Top Lid Unit and Cover, refit the right hand end cover as described on page 20.
-
Page 35: Paper Tray Unit
T Series Service Manual 12.4 Paper Tray Unit 12.4.1 Safety Precautions Ensure that the power and USB cables are completely disconnected from the scanner unit. Ensure the scanner is positioned on a stable maintenance platform. 12.4.2 Tools ... - Page 36 T Series Service Manual 3. Remove the 3 x T15 screws holding the left end of the Paper Tray Unit to the scanner. 4. Remove the 3 x T15 screws holding the right end of the Paper Tray Unit to the scanner.
- Page 37 T Series Service Manual 7. Refit the 3 x T15 screws at the left hand end. 8. Refit the 3 x T15 screws at the right hand end. 9. When tightening the front screws at either end of the Paper Tray Unit, make sure...
- Page 38 T Series Service Manual 11. Refit the Left End Cover as described on 17. 12. Refit the Right End Cover as described on page 20. Page 38 of 105...
-
Page 39: Removing And Replacing Components
T Series Service Manual Removing and Replacing Components 13.1 Main Board 13.1.1 Safety Precautions Ensure that the power and USB cables are completely disconnected from the scanner unit. Ensure the scanner is positioned on a stable maintenance platform. - Page 40 T Series Service Manual 3. Gently pull the ribbon cable from the connector. 4. Disconnect the Microswitch cable. 5. Disconnect the Mains Cable, Motor Control Cable and the 4 x LED Control Cables. 6. Disconnect the Interface Board Cable. Page 40 of 105...
- Page 41 T Series Service Manual 7. Remove the 6 x T10 screws holding the Main Board to the support bracket on the Lid Unit 8. Remove the Main Board using anti-static precautions. 9. To refit the Main Board, position onto the 6 spacers,...
- Page 42 T Series Service Manual 11. Reconnect all the cables in to their correct places. 12. Make sure the cables are in their correct places. 13. Re-insert the CIS Ribbon cables into J1 – J3, making sure the locking plate is up before inserting them.
- Page 43 T Series Service Manual 15. Replace the Top Lid Unit and Cover as described in chapter “12.3 Top Lid Unit and Cover” page 25. 16. With the Power and USB cables still connected to the Scanner open the Utilities Program on a PC.
-
Page 44: Interface Board
T Series Service Manual 13.2 Interface Board 13.2.1 Safety Precautions Ensure that the power and USB cables are completely disconnected from the scanner unit. Ensure the scanner is positioned on a stable maintenance platform. 13.2.2 Tools T10 Torx Screwdriver 13.2.3 Important Information... - Page 45 T Series Service Manual 4. Remove the 4 x T10 screws holding the Interface Board to the cover. 5. Remove the Interface Board, using anti-static precautions. 6. To refit, use the 4 x T10 screws that hold the Interface Board to the Interface Board Bracket Assembly.
- Page 46 T Series Service Manual 8. Reconnect the LED cable. 9. Refit the Right End Cover as described on page 20. Page 46 of 105...
-
Page 47: Single Sensor Glass Assembly
T Series Service Manual 13.3 Single Sensor Glass Assembly 13.3.1 Safety Precautions Ensure that the power and USB cables are completely disconnected from the scanner unit. Ensure the scanner is positioned on a stable maintenance platform. 13.3.2 Tools ... - Page 48 T Series Service Manual 4. Remove the Single Sensor Glass Assembly 5. Replace the foam gasket should it become removed with the glass 6. Before refitting the glass assembly, use a soft lint-free cloth to clean the inside of the glass.
- Page 49 T Series Service Manual 8. Press firmly all along the Single Sensor Glass Assembly until all the latches are locked in place. 9. Clean the surface to remove any fingerprints or dirt. 10. Close the Lid Unit. 11. Reconnect the Power and USB cables to the Scanner and power up the scanner and Utilities Program.
-
Page 50: Singlesensor Lid Unit Assembly
T Series Service Manual 13.4 SingleSensor Lid Unit Assembly 13.4.1 Safety Precautions Ensure that the power and USB cables are completely disconnected from the scanner unit. Ensure the scanner is positioned on a stable maintenance platform. 13.4.2 Important Information ... - Page 51 T Series Service Manual 4. Remove the Main Board Bracket. 5. Remove all the cables going through the pivot tube. 6. Refit the cables, make sure the cables going in the cable clip are not damaged when closing the clip.
- Page 52 T Series Service Manual 8. Refit the Main Board as described on page 39. 9. Refit the Top Lid Unit and Cover as described on page 10. With the Power and USB cables still connected to the Scanner open the Utilities Program on a PC.
-
Page 53: Main Drive Rollers
T Series Service Manual 13.5 Main Drive Rollers 13.5.1 Safety Precautions Ensure that the power and USB cables are completely disconnected from the scanner unit. Ensure the scanner is positioned on a stable maintenance platform. 13.5.2 Important Information ... -
Page 54: Paper Hold Up Roller
T Series Service Manual 13.6 Paper Hold Up Roller 13.6.1 Safety Precautions Ensure that the power and USB cables are completely disconnected from the scanner unit. Ensure the scanner is positioned on a stable maintenance platform. 13.6.2 Tools ... - Page 55 T Series Service Manual 4. Lean the scanner back to get your hand underneath the scanner…. 5. …. and push the Paper Hold Up Roller up 6. Gently lift the Paper Hold Up Roller out of the scanner. 7. When replacing, make sure the Paper Hold Up Roller is the correct way around.
- Page 56 T Series Service Manual 8. Gently lower the Paper Hold Up Roller into place, making sure not to damage its sleeving. 9. Make sure the flat parts of the Paper Hold Up Roller and the shaft line up 10. Refit the T10 Screws at both ends to hold the Paper Hold Up Roller to the shafts.
-
Page 57: Timing Belt
T Series Service Manual 13.7 Timing Belt 13.7.1 Safety Precautions Ensure that the power and USB cables are completely disconnected from the scanner unit. Ensure the scanner is positioned on a stable maintenance platform. 13.7.2 Tools T20 Torx Screwdriver 13.7.3 Important Information... - Page 58 T Series Service Manual 3. Apply pressure to move the Motor Assembly across, freeing the Timing Belt. Retighten the 2 x T20 screws to hold the motor in place. 4. Pull the Timing Belt off from the Motor Cog. 5. To fully remove the Timing Belt, release the Drive Cogs Tension Spring.
- Page 59 T Series Service Manual 7. To refit the Timing Belt loop the belt and feed up around the Drive Cogs, tension bar and Motor Cog 8. To tension the Timing belt, loose both the T20 screws on the Motor Assembly, allow...
-
Page 60: Paper Sensors And Bracket
T Series Service Manual 13.8 Paper Sensors and Bracket 13.8.1 Safety Precautions Ensure that the power and USB cables are completely disconnected from the scanner unit. Ensure the scanner is positioned on a stable maintenance platform. 13.8.2 Tools ... - Page 61 T Series Service Manual 4. Gently pull the Paper Sensor until it is free from the bracket. 5. Gently press the inner location tabs to free the secondary bracket. 6. Gently pull the appropriate sensor out of the bracket. NOTE: If both sensors are being...
- Page 62 T Series Service Manual 8. Re-insert the cable into the paper sensor. Pressing fully home, and the correct orientation. 9. Press fit the sensor back into its correct location. 10. Press the 2 halves of the Paper Sensor Bracket together.
- Page 63 T Series Service Manual 12. When looking at the front of the Lid Unit, the Paper Sensors must be towards the right edge of the Bracket. 13. Make sure the Paper Sensor Bracket is press in fully and level (or slightly below) the...
- Page 64 T Series Service Manual 16. If the paper senor cables need replacing, gently pull the appropriate cable through the Lid Unit hinge, and remove the paper sensor as shown above. 17. Refit the Top Lid Unit and Cover as described on page...
-
Page 65: Pinch Roller Assembly
T Series Service Manual 13.9 Pinch Roller Assembly 13.9.1 Safety Precautions Ensure that the power and USB cables are completely disconnected from the scanner unit. Ensure the scanner is positioned on a stable maintenance platform. 13.9.2 Tools ... - Page 66 T Series Service Manual 5. Press the Pinch Roller Unit until it clicks in place. 6. Repeat for as many Pinch Roller Units that need replacing. 7. Refit the Top Lid Unit and Cover as on page 25. Page 66 of 105...
-
Page 67: Power Switch
T Series Service Manual 13.10 Power Switch 13.10.1 Safety Precautions Ensure that the power and USB cables are completely disconnected from the scanner unit. Ensure the scanner is positioned on a stable maintenance platform. 13.10.2 Tools Small Flat Screwdriver 13.10.3 Important Information... - Page 68 T Series Service Manual 4. Pull the Power Switch completely out from the Rear Panel. 5. Refit the Power Switch by pushing through the hole in the Rear Panel until the latches lock in place. 6. Make sure the ‘0’ position is nearest the Power Socket, as shown.
-
Page 69: Power Socket
T Series Service Manual 13.11 Power Socket 13.11.1 Safety Precautions Ensure that the power and USB cables are completely disconnected from the scanner unit. Ensure the scanner is positioned on a stable maintenance platform. 13.11.2 Tools Small Pozi-drive Screwdriver ... - Page 70 T Series Service Manual 4. Remove the T10 screw holding the earth tag. 5. Remove 2 x pozi-drive screws holding the Power Socket to the Main Board Cover. 6. Remove the Power Socket from the Rear Panel. 7. Refit the Power Socket, using the 2 x pozi-drive screws.
- Page 71 T Series Service Manual 8. Make sure the Power Socket has the keyway towards the top, as shown. 9. Reconnect the 2 x cables to the Power Switch. 10. Press together the plug and connector to the Mains Connector. 11. Refit the earth cable under...
-
Page 72: Microswitch
T Series Service Manual 13.12 Microswitch 13.12.1 Safety Precautions Ensure that the power and USB cables are completely disconnected from the scanner unit. Ensure the scanner is positioned on a stable maintenance platform. 13.12.2 Tools T10 Torx Screwdriver ... - Page 73 T Series Service Manual 3. Release the tape holding the Microswitch cable to the end plate. Do not remove completely. 4. Remove the Paper Hold Up Roller as described on page 5. Use small flat screwdriver to remove the C Clip from the front drive roller pulley.
- Page 74 T Series Service Manual 7. Lean the scanner back onto it Lid Unit to gain access to the underside of the scanner. 8. Remove the T10 screw from the microswitch bracket. 9. Push the Microswitch Bracket through the scanner end plate.
- Page 75 T Series Service Manual 11. Remove the Microswitch Bracket and cable from the scanner. 12. If necessary, remove the Microswitch from the Bracket by removing the T10 screw. 13. Remove and replace the Microswitch and cable, making sure the bump in the...
- Page 76 T Series Service Manual 15. Use pliers to pull the bracket through the end plate. 16. Position the Microswitch bracket into position and replace the T10 screw. 17. Push the Microswitch cable through the end plate. 18. Return the scanner back to its normal position.
- Page 77 T Series Service Manual 20. Re-connect the Microswitch Cable together. 21. Refit the Driver Roller Pulley. 22. Refit the C Clip to hold the Pulley in place. 23. Refit the Paper Hold Up Roller as described on page Page 77 of 105...
- Page 78 T Series Service Manual 24. Refit the Timing Belt as described on page 57. Page 78 of 105...
-
Page 79: Motor
T Series Service Manual 13.13 Motor 13.13.1 Safety Precautions Ensure that the power and USB cables are completely disconnected from the scanner unit. Ensure the scanner is positioned on a stable maintenance platform. 13.13.2 Tools T15 Torx Screwdriver ... - Page 80 T Series Service Manual 3. Remove the 2 x T20 screws holding the Motor to the Bracket. 4. Release the tension spring from around the pillar on the end plate. 5. Remove the Motor Assembly, taking care not to catch or damage the cable.
- Page 81 T Series Service Manual 7. Use a small flat screwdriver to refit the tension spring back over the pillar on the end plate. 8. Refit the 2 x T20 screws, make sure the motor is being pushed down when tightening the screws ready to refit the timing belt.
-
Page 82: Drive Cog Unit
T Series Service Manual 13.14 Drive Cog Unit 13.14.1 Safety Precautions Ensure that the power and USB cables are completely disconnected from the scanner unit. Ensure the scanner is positioned on a stable maintenance platform. 13.14.2 Tools ... - Page 83 T Series Service Manual 3. Remove the Tension Spring from the pillar. NOTE: This procedure is exactly the same for both ends of the scanner. 4. Remove the Circlip from the front Cog 5. Remove the front Cog 6. Remove the circlip and rear...
- Page 84 T Series Service Manual 7. Gently pull the Cog Bracket off from both pillars at the same time. 8. To refit, make sure the 4 x bearings are in place, and slide onto both pillars at the same time. Make sure the spring hole is towards the front of the scanner.
- Page 85 T Series Service Manual 11. Refit the Left End Cover as described on 17 if necessary, depending on the Drive Cog Unit replaced. 12. Or Refit the Right End Cover as described on page 20 if necessary, depending on the Drive Cog Unit replaced.
-
Page 86: Lid Unit Spring Hinge
T Series Service Manual 13.15 Lid Unit Spring Hinge 13.15.1 Safety Precautions Ensure that the power and USB cables are completely disconnected from the scanner unit. Ensure the scanner is positioned on a stable maintenance platform. 13.15.2 Tools ... - Page 87 T Series Service Manual 4. While taking the weight of the Lid Unit, remove the Spring Hinge. 5. To refit the spring hinge, press back into the Lid Unit. It may be necessary to twist the Spring Hinge around until the flats of the shaft fit in properly.
-
Page 88: Utilities Program
T Series Service Manual Utilities Program 14.1 Installation The utilities shown here is for the SC Series, but operates the same for the T Series 1. If it has not been installed during the initial setup, locate the file setup.exe on the accompanying CD, or the Website, and run it. -
Page 89: Calibration
T Series Service Manual 14.2 Calibration 1. Open the Lid Unit and clean the Single Sensor Glass Assembly. Close the Lid Assembly. If fitted, also remove the Return Guide(s). 2. Insert the Calibration Target so that the black part section is inserted first, face 3. - Page 90 T Series Service Manual 4. Click ‘Calibrate’. 5. Click ‘OK’ to except the message. 6. Allow the process to complete. During calibration, the target will move through the scanner in stages several times. Reconnect the Return Guide(s). Page 90 of 105...
-
Page 91: Auto-Stitch
T Series Service Manual 14.3 Auto-stitch 7. Open the Lid Unit and clean the Single Sensor Glass Assembly. Close the Lid Assembly. If fitted, also remove the Return Guide(s). 8. Insert the Calibration Target so that the black part section is inserted first, face 9. - Page 92 T Series Service Manual 10. Click ‘Auto-Stitch’. 11. Click ‘OK’ to except the message. 12. Allow the process to complete. During calibration, the target will move through the scanner in stages several times. Reconnect the Return Guide(s). Page 92 of 105...
-
Page 93: Power Saving
2. Enter the amount of time, after last use, the scanner will power off. The Max Value is 15. 14.5 Auto width 1. Double click the T Series Utilities icon. 2. Select either mm, inches or off to display when autosizing. Page 93 of 105... -
Page 94: Second Level Utilities
T Series Service Manual 14.6 Second Level Utilities 1. Double click the T Series Utilities icon. 2. To enter the second level utilities Click ‘Utilities’ at the bottom of the front page. 14.7 Firmware Installation 1. Follow instructions to the Second Level Utilities in chapter “14.6 Second... - Page 95 T Series Service Manual 4. Agree to the warning message. NOTE: It is important to allow the firmware to complete. Although the Main Board now carries a backup firmware, there is still a possibility of irreversible corrupting if the download is disturbed.
-
Page 96: Distributor's Utilities
T Series Service Manual Distributor’s Utilities 15.1 Engineering Utilities 1. Double click on the T Series Utilities icon on the PC attached to the scanner. 2. Right mouse click in the front page to access the engineering utilities. Password: p107... -
Page 97: Manual Stitch
T Series Service Manual 15.2 Manual Stitch 1. Enter the distributor’s utilities as described in chapter “15.1 Engineering Utilities” page 96. 2. Make fine adjustments to the stitch values of each section of SingleSensor by over writing the appropriate value and clicking ‘Set Stitch’... -
Page 98: Motor Speed
T Series Service Manual 15.3 Motor Speed 1. Enter the distributor’s utilities as described in chapter “15.1 Engineering Utilities” page 96. 2. When changing a Main Board, this values might need to be recorded prior to removing the board if the... -
Page 99: Load Delay
T Series Service Manual 15.4 Load Delay 1. Enter the distributor’s utilities as described in chapter “15.1 Engineering Utilities” page 96. 2. Change the length of delay before the scanner takes the media in by over writing the value and clicking ‘Set Load Delay’... -
Page 100: Paper Staging
T Series Service Manual 15.5 Paper Staging 1. Enter the distributor’s utilities as described in chapter “15.1 Engineering Utilities” page 96. 2. Make a adjustments for the start and end of media, to reduce or increase the ‘border’ of the scanned... -
Page 101: Help Desk
T Series Service Manual Help Desk 16.1 Extending Warranty 1. Open Helpdesk www.colortrac-helpdesk.com 2. Enter your account details. 3. Create a new ticket 4. Go to the Asset Info tab, enter the serial number of the scanner in the appropriate box, and search. - Page 102 T Series Service Manual 5. Go to the Ticket Details tab, and in the request type, choose ‘Notification of Installation Date’ 6. Enter the serial number of the scanner 7. Enter the installation date, making sure that it is within...
-
Page 103: Glossary
T Series Service Manual Glossary Term Description Assembly A collection of parts put together to make a specific unit. Assy Short for Assembly, see Assembly. Automatic process to make an electronic adjustment by way of delays Auto-stitch and the use of spare pixels for each CIS that make up the SingleSensor Unit, so it sees along the same scan line correctly. - Page 104 T Series Service Manual Also known as the Upper Housing unit, this contains all the electronics Lid Assembly that operate the scanner and is located at the top of the scanner. Another term for ‘Calibration’. Setting the black and white points of the...
-
Page 105: Service Manual Release Notes
T Series Service Manual Service Manual Release Notes Issue Number Date of Release Changes to Service Manual Issue 1 15/11/2017 First issue. Issue 2 29/11/2017 Removed out-of-date warranty statement. Changed process order to remove right hand Issue 3 15/08/2018 end cover.
Need help?
Do you have a question about the T Series and is the answer not in the manual?
Questions and answers