Table of Contents
Advertisement
C
o
l
o
r
t
r
a
c
i
s
t
h
e
T
r
a
d
i
n
g
C
o
l
o
r
t
r
a
c
i
s
t
h
e
T
r
a
d
i
n
g
C
C
o
o
l
l
o
o
r
r
t
t
r
r
a
a
c
c
L
L
t
t
d
d
R
R
e
e
g
g
i
N
a
m
e
o
f
C
o
l
o
r
t
r
a
c
L
t
d
a
N
a
m
e
o
f
C
o
l
o
r
t
r
a
c
L
t
d
a
i
s
s
t
t
e
e
r
r
e
e
d
d
n
n
o
o
.
.
2
2
4
4
4
4
3
3
0
0
8
8
7
7
i
i
n
n
E
E
n
n
g
g
l
l
a
a
n
n
n
d
C
o
l
o
r
t
r
a
c
I
n
c
,
i
n
c
o
r
p
o
n
d
C
o
l
o
r
t
r
a
c
I
n
c
,
i
n
c
o
r
p
o
d
d
.
.
R
R
e
e
g
g
i
i
s
s
t
t
e
e
r
r
e
e
d
d
O
O
f
f
f
f
i
i
c
c
e
e
:
:
1
1
1
1
5
5
c
c
M
M
i
i
l
l
t
t
r
a
t
i
n
g
T
a
n
g
e
n
t
a
n
d
A
N
A
r
a
t
i
n
g
T
a
n
g
e
n
t
a
n
d
A
N
A
o
o
n
n
R
R
o
o
a
a
d
d
,
,
C
C
a
a
m
m
b
b
r
r
i
i
d
d
g
g
e
e
,
,
U
U
K
K
t
e
c
h
.
t
e
c
h
.
Advertisement
Table of Contents

Related Manuals for Colortrac SmartLF Gx25m


Summary of Contents for Colortrac SmartLF Gx25m
- Page 2 Fax: +44 (0)1480 464620 www.colortrac.com Colortrac Ltd makes no warranty with respect to this document and disclaims any implied warranties of merchantability or fitness for a particular purpose. Information in this document is subject to change without notice. Colortrac Ltd assumes no responsibility for errors that may appear in this document.
-
Page 3: Table Of Contents
SmartLF Gx Service Manual Contents Chapter Description Page Notes: Introduction Models Covered By This Manual Tools Required How To Contact Technical Support Safety Safety Warnings EMC Testing Removing Scanner Panels Removing Left Hand End Cover Removing Right Hand End Cover Opening Rear Access Panel Remove Rear Panel Removing Paper Tray Extrusion and Support Extrusion... -
Page 4: Introduction
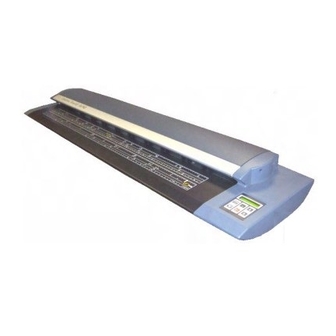
This manual contains information to assist in the repair and maintenance of the SmartLF Gx scanners from Colortrac. It acts as a reference to service engineers who are approved by Colortrac. There are 12 models consisting of two types: Standard lid (Gx) Raising lid (GxT): SmartLF Gx25m &... -
Page 5: Tools Required
CD’s are ONLY available for approved engineers and will NOT be issued to end-users How to contact Technical Support Although Colortrac technical support group will do their best to help any service engineer in difficulties in the field, we accept no responsibility if a non-approved distributor/engineer damages any part of the scanner during a field visit. -
Page 6: Safety
4.2 EMC Testing All Colortrac scanners, which includes the Gx model, have under gone and conform to EMC and FCC .The EMC test is carried out to assure that no stray signals that could cause interference are emitted from the scanner or that no external signal will interfere with the scanner. -
Page 7: Removing Scanner Panels
SmartLF Gx Service Manual Removing Scanner Panels Notes: Removing Left Hand End Cover Remove the 5 x M5 pan head screws that hold the cover to the scanner. Remove the end cover and keep it in a safe place, along with the 5 x M5 screw until re-assembling. -
Page 8: Removing Right Hand End Cover
SmartLF Gx Service Manual Removing Right Hand End Cover Notes: Remove the 5 x M5 pan head screws holding the end cover to the scanner Remove the end cover and keep it in a safe place, along with the 5 x M5 screw until re-assembling. Page 8 of 107... -
Page 9: Opening Rear Access Panel
SmartLF Gx Service Manual Opening Rear Access Panel. Notes: Always disconnect the USB and power cable before carrying out any work on the scanner. Remove the 5 x M3 pan head screws that are holding the panel in place. It is recommended that the central screw is the last to be removed, and even then it is not full removed until the access panel is supported. -
Page 10: Remove Rear Panel
SmartLF Gx Service Manual Removing Rear Panels. Notes: Open rear access panel as described in chapter "5.3 Opening Rear Access Panel" Page 9. Remove the 9 x M3 black anodised screws from the back of the scanner. Remove the black rear panel and store in a safe place for re- assembly. - Page 11 SmartLF Gx Service Manual Notes: Remove the 10 x M3 screws from inner rear panel Remove the inner rear panel and store in a safe place for re- assembly. Page 11 of 107...
-
Page 12: Removing Paper Tray Extrusion And Support Extrusion
SmartLF Gx Service Manual Removing Paper Tray Extrusion and Support Extrusion Notes: Remove the Left Hand End cover as described in chapter 5.1 "Removing Left Hand End Cover" on page 7 Remove the Right Hand End Cover as described in chapter 5.2 "Removing Right Hand End Cover"... - Page 13 SmartLF Gx Service Manual Notes: Remove paper tray extrusion from scanner and store in a safe place to prevent damage until re-assembly. To remove the paper tray support extrusion, first remove the 2 x M5 pan head screws from the Right Hand end plate. Page 13 of 107...
- Page 14 SmartLF Gx Service Manual Notes: Remove the 2 x M5 pan head screws from the Left Hand end plate. Remove the paper tray support extrusion and store in a safe place to prevent damage until re-assembly. Page 14 of 107...
-
Page 15: Removing Paper Tray
SmartLF Gx Service Manual Removing Paper Tray Notes: Remove paper tray extrusion as described in chapter 5.5 "Removing Paper Tray Extrusion and Support Extrusion" page 12. The support extrusion may not need to be removed unless it is being replaced. Remove extrusion cover as described in chapter 5.8 "removing Extrusion Covers"... - Page 16 SmartLF Gx Service Manual Notes: Remove the 5 x M5 pan head screw from along the top of the extrusion that holds the paper tray to the scanner. Completely remove the paper tray and store in a safe place to prevent damage until re-fitting.
-
Page 17: Removing Scan Glass
SmartLF Gx Service Manual Removing Scan Glass. Notes: Release the paper guide assembly by lifting the two catches at either end. Raise the PGA (paper guide assembly) open and secure with the safe lever on the Left Hand side. Page 17 of 107... - Page 18 SmartLF Gx Service Manual Notes: Using the special tool provided with every Gx scanner….. … insert the tool at one end of the scan glass into the slots near the glass. Page 18 of 107...
- Page 19 SmartLF Gx Service Manual Notes: Lift the glass up and out and store in a safe place to prevent damage until re-fitting. NOTE: If replacing the scan glass, slot the cleaned new piece in place at this point making sure the edge with the largest chamfer goes towards the front of the scanner.
-
Page 20: Removing Extrusion Covers
SmartLF Gx Service Manual Removing Extrusion covers. Notes: Remove the scan glass as described in chapter 5.7 "Removing Scan Glass" page 17. Remove 4 x M4 black pan head screw holding the cover over both ends of the lamps, and remove covers at both ends, storing them safely to prevent damage until re-fitting. - Page 21 SmartLF Gx Service Manual Notes: Using you fingers as a pivot point, apply pressure to the screw driver to prise the end of the cover off the extrusion. Using your finger tips, work your way along the extrusion cover to pull the cover away from the extrusion. Page 21 of 107...
- Page 22 SmartLF Gx Service Manual Notes: Lift out of the scanner and store in a safe place to prevent damage until re-fitting. Repeat the same procedure for the rear extrusion cover if necessary. To re-fit the cover, position the cover in the front lip and press down until it clips in place, moving all the way along to make sure it is evenly fitted.
-
Page 23: Replacing Scanner Components
SmartLF Gx Service Manual Replacing Scanner Components Notes: Replacing Lamps. Remove the glass as described in chapter 5.6 "Removing Scan Glass" page 15. Remove 4 x M4 black pan head screw holding the cover over both ends of the lamps, and remove covers at both ends, storing them safely to prevent damage until re-fitting. - Page 24 SmartLF Gx Service Manual Notes: When the pins are vertical, use the 90% end of the Allen key to hook out the lamp. When fitting lamp back in, or fitting new lamp, make sure the lamp cap has the slot vertical at both ends of the scanner, then insert one end with the pins in the same direction.
- Page 25 SmartLF Gx Service Manual Notes: Lower the other end into the lamp cap and press home. Do not use unnecessary force that could brake the pins or lamp. Use the Allen key again to twist and lock the lamp into position.
-
Page 26: Replacing Main Board
SmartLF Gx Service Manual Replacing Main Gx Board. Notes: Open the rear access panel as described in chapter 5.3 "Opening Rear Access Panel" page 9 Disconnect the power cable and motor control cable from the Main Combined Gx Board. Disconnect the control panel cable from Main Combined Gx Board. - Page 27 SmartLF Gx Service Manual Notes: Remove the CCD ribbon cables by first lifting the locking plate on each connector, and pulling cable out, being careful not to damage cable or break any of the wires by doing this. Remove the 2 x M4 pan head screws that are either side of the USB2 connector, followed by the 10 x M3 screw around the out side of the board.
- Page 28 SmartLF Gx Service Manual Notes: Remove board for access panel and store in a static free, safe environment if the board is being re-fitted. Reposition the replacement or original board back in the same location. NOTE: There is metallic tape fitted, which stops stray EMC emissions from the Gx scanners, make sure this tape is carefully removed from the old board and refitted to the board being fitting into the scanner.
- Page 29 SmartLF Gx Service Manual Notes: Refit the CCD Camera cables in to the Main Combined Gx Board, making sure the locking plate is up before fitting the cable, blue plate towards the rear and wires showing at front, into the connectors. With the cable in correctly, push the locking plate down both edges to secure the ribbon cable.
-
Page 30: Replacing Psu
SmartLF Gx Service Manual Notes: 10. Refit the power cable and motor control cable to the Main Combined Gx Board. 11. Close access panel as in chapter 5.3 "Opening Access Panel" page 9 Replacing Power Supply Unit. Remove the 7 x M3 pan head screws from the PSU (power supply unit) cover and store in a safe place. - Page 31 SmartLF Gx Service Manual Notes: Carefully lift the cover away from the access panel, but be aware that the fans are plugged in so do not try to take the cover away completely at this point. Disconnect the 2 x plugs from the fans, and completely remove the cover from the PSU.
- Page 32 SmartLF Gx Service Manual Notes: Un-plug the power out connector from the PSU. Un-plug the power in connector from the PSU. Page 32 of 107...
- Page 33 SmartLF Gx Service Manual Notes: Remove the 4 x M4 screws holding the PSU to the access panel. Remove PSU from access panel and replace or store in a safe place until refitting. Page 33 of 107...
- Page 34 SmartLF Gx Service Manual Notes: When fitting PSU to access panel, insert the first M4 pan head screw in the top Right Hand corner making sure the earth cables are screwed between the PSU and the threaded post. Insert the remaining M4 screws and tighten them all up. Page 34 of 107...
- Page 35 SmartLF Gx Service Manual Notes: 10. Refit the 2 x cables for the fans to the PSU as well as the power in and out connectors. 11. Refit the cover, making sure that there are no cables damaged or caught by the cover. Insert all the screw to hold the cover in place.
-
Page 36: Replacing Lamp Ballast Board
SmartLF Gx Service Manual Replacing Lamp Ballast Board. Notes: Remove front support extrusion as is chapter 5.5 "Remove Paper tray Extrusion and Support Extrusion" page 12. Remove the Paper Tray as in chapter 5.6 "Removing Paper Tray" page 15. The ballast for the Gx(T)42 scanner is different than the Gx(T)25, so be careful to fit the correct one in the correct scanner. - Page 37 SmartLF Gx Service Manual Notes: Remove the 2 x M4 pan head screws holding the ballast to the ballast bracket. Remove the ballast board from the scanner. Page 37 of 107...
- Page 38 SmartLF Gx Service Manual Notes: Position the replacement ballast board in place with the input in at the right hand side and screw down using the 2 x M5 pan head screws. Replace wires are had been removed by pressing down on the cable clamp buttons and inserting the bare bit of the wire in place and release the button.
- Page 39 SmartLF Gx Service Manual Gx(T)42 ballast wiring: Notes: NOTE: The 2 red, yellow or blue from the output do not have a preference as to which way around they are fitted, as with the sensor cable. New style ballast board fitted to newer scanners for Gx(T)42 scanner NOTE: 2x28/54 DIM markings.
-
Page 40: Replacing Main Timing Belt
SmartLF Gx Service Manual Replacing Main Timing Belt. Notes: Remove Left Hand End Cover as described in chapter 5.1 "Removing Left Hand End Cover" page 7. Loosen the M4 nut on the end of the tension bar, which will loosen the belt. Slide the belt off the tension bar. Remove the belt from the roller drive pulleys and motor pulley. - Page 41 SmartLF Gx Service Manual Notes: The GxT scanners need to have the belt fed around the raising mechanism bracket. Remove 2 x M4 screws holding the support bracket in place. Move the support bracket down and off the bearing so that the belt can be fed around the bracket and removed.
- Page 42 SmartLF Gx Service Manual Notes: Feed the support bracket up over the bearing fitted on the raising mechanism. Reinsert the 2 x M4 screws to hold the raising mechanism in place. Page 42 of 107...
- Page 43 SmartLF Gx Service Manual Notes: Feed the belt around both the roller drive pulleys, and the motor pulley, before then feeding around the tensioning bar. While applying light pressure underneath the tensioning bar, tighten the M4 nut up to lock the tension bar in place. 10.
-
Page 44: Removing Drive Rollers
SmartLF Gx Service Manual Removing Drive Rollers. Notes: If the scanner being worked on is a raising lid, the lid will need to be lifted slightly to work on it. Power the scanner and use the control panel to lift the lid, then disconnect the power again. Remove Right Hand End Cover as described in chapter 5.2 "Removing Right Hand End Cover"... - Page 45 SmartLF Gx Service Manual Notes: Remove the 2 x M3 screws and washers holding the roller bearing in place on the Right Hand End plate. Push the bear off the roller shaft from the inside of the scanner towards the out. Completely remove this bearing. Page 45 of 107...
- Page 46 SmartLF Gx Service Manual Notes: Remove the 2 x M3 screws and washers holding roller bearing in place on the Left Hand End plate. Push the bear off the roller shaft from the inside towards the outside. Pull the roller shaft back so the end is as clear of the end plate as possible, and lift the roller out.
- Page 47 SmartLF Gx Service Manual Notes: 10. In some cases the tolerances on everything makes it very hard to just pull the roller back to lift it out, because the rubber rollers hit on the sensors. To get around this, the sensor brackets may need to be loosened to allow the roller shaft to have that extra amount of movement.
-
Page 48: Replacing Paper Sensors
SmartLF Gx Service Manual Replacing Paper Sensor. Notes: Remove the front rollers as described in chapter 6.5 "Removing Drive Rollers" page 40 If not already done so, loosen the 2 x M3 screws holding the bracket to the scanner (but do not take out completely), then remove the M4 screw holding sensor to bracket. -
Page 49: Replacing Camera Unit
SmartLF Gx Service Manual Replacing Camera Unit. Notes: The camera unit can be replaced as a whole unit. The camera board will be fitted to the mirror unit and magnified, focused and aligned, so all the needs to happen is the unit is bolted on the underside of the chassis and an auto stitch procedure is carried out. - Page 50 SmartLF Gx Service Manual Notes: The camera unit is held underneath the scanner chassis inside the access panel. When removing the unit, hold the unit while removing any screws to prevent it from falling and being damaged. Remove the 4 x M3 nut from the top side of the extrusion that has been made accessible by removing the extrusion covers Page 50 of 107...
- Page 51 SmartLF Gx Service Manual Notes: Lift the camera unit carefully out of the scanner, and put in a safe place ready to replace or return to Colortrac. The unit being placed to the scanner will be provided from Colortrac already magnified, focused and aligned. To achieve magnification, the camera unit may have to have a different distance from the scan line of the scanner.
- Page 52 SmartLF Gx Service Manual Notes: Position the replacement camera unit back into the scanner and hold in place, making sure the adjustment washers are fitted before fitting in place. 10. Replace the washers and M3 nuts to hold the camera unit in place, do not tighten at this moment.
- Page 53 SmartLF Gx Service Manual Notes: Edge of camera unit scan gap Extrusions When fitting the camera unit, look between the gap in the extrusion and made sure that the edges of the camera unit scan line is central to the extrusion gap. If you can see move from one side than the other, it is incorrect.
-
Page 54: Replacing Gx Camera Board
SmartLF Gx Service Manual Notes: 12. Refit rear panel as described in chapter 5.4 "Remove Rear Panel" page 10. 13. Close the rear access panel as described in chapter 5.3 "Opening Rear Access Panel" page 9. 14. Replace the extrusion covers as in chapter 5.8 "Removing Extrusion Covers"... - Page 55 SmartLF Gx Service Manual Notes: Remove the camera ribbon cable from the camera requiring removal. Remove the 2 x M3 nuts on the camera board being removed. Page 55 of 107...
- Page 56 SmartLF Gx Service Manual Notes: Remove the 4 x M3 pan head screws holding the board against the camera housing. Either unsolder the earth lead on the camera board, or remove from the other end by removing the removing the M4 pan head screw.
- Page 57 SmartLF Gx Service Manual Notes: Remove the board, making sure to retain the gasket from between the camera board and housing. The earth lead will either need to be unsoldered from the board, or if the replacement board has one attached, will need to be removed from the other end.
-
Page 58: Aligning The Gx Camera
A software program called PlotWorks is also needed and this is available on the Gx Service CD or the support website: www.colortracsupport.co.uk username: colortrac password: service. The CCD mounted on the camera board reflects off 2 mirrors and up through the gap in the extrusion. - Page 59 SmartLF Gx Service Manual Notes: Turning the 2 screws mounted under the camera housing will move the ends of the board allowing the CCD to be aligned to the target. It is far easier to run the PlotWorks program on a laptop, so the screen can be easily see without obstructions during adjustment.
- Page 60 SmartLF Gx Service Manual Notes: Make sure the dotted line of the target is central and straight along the scan line under the glass. Make sure the whole target is central to the scan glass width, so the ends of the lines are the same distance from the paper hold down bearing at either end.
- Page 61 Gx Service CD or the support site. This installation does NOT put an icon on the desk top, so it needs to be located to run. The location for the installed PlotWorks program is: C:\Program Files\Colortrac\SmartLF Plotworks\PlotWorks.exe Page 61 of 107...
- Page 62 SmartLF Gx Service Manual Run the PlotWorks.exe (the scanner must be attached and Notes: seen by the PC to open) For initial firmware download in production, DO NOT USE Used to configure scanner type, using this feature will not before harm the scanner, set to T or non-T setting to Gx25 if necessary.
- Page 63 SmartLF Gx Service Manual Notes: The above image shows an aligned camera. The bottom line must be all the way down and level when the camera is aligned. If either end goes up at all, then the camera is not aligned. Scan Line Pictorial view of camera showing the position of the dotted line on the target compared to the blue channel of the CCD on the camera board of an aligned camera board.
- Page 64 SmartLF Gx Service Manual Notes: Scan Line A completely un-aligned camera. The CCD is nowhere near the dotted line of the target, so is not looking central to the scan line. Scan Line Scan Line Almost aligned. The camera is seeing the dotted line, but is looking diagonally across it.
- Page 65 SmartLF Gx Service Manual Notes: To align the camera, the 4 x pan head locking screws that hold the camera to the mount have to be loose. But not too loose so that the camera can move away from the mount, a quarter of a turn should be enough to allow the camera to move up and down.
- Page 66 SmartLF Gx Service Manual Notes: 10. Using the alignment screws, situated under the camera mount, move the camera up or down to locate the dotted line on the target. Camera Board Alignment Slot Locking Screw The easiest way to find the line is to move the board all the way up to the top (turn the screws anti-clockwise) on both alignment screws so the locking screws are at the bottom of the alignment slots.
- Page 67 SmartLF Gx Service Manual Manipulate the screws to position the camera board so that the Notes: image on the PC is correct. This means the screws can be turned in either direction to get it correct. There is no specific rule to this, it is down to moving the camera until the image appears as shown with the lines fully down, and may be a time consuming process.
-
Page 68: Focus Of Gx Cameras
SmartLF Gx Service Manual 6.8.3 Focus of Gx Cameras Notes: If the camera is out of focus and needs adjusting, then the alignment shown in previous chapter will need to be carried out afterwards. Attach the alignment target as described in the previous chapter, as well as disconnecting the power cable. - Page 69 SmartLF Gx Service Manual Notes: Loosen the locking grub screws underneath the camera cast. If the cast is the full length housing all 5 cameras, there are 2 grub screws locking off the lens, if it is the individual casting per camera, then there is only 1 grub screw.
- Page 70 SmartLF Gx Service Manual Notes: Out of focus In focus Above image shows an in-focus camera where the lines are even and at their peak distance apart. The insert shows an out of focus camera where the lines are too close together. If the lines are low, turn the adjustment screw until the distance between the lines starts to get bigger, if turning the screw narrows the lines, turn the screw the opposite direction until it...
-
Page 71: Replacing Control Board
SmartLF Gx Service Manual Replacing Control Board Notes: 1. Remove the Right Hand end cover as in chapter 5.2 "Removing Right Hand End Cover" page 8. 2. Disconnect all attached cables from the control board. Using a pencil, marking the connectors and keeping note of the position they were removed from. - Page 72 SmartLF Gx Service Manual Notes: 4. Remove the 4 x M3 nuts from each corner of the control board, when the board is removed, be careful not to loose the 4 spacers that are fitted between the board and the control panel. 5.
- Page 73 SmartLF Gx Service Manual Notes: 6. Replace the ID chip if not already done so. 7. Reconnect the cables to the control panel. 8. Replace the Right Hand end cover in reverse order as described in chapter 5.2 "Removing Right Hand End Cover" page 8 Page 73 of 107...
-
Page 74: Replacing The Paper Hold Down Roller
SmartLF Gx Service Manual 6.10 Replacing the Paper Hold down Roller. Notes: Open the paper guide assembly by releasing the catch at either end of the paper guide assembly Remove the top cover by first removing the 2 x M3 CSK screws at either end of the top cover, gently lift the cover off and store in a safe place until re-fitting. - Page 75 SmartLF Gx Service Manual Notes: Once the top cover is removed it becomes obvious that the cable from the height sensor is in the way of removing the cover plate. This needs moving first, cut off the tie wrap holding the cable down. This cable is only fitted to the raising lid units and is not present on standard lids.
- Page 76 SmartLF Gx Service Manual Notes: Feed the sensor cable through the hole in assembly. Remove the 14 x M3 screws holding the cover plate, and remove the plate and store safely. Page 76 of 107...
- Page 77 SmartLF Gx Service Manual Notes: Remove the 2 x M3 CSK screws on the roller spring bracket at either end of the paper hold down roller, and store the bracket, screws and spring in a safe place. On the underside of the paper guide assembly, remove the 4 x M3 CSK screws that hold the support bracket over the rollers at either end of the paper guide assembly.
- Page 78 SmartLF Gx Service Manual Notes: Lift the brackets off from either end of the roller and store safely. 10. Lift the paper hold down roller out of the unit, removing the end from the timing belt Page 78 of 107...
- Page 79 SmartLF Gx Service Manual Notes: 11. Remove the timing pulley from the paper hold down roller by loosening the grub screw in the pulley, and re-fit onto the replacement roller. 12. Fit the new roller back into the timing belt and replace everything in the reverse order they were taken off.
-
Page 80: Setting Up The Paper Hold Down Roller
SmartLF Gx Service Manual 6.11 Setting up the Paper Hold down Roller. Notes: Roller sitting correctly Rollers not sitting correctly, needs adjusting. When setting up the paper hold down roller against the glass, it must be set up so that the soft roller is just touching the glass. -
Page 81: Replacing The Right Hand Raising Lid Belt
SmartLF Gx Service Manual 6.12 Replacing Right Hand Raising Lid Belt. Notes: This only applies to the raising lid version of Gx scanners which are labelled as the GxT scanner. Remove the Right Hand End Cover as described in chapter 5.2 "Removing Right Hand End Cover"... - Page 82 SmartLF Gx Service Manual Notes: To allow the mechanism to be able to rotate enough to allow the belt to be removed, take out the locating pin for the paper guide assembly, making sure not to loose the nylon washer behind the lifting bar.
- Page 83 SmartLF Gx Service Manual Notes: Feed the old belt around the lower mounting bracket to remove it. Fit the new belt around the lower mounting bracket, making sure the teeth are on the inside of the belt. Page 83 of 107...
- Page 84 SmartLF Gx Service Manual Notes: Rotate the mechanism back down, making sure the belt is fitted correctly with the belt coming from the top of the horizontal pulley going behind the pulley on the lifting bar. NOTE: If the belt is put on incorrectly, then the mechanism will work in the operate direction to the other end of the paper guide assembly and damage the scanner, so it is very important to fit the belt correctly.
- Page 85 SmartLF Gx Service Manual Notes: 10. Re-fit the locating pin back in to the hole in through the lifting bar and paper guide assembly, it may be necessary to move the paper guide assembly slightly to line the holes up. Tighten the pin back up.
- Page 86 SmartLF Gx Service Manual Notes: 12. Refit the 2 x M4 Pan head Screws into the bottom mounting bracket and leave the screws loose at this moment. 13. Make sure the lifting bar is in a straight position (90 compared to the scanner) and that it is applying tension on the timing belt.
-
Page 87: Replacing The Left Hand Raising Lid Belt
SmartLF Gx Service Manual Notes: 6.13 Replacing Left Hand Raising Lid Belt Remove the Left Hand end cover as described in chapter 5.1 "Removing Left Hand End Cover" page 7. Remove 2 x M4 Pan Head Screws from the lower bracket. Remove the 2 x M4 Pan Head Screws from the upper bracket. - Page 88 SmartLF Gx Service Manual Notes: By lifting the front end of the paper guide assembly will allow the tension from the belt to loosen enough to free it from the pulley. Remove the timing belt from the pulleys and let the paper guide back down again.
- Page 89 SmartLF Gx Service Manual Notes: Feed the belt around the lower bracket to remove it totally from the scanner. Loop and feed the new belt around the lower bracket, making sure the teeth on the belt are facing inward. Page 89 of 107...
- Page 90 SmartLF Gx Service Manual Notes: Feed the belt back around both pulleys, the paper guide assembly needs to be lifted at the front to allow the belt to go around the front pulley. Do not rotate the pulley to fit the belt on as this will mis-align the whole paper guide assembly.
- Page 91 SmartLF Gx Service Manual Notes: 10. Refit the 2 x M4 Pan Head Screws in the lower bracket and leave screws loose at the moment. 11. Refit the 2 x M4 Pan Head Screws in the upper bracket and leave loose at the moment. Page 91 of 107...
- Page 92 SmartLF Gx Service Manual Notes: 12. Make sure the lifting bar is in a straight position (90 compared to the scanner) and that it is applying slight tension on the timing belt. Tighten the lower and upper bracket screws up finger tight so there is still a bit of movement in the lifting bar assembly.
-
Page 93: Voltages
SmartLF Gx Service Manual Voltages Notes: PSU Output +12V +12V Page 93 of 107... -
Page 94: Utilities Software
The passworded section is for distributors engineers to use, and must not be given to an end user or customer without permission from Colortrac Ltd. NOTE: Neither the 4080 utilities NOR the Cx40 utilities can be used to work on the Gx scanners, and vica versa. -
Page 95: Normalisation
'ready' mode and pass the 'scanner warmup' message on the display. To run normalisation and stitch, the scanner needs to have warmed up for at least one hour. Normalisation Open the Gx Utilities from the Start/Colortrac menu. Page 95 of 107... - Page 96 SmartLF Gx Service Manual Notes: Click the 'Normalise' Button…. … and insert the white normalisation sheet in to the scanner, matt side facing downwards. Click to except the '5 Minute' warning. Page 96 of 107...
-
Page 97: Auto / Manual Stitch
SmartLF Gx Service Manual Notes: After completion, remove the target and close the utilities software. NOTE: This calibration target is supplied with the scanner and should have a width of 105cm, if the target is longer than that please cut the length down to size. If the target is missing/damaged, any good quality large format paper can be used making sure it is cut to 105 x 50cm. - Page 98 SmartLF Gx Service Manual Notes: Open the Gx Utilities from the start menu, and enter the stitch program by either right clicking anyway within the control panel and entering the password 'pass', or clicking the utilities button in bottom left hand corner. To auto-stitch the scanner, got the 'stitch' tab and click the auto stitch button and agree to the any messages.
- Page 99 SmartLF Gx Service Manual Notes: Open ScanWorks 2.4.4.6 (or above) and set the scan perimeters to 400dpi (or 600dpi depending on PC ability), greyscale, 40” x 25” and set the ‘Media Handling’ to ‘rewind on Save/delete’. ScanWorks and Gx Utilities both need to be left open during this adjustment.
- Page 100 SmartLF Gx Service Manual Notes: Starting with CIS 1 & 2, correct the stitch at this point before working along the 5 stitch points, i.e. stitch 2 – 3 ; stitch 3 – 4 & 4 – 5. Adjust the FB ( front/back) stitch before the LR (Left/Right).
- Page 101 SmartLF Gx Service Manual Notes: Use the following as an indication as to which way to set the FB figures: Good Stitch FB out, decrease figure FB out, increase figure for CIS 2. for CIS 2. Adjust CIS 2 to correct stitch point 1 – 2, then adjust CIS 3 to adjust the stitch point 2 –...
- Page 102 SmartLF Gx Service Manual Notes: 11. At CIS stitch point 1 & 2, try changing the figure on CIS 2 higher or lower to adjust the LR stitch between the two CIS arrays. Stitch values can only be positive numbers and the lowest denomination is ‘0’.
- Page 103 SmartLF Gx Service Manual Notes: 14. When all the FB and LR stitch points look to be good, exit the engineering menu software. The scanner is now ready for use. Page 103 of 107...
-
Page 104: Motor Speed
SmartLF Gx Service Manual Motor Speed Notes: Used to set the motor speed in cases where the speed might need adjusting. The motor speed is the time it takes the media to pass through the scanner correctly to create the right image length. Enter the adjusted value. -
Page 105: Usb
SmartLF Gx Service Manual Notes: SmartLF Gx scanners will only work with USB2. To check the PC has the correct connection, this program will measure the speed and inform you if it is correct, or if you need to get USB2 compatibility. -
Page 106: Updating The Firmware & Driver
SmartLF Gx Service Manual Updating the Firmware and Driver. Notes: Open the Gx Utilities from the start menu, and enter the stitch program by right clicking anyway within the control panel and entering the password 'pass'. On the Driver installation page, click on either the 'Install New Firmware' or 'Install New Driver' button, depending as to which you want to update (both update in the same way). - Page 107 PC's and will need to have the driver updated in the PC 'Device Manager'. NOTE: The latest firmware and drivers can be found on www.colortrac.com/smartdownloads and can be saved to your desktop. The user name and password is available from support@colortrac.com...
Need help?
Do you have a question about the SmartLF Gx25m and is the answer not in the manual?
Questions and answers