Advertisement
A1
STEP 1
Choose a wall location to mount your Gateway. Make sure there is access to a 120VAC outlet and, preferably, an ethernet connection.
STEP 2
Attach mount brackets to the enclosure
with the included screws. Brackets fit on
protruding screwholes on the back of
the enclosure. Then, use drywall screws
and attach unit to the wall.
STEP 3
Install 3 cable glands using a drill and bit on the HCM-100.
-One cable gland is for 110VAC positive and negative wires.
-One cable gland is for BinCloud Gateway Channel 1(A&B) to HCM-100 RX-A&B
-One cable gland for HART communication wires going to NCR sensors
STEP 4
Attach the antenna as shown. This Gateway has been setup with multiNetwork cell connection that will
automatically connect when powered. If cell service is unavailable it is possible to connect the Gateway
ethernet plug to a network router or switch.
(Cable glands not included)
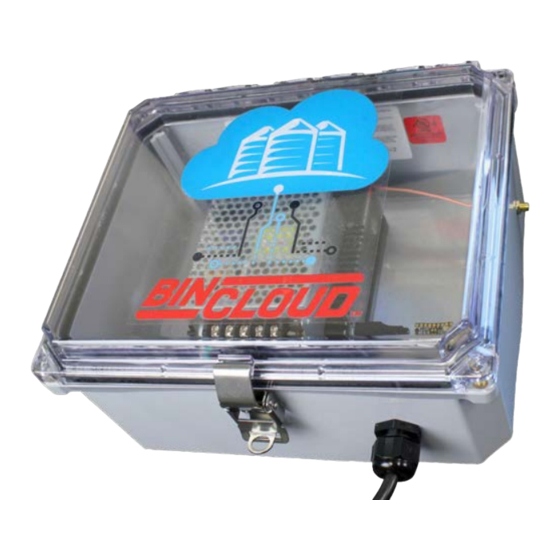
QUICK SETUP GUIDE
BCGW.XXXXC-HCM
BINCLOUD GATEWAY
Tools needed: drill and bit, phillips screwdriver, drywall/
wood screws, ethernet cable, pliers. Screws and plas-
tic plugs, A1, can be used to secure the top cover.
Advertisement
Table of Contents

Subscribe to Our Youtube Channel
Related Manuals for BINMASTER BINCLOUD BCGW HCM Series


Summary of Contents for BINMASTER BINCLOUD BCGW HCM Series
- Page 1 QUICK SETUP GUIDE BCGW.XXXXC-HCM BINCLOUD GATEWAY Tools needed: drill and bit, phillips screwdriver, drywall/ wood screws, ethernet cable, pliers. Screws and plas- tic plugs, A1, can be used to secure the top cover. STEP 1 Choose a wall location to mount your Gateway. Make sure there is access to a 120VAC outlet and, preferably, an ethernet connection. STEP 2 Attach mount brackets to the enclosure with the included screws.
- Page 2 - Wait 25 minutes and call BinMaster at 1-800-278-4241 to confirm the internet connection. - BinMaster will create a custom cloud page with your specific bins, tanks, silos, sizes, locations, etc. We’ll chat about your page during the connection verification call.
Need help?
Do you have a question about the BINCLOUD BCGW HCM Series and is the answer not in the manual?
Questions and answers