
Subscribe to Our Youtube Channel
Related Manuals for LELY Juno


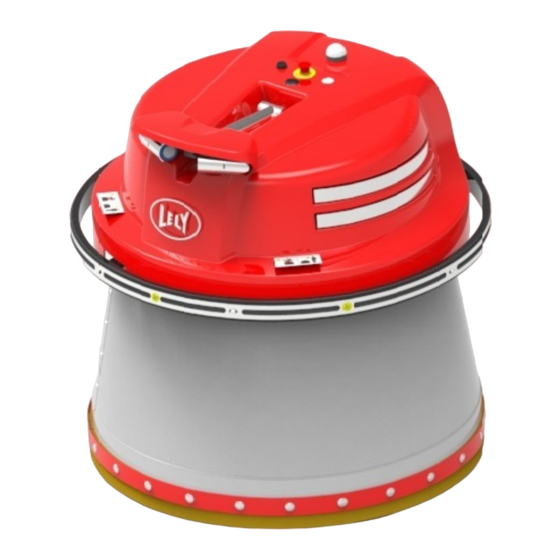
Summary of Contents for LELY Juno
- Page 1 Lely Juno Feed Pusher Operator Manual en-US - English Original 5.4303.8558.0 - Lely Industries N.V. www.lely.com...
- Page 2 in n o vato rs in ag ric u ltu re INTENTIONALLY BLANK...
- Page 3 No part of this publication may be copied or published by means of printing, photocopying, microfilm or any other process whatsoever without prior permission in writing by Lely Holding b.v. Although the contents of this publication have been compiled with the greatest possible care, Lely cannot accept liability for any damage that might arise from errors or omissions in this publication.
- Page 4 in n o vato rs in ag ric u ltu re INTENTIONALLY BLANK Trademarks, Copyright and Disclaimer...
- Page 5 in n o vato rs in ag ric u ltu re List of included Amendments Issue Date Revision Chapter(s) Remarks (yyyy/mm) – 2022/06 Initial issue. List of included Amendments...
- Page 6 in n o vato rs in ag ric u ltu re INTENTIONALLY BLANK List of included Amendments...
- Page 7 Store this manual in a safe place for future reference. All information in this manual has been compiled with care. Lely shall not be liable for errors or faults in this manual. The recommendations are meant to serve as guidelines. All instructions, pictures and specifications in this manual are based on the latest information that was available at the time of publication.
- Page 8 in n o vato rs in ag ric u ltu re Figure 1. Type and serial number plate We suggest that you complete the table below with the type and serial numbers of your machine. This makes sure that you can easily find the information. Type number Serial number Figure 2.
- Page 9 Technician Training All the technicians certified by Lely Industries have completed an approved training program, and passed written and practical examinations during and at the end of the training program. The training is given by Lely International or a specialist from the LSO and includes troubleshooting and corrective maintenance of the machine.
- Page 10 in n o vato rs in ag ric u ltu re Left, Right, Rear and Front The positions left, right, rear and front in this manual refer to either: The machine, as seen in the driving direction. • The particular component, as seen when standing in front of it. •...
-
Page 11: Table Of Contents
....................1-1 The Lely Juno Feed Pusher . - Page 12 in n o vato rs in ag ric u ltu re 4.2.1 Feed Pusher Vehicle ..............4-1 4.2.2 Covers .
- Page 13 ..................6-1 Install the Lely Control Plus App on the Smartphone .
- Page 14 8.3.2 Troubleshooting Table Juno Charging Station ......... . 8-5 Reset the Machine when it is connected to the Charging Station .
-
Page 15: Lely Juno
'Safety'. Intended Use The Juno is designed as an autonomous driving machine to push cattle feed towards the feed fence in a barn. The feed pusher has been built exclusively for pushing cattle feed lying on the ground of a barn with a level concrete floor (= proper use). - Page 16 INTENTIONALLY BLANK Lely Juno...
-
Page 17: Safety
Safety Introduction The Juno Feed Pusher is an automated machine. Therefore it is of the utmost importance to obey all safety instructions. Signal Icons Note the use of the signal words DANGER, WARNING and CAUTION with the safety messages. The signal... -
Page 18: Safety Instructions
in n o vato rs in ag ric u ltu re Indicates information that may help the reader, but not hazard related. Safety Instructions YOU are responsible for the SAFE operation and maintenance of your machine. YOU must make sure that you and anyone else who is going to operate, maintain or work in the vicinity of the machine knows all the related SAFETY information in this manual. -
Page 19: Electrical Safety
Do not stand or sit on the machine (not when it is standing still and not when it is driving). • Know the emergency medical center number for your area. • Contact your nearest Lely service provider if you have any questions. • Review safety related items with all operators frequently (annually). •... - Page 20 Make sure the slope of the floor is no more than 8.5° (15 cm per 100 cm) when the machine travels. • Make sure no slopes are present when the machine pushes feed. Contact your nearest Lely service provider if you have any questions. • The machine weighs approximately 635 kg (1400 lb). Always use the correct hoisting equipment when •...
- Page 21 in n o vato rs in ag ric u ltu re j2_2022_tech_doc.asm.0.26 Figure 4. Maximum slope when the machine travels KEY: A: 8.5˚ Safety...
-
Page 22: Safety Decals
in n o vato rs in ag ric u ltu re Safety Decals 2.4.1 Position of the Safety Decals Figure 5. Position of the safety decals KEY: 1. ‘Electric shock - area with electric pulse’ decal - 2. ‘Do not sit on the vehicle’ and ‘keep safe distance’ decal 2.4.2 Explanation of Safety Decals General safety messages appear in this safety messages section. -
Page 23: Installation Of Safety Decals
in n o vato rs in ag ric u ltu re Warning: Risk of falling or being crushed Unmanned moving vehicle. Do not sit on the machine. Keep safe distance. Warning: Restricted area Only persons who are authorized and have read and understood all applicable safety instructions are permitted to enter the area. -
Page 24: Safety Devices
Replace safety decals that are missing or that are illegible. • Safety decals can be purchased from your local Lely service provider. • Safety Devices 2.5.1... -
Page 25: Bumper
A buzzer is installed on the machine. The buzzer alerts persons and cows when the vehicle starts to move, moves or when an alarm occurs. The beep lengths and beep frequencies of the buzzer are: Operational state of the Juno Beep frequency buzzer Normal operation... -
Page 26: Barn Door Control (Optional)
When the machine drives from one barn to another, it communicates with the barn door control unit to open/close the barn door(s). Lely is not responsible for the barn door. The customer needs to arrange permission for the barn door manufacturer to connect the barn door to the Lely barn door control system via the ‘CE questionnaire barn door supplier’... -
Page 27: Led Beacon (Optional)
in n o vato rs in ag ric u ltu re Machine status Shock system status Out of operation In operation, charging + safety bumper is activated 2.5.10 LED Beacon (optional) The machine is optionally fitted with a LED beacon that makes the machine visible when it drives in the dark from one barn to another. - Page 28 in n o vato rs in ag ric u ltu re INTENTIONALLY BLANK 2-12 Safety...
-
Page 29: Specifications
in n o vato rs in ag ric u ltu re Specifications Feed Pusher 3.1.1 Dimensions and Weight Diameter: 110 cm (43.3 in). • Height: 115 cm (45.3 in). • Weight: 635 kg (1400 lb). • • Rotating part height: 630 – 670 mm (24.8 in – 26.4 in) depending on skirt setting. 3.1.2 Battery Number of batteries: 1. -
Page 30: Miscellaneous
in n o vato rs in ag ric u ltu re Ultrasound maximum distance to feed fence or wall: 2.5 m (8.2 ft). • Ultrasound minimum distance to feed fence or wall: 0.54 m (21.3 in). • Minimum distance between machine and wall (without warning light): 0.5 m (19.7 in). •... -
Page 31: Smartphone Requirements
in n o vato rs in ag ric u ltu re Input voltage range and frequency: 180 - 250 VAC 45 – 65 Hz. • Output voltage: 15.2 – 17 VDC. • Max. charge current: 20 A. • Safety features: Reverse polarity (fuse). Output short circuit. Over temperature. •... - Page 32 in n o vato rs in ag ric u ltu re INTENTIONALLY BLANK Specifications...
-
Page 33: Description And Operation
in n o vato rs in ag ric u ltu re Description and Operation Introduction This chapter describes the parts of the feed pusher. It also explains how the parts work together to push the feed towards the feed fence. Figure 7. -
Page 34: Covers
in n o vato rs in ag ric u ltu re Steel weight block. • Driving mechanism. • Power system. • Control system. • Shock system (optional). • Figure 8. Component overview KEY: 1. Skirt - 2. Charging strips - 3. Cover - 4. Ultrasonic sensors - 5. Hoisting eye point cover - 6. Emergency stop button - 7. LED beacon - 8. -
Page 35: Carriage
in n o vato rs in ag ric u ltu re Figure 9. Covers and bumper sensors KEY: 1. Cover - 2. Cover opening mechanism - 3. Skirt - 4. Bumper sensors 4.2.3 Carriage The carriage has: Frame. • Steel weight block. •... -
Page 36: Power System
in n o vato rs in ag ric u ltu re Figure 10. Driving mechanism KEY: 1. Left drive wheel - 2. Motor plate left drive motor - 3. Front swivel wheel 4.2.5 Power System Do not cover the vent ports of the battery. The power system stores and distributes the electrical power for the driving mechanism and the control system. -
Page 37: Safety System
in n o vato rs in ag ric u ltu re VCB. • Figure 11. Power system KEY: 1. VIOB - 2. VCB - 3. Charging strips - 4. Battery vent ports - 5. Battery 4.2.6 Safety System The machine has a safety system to: •... -
Page 38: Control System
• Gyroscope. • Inductive sensor (2x). • Lely Control Plus app. • All the parts work together to keep the machine on the correct route. The VCB hosts the management software and communicates with the VIOB. VIOB The VIOB is the interface between the VCB and the sensors and actuator on the machine. -
Page 39: Shock System (Optional)
Figure 12. Inductive sensors KEY: 1. Inductive sensors - 2. Metal guiding strip - 3. Protective casing Lely Control Plus app Lely control Plus is the application for mobile devices to operate the machine via a bluetooth connection. 4.2.8 Shock System (optional) Electrical hazard. - Page 40 in n o vato rs in ag ric u ltu re The maximum amount of energy the electric pulse of the bumper transfers is 15mJ (at 500R). This does not harm cows or humans. The shock system meets the standard EN IEC 60335-2-76 for electric fence energizers.
-
Page 41: Skirt Lift And Rotation System
in n o vato rs in ag ric u ltu re 4.2.9 Skirt Lift and Rotation System The skirt lift and rotation system has: Electric actuator (optional). • Skirt lift and rotation mechanism. • The skirt lift and rotation system rotates the skirt to the lifted middle position or to the left or right feed push position. -
Page 42: Charging Station
in n o vato rs in ag ric u ltu re 4.2.10 Charging Station The charging station is the start and end point for all routes in the day planning. The machine can be left permanently connected to the charging station. This keeps the battery in good condition. The VCB continuously examines the voltage of the battery. -
Page 43: User Interface
in n o vato rs in ag ric u ltu re Figure 15. Charging station KEY: 1. Charging electrodes - 2. Indicator LEDs User Interface 4.3.1 Main Menu The main menu can be accessed from the dashboard with button The machine is operated with a smartphone. The smartphone communicates with the software via bluetooth. - Page 44 in n o vato rs in ag ric u ltu re Display Description The main menu on the smartphone has the following items: • Home. • Testing. Manual control. • Routes. • Feed options. • Day planning. • Alarms. • Logout.
- Page 45 in n o vato rs in ag ric u ltu re Figure 16. Main menu items of the user interface Description and Operation 4-13...
-
Page 46: Home
in n o vato rs in ag ric u ltu re 4.3.2 Home The home screen is used for daily operation of the machine. You can operate the machine in automatic mode using a day planning and in manual mode. Button must be used to put the machine into operation. -
Page 47: Power Management
in n o vato rs in ag ric u ltu re Display Description The menu Testing has read out and test possibilities for the following machine items: Power management. • Motors. • Ultrasound sensors. • • Induction sensors. Gyroscope. • Pause button. - Page 48 in n o vato rs in ag ric u ltu re 4.3.3.1 Power Management Display Description The menu Power management gives status information about the battery and the charger. Battery State of charge (Ah): the amount of amperes the battery is •...
- Page 49 in n o vato rs in ag ric u ltu re 4.3.3.2 Motors Display Description The menu Motors gives actual status information about the left and right drive motor. Speed (mm/s): the actual drive speed of the left and right •...
- Page 50 in n o vato rs in ag ric u ltu re 4.3.3.3 Ultrasound Sensors Display Description The menu Ultrasound sensors gives actual status information about the left and right ultrasound sensor. Power OK: power check on both sides of the machine. •...
- Page 51 in n o vato rs in ag ric u ltu re 4.3.3.4 Induction Sensors Display Description The menu Induction sensors gives actual status information about the left and right induction sensor. Strip status: the status indicator turns to green when the •...
- Page 52 in n o vato rs in ag ric u ltu re 4.3.3.5 Gyroscope Description Display The menu Gyroscope gives actual status information about the gyroscope. Gyroscope temperature: the actual temperature of the • gyroscope in degrees Celsius. Target gyroscope temperature: the set target temperature of •...
- Page 53 in n o vato rs in ag ric u ltu re 4.3.3.6 Pause Button Display Description The menu Pause button gives status information about the pause button. Current mode: the actual status of the pause button: • On: pause button active (Current mode A and B On). •...
- Page 54 in n o vato rs in ag ric u ltu re 4.3.3.7 Electric Actuator Display Description The menu Electric actuator gives actual status information about the actuator. Also you can adjust the feed push position of the skirt or lift the skirt to the middle position in this menu. Total number of cycles: the total amount of times the actuator •...
- Page 55 in n o vato rs in ag ric u ltu re 4.3.3.8 Buzzer Display Description In the menu Buzzer you can switch the buzzer on or off for test purposes. Enable / disable test mode: • Buzzer currently on. • •...
- Page 56 in n o vato rs in ag ric u ltu re 4.3.3.9 Wheels Display Description The menu Wheels gives actual status information on the drive wheels: Driven distance left (km): the total amount of kilometers • driven by the left wheel. Driven distance right (km): the total amount of kilometers •...
- Page 57 in n o vato rs in ag ric u ltu re 4.3.3.10 Safety Bumper Description Display The menu Safety bumper displays the status of the safety bumper and the amount of times it was activated. Current mode: • On: safety bumper is activated. The bumper is pushed •...
- Page 58 in n o vato rs in ag ric u ltu re 4.3.3.11 Emergency Button Display Description The menu Emergency button displays the status of the emergency stop button and the amount of times it was activated. Current mode: • On: the button is currently activated. •...
- Page 59 in n o vato rs in ag ric u ltu re 4.3.3.12 Temperatures Description Display The menu Temperatures gives actual status information on the ambient temperature and the temperatures of: The gyroscope. • The VIOB. • The VCB. • Ambient temperature: the temperature in the direct •...
- Page 60 in n o vato rs in ag ric u ltu re 4.3.3.13 Statistics Display Description The menu Statistics counts values for the following machine items: Electric actuator. • Motors. • Pause button. • Ultrasound sensors. • • Induction sensors. Wheels. •...
-
Page 61: 4.3.3.14 Barn Door
in n o vato rs in ag ric u ltu re Display Description Wheels • Driven distance left (km): the total distance the left drive wheel has travelled in kilometers since the last reset action. Driven distance right (km): the total distance the right drive •... -
Page 62: Machine Info
Application version: the version number of the gyroscope • software. VCB hardware Serial number: the serial number of the VCB. • Lely Control Plus App Application version: version number of the application. • Application version date: release date of the application • version. - Page 63 in n o vato rs in ag ric u ltu re Display Description Manually move the machine. • Buttons to move the machine in all directions. • Ribbon buttons: • Charger drive L: to detect the strip at the charger •...
- Page 64 in n o vato rs in ag ric u ltu re Display Description Ultrasound follow L: to follow a wall or fence at the • left side of the machine at a distance of 1.8 meter (5.9 ft) from the wall or fence using ultrasound. Ultrasound follow R: to follow a wall or fence at the •...
-
Page 65: Routes
in n o vato rs in ag ric u ltu re 4.3.6 Routes Display Description The menu Routes displays a list with the available routes for the machine. Behind the route name the average driving time is displayed. When a route is not driven yet the time displayed is 0 minutes. 4.3.7 Feed Options The menu Feed options is used to create feed groups and to set the feed push power for a feed group. - Page 66 in n o vato rs in ag ric u ltu re Display Description Edit Feed Groups: push power to assign to a feed group. • Assign Feed Groups: feed push power (feed group) to assign to • a feed push action in a route. Buttons to return to the main menu.
- Page 67 in n o vato rs in ag ric u ltu re Edit Feed Groups Display Description This menu is used to create feed groups and to set the feed push power for each feed group. There are five levels of push power: Extra low: light, dry roughages like hay, straw.
-
Page 68: Day Planning
in n o vato rs in ag ric u ltu re Figure 17. Feed groups and feed push power KEY: 1. Young stock - 2. Dairy cows - 3. Feed group for young stock - 4. Feed group for dairy cows - 5. Feed push action Assign Feed Groups Display Description... -
Page 69: Alarms
in n o vato rs in ag ric u ltu re machine drives routes in a day planning maximum 40% of the time. The other 60% of the time the machine charges at the charging station. The display shows the following information: Display Description Day planning: start times of set routes. - Page 70 in n o vato rs in ag ric u ltu re Display Description The alarm list displays three kinds of alarms: • Grey: information alarms. • Yellow: non critical alarms. Red: critical alarms. • Buttons to return to the main menu. •...
-
Page 71: Settings
in n o vato rs in ag ric u ltu re Display Description The alarms display three kinds of information: • Kind of alarm. • Potential causes: what causes the alarm. Recovery: solution for how to handle the alarm. • Buttons to return to the alarm list. - Page 72 in n o vato rs in ag ric u ltu re Display Description Machine configuration to set: • Machine name. Machine settings to set: • Shock device working mode. • Led beacon working mode. Buzzer working mode. • Buzzer beep length (ms). •...
-
Page 73: Machine Configuration
in n o vato rs in ag ric u ltu re 4.3.10.1 Machine Configuration Display Description Machine configuration: Machine name. • Buttons • to go back to the previous menu. 4.3.10.2 Machine Settings Display Description Machine settings: Shock device working mode: to switch the shock device on or •... -
Page 74: Wheels
in n o vato rs in ag ric u ltu re 4.3.10.3 Wheels Display Description Wheels: • Left Wheel diameter: the set diameter for the left wheel in mm. • Right Wheel diameter: the set diameter for the right wheel in Last time left wheel calibrated. -
Page 75: Wifi Configuration
in n o vato rs in ag ric u ltu re Display Description The row of LED indicators at the top of the screen display: • Router: the status of communication between the robot and • the router (green: communication is active). •... -
Page 76: 4.3.10.6 Logs
in n o vato rs in ag ric u ltu re 4.3.10.6 Logs Display Description Robot Logs: menu to view and create logs of the routes and alarm data of the machine. Buttons to go back to the previous menu. •... -
Page 77: 4.3.10.8 Language
in n o vato rs in ag ric u ltu re 4.3.10.8 Language Display Description Language: menu to set the language of the user interface of the machine. Buttons to go back to the previous menu. • • to set the preferred language. Description and Operation 4-45... -
Page 78: 4.3.10.9 About
in n o vato rs in ag ric u ltu re 4.3.10.9 About Display Description About: displays detailed information about the software version. Buttons • to go back to the previous menu. 4.3.11 Logout The menu Logout is used to logout from the user interface and to disconnect the smartphone from the machine. -
Page 79: Control System
in n o vato rs in ag ric u ltu re Manual Feed Pushing with Manual Control When Manual control is enabled the machine can be driven manually through the barn or the machine can follow a route independent from the day planning. For instance to test a route. Figure 18. - Page 80 in n o vato rs in ag ric u ltu re Obstacles The machine has a bumper that stops the vehicle immediately when it hits an object that is at least 60 cm above floor level. If the machine hits a solid object the bumper sensors are activated and the machine stops driving. After 30 seconds the machine tries to continue its route.
-
Page 81: First Use
The sign ‘area with unmanned autonomous vehicle’. • The sign ‘no admittance for unauthorized persons’. • The machine itself. • The Lely Control Plus app is installed on the smartphone. • The machine is switched ON. • The machine is paired with the smartphone. •... - Page 82 in n o vato rs in ag ric u ltu re INTENTIONALLY BLANK First use...
-
Page 83: Operating Instructions
This chapter describes how to prepare the machine for operation and how to operate it. To prepare the machine for operation the following actions must be done: Install the Lely Control Plus app on the smartphone. Pair the machine with the smartphone. - Page 84 The name of the machine that is displayed on the smartphone can only be modified by a certified Lely technician. Set the Farmer Password The farmer password must be set by a certified Lely technician. Open or Close the Cover Take the machine out of operation before you open the cover to make sure the machine and its shock system (optional) are deactivated.
- Page 85 At the right top corner of the VIOB, push the power button to switch the machine ON. The machine starts up. This takes approximately one minute. Close the cover. Open the Lely Control Plus app on the smartphone. On the home screen tap the button Operating Instructions...
- Page 86 Put the machine into operation (tap start in the user interface). Please wait for motor initialization is displayed. When you select the next action you want to do in the Lely Control Plus app, the message Please wait for calibration to finish is displayed. The gyroscope is calibrated.
- Page 87 Figure 20. Switch the machine ON or OFF KEY: 1. Power button Pair the Machine with the Smartphone Make sure the smartphone has bluetooth switched on and location permission for the app is set. The farmer password must be set by a certified Lely technician. Operating Instructions...
- Page 88 Teamviewer) is strictly forbidden to avoid dangerous situations. The first time the machine and the user interface are connected, the Lely service technician must set the farmer password before you can continue. Make sure you are in the vicinity of the machine when you connect the smartphone to the machine.
- Page 89 The machine can not be connected to more than 1 smartphone simultaneously. Start the Lely Control Plus app. No machine is connected, the Find machine screen is displayed. •...
- Page 90 To detect a strip it is recommended to approach it at a 45 - 90° angle. Open the Lely Control Plus app on the smartphone. Take the machine out of operation.
- Page 91 in n o vato rs in ag ric u ltu re Manually drive the machine with the joystick and the actions displayed on the ribbon: Joystick to drive forward. • to drive backwards. • to rotate counter clockwise. • to rotate clockwise. •...
- Page 92 Do not drive backwards to the charger. Approach the charger in the forward direction. Open the Lely Control Plus app on the smartphone. Take the machine out of operation. Manually drive the machine to 0.3 - 2 m (1 - 7 ft) from the strip at the charger station.
- Page 93 6.11 Set Feed Options 6.11.1 Edit Feed Groups and set Feed Push Power Open the Lely Control Plus app on the smartphone. On the home screen tap Tap Feed options. Tap Edit Feed Groups. Add group to add a new feed group.
- Page 94 High or Extra high: heavy compact feeds, long strands mixed in with finely cut feeds or starchy feeds like potato/beans mixed in. Tap Save. 6.11.2 Assign Feed Groups Open de Lely Control Plus app on the smartphone. On the home screen tap Tap Feed options. Tap Assign Feed Groups. Tap the name of the route.
- Page 95 Figure 22. Assign feed groups (feed push powers) to a feed push action 6.12 Modify Actions of an existing Route Open the Lely Control Plus app on the smartphone. On the home screen, tap Tap Routes. Tap the applicable route.
- Page 96 Use the PC to browse to the Lely backup folder on the smartphone: /internal storage/LelyControl/ JunoNext/backup. Select the applicable backup file (.bkp). Copy the backup file from the smartphone.
- Page 97 Remove routes from the day planning Open the Lely Control Plus app on the smartphone. Take the machine out of operation. On the home screen tap Day planning. Tap and hold the line of the route that you want to remove from the day planning. The line turns to green and the buttons are displayed.
- Page 98 6.19 Take the Machine out of Operation Open the Lely Control Plus app on the smartphone. On the home screen tap button . Or: Push the pause button on the machine.
- Page 99 in n o vato rs in ag ric u ltu re Tap button Mark as solved. Tap button The user interface indicates to: Release the emergency stop button. Press the pause button. Put the machine into operation (tap button start in the user interface). 6.23 Drive the Machine when the Bumper is blocked When the bumper is blocked the machine stops driving and an alarm pops up on the user interface.
- Page 100 The manual of the hoisting eye must be stored with the hoisting eye. The hoisting eye and its manual are typically stored in the charging station. If the manual of the hoisting eye is lost, contact your local Lely service provider.
- Page 101 Remove the black cap from the cover of the machine. Before every use of the hoisting eye, do the necessary safety checks as described in the manual of the hoisting eye. If there are any abnormalities, do not use the hoisting eye and contact your local Lely service provider.
- Page 102 in n o vato rs in ag ric u ltu re INTENTIONALLY BLANK 6-20 Operating Instructions...
- Page 103 in n o vato rs in ag ric u ltu re Maintenance Introduction This chapter contains the preventive maintenance schedule and the applicable preventive maintenance procedures for the machine. Preventive Maintenance Schedule Frequencies Maintenance Tasks Note Operating Months Examine the charger. Clean the charging strips and the charging electrodes.
- Page 104 Examine the charging electrodes (2) slide over the middle of the charging strips (1) when the machine connects to the charger. If the electrodes do not slide over the middle of the strips, call your local Lely service provider.
- Page 105 in n o vato rs in ag ric u ltu re Preparation Disconnect the main power supply to the charging station. Manually drive the machine to a clean and quiet location. Open the cover of the machine. At the right top corner of the VIOB, push the power button to switch the machine OFF. Close the cover.
- Page 106 Examine and Clean Clean the ultrasonic sensor(s) with a moist cloth. Examine the angle of the ultrasonic sensor(s). If the angle deviates and the brackets of the ultrasonic sensor(s) are bend or cracked, call your local Lely service provider. Maintenance...
- Page 107 Manually drive the machine to a clean and quiet location. Examine Examine the skirt for dirt and damage. If necessary clean the machine. If the skirt is damaged, call your local Lely service provider. Close-up Manually drive the machine to the charging station.
- Page 108 in n o vato rs in ag ric u ltu re 7.3.6 Adjust the Ultrasonic Sensor Height The ultrasonic sensor must be at the same height as the centre of the top tube of the feed fence. Preparation Take the machine out of operation. Manually drive the machine to a location parallel to the feeding fence.
- Page 109 in n o vato rs in ag ric u ltu re Figure 27. Make sure the ultrasonic sensor arm is in the boundaries of the bumper Figure 28. Adjust the ultrasonic sensor arm to an angle of maximum 60˚ Adjust the tube length of the ultrasound sensor Support the ultrasonic sensor manually.
- Page 110 Manually drive the machine to a clean and quiet location. Examine Open the cover of the machine. Examine the profile of the drive wheels. If the profile is less than 2 mm, call your local Lely service provider for replacement of the tyres. Close-up Manually drive the machine to the charging station.
- Page 111 in n o vato rs in ag ric u ltu re Tap Driven distance. Fill out the driven distance in mm. Tap button Calibrate. Calibration of wheel diameter was successfull is displayed. Tap Ok. Examine the wheel calibration values and the date of calibration. If necessary, repeat the calibration procedure.
- Page 112 in n o vato rs in ag ric u ltu re The metal strip must be installed in its original place. If the machine does not find the metal strip on the same location it can get lost on the route and generate an alarm.
- Page 113 in n o vato rs in ag ric u ltu re Replace a metal Strip Make sure that strips recessed in the floor are installed flush with the floor level or slightly above the floor level. Do not install strips below the floor level.
- Page 114 in n o vato rs in ag ric u ltu re Put the new strip on the floor. If necessary cut the strip with a grinder. Make sure: The machine will find the metal strip on the exact same position as the old one. •...
- Page 115 • Relay 2. • Open and close the door with the Lely Control Plus app. Examine in the Testing menu if at: Relay 1 the status indicator turns to green when the door opens. • Relay 2 the status indicator turns to green when the door closes.
- Page 116 in n o vato rs in ag ric u ltu re 7.3.13 Set the Gyroscope Target Temperature Only change this setting if the gyroscope does not calibrate properly. On the smartphone: Connect your smartphone to the machine. In the main menu tap Settings. Tap Machine settings.
- Page 117 in n o vato rs in ag ric u ltu re Troubleshooting Alarm Handling Critical Alarms When the machine is in operation and a critical alarm occurs: An alarm message is displayed on the smartphone. • • The led in the pause button on the machine blinks. •...
- Page 118 The alarm is displayed in the signals app at the top of the list. Tap the line of the alarm to read the alarm. In the Lely Control Plus app you can mark the alarm as solved. In the WiFi configuration screen is displayed if the alarm notification is read in Signals.
- Page 119 The battery is low. Drive the machine to the charging station. Charge for one hour. The fuse is blown. Call your local Lely service provider. The power supply is not Connect the power supply. connected. The emergency stop button is Reset the emergency stop pushed.
- Page 120 Possible cause Action Day planning is not set. Create a day planning. The machine swings. The gyroscope is drifting. Call your local Lely service provider. The ultrasonic sensor does not Clean the ultrasonic sensor. function correctly. Test the ultrasonic sensor.
- Page 121 If the version is not correct update the smartphone software. 8.3.2 Troubleshooting Table Juno Charging Station Symptom Possible cause Action Green LED is off. Power disconnected. Connect the power supply.
- Page 122 Close-up Start the Lely Control Plus app and connect the smartphone to the machine. Put the machine into operation. Troubleshooting...
- Page 123 Diagrams Dimensions Feed Pusher Figure 32. Dimensions Juno Feed Pusher KEY: A: 1550 mm (61.0 in) B: 1100 mm (43.3 in) C: 1000 mm (39.4 in) Diagrams...
- Page 124 in n o vato rs in ag ric u ltu re Dimensions Charging Station Figure 33. Dimensions charging station KEY: A: 290 mm (11.4 in) B: 660 mm (26.0 in) C: 281 mm (11.1 in) Diagrams...
- Page 125 Supplier code/reference Lely code/reference It is our intention to cooperate this barn door with a mobile agricultural robot from Lely Industries N.V. The mobile agricultural robot is covered by the Machine directive 2006/42/EC. Lely Industries N.V. will act as the legal manufacturer for the mobile agricultural robot. As legal manufacturer, safety for all users of the total system is our utmost concern.
- Page 126 in n o vato rs in ag ric u ltu re Additional remarks: Name: Supplier: Date: Sign: 10-2 CE Questionnaire Barn Door Supplier...
- Page 127 All lubricants and fluids must be disposed in compliance with the local rules and regulations. Contact your local authority or local Lely service provider for further details. Disposal 11-1...
- Page 128 in n o vato rs in ag ric u ltu re INTENTIONALLY BLANK 11-2 Disposal...
- Page 129 WEEE directive, require special reuse and recycling processing. For this reason, Lely Industries N.V. has arranged that this product can be recycled at the local recycling/ disposal companies to collect and recycle this product at no cost to you.
- Page 130 in n o vato rs in ag ric u ltu re INTENTIONALLY BLANK 12-2 WEEE...
- Page 131 Declaration of Conformity 13.1 EC Declaration of Conformity – Feed Pusher Lely Juno 5.4303.0850.X 5.4303.0860.X Machinery directive 2006/42/EC EN-ISO 12100:2010 EN 60204-1:2018 24-Feb-22 Declaration of Conformity 13-1 5.4303.8507.9...
- Page 132 13.2 UKCA Declaration of Conformity – Feed Pusher Lely Juno 5.4303.0850.X 5.4303.0860.X Supply of Machinery (Safety) Regulations 2008 (UK) EN-ISO 12100:2010 EN 60204-1:2018 24-Feb-22 5.4303.8507.9 13-2 Declaration of Conformity...
- Page 133 in n o vato rs in ag ric u ltu re 13.3 EC Declaration of Conformity – Door Control Box Declaration of Conformity 13-3...
- Page 134 UKCA Declaration of Conformity – Door Control Box Lely Door Control Box 5.4303.0562.x Is intended to be used in combination with Lely Juno. Electrical Equipment (Safety) Regulations 2016 (UK) Electromagnetic Compatibility Regulations 2016 (UK) Radio Equipment Regulations 2017 (UK) EN 300 328 V2.1.1...
- Page 135 Torque loading .............7 Troubleshooting......... 8-2, 8-5 Induction sensor..........4-19 Type number ............7 Inductive sensor ..........7-12 Ultrasonic sensor........7-4, 7-6 LED beacon ............. 2-11 Ultrasound sensor ........... 4-18 Lely Control Plus ........6-2, 6-5–6-6 User interface ..........4-11 Logout ............4-46 Index...
- Page 136 in n o vato rs in ag ric u ltu re Version info............. 4-30 WEEE .............. 12-1 Wheel ............. 4-24 Index...
- Page 138 Lely Industries N.V. CornelisFvanFderFLelylaanF1 NL-3147FPB FMaassluis Tel +31F(0)88F-F12F28F221 Fax +31F(0)88F-F12F28F222 www.lely.com...
Need help?
Do you have a question about the Juno and is the answer not in the manual?
Questions and answers