
Related Manuals for Wampat W01J3180V


Summary of Contents for Wampat W01J3180V
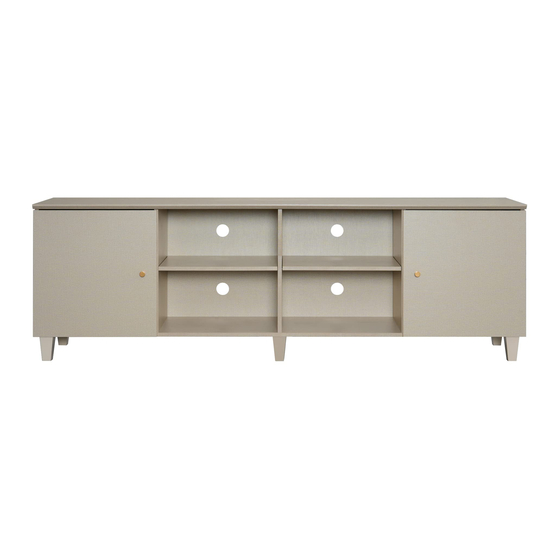
- Page 1 Assembly Instructions W01J3180V Please read this manual carefully before beginning assembly of this product.Keep this manual for future reference.
- Page 3 Warning: Select the option you like first(A or B or C), then follow the option installation step. ご注意: お好みのオプションを選んで、対応するオプショ ンの手順に従って組み立ててください。 Option A ( TV stand ) Option B ( TV stand ) Option C ( TV stand )
- Page 4 2 ...
- Page 5 x 10 x 32 x 10 x 24 Wooden dowel Screw Cam bolt Cam lock Ø4x12mm Ø6x33.5mm Ø8x30mm Ø15x11mm x 10 x 10 x 16 Screw Screw Handle bolt Plastic wedge Ø3.5x14mm Ø4x35mm M4x18mm x 14 Crash pad Shelf support pin Footpads Sticker Ø10x2mm...
- Page 6 Option A ( TV stand ) · Screw cam bolts (A) into panels (1). x 10...
- Page 7 Option B ( TV stand ) x 10 · Screw cam bolts (A) into panels (1). · Attach Iron sheet (S) to panel (1) with Screw (R).
- Page 8 Option C ( TV stand ) x 10 · Screw cam bolts (A) into panels (1). · Attach Iron sheet (S) to panel (1) with Screw (R).
- Page 9 · Insert dowels (B) into Wooden leg (7). x 12 · Attach panels (3) to Wooden leg (7), · Insert and secure screw (H) to Wooden leg (7) to lock it.
- Page 10 Option A ( TV stand ) · Insert dowels (B) into panels (4,5,8,9,10). x 10 x 10 · Then attach panel (3) to panels (4,5,8,9,10) using screws (H). · Stick the skid pad (J) on the bottom of the Wooden leg (7).
- Page 11 Option B ( TV stand ) · Insert dowels (B) into panels (4,5,8,9,10). x 10 x 10 · Then attach panel (3) to panels (4,5,8,9,10) using screws (H). · Stick the skid pad (J) on the bottom of the Wooden leg (7).
- Page 12 Option C ( TV stand ) · Insert dowels (B) into panels (4,5,8,9,10). x 10 x 10 · Then attach panel (3) to panels (4,5,8,9,10) using screws (H). · Stick the skid pad (J) on the bottom of the Wooden leg (7).
- Page 13 · Carefully slide panels (6) into place along the back of the assembly.
- Page 14 Option A ( TV stand ) · Insert dowels (B) into panels (4,5,8,9,10). · Attach panel (1) to panels (4,5,8,9,10) correctly. x 10 x 10 · Insert and secure cam locks (C) to panels (4,5,8,9,10) to lock it. · Stick stickers (I) on screw (H).
- Page 15 Option B ( TV stand ) · Insert dowels (B) into panels (4,5,8,9,10). · Attach panel (1) to panels (4,5,8,9,10) correctly. x 10 x 10 · Insert and secure cam locks (C) to panels (4,5,8,9,10) to lock it. · Stick stickers (I) on screw (H).
- Page 16 Option C ( TV stand ) · Insert dowels (B) into panels (4,5,8,9,10). x 10 x 10 · Attach panel (1) to panels (4,5,8,9,10) correctly. · Insert and secure cam locks (C) to panels (4,5,8,9,10) to lock it. · Stick stickers (I) on screw (H).
- Page 17 x 10 x 10 · Secure parts (E) to panels (1,3,4,5) using screws (F).
- Page 18 · Attach part (O) to panels (11,12) with screws (D) correctly. · Attach part (N) to panels (11,12) with bolts (G) correctly.
- Page 19 Option A ( TV stand ) Warning: follow the next step to adjust the crack of the doors . 警告 : 次の手順に従ってド アの隙間を調整しま す。 · Attach part (11,12) to panel (4,5) with screws (D) correctly. x 16 · Stick part (K) on panels (11,12) correctly.
- Page 20 Option B ( TV stand ) Warning: follow the next step to adjust the crack of the doors . 警告 : 次の手順に従ってド アの隙間を調整しま す。 · Attach part (11,12) to panel (4,8) with screws (D) correctly. x 16 · Stick part (K) on panels (11,12) correctly. 18 ...
- Page 21 Option C ( TV stand ) Warning: follow the next step to adjust the crack of the doors . 警告 : 次の手順に従ってド アの隙間を調整しま す。 x 16 · Attach part (11,12) to panel (5,9) with screws (D) correctly. · Stick part (K) on panels (11,12) correctly. 19 ...
- Page 22 Warning: open the doors and adjust the left and right hinge follow the picture 1 and 2(the middle crack of the doors is about 3-4mm,and the side crack of the doors is about 1mm). 警告 : ドアを開けて、図1と図2に従って左右のヒンジを調整します。 (ドアの間の隙間は約3 ~ 4ミリ、ドアの側面の隙間は約1ミリ)。 3mm-4mm 20 ...
- Page 23 Adjust Height / 高さを調節 Adjust front and back / 前後を調節 Adjust Left and right / 左右を調節...
- Page 24 · Stick stickers (I) on cam locks (C). Option A ( TV stand ) x 10 · Insert the shelf supports (L) at the desired level and place the adjustable shelves (2) onto the shelf supports.
- Page 25 · Stick stickers (I) on cam locks (C). Option B ( TV stand ) x 10 · Insert the shelf supports (L) at the desired level and place the adjustable shelves (2) onto the shelf supports. 23 ...
- Page 26 · Stick stickers (I) on cam locks (C). Option C ( TV stand ) x 10 · Insert the shelf supports (L) at the desired level and place the adjustable shelves (2) onto the shelf supports.
- Page 27 LED CONTROLLER Option A ( TV stand ) Please clean the surface before installation. Step 1: Connect the LED controller and LED cable correctly. Step 2: Plug USB cable into your TV or socket. Step 3: Tear tape behind the light strip and stick anywhere you want. Note: 1.Expose the LED controller when installing to avoid not being able to remote control.
- Page 28 LED CONTROLLER Option B ( TV stand ) Please clean the surface before installation. Step 1: Connect the LED controller and LED cable correctly. Step 2: Plug USB cable into your TV or socket. Step 3: Tear tape behind the light strip and stick anywhere you want. Note: 1.Expose the LED controller when installing to avoid not being able to remote control.
- Page 29 LED CONTROLLER Option C ( TV stand ) Please clean the surface before installation. Step 1: Connect the LED controller and LED cable correctly. Step 2: Plug USB cable into your TV or socket. Step 3: Tear tape behind the light strip and stick anywhere you want. Note: 1.Expose the LED controller when installing to avoid not being able to remote control.
- Page 30 LED CONTROLLER Option A ( TV stand ) 組み立てる前に表面を拭いてください。 ステップ1:LEDコントローラとLEDケーブルを正しく接続する。 ステップ2:USBケーブルをテレビまたはコンセントに差し込みます。 ステップ3:テープライトの背面にあるシールをはがして、設置したいところに貼り付ます。 ご注意: 1.リモートコントロールできないようにLEDコントローラを露出させて設置してください。 2.テープライトは防水ではありません。 3.テープライトにカットマークがあります。カットマークに沿ってサイズに合わせて自由にカットが 可能です。切断すると電源に接続されていない残った部分は再利用できません。...
- Page 31 LED CONTROLLER Option B ( TV stand ) 組み立てる前に表面を拭いてください。 ステップ1:LEDコントローラとLEDケーブルを正しく接続する。 ステップ2:USBケーブルをテレビまたはコンセントに差し込みます。 ステップ3:テープライトの背面にあるシールをはがして、設置したいところに貼り付ます。 ご注意: 1.リモートコントロールできないようにLEDコントローラを露出させて設置してください。 2.テープライトは防水ではありません。 3.テープライトにカットマークがあります。カットマークに沿ってサイズに合わせて自由にカットが 可能です。切断すると電源に接続されていない残った部分は再利用できません。...
- Page 32 LED CONTROLLER Option C ( TV stand ) 組み立てる前に表面を拭いてください。 ステップ1:LEDコントローラとLEDケーブルを正しく接続する。 ステップ2:USBケーブルをテレビまたはコンセントに差し込みます。 ステップ3:テープライトの背面にあるシールをはがして、設置したいところに貼り付ます。 ご注意: 1.リモートコントロールできないようにLEDコントローラを露出させて設置してください。 2.テープライトは防水ではありません。 3.テープライトにカットマークがあります。カットマークに沿ってサイズに合わせて自由にカットが 可能です。切断すると電源に接続されていない残った部分は再利用できません。...
Need help?
Do you have a question about the W01J3180V and is the answer not in the manual?
Questions and answers