Table of Contents
Advertisement
Quick Links
Advertisement
Table of Contents

Related Manuals for ELNA eXtend 864air


Summary of Contents for ELNA eXtend 864air
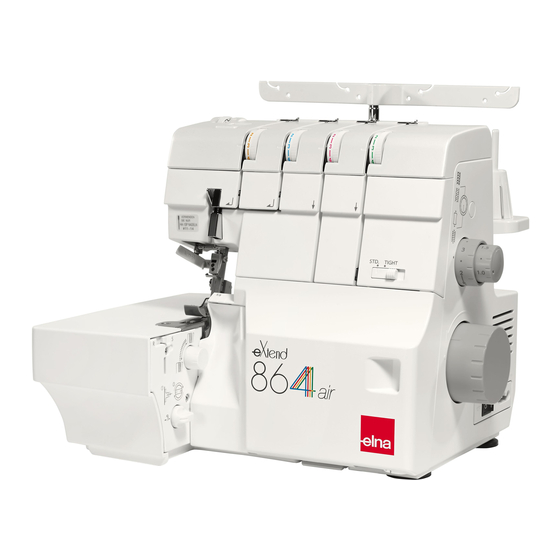
- Page 1 864air | Instruction Manual |...
- Page 3 IMPORTANT SAFETY INSTRUCTIONS When using an electrical appliance, basic safety precautions should always be followed, including the following: This Serger/Overlocker/Overlock machine is designed and manufactured for household use only. Read all instructions before using this Serger/Overlocker/Overlock machine. DANGER — To reduce the risk of electric shock: 1.
-
Page 4: Table Of Contents
TABLE OF CONTENTS ESSENTIAL PARTS Thread Tension (3 threads) .......... 39 Names of Parts ............... 3 Thread Tension (2 threads) .......... 40 Safety Device ..............4 Standard Accessories ............ 5 ROLLED HEMMING, PICOT EDGING AND NARROW HEMMING Waste Chip Box .............. 6 Tension Dial and Machine Settings According to the Thread and Fabric ............ -
Page 5: Essential Parts Names Of Parts
ESSENTIAL PARTS q w e r Names of Parts Left needle thread tension dial Right needle thread tension dial Upper looper thread tension dial Lower looper thread tension dial Lower looper pre-tension setting slider Stitch length dial Differential feed dial Ventilation openings Handwheel Machine socket... -
Page 6: Safety Device
Safety Device This machine is equipped with a safety device that prevents the machine from starting in the following conditions: • The looper cover or the side cover is open q Looper cover w Side cover • The presser foot lifter is raised e Presser foot lifter Be sure to close the looper cover and the side cover, and to lower the presser foot lifter before starting the... -
Page 7: Standard Accessories
U.K. C-2085-1 17 Foot control* Australia C-2065 Continental Europe C-2060 *The foot control included may differ from the illustration. NOTE: A presentation video with quick-start information is available for this model and can be downloaded from our website at www.elna.com/support... -
Page 8: Waste Chip Box
Waste Chip Box The waste chip box collects trimmings. Dispose trimmings after sewing. To attach: Sliding the waste chip box along the looper cover guide, insert the tabs into the slit under the looper cover. q Looper cover w Waste chip box e Looper cover guide r Slit To remove:... -
Page 9: Getting Ready To Sew
GETTING READY TO SEW NOTE: A presentation video with quick-start information is available for this model and can be downloaded from our website at www.elna.com/support Connecting the Power Supply WARNING While in operation, always keep your eyes on the sewing area, and do not touch any moving parts such as the thread take-up lever, handwheel, knives, loopers or needles. -
Page 10: Handwheel
Handwheel Match the “ ” mark of the belt cover with the “–” mark of the handwheel when threading needles, adjusting the chaining finger switch knob or raising/lowering the spreader. Always turn the handwheel toward you (counterclockwise). q Handwheel w Belt cover e “... -
Page 11: Presser Foot Lifter
Presser Foot Lifter The presser foot lifter raises and lowers the presser foot. Raise the presser foot lifter before you thread the machine. Always lower the presser foot lifer when you start sewing. q Presser foot w Presser foot lifter NOTE: Tension disks open when the presser foot lifter is raised. -
Page 12: Presser Foot Pressure Dial
Presser Foot Pressure Dial Foot pressure can be adjusted by turning the presser foot pressure dial. Set the pressure to “N” for ordinary fabrics. Turn the dial toward you for light weight fabrics . Turn the dial away from you for heavy weight fabrics. q Presser foot pressure dial w Setting mark e To increase... -
Page 13: Stitch Length Adjustment
Stitch Length Adjustment To adjust the stitch length, turn the stitch length dial. The larger the number, the longer the stitch. q Stitch length dial w Setting mark The standard stitch length setting for serging stitch is “3” (approximately 3 mm). The dial clicks when you turn the dial to 3. The stitch length can be adjusted while sewing. -
Page 14: To Deactivate Or Activate The Upper Knife
To Deactivate or Activate the Upper Knife CAUTION • Turn the power switch OFF before deactivating or activating the upper knife. • Do not cut anything else with the upper knife other than fabric, causing the upper knife to break. Deactivate the upper knife for flatlock, pintucking, etc. -
Page 15: Chaining Finger Switch Knob Adjustment (Changing To Standard Serging Or Rolled Hemming)
Chaining Finger Switch Knob Adjustment (Changing to Standard Serging or Rolled Hemming) CAUTION Turn the power switch OFF before adjusting the chaining finger switch knob. The chaining finger switch knob is connected to the chaining finger. The chaining finger slides back and forth when you set the chaining finger switch knob to “S”... -
Page 16: Position Of Thread Guide Bar
Position of Thread Guide Bar Pull the thread guide bar up as far as it will go. q Thread guide bar Turn the thread guide bar until it snaps into place. Be sure to snap both stoppers into places. The thread guide bar is placed right above the spool pins as shown. -
Page 17: Machine Threading
MACHINE THREADING Threading the Machine (4 threads) CAUTION Turn the power switch OFF before threading the machine. NOTE: • The looper threader can be used with standard threads #60 - #100. • The looper threader cannot be used with special threads, such as wooly nylon, gold thread, etc. -
Page 18: Threading The Machine (3 Threads)
Threading the Machine (3 threads) You can sew three-thread serging using the right needle or the left needle. CAUTION Turn the power switch OFF before threading the machine. Using the needle on the right only (for regular three-thread serging) When you use the right needle, the standard sewing width is 3.5 mm. -
Page 19: Threading The Machine (2 Threads)
Threading the Machine (2 threads) You can sew two-thread serging using the right needle or the left needle. Use the lower looper and the spreader. Refer to page 18 for details on how to raise and lower the spreader. CAUTION Turn the power switch OFF before threading the machine. -
Page 20: Using The Spreader For Two-Thread Serging
Using the Spreader for Two-thread Serging Use the spreader pin (needle holder) to raise or lower the spreader. CAUTION Turn the power switch OFF before raising or lowering the spreader. Raising the spreader z Turn the handwheel toward you to match the “ ” mark on the belt cover with the “–”... -
Page 21: Threading The Lower Looper
Threading the Lower Looper CAUTION Turn the power switch OFF before threading the machine. NOTE: Raise the presser foot lifter for easier threading. z Draw the thread through the right side thread guide from back to front: (A) q Thread guide NOTE: If the thread tends to slip away from the guide while sewing, pass the thread through both thread guide holes as shown: (B) - Page 22 ⁄0 n Pull out approximately 12˝ (30 cm) of thread. Make sure that the thread does not get tangled around the lever or the cover. i Thread m Set the looper threader switch lever to the “THREADING” position. o Looper threader switch lever Adjusting the looper threader switch lever Set the looper threader lever to the “THREADING”...
- Page 23 ⁄1 Raise the looper threader lever until it clicks into ⁄1 place. !6 Looper threader lever ⁄2 Lower the looper threader lever until it knocks into ⁄2 place. ⁄3 Make sure that the thread comes out from the hole of ⁄3 the lower looper tip.
-
Page 24: Threading The Upper Looper
Threading the Upper Looper CAUTION Turn the power switch OFF before threading the machine. NOTE: Raise the presser foot lifter for easier threading. z Draw the thread through the thread guide from back to front: (A) q Thread guide NOTE: If the thread tends to slip away from the guide while sewing, pass the thread through both thread guide holes as shown: (B) -
Page 25: Adjusting The Looper Threader Switch Lever
b Pull out approximately 12˝ (30 cm) of thread. Make sure that the thread does not get tangled around the lever or the cover. u Thread n Set the looper threader switch lever to the “THREADING” position. i Looper threader switch lever Adjusting the looper threader switch lever Set the looper threader lever to the “THREADING”... - Page 26 ⁄0 Raise the looper threader lever until it clicks into place. ⁄0 !5 Looper threader lever ⁄1 Lower the looper threader lever until it knocks into ⁄1 place. ⁄2 Make sure that the thread comes out from the hole of ⁄2 the upper looper tip.
- Page 27 Instructions for using the looper threader 1. If either the upper or lower looper thread breaks while sewing, cut both of the upper and lower threads in front of the threading holes, and remove the thread from the holes. Rethread both of the threads. 2.
-
Page 28: Threading Loopers With The Looper Threading Wire Or Standard Thread
Threading Loopers with the Looper Threading Wire or Standard Thread If the looper threads are made from materials that are difficult to thread, such as wooly nylon, there are 2 ways to thread the looper threads: • Use the looper threading wire (looper threader) •... -
Page 29: Using A Standard Thread
Using a standard thread z Pass the thread up to the looper thread guide (in front of the looper threader hole). q Looper thread x Prepare 12˝ (30 cm) of a standard thread and tie it 5 cm from the end of the looper thread as shown. w Standard thread e Knot r 5 cm... -
Page 30: Threading The Right Needle
Threading the Right Needle CAUTION Turn the power switch OFF before threading the machine. NOTE: Raise the presser foot lifter for easier threading. z Draw the thread through the thread guide from back to front: (A) q Thread guide NOTE: If the thread tends to slip away from the guide while sewing, pass the thread through both thread guide holes as shown: (B) - Page 31 v Pull the thread down along the slit and draw it to the left through the thread path. y Slit u Thread path b Pull the thread up and along the left side of the thread take-up lever cover and pass it over the take-up lever thread guide.
-
Page 32: Using The Needle Threader
Using the needle threader Following the procedure m on page 29 or page 32, thread the needles with the needle threader shown below. CAUTION Turn the power switch OFF before threading the machine. z Turn the handwheel toward you to match the “ ” mark on the belt cover with the “–”... -
Page 33: Threading The Left Needle
Threading the Left Needle CAUTION Turn the power switch OFF before threading the machine. NOTE: Raise the presser foot lifter for easier threading. z Draw the thread through the thread guide from back to front: (A) q Thread guide NOTE: If the thread tends to slip away from the guide while sewing, pass the thread through both thread guide holes as shown: (B) - Page 34 v Pull the thread down and along the slit and draw it to the left through the thread path. y Slit u Thread path b Pull the thread up and along the left side of the thread take-up lever cover and pass it over the take-up lever thread guide.
-
Page 35: Thread And Needle Chart
Thread and Needle Chart Chaining Lower looper Stitch Differential Type of fabric Thread Needle finger switch pre-tension Upper knife length dial feed dial knob setting slider Light weight Organdy, Synthetic HAx1SP Georgette, 2.0-3.0 0.5-1.0 #80-100 #11-14 Lawn, Crepe de chine, Lining Medium weight Synthetic... -
Page 36: Test Stitching Starting Sewing
TEST STITCHING Starting Sewing z Close the side cover and the looper cover. Turn the power switch ON. x Make sure that the upper knife is activated (in the raised position). c Lower the presser foot lifter. v Draw all of the threads back under the foot. Slowly run the machine and produce a 2˝... -
Page 37: Sewing Continuously
Sewing Continuously Insert the next piece of the fabric under the toe of the foot, and start sewing. You do not need to raise the presser foot for ordinary fabric. * For heavyweight fabric, raise the presser foot and insert the fabric in front of the knife. -
Page 38: Securing Ends
Securing Ends To avoid raveling, you need to leave a thread chain approximately 2˝ (5 cm) long at the beginning and at the end of a seam. To secure the beginning and end of a seam, choose one of the following methods. At the beginning of the seam A. -
Page 39: Thread Tension (4 Threads)
Thread Tension (4 threads) Correct tension The illustration to the left shows a seam sewn at the correct tension. Note that you may need to adjust the thread tension depending on the fabric and thread being used. q Wrong side of fabric w Right side of fabric e Right needle thread r Left needle thread... - Page 40 Looper thread tension is out of balance (1) The illustration shows sewing results when the lower looper thread tension is too tight and/or upper looper thread tension is too loose. Remedy: Loosen lower looper thread tension and/or tighten upper looper thread tension. q Wrong side of fabric w Right side of fabric e Right needle thread...
-
Page 41: Thread Tension (3 Threads)
Thread Tension (3 threads) Correct tension The illustration to the left shows a seam sewn at the correct tension. Note that you may need to adjust the thread tension depending on the fabric and thread being used. q Wrong side of fabric w Right side of fabric e Right or left needle thread r Upper looper thread... -
Page 42: Thread Tension (2 Threads)
Thread Tension (2 threads) Correct tension The illustration to the left shows a seam sewn at the correct tension. Note that you may need to adjust the thread tension depending on the fabric and thread being used. q Wrong side of fabric w Right side of fabric e Right or left needle thread r Lower looper thread... - Page 43 Correct tension for rolled hem The illustration to the left shows a seam sewn at the correct tension. Note that you may need to adjust the thread tension depending on the fabric and thread being used. Use synthetic thread for the needle thread and woolly nylon thread for the lower looper thread.
-
Page 44: Rolled Hemming, Picot Edging And Narrow Hemming Tension Dial And Machine Settings According To The Thread And Fabric
ROLLED HEMMING, PICOT EDGING AND NARROW HEMMING Tension Dial and Machine Settings According to the Thread and Fabric The setting of tension dials may vary depending on the type and thickness of fabric and thread being sewn. CAUTION Make sure to turn the power switch off before changing the needle or setting the chaining finger switch knob. -
Page 45: For Better Results
For Better Results Rolled hemming Gently pull the end of thread chain to the back at the beginning and end of sewing. Picot edging Gently pull the fabric to the back while sewing. NOTE: The sewing procedure of narrow hemming is the same as that for standard overedging. -
Page 46: Thread Tension
Thread Tension Correct tension The illustration to the left shows a seam sewn at the Rolled hemming correct tension. Note that you may need to adjust the thread tension depending on the fabric and thread being used. q Wrong side of fabric w Right side of fabric e Right needle thread r Upper looper thread... - Page 47 For rolled hemming and picot edging * Thread tension adjustment for narrow hemming is the same as that for 3-thread overedging (refer to page 39). q Wrong side of fabric w Right side of fabric e Right needle thread r Upper looper thread t Lower looper thread The lower looper thread tension is too tight and/or the right thread tension is too loose...
-
Page 48: Advanced Techniques Decorative Overedging
ADVANCED TECHNIQUES Decorative Overedging NOTE: • You may need to adjust the thread tension. • For best results, gently pull the thread chain to the back at the beginning and end of sewing. CAUTION Machine Setting Make sure to turn the power switch off before Lower looper changing the needle, deactivating/activating the upper pre-tension... -
Page 49: Gathering
Gathering Sew and check the thread tensions. If the tension balance on the test piece is not satisfactory, you can adjust the thread tension with the thread tension dial. * Adjust the differential feed dial between 1.0 and 2.0 for gathering. -
Page 50: Pintucking
Pintucking NOTE: • You may need to adjust the thread tension depending on the type of fabric and thread being used. • If the tension balance on the test piece is not satisfactory, you can adjust the thread tension with the thread tension dial. -
Page 51: Flatlock
Flatlock NOTE: • You may need to adjust the thread tension depending on the type of fabric and thread being used. • If the tension balance on the test piece is not satisfactory, you can adjust the thread tension with the thread tension dial. - Page 52 Sewing z Fold the fabric wrong sides together. z x c q Wrong side of fabric x Adjust the seam width as twice as the cutting width. c Sew a test piece and check the tensions. w Needle thread e Upper looper thread r Lower looper thread v Deactivate the upper knife and sew.
-
Page 53: Sewing Corners
Sewing Corners Outer corners z Trim three corners (other than the starting point) 3 cm as illustrated. q Starting point w Cutting line e Trimmed corner r 3 cm x When you reach the next corner, stop the machine. x c v Raise the needle and the presser foot. -
Page 54: Care Of Your Machine Cleaning The Upper Knife Area
CARE OF YOUR MACHINE Cleaning the Upper Knife Area CAUTION Make sure to turn the power switch off before cleaning the machine. Open the looper cover. With a forward brushing movement, use the lint brush to remove any lint. q Lint brush * You may use a vacuum cleaner to clean the upper knife area or feed dog. -
Page 55: Cleaning The Looper Threader Pipe
Cleaning the Looper Threader Pipe CAUTION Make sure to turn the power switch off before cleaning the machine. Use the looper threading wire to clean the pipe of the looper threader device. z Open the looper cover and set the looper threader switch lever to the “THREADING”... -
Page 56: Replacing The Upper Knife
Replacing the Upper Knife z x c CAUTION Make sure to turn the power switch off before replacing the upper knife. To remove: z Open the looper cover. x Turn the handwheel toward you until the upper knife reaches its highest position. c Remove the hexagonal bolt with the double-ended spanner (use the small end) and remove the upper knife. -
Page 57: Oiling The Machine
Oiling the Machine z x c v CAUTION Make sure to turn the power switch off before oiling the machine. NOTE: It is recommended to apply oil once a week for normal use or once every 10 hours for continuous use. z Apply a few drops of fine quality sewing machine oil to the parts indicated with arrows. -
Page 58: Troubleshooting
Troubleshooting Condition Cause Reference The machine 1. The machine is not been plugged in properly. Refer to page 7. does not operate. 2. The power switch is turned off. Turn the power switch ON. 3. The safety device is activated. Refer to page 4. -
Page 59: Optional Accessories
Optional Accessories Part Name Description Part No. Use to blind stitch 1 Blind stitch foot 202040015 a cuff or a skirt. Use to sew 2 Cording foot (1) decorative 202034016 cording. Use to sew 3 Cording foot (2) decorative 202035017 cording. -
Page 60: Ec Declaration Of Conformity
This machine complies with the following regulations: EN 60335-1: 2012; A11 EN 60335-2-28: 2003; A1 EN 62233: 2008 EN 55014-1: 2006; A1; A2 EN 55014-2: 2015 EN 61000-3-2: 2014 EN 61000-3-3: 2013 Supplier: Elna International Corp. SA Address: Rue Veyrot 14 CH - 1217 Meyrin Switzerland... - Page 61 This page is left intentionally blank...
- Page 62 Version 1.01 31/10/2018...
- Page 64 799-800-201q (EN)
Need help?
Do you have a question about the eXtend 864air and is the answer not in the manual?
Questions and answers