Table of Contents
Advertisement
Quick Links
Advertisement
Table of Contents

Subscribe to Our Youtube Channel
Related Manuals for ELNA eXpressive 830


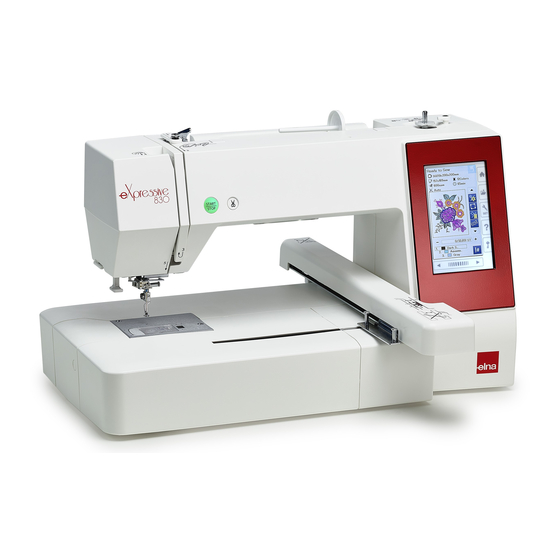
Summary of Contents for ELNA eXpressive 830
- Page 1 830 | Instruction Manual |...
- Page 3 IMPORTANT SAFETY INSTRUCTIONS When using an electrical appliance, basic safety precautions should always be followed, including the following: This sewing machine is designed and manufactured for household use only. Read all instructions before using this sewing machine. DANGER — To reduce the risk of electric shock: 1.
-
Page 4: Table Of Contents
TABLE OF CONTENTS Rotating a pattern ............36 GETTING READY TO SEW Flipping a pattern ............36 Names of Parts ..............3 Monogramming in an arc ..........37 Standard Accessories ............4 Grouping patterns ............38 Extra Wide Table ............. 5 Customizing the display colors ........ -
Page 5: Getting Ready To Sew Names Of Parts
GETTING READY TO SEW Names of Parts Thread take-up lever Upper thread guide Pre-tension thread guide Bobbin winder thread guide Spool pin Spool holder (large) !2 !3 Hole for extra spool pin Bobbin thread cutter Bobbin winder spindle Bobbin winder stopper Face plate Start/stop button Thread cutter button... -
Page 6: Standard Accessories
* The power cable included may differ from the illustration. **These two types of embroidery hoops are optional items. NOTE: A presentation video with quick-start information is available for this model and can be downloaded from our website at www.elna.com/support... -
Page 7: Extra Wide Table
Extra Wide Table Use the extra wide table when the Embroidery hoop RE20b, SQ20b or RE28b is attached to the machine. Extract the 4 legs located the underside of the table. Place the extra wide table on the machine. NOTE: Adjust the height of the extra wide table to the height of the machine table by turning the adjusting screws of 4 legs. -
Page 8: Connecting The Power Supply
Connecting the Power Supply z First make sure the power switch q is off. x Insert the machine plug w of the power supply cord into the power inlet e. c Insert the power supply plug r into the wall outlet t, and turn the power switch q on. -
Page 9: Raising And Lowering The Presser Foot
Raising and Lowering the Presser Foot You can raise and lower the presser foot with the presser foot lifter. q Presser foot lifter w Extra lifted position You can raise the presser foot about 7 mm (1/4˝) higher than the normal up position by exerting more pressure when lifting the presser foot lifter. -
Page 10: Setting The Spool Of Thread
Setting the Spool of Thread Lift up the spool pin. Place the spool of thread on the spool pin. Attach the large spool holder, and press it firmly against the spool of thread. NOTE: Use the small spool holder to hold narrow or small spools of thread. -
Page 11: Winding The Bobbin
Winding the bobbin z Draw the thread from the spool. Guide the thread around the bobbin winder thread guide. q Bobbin winder thread guide x Put the bobbin on the bobbin winder spindle. w Bobbin e Bobbin winder spindle c Pass the thread to the bobbin. Hold the thread with both hands and wind it around the bobbin clockwise several times. -
Page 12: Inserting The Bobbin
Inserting the bobbin z Press the lockout key. Place a bobbin in the bobbin holder with the thread running off counterclockwise as shown on the hook cover plate. q Lockout key w End of thread e Bobbin holder r Hook cover plate x Hold the bobbin with your fingertip so it does not rotate. -
Page 13: Threading The Machine
Threading the Machine Raise the presser foot lifter. Press the lockout key to lockout the machine. Turn the handwheel toward you to raise the needle at its highest position. q Lockout key Pass the thread in order from z to m. z Pull the thread from the spool. -
Page 14: Built-In Needle Threader
Built-in Needle Threader NOTE: The needle threader can be used with a #11 to #14 needle. Thread size 50 to 90 is recommended. Do not use thread size 30 or thicker. z Press the lockout key to lock the machine. Lower the presser foot. -
Page 15: Replacing Needles
NOTE: • Use the needles equipped with the machine or supplied by an ELNA authorized dealer. • Use size 11 blue tipped needle for fine fabrics. • For medium to heavy weight fabrics, use size 14 needles or red tip needle*. -
Page 16: On-Screen Help
On-screen Help Press the help key to open the help menu. You can view instructions on 4 topics of essential operations of the machine. Select the help topic by pressing the book icon and the step-by-step instruction will open. q Help key w Book icon To view the next page, press the next page key. -
Page 17: Removing And Attaching The Embroidery Foot
Removing and Attaching the Embroidery Foot Remove the embroidery foot when removing the needle plate for the maintenance, etc. CAUTION: Always make sure to press the lockout key to lockout the machine or turn the power switch off before removing or attaching the embroidery foot. To remove: z Turn the power switch off or press the lockout key. -
Page 18: Bobbin Holder For Embroidery (High Tension)
Bobbin Holder for Embroidery (high tension) Replace the standard bobbin holder with the bobbin holder for embroidery (high tension) when using bobbin threads other than Janome bobbin thread for embroidery. CAUTION: Always make sure to press the lockout key to lockout the machine or turn the power switch off before attaching the bobbin holder. -
Page 19: Types Of The Stabilizers
Stabilizers To create the best quality embroidery, it is important to use stabilizers. How to use: Attach the stabilizer to the wrong side of the fabric. You may need to use more than one layer. For firm fabrics, you may place a thin sheet of paper under the fabric. -
Page 20: Setting The Fabric In An Embroidery Hoop
Setting the Fabric in an Embroidery Hoop z Prepare a fabric and attach a stabilizer to the wrong side of the fabric. The fabric and stabilizer should be larger than the hoop size. Draw the centerlines on the fabric with tailor’s chalk. q Fabric w Centerlines x Lay the inner hoop and template on the fabric,... -
Page 21: Attaching The Embroidery Hoop To The Machine
Attaching the Embroidery Hoop to the Machine To attach: z Raise the presser foot. Turn the handwheel toward you to raise the needle at its highest position. Turn the power switch on. If the carriage is not at the home position, the caution message appears to move the carriage to the home position. -
Page 22: Selecting Built-In Embroidery Designs
Thread Holder To avoid sewing over a tail of the needle thread, place the thread end on the thread holder. Pass the needle thread through the hole in the embroidery foot and draw it up to the thread holder. Hang the thread on the thread holder from front to back. q Thread holder Selecting Built-in Embroidery Designs Press the built-in design key and the first page of the... -
Page 23: Monogramming
Selecting the design by hoop size Press the hoop selection key e and the hoop selection window will open. Select a hoop size the same or smaller than the one you will attach. Browse the design list with the previous/next page keys, and select the desired pattern by pressing the pattern icon key. -
Page 24: Function Keys
Function Keys q Font selection key Press this key to open the font selection window. w Lettering orientation key Press this key to select the horizontal or vertical orientation. e Letter size key You can select the following 3 letter sizes by pressing this key. -
Page 25: Programming A Monogram
Programming a Monogram Example: Programming “R&B” in Gothic style font. Enter “R”, the cursor shifts to the right and “R” is automatically memorized. Press the letter size key and select small size. q Letter size key Enter “&”, the cursor shifts to the right and “&” is automatically memorized. -
Page 26: 2-Letter Monogram
2-Letter monogram Example: 2-Letter in an octagon z Press the font selection key q. Select 2-letter w. x Select the octagon e. c Enter “A” and “B”. Press the OK key and a warning message will appear. Press the OK key and the carriage moves to the starting position. -
Page 27: Editing A Monogram
Editing a Monogram Deleting a character: Deleting “R” from “MART” z Press the cursor key q to move the cursor under “R”. x Press the delete key w and letter “R” is deleted. Inserting a character: Inserting “E” into “MAT” z Press the cursor key q to move the cursor under “A”. -
Page 28: Ready To Sew Window
Ready to Sew Window The ready to sew window shows embroidery function keys and information on the selected pattern. Press the down arrow key t or up arrow key y to show the next set of function keys (u to o). Function keys q Color section key w Trace key... -
Page 29: Stitch Back/Forward Keys
Stitch back/forward keys Press the “–” key q to move the hoop back to a previous sewing point. Press the “+” key w to move the hoop ahead. The hoop will move one stitch each time the key is pressed. Hold down the key to travel faster and jump 10, 100 or 500 stitches at a time. -
Page 30: Trace Key
Trace key You can check the size of the embroidery area by tracing the pattern outline without stitching or with basting stitches. Press the trace key and the trace option window will open. q Trace key The following 3 options are available: 1. -
Page 31: Fine Position/Angle Adjustment Key
Fine position/angle adjustment key You can make fine adjustments to the position or angle of the embroidery design without removing the embroidery hoop from the machine. Press the fine position/angle adjustment key q. The original embroidery design position is previewed as a rectangle w. -
Page 32: Color List Key
Color list key Press the down arrow key q or up arrow key w to show the next set of function keys. Press the color list key e to view a list of thread colors employed in the selected design. Press the stitch number key r to view a number of stitches for each color in the selected design. -
Page 33: Hoop Back Key
Hoop back key Turn the handwheel toward you to raise the needle at its highest position if the needle is in down position. Raise the presser foot. Press the hoop back key q and hoop back option window will open. key w and the confirmation window open. -
Page 34: Starting To Sew Embroidery
Starting to Sew Embroidery z Select the desired pattern. Press the thread color/Jog key q. The jog keys appear. x Adjust the hoop position with the jog keys so that the needle position comes right above the center of the centerlines on the fabric. -
Page 35: Editing Mode
Editing Mode In the editing mode, you can edit and combine patterns to create original embroidery designs. Press the editing mode key q and the editing window for the hoop SQ20b will open. q Editing mode key Selecting a hoop size You can select other hoop sizes. -
Page 36: Editing Tool Bar Information
Editing tool bar information The editing tool bar contains the following keys as shown. Press the next set key w to show the next set of editing tools. Press the previous set key e to show the previous set of editing tools. q Layout keys w Next set key e Previous set key... -
Page 37: Duplicating A Pattern
Duplicating a pattern z Press the duplicate key to make a copy of the selected pattern. q Duplicate key x The duplicated pattern will be superimposed over the original pattern. Move the duplicate to show the original pattern. Deleting a pattern z Press on the pattern to delete. -
Page 38: Rotating A Pattern
Rotating a pattern z Press the next set key q to show the next set of editing tools. Press the rotate key w to open the rotation option window. w Rotate key x Press the key e to rotate the selected pattern 1 degree clockwise. -
Page 39: Monogramming In An Arc
Monogramming in an arc In the editing mode, you can make a monogram in an upper or lower arc. z Enter the characters and press the OK key. x The entered characters are displayed in the editing window. Press the arc key and the arc layout window will open. q Arc key c Press the upper arc key w to make an upper arc. -
Page 40: Grouping Patterns
Grouping patterns z You can group patterns together. Press the next set key q to show the next set of editing tools. Press the group key w and the grouping option window will open. q Next set key w Group key x Press the group all key e and press the OK key to group all the patterns in the editing window. -
Page 41: Customizing The Display Colors
Customizing the display colors You can simulate the colors of the actual fabric and threads on the screen by customizing the colors of the design image and editing window. z Press the custom color key and the custom color window will open. q Custom color key x If you wish to change the color of the design pattern, press the design color key. -
Page 42: Color Grouping
Color grouping When combining duplicated patterns, you can reduce the number of color sections with color grouping. z For example, the combined design pattern created on page 42 has 12 color sections. x Press the color group key q and the color grouping window will open. -
Page 43: Sewing Order
Sewing order You can change the sewing order of a pattern combination. Press the sewing order key q and press on the images of the pattern one by one. The patterns will be sewn in the order you press on the images. -
Page 44: Creating A Square Frame
Creating a square frame z Select pattern Geometric Design SQ14B-56. Move the design up and to the right. x Press the corner layout key. The pattern will automatically be copied and placed symmetrically into 4 corners. Press the OK key. q Corner layout key c The ready to sew window will open. -
Page 45: Zooming In The Editing Window
Zooming in the editing window Press the zoom key to open the zoom in/out window. Select the view size from normal, large or largest by pressing one of the view size keys. q Zoom key w Normal view size key e Large view size key r Largest view size key The scroll function is activated automatically when... -
Page 46: Pantry Designs For Applique
Pantry Designs for Applique Pantry designs SQ14b-67 to SQ14b-69 are special designs for machine embroidery applique. You can attach applique piece to background fabric and embroider applique design at the same time. Example: Pantry design SQ14b-67 Prepare background fabric and applique fabric. Select Pantry design SQ14b-67, and set the background fabric to the hoop. -
Page 47: Alternative Method
Alternative method Prepare applique fabric larger than hoop size. Set the applique fabric to the hoop. Sew the first section (color) only. Remove the hoop and unhoop the applique fabric. Cut the applique fabric along the stitching line to make an applique piece. -
Page 48: Celebration Designs
Celebration Designs You can make your own flag garland with the celebration designs. z Select the design list by hoop size and select the hoop SQ20b. Select design pattern SQ20b-39. x Edit your pennant design in the editing mode. c Press the OK key to open the ready to sew window. Set the fabric in the hoop and attach the hoop to the carriage. -
Page 49: Bracelet Designs
Bracelet Designs You can make a your own bracelet by sewing the bracelet designs on a water soluble stabilizer. Use the same thread for the bobbin as the needle thread. Use a fully wound bobbin. Set the low bobbin thread warning level to 3 or 4 (refer to page 51). -
Page 50: Customizing Machine Settings Machine Setting Mode
CUSTOMIZING MACHINE SETTINGS Machine Setting Mode Press the set mode key to enter the machine setting mode. You can select various options and customize the machine settings to suit your personal preference. q Set mode key Press one of the 3 tabs to select the mode to customize. w Common Setting Mode Press the common setting mode tab to enter the common setting mode. -
Page 51: Common Setting Mode
Common Setting Mode q Screen Contrast You can adjust the contrast of the visual touch screen by pressing the “+” or “–” key. w Sound Volume The signal sound can be adjusted by pressing the “+” or “–” key. Set the value to “OFF” by pressing the “–” key several times to mute the signal sounds. - Page 52 t Formatting the memory If the internal memory of the machine or USB flash drive does not function due to damage to the memory bank, you need to re-enable it by formatting the memory. To format the machine’s internal memory, press the machine icon key and a confirmation message will appear.
-
Page 53: Customizing Embroidery Mode Settings
!3 Auto-off (Time Setting) The machine will be automatically turned off if you do not use the machine within the time period set by this timer. The auto-off timer can be set from 1 to 12 hours. If you wish to turn off the timer, press and hold the “+” key until “OFF”... - Page 54 y Hoop confirmation The hoop confirmation message will appear every time before opening the ready to sew window. However you can turn this option off by selecting off. u Hoop calibration You can calibrate the center position of the hoops. Press the Yes key.
- Page 55 Thread cutting i Easy setting When this setting is turned on, the machine will trim the threads if the jump thread is 3 mm or longer, or when the machine stops to change the thread to the next color. Press the OK key to confirm the easy setting. o Advanced setting When this setting is turned on, you can configure the Jump thread cutting !0 , Cut at color change/end !1 , and...
-
Page 56: Language Selection Mode
!4 Grid line on/off Turn this option on to show grid in the editing window. The grid size can be altered from 10 to 30 mm with the “+” or “−” key when this option is on. Turn this option off to hide the grid. !5 Resume mode When Resume Mode is turned on, the last pattern sewn before turning the power off will resume when you turn... -
Page 57: Saving And Opening A File
Saving and Opening a File You can save original embroidery designs as files in the built-in memory and/or USB flash drive. Press the save file key and the save file window will open. q Save file key A folder labeled “Embf” is displayed on the screen. To select a folder, press the folder icon. -
Page 58: Opening A File
Deleting a file or folder Press the delete key and select the file or folder to delete. A confirmation message appears. Press the OK key to delete the file or folder. q Delete key Opening a file To open saved files, press the open file key to open the open file window. -
Page 59: Changing A Name Of The File Or Folder
Press the X key and enter another name. Direct PC-Link You can connect the eXpressive 830 to a PC with the USB cable included in the standard accessories. You need to install Embroidery Editor and the USB driver for the eXpressive 830 on your computer. -
Page 60: Care And Maintenance
CARE AND MAINTENANCE Cleaning the Hook Area Clean the hook area at least once a month. When the clean bobbin holder message option is turned on, the caution message for cleaning the bobbin case and the hook race will be displayed when the certain time passes (refer to page 50). -
Page 61: Cleaning The Thread Path
Cleaning the Thread Path Clean lint and wax in the tension area with a piece of paper. Insert a piece of paper along the right channel and scrape out lint. Clean the needle bar thread guide with lint brush. -
Page 62: Oiling The Machine
Oiling the Machine WARNING: Move the carriage to the home position (refer to page 31), and turn off the power switch and/or unplug the machine before oiling the machine. Wait until the motor cools down before oiling. Do not dismantle the machine in any way other than as explained in this section. - Page 63 v Oil the arrow points as indicated in the illustration. t Needle bar y Presser bar u Thread take-up lever To attach the face plate, reverse the procedure z to c in reverse. Oil the oil wick Slide the cover q on the top rear side of the machine. Oil the oil wick w inside of the machine.
- Page 64 Oil the lower shaft supporter (front) NOTE: Be careful not to damage any parts when raise the machine. Remove the cap q and setscrew A w with a screwdriver. Stand the machine so that the handwheel side comes to the underside of the machine. Insert the screwdriver from the bottom hole of the thread cutter cover.
- Page 65 Oil the Y-carriage z Remove the setscrew q. q Setscrew x Remove the setscrew w. Remove the carriage cover e. w Setscrew e Carriage cover c Oil the arrow point (felt) as indicated in the illustration. To attach the carriage cover, reverse the procedure z to x in reverse.
- Page 66 Oil the X-carriage Oil the arrow point (felt) inside of the carriage slit.
-
Page 67: Troubleshooting
Troubleshooting Condition Cause Reference The machine is noisy. 1. Thread is jammed in the hook area. See page 58. See page 11. The needle thread 1. The needle thread is not threaded properly. See page 51. breaks. 2. The needle thread tension is too tight. See page 13. -
Page 68: Design Chart Embroidery
DESIGN CHART Pattern images are not to scale. Embroidery Petite Designs (SQ14b) Favorite Designs (SQ14b) (SQ20b) - Page 69 DESIGN CHART Pattern images are not to scale. Embroidery Border Designs (SQ14b) (SQ20b) Geometric Designs (SQ14b) Pantry Designs (SQ14b) (SQ20b)
- Page 70 DESIGN CHART Pattern images are not to scale. Embroidery Word Style Designs (SQ14b) (SQ20b) Flourish Alphabet (SQ14b)
- Page 71 DESIGN CHART Pattern images are not to scale. Embroidery Quilting Designs (SQ14b) (SQ20b) Bracelet Designs (SQ20b) Celebration Designs (SQ20b) Calibration Pattern (SQ14b)
- Page 72 DESIGN CHART Embroidery Gothic Cyrillic 1 Script Cyrillic 2 Cheltenham Cyrillic 3...
- Page 73 DESIGN CHART Embroidery 2-letters / 3-letters Border Normal Sew...
-
Page 74: Ec Declaration Of Conformity
This machine complies with the following regulations: EN 60335-1:2012;A11;A13;A1;A14;A2 EN 60335-2-28:2003;A1;A11 EN 62233: 2008 EN 55014-1:2017 EN 55014-2: 2015 EN 61000-3-2: 2014 EN 61000-3-3: 2013 Supplier: Elna International Corp. SA Version 1.00 Address: Rue de Veyrot 14 - 1217 Meyrin - Switzerland 3/8/2020... - Page 76 864-800-594 (EN)
Need help?
Do you have a question about the eXpressive 830 and is the answer not in the manual?
Questions and answers