Sign In
Upload
Download
Table of Contents
Contents
Add to my manuals
Delete from my manuals
Share
URL of this page:
HTML Link:
Bookmark this page
Add
Manual will be automatically added to "My Manuals"
Print this page
×
Bookmark added
×
Added to my manuals
Manuals
Brands
Rohde & Schwarz Manuals
Measuring Instruments
FSL3
Quick start manual
Rohde & Schwarz FSL3 Quick Start Manual
Spectrum analyzer
Hide thumbs
1
2
3
4
5
6
7
8
9
10
11
12
13
14
15
16
17
18
Table Of Contents
19
20
21
22
23
24
25
26
27
28
29
30
31
32
33
34
35
36
37
38
39
40
41
42
43
44
45
46
47
48
49
50
51
52
53
54
55
56
57
58
59
60
61
62
63
64
65
66
67
68
69
70
71
72
73
74
75
76
77
78
79
80
81
82
83
84
85
86
87
88
89
90
91
92
93
94
95
96
97
98
99
100
101
102
103
104
105
106
107
108
109
110
111
112
113
114
115
116
117
118
119
120
121
122
123
124
125
126
127
128
129
130
131
132
133
134
135
136
137
138
139
140
141
142
143
144
145
146
147
148
149
150
151
152
153
154
155
156
157
158
159
160
161
162
163
164
165
166
167
168
169
170
171
172
173
174
175
176
177
178
179
page
of
179
Go
/
179
Contents
Table of Contents
Bookmarks
Table of Contents
Table of Contents
Front and Rear Panel
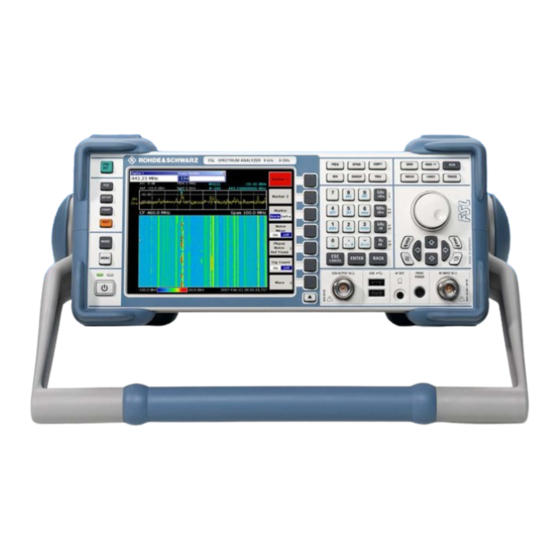
Front Panel View
Function Keys on the Front Panel
Connectors on the Front Panel
Standard Front Panel Connectors
Optional Front Panel Connectors
Rear Panel View
Connectors on the Rear Panel
Standard Rear Panel Connectors
Optional Rear Panel Connectors
Preparing for Use
Preparing for Operation
Unpacking the Instrument and Its Accessories
Checking the Accessories
Ship Damage Inspection
Warranty
Recommended Calibration Interval
Preparing the Instrument for Operation
Standalone Operation
Rackmounting
Power Supply Options
Instrument Modes
Behavior of the ON/STANDBY Key
Connecting the AC Power
Switching on the Instrument
To Switch on the Instrument
Performing a Self Alignment and a Self Test
To Perform a Self Alignment
To Perform a Self Test
Checking the Furnished Items
To Check the Installed Options
Switching off the Instrument
To Switch to Standby Mode
To Change into off Mode
Replacing the Fuses
To Replace the Fuses
Charging the Battery Pack (Option R&S FSL-B31)
Cleaning the Outside
Connecting External Devices
Connecting USB Devices
Connecting an External Monitor
R&S FSL Setup
Selecting the Frequency Reference
Setting the Date and Time
To Open the Date and Time Properties Dialog Box
To Change the Date
To Change the Time
Configuring the GPIB Interface (Option R&S FSL-B10)
To Display the GPIB Submenu
To Set the GPIB Address
To Set the ID Response String
Setting the Screen Colors
To Display the Screen Colors Submenu
To Use the Default Color Settings
To Use the Predefined Color Set
To Define and Use Your Own Color Set
Setting the Automatic Display off Function
To Activate Automatic Display off
To Deactivate Automatic Display off
Selecting and Configuring Printers
To Configure the Printer and the Printout
To Select the Printout Colors
LXI Configuration
LXI Classes and LXI Functionality
LXI Configuration Dialog
Default State of the Network Settings
LXI Browser Interface
LAN Configuration
Ping
Configuring the LAN Interface
Connecting the Instrument to the Network
Configuring the Network Card
Changing the IP Address and Configuring the Network Protocols (TCP/IP Protocol)
To Display the Network Address Submenu
To Configure the Network Protocol in a Network Without DHCP Server
To Configure the Network Protocol in a Network with DHCP Server
Operating System Properties
Windows XP Software Approved for the R&S FSL
Windows XP Service Packs
Login
Windows XP Start Menu
To Open the Windows XP Start Menu
To Return to the Measurement Screen
Firmware Update and Installation of Firmware Options
Firmware Update
To Update the Firmware
To Update the Firmware (Via Windows XP)
Firmware Options
To Activate Firmware Options
Basic Operations
Information in the Diagram Area
Display of Hardware Settings
Status Displays
Trace Information
Enhancement Labels
Setting Parameters
Keypad
Rotary Knob
Arrow and Position Keys
Softkeys
Dialog Boxes
To Enter Numeric Parameters
To Enter Alphanumeric Parameters
To Navigate in Dialog Boxes
Specialties in Windows Dialog Boxes
How to Use the Help System
To Call Context-Sensitive and Non Context-Sensitive Help
To Navigate in the Table of Contents
To Navigate in the Help Topics (with Front Panel Keys)
To Search for a Topic
To Change the Zoom
To Close the Help Window
Basic Measurement Examples
Measuring a Sinusoidal Signal
Measuring the Level and Frequency Using Markers
Increasing the Frequency Resolution
Setting the Reference Level
Measuring the Signal Frequency Using the Frequency Counter
Measuring Harmonics of Sinusoidal Signals
Measuring the Suppression of the First and Second Harmonic of an Input Signal
Reducing Noise
Measuring Signal Spectra with Multiple Signals
Separating Signals by Selecting the Resolution Bandwidth
Separating Two Signals with a Level of -30 Dbm each at a Frequency Spacing of 30 Khz
Measuring the Modulation Depth of an AM-Modulated Carrier (Span > 0)
Measuring of AM-Modulated Signals
Displaying the AF of an AM-Modulated Signal (Zero Span)
Measurements in Zero Span
Measuring the Power Characteristic of Burst Signals
Measuring the Power of a GSM Burst During the Activation Phase
Measuring the Edges of a GSM Burst with High Time Resolution
Measuring the Signal-To-Noise Ratio of Burst Signals
Signal-To-Noise Ratio of a GSM Signal
Measuring of FM-Modulated Signals
Displaying the AF of an FM-Modulated Carrier
Storing and Loading Instrument Settings
Storing an Instrument Configuration (Without Traces)
Storing Traces
Loading an Instrument Configuration (with Traces)
Configuring Automatic Loading
Brief Introduction to Remote Control
Basic Steps in Remote Control Programming
Linking the Remote Control Library for Visual Basic
Initialization and Default State
Creating Global Variables
Initializing the Remote Control Session
Initializing the Instrument
Switching the Screen Display on and off
Configuring the Power Save Function for the Display
Sending Simple Instrument Setting Commands
Switching to Manual Operation
Reading out Instrument Settings
Marker Positioning and Readout
Command Synchronization
Reading Output Buffers
Reading Error Messages
Detailed Programming Examples
Default Setting of the R&S FSL
Setting the Remote Control Status Registers
Default Settings for Measurements
Using Markers and Delta Markers
Marker Search Functions, Restricting the Search Range
Frequency Counting
Working with a Fixed Reference Point
Measuring Noise and Phase Noise
Reading out Trace Data
Storing and Loading Instrument Settings
Storing Instrument Settings
Loading Instrument Settings
Setting the Data Record for Startup Recall
Configuring and Starting a Printout
Appendix A: Printer Interface
Installing Local Printers
To Install a Local Printer
Appendix B: LAN Interface
Configuring the Network
To Change the Computer Name
To Change the Domain or Workgroup
To Operate the Instrument Without a Network
To Create Users
To Change the User Password
To Log on to the Network
To Deactivate the Automatic Login Mechanism
To Reactivate the Automatic Login Mechanism
To Map Network Drives
To Disconnect Network Drives
To Install a Network Printer
To Share Directories (Only with Microsoft Networks)
Remote Operation with XP Remote Desktop
To Configure the R&S FSL for Remote Operation
To Configure the Controller
To Set up a Connection to the R&S FSL
To End Remote Desktop Control
To Restore the Connection to the R&S FSL
To Deactivate the R&S FSL Via Remote Operation
RSIB Protocol
Advertisement
Quick Links
1
Table of Contents
2
Front Panel View
Download this manual
Quick Start Guide
Spectrum Analyzer
R&S FSL3
1300.2502K03
1300.2502K13
1300.2519.62-13
R&S FSL6
1300.2502K06
1300.2502K16
Test and Measurement
R&S FSL18
1300.2502K18
1300.2502K28
Table of
Contents
Previous
Page
Next
Page
1
2
3
4
5
Advertisement
Table of Contents
Need help?
Do you have a question about the FSL3 and is the answer not in the manual?
Ask a question
Questions and answers
Related Manuals for Rohde & Schwarz FSL3
Measuring Instruments Rohde & Schwarz R&S FSL3 Service Manual
Spectrum analyzer (153 pages)
Measuring Instruments Rohde & Schwarz FSL6 Quick Start Manual
Spectrum analyzer (179 pages)
Measuring Instruments Rohde & Schwarz FSL18 Quick Start Manual
Spectrum analyzer (179 pages)
Measuring Instruments Rohde & Schwarz FSVA Operating Manual
Signal and spectrum analyzer (1106 pages)
Measuring Instruments Rohde & Schwarz FSW-K40 User Manual
Spectrum analyzers/phase noise measurements (166 pages)
Measuring Instruments Rohde & Schwarz FSW Series User Manual
Analog demodulation measurement option (371 pages)
Measuring Instruments Rohde & Schwarz FSW Series Getting Started
Signal and spectrum analyzer (123 pages)
Measuring Instruments Rohde & Schwarz 1309.6000.08 Operating Manual
Handheld spectrum analyzer (142 pages)
Measuring Instruments Rohde & Schwarz FSUP8 Manual
Signal source (7 pages)
Measuring Instruments Rohde & Schwarz FSH3 Operating Manual
Handheld spectrum analyzer (169 pages)
Measuring Instruments Rohde & Schwarz FSH Quick Start Manual
Handheld spectrum analyzer (64 pages)
Measuring Instruments Rohde & Schwarz FSQ series Quick Start Manual
Signal analyzer (229 pages)
Measuring Instruments Rohde & Schwarz FSVA3000 User Manual
Signal and spectrum analyzer (1489 pages)
Measuring Instruments Rohde & Schwarz FS300 Operating Manual
(172 pages)
Measuring Instruments Rohde & Schwarz R&S FSP Series Operating Manual
Spectrum analyzer (796 pages)
Measuring Instruments Rohde & Schwarz FSP3 Service Manual
Spectrum analyzer (254 pages)
This manual is also suitable for:
Fsl6
Fsl18
1300.2502k03
1300.2502k13
1300.2502k06
1300.2502k16
...
Show all
1300.2502k18
1300.2502k28
Table of Contents
Save PDF
Print
Rename the bookmark
Delete bookmark?
Delete from my manuals?
Login
Sign In
OR
Sign in with Facebook
Sign in with Google
Upload manual
Upload from disk
Upload from URL


Need help?
Do you have a question about the FSL3 and is the answer not in the manual?
Questions and answers