
Related Manuals for Kozyard Caesar


Summary of Contents for Kozyard Caesar
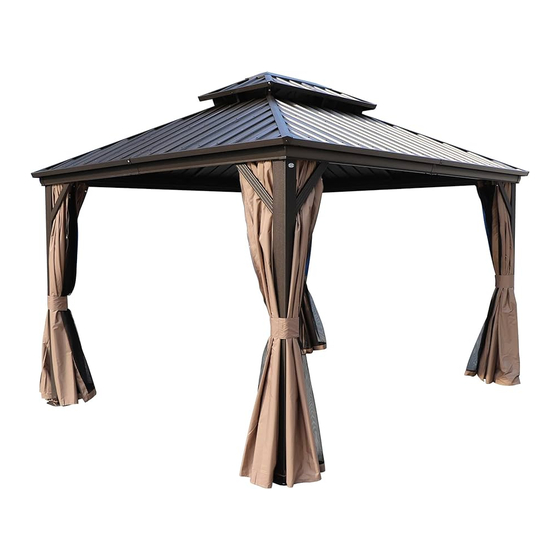
- Page 1 10’x12’ Caesar Hardtop Gazebo With Double Roof Assembly Manual Kozyard LLC Products © Copyright 2016 - 2023 Kozyard LLC. | All Rights Reserved.
-
Page 2: Warnings And Cautions
Warnings and Cautions Please read and follow this assembly and operation guide to reduce personal injury and damage to your gazebo. Do not discard any of the packaging until you have checked that you have all the parts Tie sidewalls and nettings to the poles when it is incoming over 30 MPH wind. Some parts might have sharp edges/corners.please follow basic safety precautions to reduce the risk of hurts, this item contains small parts which can be swallowed by children. - Page 3 J6 x4 Corner Solidifyng Bar Inside Roof Connector Outside Roof Connector Corner Roof Bar Roof Bar K x1 Finishing End Roof Bar Connector Finishing Bar Net Frame Finishing Bar K1 x1 Net Frame Net Frame Caesar 10’x12’ assembly manual page 1...
- Page 4 Roof Panel Roof Panel Roof Panel Roof Panel V2 x2 V1 x2 Roof Panel Roof Panel Roof Panel Roof Panel Roof Panel V3 x2 V4 x2 V5 x2 V6 x2 Roof Panel Roof Panel Caesar 10’x12’ assembly manual page 2...
- Page 5 56+2 Bracket Bracket Bracket Bracket 4# x104+3 Bracket Screws 174+4 Screws 16+2 Screws 1# x174+4 Screws 16+2 104+3 Hook Screws 64+3 2# x16+2 Screws Screws 28+2 24+2 Screws 3# x 8+1 φ12x20+M6x12 Screws Screws Caesar 10’x12’ assembly manual page 3...
-
Page 6: Parts Required
After completing assembly, If it is often strong wind in your location during bad weather or when the wind scale reaches level 5 or above it, please reinforce it as is shown above . Caesar 10’x12’ assembly manual page 4... - Page 7 Connect Beams (Part E5, D5) into one beam using Union Bar (Part F5) with screws 1# as shown in diagram. Short Beam Overall: Connect Beams (Part E6, D6) into one beam using Union Bar (Part F5) with screws 1# as shown in diagram. Long Beam Overall: Caesar 10’x12’ assembly manual page 5...
- Page 8 Use screws 3#L and 3# first, then use screw 2# to connect Poles and Beams together as shown in diagram. ① Tip: All parts must be put on the carpet in the assembly. ② ② ① Tip: At least three people for this step. Caesar 10’x12’ assembly manual page 6...
- Page 9 Affix the frame with Corner Solidifying Bars (Part J5,J6) using screws 1# as shown in diagram. Tips: Please measure between posts to posts (DIAGONALLY),to assure it is squared up so that all of the pre-manufactured materials fit as planned. page 7 Caesar 10’x12’ assembly manual...
- Page 10 Parts Required: G5 x4 H5 x4 ① ② Step 5: Cover the connections Affix middle beams using Joint Finish Connecting Beams using Cover (Part H5) and screws 9# as Corner Covers (Part G5) and screws 9# shown in diagram. ① as shown in diagram.
- Page 11 Joint Cover (Part H1) to lock them. ② ① The quantity of hooks for each slot as below: Hooks to each slot of Hooks to each slot of Sidewall Track on Beams (Part E5,D5). Sidewall Track on Beams (Part E6,D6). Caesar 10’x12’ assembly manual page 9...
- Page 12 Top of Poles using screw 1# as shown in diagram. Attach Finishing Bar (Part P , Q)with Finish End (Part R) using screws 1# to Corner Roof Bar (Part M5) as shown in diagram. Caesar 10’x12’ assembly manual page 10...
- Page 13 Attach Roof Bar (Part N5) to Roof Connector (Part K) using screw 1# as shwon in diagram. Attach Roof Bar (Part N5) to Beams using screw 1# as shwon in diagram. Caesar 10’x12” assembly manual page 11...
- Page 14 Connect Outside Roof Connctor (Part K1)to Inside Roof (Part K)using screw 1# as shown in diagram. Upward View Tips: Do not tighten these two screws completely before step 12, only after puting all upper panels in place,then tighten them thoroughly. Caesar 10’x12’ assembly manual page 12...
- Page 15 Please stick Double-sided Adhesive Tape (Part H3) to the down side edge of the roof panels where the Brackets (Part Z, Z1,Z2) are supposed to attached in order to avoid these plastic brackets from sliding off prior to assembly. Caesar 10’x12’ assembly manual page 13...
- Page 16 Assemble Roof Panels Push the Roof Panels (Part V1,V2,V3,V4,V5,V6) to upper roof as shown in diagram. Attach Finishing Bars (Part T,T1) to upper roof with Finish End (Part R) using screws 1# as shown in diagram. Caesar 10’x12’ assembly manual page 14...
- Page 17 If the holes on Solidifying Bar (part U0, U) and the hole of the roof panel cannot be aligned, please adjust or loose screw 1#, until the screws of the roof panel in place. Caesar 10’x12’ assembly manual page 15...
- Page 18 Please stick Double-sided Adhesive Tape (Part H3) to the down side edge of the roof panels where the Brackets (Part Z, Z3,Z4) are supposed to attached in order to avoid these plastic brackets from sliding off prior to assembly. Caesar 10’x12’ assembly manual page 16...
- Page 19 Please stick Double-sided Adhesive Tape (Part H3) to the down side edge of the roof panels where the Brackets (Part Z, Z3,Z4) are supposed to attached in order to avoid these plastic brackets from sliding off prior to assembly. Caesar 10’x12” assembly manual page 17...
- Page 20 Part S onto Panel (Part B13 , A14) by Double-sided adhesive tape (Part H3) in advance to avoid Part S sliding down during assembly. Part S with adhesive tape B13 , A14 The back view of Part B13 , Part A14 Caesar 10’x12’ assembly manual page 18...
- Page 21 L 45mm L 50mm L 28mm L 25mm Step 15: Affix roof panels using screws and Spacers (Part S) as shown in diagram. ATTENTION – VERY IMPORTANT! Tip: At least two people for this step. page 19 Caesar 10’x12’ assembly manual...
- Page 22 Step 16: Cover edge of roof Attach Finishing bars (Part R9,R10,R11,R12) to Roof bar and Corner Roof bar, then put Finshih End (Part R,R1) to cover them using screws 1# as shown in diagram. Caesar 10’x12’ assembly manual page 20...
- Page 23 Attach Net Frames (Part P1,Q1,Q2) to Finishing Bars ( Part P , Q)using screws (1#,11#) as shown in diagram. Perspective: Tip: The perspective drawing is for demonstrating how to assemble final step that set up Net Frame (Parts P1,Q1,Q2) better. Caesar 10’x12’ assembly manual page 21...
- Page 24 S1 x2 S2 x2 Step 18: Assemble Net and Sidewall Hang up Mosquito Net on inner rails and Solid Sidewalls on outer rails as shown in diagram. S1,S2 Y1,Y2 10 11 Curtain 13th 13th Caesar 10’x12’ assembly manual page 22...
-
Page 25: Care And Warranty
1 year from item purchased.Damage from exposure to chemicals(including not only oils, spills,fluids) won’t be covered by this warranty. Please inspect and tighten all bolts or fasteners on a regular basis to ensure proper performance and safety of your gazebo. Caesar 10’x12’ assembly manual page 23... - Page 26 Kozyard LLC Warehouse in West: 10808 6th ST, Unit 100,Rancho Cucamonga, CA 91730 Warehouse in East: 100 Ethel Rd W, Piscataway, NJ 08854 © Copyright 2016 - 2023 Kozyard LLC. | All Rights Reserved.
Need help?
Do you have a question about the Caesar and is the answer not in the manual?
Questions and answers