
Subscribe to Our Youtube Channel
Related Manuals for Kozyard Odessey


Summary of Contents for Kozyard Odessey
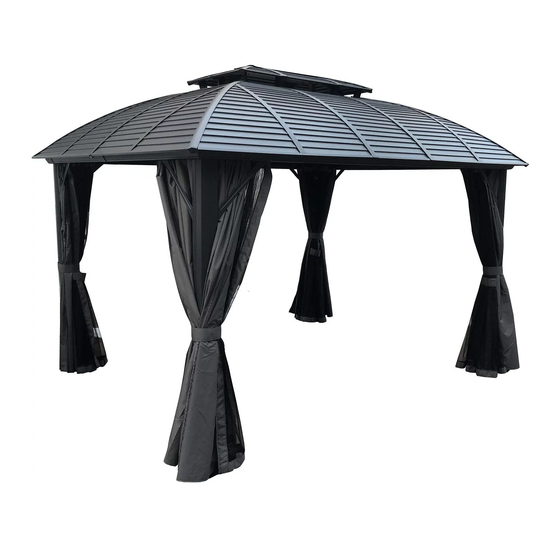
- Page 1 10’x12’ Odessey Permanent Gazebo with Double Roof Assembly Manual Kozyard LLC Products Copyright 2016 - 2019 Kozyard LLC. | All Rights Reserved.
- Page 2 Required tools (Not Included) Stepladder Safety google Safety HAT Use the hex keys in the box. Please use a Phillips screwdriver. You may need to use a drill for this step. Wearing protective gloves is recommended. Two or more people are required at this stage. Do not tighten screws all the way for now.
- Page 3 POLE BEAM BEAM BEAM CORNER ROOF BAR BEAM ROOF BAR FINISHING BAR FINISHING BAR FINISHING BAR FINISHING BAR FINISHING BAR FINISHING BAR FINISHING BAR ROOF BAR SOLIDIFYING BAR...
- Page 4 SOLIDIFYING BAR SOLIDIFYING BAR FINISHING BAR FINISHING BAR CORNER SOLIDIFYING BAR FINISHING BAR PLATE CORNER CORNER SUPPORTING SOLIDIFYING BAR JOINT COVER PART COVER FINISHING FINISHING INSIDE ROOF OUTSIDE ROOF CONNECTOR CONNECTOR SUPPORTING FINISHING PANELS PANELS PART PANELS PANELS PANELS PANELS PANELS PANELS PANELS...
- Page 5 SOLID PLASTIC HOOK PANELS SIDEWALL LOCK MOSQUITO JOINT COVER SCREWS SCREWS SIDEWALL ALLEN KEY SCREWS SCREWS SCREWS Step 1: Set up poles (Part A) with Plates (Part B) using screws 1# as shown in diagram.
- Page 6 Step 2: Connect Part C and C1 into one beam using screws 1# as shown in diagram. C 2x C1 2x C2 2x C3 2x 1 16x Connect Part C2 and C3 into one beam using screws 1# as shown in diagram.
- Page 7 Step 3: Use screws 1# 2# 3# to connect poles and beams together as shown in diagram.
- Page 8 Step 4: Affix the frame with Corner Solidifying Bars (Part L and L1) by using Screws 1# as shown in diagram.
- Page 9 M5x10 x104 AA x4 Step 5: ② ① ① ② After finish hooks into tracks, then put AA to lock them. ① ② Put 6 hooks to each slot of Put 7 hooks to each slot of sidewall track (part C&Part C1) sidewall track (part C2&Part C3)
- Page 10 Step 6: Finish connecting beams using Corner Covers (Part M) and screws 4# as shown in diagram. Affix middle beams using joint cover (Part N) and screws 4# &5# as shown in diagram.
- Page 11 Step 7: Set up roof frame. Affix the supporting part(Part P) Connect the Inside roof with corner roof bar using connector (Part Q) with the screws 1# Corner Roof Bar (Part D) using Screws 1# as shown in diagram. Step 8: Attach the Corner Roof Bar (Part D) and main frame using Screws 1# as show in diagram.
- Page 12 Step 9: M6x12 Attach Roof Bars (Part E) to inside roof connector and main beam using Screws 1#&2# as shown in diagram.
- Page 13 Step 10: Connect the Outside Roof Connector (Part Q1) to inside roof (Part Q) using screw 2# as shown in diagram. M6x12 M6x16 Affid Finishing Bars (Part F,F1&F2) to roof bars(Patrt D&E) using Finishing End (Part R&R1) and Screws 1#&2# as shown in diagram.
- Page 14 Step 11: Insert Panels (Part T,T1,T2) into the slots of roof bars as shown in diagram. Step 12: M6x12 Affix Finshing Bars (Parts G,G1&G2) to Roof Bars (Part E&D) using Finishing End (Part R&R2) and Screw 1#as shwon in diagram.
- Page 15 Step 13: Affix Roof Bars (Part H&H1) to Beam using supporting part (Part S) and Screws 1# as shown in diagram. M6x12 Insert Roof Bars (Part H&H1) to the slot of Corner Roof Bar (Part D) as shown in diagram.
- Page 16 Step 14: Affix Solidifying Bars (Part J&J1) to Corner Roof Bar (Part D) using screw 1# as shown in diagram. M6x12 Affix Solidifying Bars (Part J&J2) to Roof Bar (Part E) using screw 1# as shown in diagram.
- Page 17 Overall Roof Assembly Attention: Start from V and install clockwisely in sequence piece by piece, only W and W1 can joinly insert into the slot. Fit the V2 and V3 from top to the slot.
- Page 18 Step 15: 2. Only when sheet metal fit well into the slot, then install part Y to fix it. 1. Insert V into the slot of H and E, then put V2 from above to the slot and join with V. Join W1 and W, then insert into the slot of E Connection between V&V2,V1&V3,W&W1...
- Page 19 Step 16: M6X12 Affix Finishing bars (Part K,K1&K2) to roof bars using Finishing End (Part R&R2) and screws as shown in diagram.
- Page 20 Step 17 : Hang up solid sidewall as shown in diagram. In the end check all screws are fixed tightly before using.
- Page 21 Kozyar © Copyright 2016 - 2019 Kozyard LLC. | All Rights Reserved.
Need help?
Do you have a question about the Odessey and is the answer not in the manual?
Questions and answers