Advertisement
ITEM: L-AZ 905**
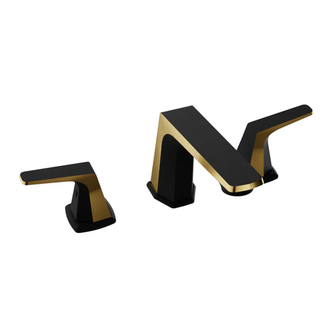
2 TONE LAVATORY FAUCET
Installation & OPERATION MANUAL
V1.0
10/30/2022
LEAD FREE
NSF/ANSI/CAN 61
DON'T WAIT!
REGISTER NOW!
Register your product within 90 days to ensure your product is
recognized as an
purchase and is
for warranty
coverage.
in the
registry card (Pg. 2) or register
at www.swcorp.com/register.
Advertisement
Table of Contents

Subscribe to Our Youtube Channel
Summary of Contents for Anzzi L-AZ 905 Series
- Page 1 ITEM: L-AZ 905** 2 TONE LAVATORY FAUCET INSTALLATION & OPERATION MANUAL V1.0 10/30/2022 LEAD FREE NSF/ANSI/CAN 61 DON’T WAIT! REGISTER NOW! Register your product within 90 days to ensure your product is recognized as an purchase and is for warranty coverage.
- Page 3 PRODUCT SIZE CHART 2.7" 5"-16" [69mm] [127mm-406mm] 2.01" [51mm] 2.05" 1.06-1.18" [52mm] [27-30mm] 1/2" male thread connection 5.5" [140mm] 1.3-1.38" [33-35mm] 2.05" [52mm] TOOLS Wrench Screwdriver PG.1...
- Page 4 COMPONENTS [01] [02] [03] [05] [17] [04] [06] [07] [18] [08] [09] Part. Description [13] [10] [01] Spout [14] [11] [02] Aerator [03] Button [12] [15] [04] Screw [05] [06] Handle [07] Handle Base [08] O-ring [09] Valve Assembly [16] [10] Rubber Washer [11]...
- Page 5 INSTALLATION [04] [01] [17] [06] [03] [07] [08] [01] [11] [16] Stem [08] [09] [10] [11] red ring [13] [12] outlet [14] blue ring [15] STEP 1: Remove Rubber Gasket [13], Metal Gasket [14] and Lock Nut [15] from Spout [01]. Install Hoses [16] to the screw holes at the bottom of the Spout [01] and tighten the Hoses [16] to secure.
- Page 6 INSTALLATION inlet inlet hose or copper tube [16] outlet outlet COLD STEP 3: STEP 4: Connect the Hoses [16] to the outlets of Valve Use hoses or copper tubes(NOT PROVIDED) to Assembly [09]. connect the inlets of Valve Assembly [09] and the Hot and Cold water supplies.
- Page 7 PUSH POP-UP INSTALLATION Specification Body Gasket STEP 6: Remove Body and Gasket from POP-UP drain. Install the Body and Gasket through the drain hole of the sink as shown in Figure 6. Body Washer Gasket Plastic washer Lock nut Outlet pipe STEP 7: STEP 8: Slide Washer, Plastic washer and Lock nut...


Need help?
Do you have a question about the L-AZ 905 Series and is the answer not in the manual?
Questions and answers