Table of Contents
Advertisement
Quick Links
USER MANUAL
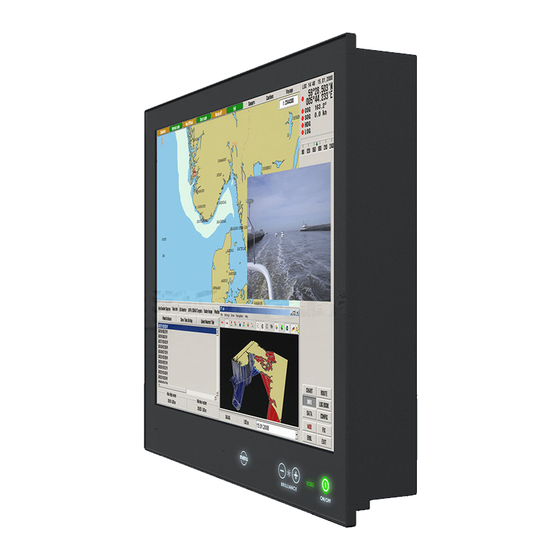
Series X G2 - Maritime Multi Computer (MMC) Models
HD 19T22 MxC-yyy-yyyyyy - 19.0 inch Maritime Multi Computer
HD 24T22 MxC-yyy-yyyyyy - 24.0 inch Maritime Multi Computer
HD 26T22 MxC-yyy-yyyyyy - 25.54 inch Maritime Multi Computer
HD 27T22 MxC-yyy-yyyyyy - 27.0 inch Maritime Multi Computer
(where x is either; M=Standard (MMC), E=ECDIS Calibrated (MEC)
(where y=configurations/factory options)
User Manual MMC Series X G2
Updated: 22 Nov 2022
Doc Id: INB101191-1 (Rev 14)
Created: 363
Approved: 6987
Advertisement
Table of Contents

Related Manuals for Hatteland X G2 Series


Summary of Contents for Hatteland X G2 Series
- Page 1 USER MANUAL Series X G2 - Maritime Multi Computer (MMC) Models HD 19T22 MxC-yyy-yyyyyy - 19.0 inch Maritime Multi Computer HD 24T22 MxC-yyy-yyyyyy - 24.0 inch Maritime Multi Computer HD 26T22 MxC-yyy-yyyyyy - 25.54 inch Maritime Multi Computer HD 27T22 MxC-yyy-yyyyyy - 27.0 inch Maritime Multi Computer (where x is either;...
- Page 2 Copyright © 2022 Hatteland Technology AS Eikeskogvegen 52, N-5570 Aksdal, Norway. All rights are reserved by Hatteland Technology AS. This information may not, in whole or in part, be copied, photocopied, reproduced, translated or reduced to any electronic medium or machine- readable form without the prior written consent of Hatteland Technology AS.
-
Page 3: Table Of Contents
Contents of package ....................... 6 General .................... 9 IEC62368 policy - Introduction ..................... 10 About this manual ........................11 About Hatteland Technology ....................11 www.hattelandtechnology.com ....................11 Contact Information .......................11 Maritime Multi Computer (MMC) Generation 2 (G2) - Introduction ........12 Product Labeling ........................13 Installation .................. - Page 4 How to activate Windows Recovery Environment on OS Drive .......... 66 WatchDog Timer function ..................... 67 Pinout Assignments ......................68 IEC62368 policy for Hatteland Technology products ............71 Declaration of Conformity ..................... 73 Return Of Goods Information ....................74 General Terms and Conditions ..................... 75 Pixel Defect Policy ........................
- Page 5 This page left intentionally blank IND100130-2...
-
Page 6: Contents Of Package
Contents of package Note: Entries listed below are for Standard factory shipments. Customized factory shipments may deviate from this list. Item Description Illustration 1 pcs of power cable European Type F “Schuko” to IEC. EUR TYPE F Length 1.8m TP52/TC01-1,8M 1 pcs of power cable US Type B plug to IEC. - Page 7 Package may also include: (based on accessories/options ordered) Item Description Illustration Depending on factory mounted options, Terminal Bracket Connector kit as follows: 4 x 5-pin Terminal Block 3.81 for RS-422 / RS-485 NMEA COM (PCA200828-1 / PCA100293-1) 4 x 4-pin Terminal Block 3.81 for CAN Interface (ZIA0001310-B) 4 x 5-pin Terminal Block 3.81 for Digital Input/Output (PCA100297-1) Note: Location of module(s) may 2 x 5-pin Terminal Block 3.81 for RS-422 / RS-485 NMEA COM + Digital Input/Output (Q170 IO)
- Page 8 This page left intentionally blank IND100130-2...
-
Page 9: General
General IND100130-2... -
Page 10: Iec62368 Policy - Introduction
Please read and understand the material in this manual in its entirety before doing any installation/servicing/upgrades. Personnel who are allowed to do work on the unit is detailed in the “IEC62368 policy for Hatteland Technology product” section later in this manual. Symbols pertaining to different personnel in regard to operations is described in the user manual. -
Page 11: About This Manual
About Hatteland Technology Hatteland Technology is the leading technology provider of specialized display and computer products, delivering high quality, unique and customized solutions to the international maritime, naval and industrial markets. The company represents innovation and quality to the system integrators worldwide. Effective quality assurance and investment in sophisticated in-house manufacturing methods and facilities enable us to deliver Type Approved and Mil tested products. -
Page 12: Maritime Multi Computer (Mmc) Generation 2 (G2) - Introduction
The integrated nature of Hatteland Technology’s second generation Series X Panel Computers also enables tangible cost savings for equipment manufacturers and systems integrators. Hatteland Technology’s Panel Computers provide... -
Page 13: Product Labeling
This section details the locations, content details and specifications for factory mounted labels for all currently available standard Hatteland Technology Panel Computer (MMC) models. This information will in most cases also apply for most Customized Models as well, but may differ based on customer requirements, in that case, please refer to the customized User Manual (paper or electronic version, dependent on customer requirements). - Page 14 Product Labeling Label Locations Number ID and coloring based on “Label Size and Types“ table from previous page. All illustrations below are seen from rear (and side where needed) with connectors facing down. Actual labels regarding its size and text orientation vs product size is drawn in.
- Page 15 Product Labeling Warranty Label If you are to perform service on a unit still under warranty, any warranty will be void if this label show signs of removal attempts or damaged by screw driver. This label is located on the back of the product and covers a key screw. This is to aid service departments in determining if there has been any unauthorized service on a unit still under warranty.
- Page 16 *Projected Capacitive (PCTS) / Water: Touch Screen Glass Surface can withstand drip and direct rain, but expect reduced capability, detection and performance if units are exposed to these factors while powered. Hatteland Technology recommends protecting the unit from direct rain or drips if critical touch operations are to be performed.
- Page 17 Note: For optimal graphical performance/hardware support with Skylake/Kaby Lake CPU’s on T22 MMC units, the Linux Kernel 4.4 or later is required/recommended. Note for Microsoft® Windows® XP Support: - Multi-Touch Screen is not supported for this Operating System or Hatteland Technology products described in the manual supports Windows XP. End of Life reference: https://www.hattelandtechnology.com/product-notifications/update-eol-microsoft-windows-xp-professional-for-embedded-systems-and-...
- Page 18 Touch Screen Products Touch Screen Calibration If you experience any deviation in the touch input accuracy, consider re-calibrating the touch screen for your system. Procedures below are for standard Microsoft® Windows® Operating System calibrate functions. Example for Microsoft® Windows® 10 IoT: 1.Open Control Panel.
-
Page 19: Installation
Installation IND100130-2... -
Page 20: General Installation Recommendations
(sun shades, distance from the windows, ventilation, etc.). To maximize product life, it is recommended using Hatteland Technology's UV Sun Covers when the product is not in use. Long term direct sun exposure might have cosmetic impacts on the product. -
Page 21: Installation Limitations
11. Additional rules may apply to certain procedures where the symbols are present. For more information, review “IEC62368 policy for Hatteland Technology product” section later in this manual. Installation limitations Due to environmental factors, please review the points noted below. - Page 22 9. The classification is only valid for approved mounting brackets provided by Hatteland Technology. The unit should be mounted stand-alone without any devices or loose parts placed at or nearby the unit. Any other type of mounting might require test and re-classification.
-
Page 23: Ergonomics
General Installation Recommendations Ergonomics 1. The front surface of the display glass has an anti-reflective (AR) coating which can be scratched and damaged with improper cleaning. It is recommended using only 90+% pure Isopropyl alcohol (Isopropanol) and a soft fabric cloth for this first cleaning. -
Page 24: Cables
General Installation Recommendations Cables Use only high quality shielded signal cables. Cable Entries & Connectors (Marked area) Illustration below for smallest/largest sizes only. Bottom View - Displays Back View - Displays Bottom View - Panel Computers Back View - Panel Computers Maximum Cable Length Any cable should generally be kept as short as possible to provide a high quality input/output. -
Page 25: Housing / Terminal Block Connector Overview
Connector used for module 2-pin MSTB 2,5/ 2-STF-5,08 BK • DC Power IN (24VDC) - Dual Input Screwdriver: SZS 0,6x3,5, slot- Identifi ed on Hatteland Technology product datasheet as: “Terminal Block 5.08” headed. Tightening torque min. 0.5 Nm. Tightening torque max 0.6 Nm. - Page 26 General Installation Recommendations Configuring Housing / Terminal Block connectors Below is a brief illustration that might be useful during configuration and installation of such connectors. You will need suitable pre-configured cable(s) and tools to configure the connector(s) and cable(s) that are present in your installation environment.
-
Page 27: Panel Cutout / Console Mounting Bracket Kit For 19 Inch
Installation Procedures Panel Cutout / Console Mounting Bracket Kit for 19 inch You need: Hex tool (5mm), 1 pcs of HD CMB SX2-N1 Kit (included in delivery). Attention: A suitable pre-cut panel cutout should be made prior to mounting. Do not force the unit into the panel cutout as it might break the outer glass or scratch the chassis on the unit. - Page 28 Installation Procedures ▼ 5: Mount the Thumb Screw and Mounting Socket Nut ▼ 6: Finally, in a even way fasten each of the 4 Thumb through each of the flat brackets threaded holes as Screws to securly fasten the unit to the rear of the Panel illustrated and fasten the Mounting Nut tight at the end.
-
Page 29: Panel Cutout / Console Mounting Bracket Kit For 24 And 27 Inch
Installation Procedures Panel Cutout / Console Mounting Bracket Kit for 24 and 27 inch You need: Torx T25 tool, 1 pcs of HD CMB SX2-E1 kit (included in delivery). Procedure suitable for: Display and Panel Computers Series X Generation 2 range. Brackets are EN60945 Tested. Attention: A suitable pre-cut panel cutout should be made prior to mounting. -
Page 30: Panel Cutout / Console Mounting Bracket Kit For 26 Inch
Installation Procedures Panel Cutout / Console Mounting Bracket Kit for 26 inch You need: Torx T25 tool, 1 pcs of HD CMB SX2-F1 kit (included in delivery). Procedure suitable for: Display and Panel Computers Series X Generation 2 range. Brackets are EN60945 Tested. Attention: A suitable pre-cut panel cutout should be made prior to mounting. -
Page 31: Mounting Bracket, Table / Desktop / Ceiling - 15, 17 And 19 Inch
Installation Procedures Mounting Bracket, Table / Desktop / Ceiling - 15, 17 and 19 inch Procedure suitable for: Display (MMD) and Panel Computer (MMC) Series X Generation 2 (G2) product ranges. 19 inch Maritime Multi Display (MMD) used as example below. You need: - M3 Unbrako®... - Page 32 Installation Procedures ▼ 5: Please note the Factory Mounted Torx screws on both bracket sides, THESE ARE NOT TO BE ADJUSTED OR LOOSENED! ▼ 6: Fasten the complete unit to your table/desktop location, and tilt it into the desired position. Locate the Set Socket Screws on both brackets decribed in step 3.
-
Page 33: Mounting Bracket, Table / Desktop / Ceiling - 24, 26 And 27 Inch
Installation Procedures Mounting Bracket, Table / Desktop / Ceiling - 24, 26 and 27 inch You need: M5 Unbrako® Hex Key tool and 1 pcs of HD TMB SX1-C1 Mounting Bracket Kit. Fasteners (6 pcs M6) for Table / Desktop location not included. Procedure suitable for: Display and Panel Computers. 24 inch unit used as illustration below, but same procedure apply for 26 and 27 inch units as well. - Page 34 Installation Procedures ▼ 5: You may now mount the unit onto your desired location. It is advised that you unlock the Lock Pin (as shown in step 4), tilt the unit 90° backwards (FIG1) and properly fasten the bracket base into location (FIG2). NB! Be careful not to break or scratch the edge of the front glass! Then repeat step 4 again until your desired tilting position has been achieved and you have verified that the Lock Pin are in locking position and the unit is firmly attached and does not appear loose (FIG3).
-
Page 35: Physical Connections
Physical Connections Connection area of 24, 26 and 27 inch units (illustration) Grounding Screw Module(s) Grounding Screw Module(s) Grounding Screw Module(s) Grounding Screw Power Expansion Area for 1 x DisplayPort Out 1 x RJ45 Network (2) 1 x RJ45 Network (3) Power Inputs DC &... - Page 36 Grounding Screws located near modules (Expansion) area. See references in illustration above. Please review “General mounting instructions” in the “Installation” chapter, pt. 7 for more information. Note for Grounding Screws:Standard Grounding Screw/Bolt provided by Hatteland Technology is “Pan head screws M4x8mm w/spring and plainwasher”.
- Page 37 (Activity) will be shown as “HDD” illuminated symbol on the front glass. Before inserting or removing trays with SSD devices installed, the Panel Computer unit must be shut down / powered down before proceeding. Single Removable Tray and Pre-mounted Storage Device are available from Hatteland Technology as accessory. Typenumber...
- Page 38 Physical Connections EXPANSION AREA for Optional modules: In this expansion area of the unit (1 x small and 2 x large), optional factory mounted modules may be available if ordered. (see illustrations below or dedicated Data Sheets as well as “Housing / Terminal Block Connector Overview” in this manual for more information).
-
Page 39: Com Ports Numbering
Physical Connections Internal (COM port) support for remote controlling MMC units: A detailed description of the SCOM (Serial/Ethernet Communication) can be found here: https://www.hattelandtechnology.com/hubfs/pdfget/inb100018-5.htm - Review also the “Pinout Assignments” chapter in this manual for additional help during preperation and/or installation of external equipment intended to communicate with. - Page 40 This page left intentionally blank IND100130-2...
-
Page 41: Operation
Operation IND100130-2... -
Page 42: User Controls
User Controls USER CONTROLS OVERVIEW The units are designed using Glass Display Control™ (GDC) touch technology to allow interactivity adjusting brilliance (brightness) and control power on / off with the use of illuminated symbols. Note that these symbols are only visible (backlight illuminated) when suitable power is connected. - Page 43 Used to sense level of ambient light in the surrounding environment. The sensor data can be read by suitable software through the Hatteland Technology SCOM functionality of the unit and thus can be used to control brightness remotely. Note: This sensor is barely visible to the eye and lies under the glass. It has no illumination behind to indicate it’s position.
- Page 44 This page left intentionally blank IND100130-2...
-
Page 45: Appendixes
Appendixes IND100130-2... -
Page 46: Ssd Selection Guide
Last revised : November 2020 SSD's has many benefits over conventional hard drives where operational performance in marine environment is the reason for Hatteland Technology to recommend SSD's. Historically, the limited write endurance and storage capability vs cost been the main limitations for SSD devices. - Page 47 SSD Selection Guide Calculation / estimation of operational lifetime Assumed System with Hatteland Technology provided SSD or selected according to guide above. 1. Measure/estimate/calculate average disk usage per day. For measuring, use SMART data. Measure the difference in numbers of write cycles at the start and at end of the test...
- Page 48 Calculation of required size of SSD (Multi-Level Cell - MLC) device The table below details the write endurance of the an enterprise environment. All values are verified by Hatteland Technology during the qualification / selection process. Please review our relevant Product Datasheets for your unit to determine the actual installed device and its TBW values before proceeding with calculations below.
- Page 49 SSD Selection Guide Measure of number of write cycles (Intel® Solid-State Drive Toolbox software) https://downloadcenter.intel.com/download/30162?v=t Download Software from: Preparation 1: Install "Intel® Memory and Storage Tool" at target system. 2: Install the unit in valid configuration, i.e. the application shall running valid use case, if possible use worst case scenario (with respect to disk activity).
-
Page 50: Bios Default Settings Overview
BIOS Default Settings Overview Items BIOS default setting comment Main> System Date [xx xx/xx/xxxx] System Time [xx:xx:xx] Advanced> [Disabled] USB Power Control [Enabled] * [Disabled] * PS2 Keyboard wake Control [Enabled] [Disabled] * PS2 Mouse wake Control [Enabled] [Disabled] * Preheat Function Configuration [Enabled] ACPI Settings... - Page 51 BIOS Default Settings Overview [Enabled]* Serial Port [Disabled] Device Settings IO=3F8h; IRQ=4; [Auto]* IO=3F8h; IRQ=4; IO=3F8h; IRQ=3,4,5,6,7,,9,10,11,12; Change Settings IO=2F8h; IRQ=3,4,5,6,7,,9,10,11,12; IO=3E8h; IRQ=3,4,5,6,7,,9,10,11,12; IO=2E8h; IRQ=3,4,5,6,7,,9,10,11,12; [RS232 Mode]* F81846 SERIAL PORT1 MODE SELECT RS485 Mode RS422 Mode Serial Port 2 Configuration Serial Port 2 Configuration [Enabled]* Serial Port...
- Page 52 BIOS Default Settings Overview CPU Fan speed : xxx RPM SYS Fan speed : xxx RPM VCORE :+0.xx V : +5.xx V :+12.xx V Memory Voltage : +1.xx V VCC3V : +3.xx V CPU Shutdown Temperature [Disabled] * 70 C/158 F 75 C/167 F 80 C/176 F 85 C/185 F...
- Page 53 BIOS Default Settings Overview Network UEFI Legacy SCOM Bus Configuration SCOM Bus Status Working [Always On]* Power Mode [Power Button Only] [Previous State] [Disabled] Buzzer off [Enabled] * [Disabled] GPO Reset [Enabled] * USB Configuration USB Configuration USB Module Version USB Controllers: 1 XHCI USB Devices:...
- Page 54 BIOS Default Settings Overview Memory Frequency xxxx MHz Total Memory xxxx MB LCD/eDP Control LCD/eDP Control [Disabled]* eDP Control [Enabled] [Disabled] LVDS Control [Enabled] * [800x600] [1024x768] [1366x768] LVDS Panel Type [1440 x 900] [1600 x 900] [1280 x 1024] [1920x1080]* [18 Bit] Panel Color Depth...
- Page 55 BIOS Default Settings Overview [Enabled] [LEGACY]* Boot mode select [UEFI] FIX BOOT ORDER Priorities [Hard Disk]* [CD/DVD] [USB Hard Disk] [USB CD/DVD] Boot option #1 [USB Key] [USB Floppy] [USB Lan] [Network] [Disable] [Hard Disk] [CD/DVD]* [USB Hard Disk] [USB CD/DVD] Boot option #2 [USB Key] [USB Floppy]...
- Page 56 BIOS Default Settings Overview [Disable] [Hard Disk] [CD/DVD] [USB Hard Disk] [USB CD/DVD] Boot option #6 [USB Key] [USB Floppy]* [USB Lan] [Network] [Disable] [Hard Disk] [CD/DVD] [USB Hard Disk] [USB CD/DVD] Boot option #7 [USB Key] [USB Floppy] [USB Lan]* [Network] [Disable] [Hard Disk]...
-
Page 57: Bios - How To Create Raid Volume
BIOS - How to create RAID volume Instructions Before configuring it is assumed the user has the appropriate knowledge on how to enter and navigate within BIOS and change values. When BIOS screen has been accessed, follow the steps below. 1: Go to Advanced / SATA Configuration, and click enter: Aptio Setup Utility - Copyright (C) 2012 American Megatrends, Inc. - Page 58 BIOS - How to create RAID volume During next boot press Ctrl+I to enter RAID Setup when the following menu is displayed: Intel(R) Rapid Storage Technology - Option ROM - 12.5.0.1815 Copyright(C) 2003-13 Intel Corporation. All Rights Reserved. RAID Volumes: None defined.
- Page 59 BIOS - How to create RAID volume Then configure the RAID Volume as you want: Intel(R) Rapid Storage Technology - Option ROM - 12.5.0.1815 Copyright(C) 2003-13 Intel Corporation. All Rights Reserved. CREATE VOLUME MENU NAME: Volume1 RAID1(Mirror) RAID Level: Disks: Select Disks Strip Size: N/A Capacity: 74.5 Sync: N/A...
- Page 60 BIOS - How to create RAID volume Procedure to reset disk mode in Microsoft® Windows® 7 before capturing image: - Open Registry Editor and go to: HKEY_LOCAL_MACHINE\System\CurrentControlSet\Services\ For each of the subkeys: Msahci, iaStorV and iaStor; - Find “Start” string, doubleclick and change value from 3 to 0, if not set. - Exit and shutdown the unit.
-
Page 61: Basic Trouble-Shooting
Basic Trouble-shooting GENERAL ISSUES FOR TFT PANEL BASED PRODUCTS Note: Applies for a range of various products. This is only meant as a general guide. O PICTURE / LED BEHAVIOUR: If there is no light at all in the LED at the FRONT, check power cables. If the LED in front is green, then check if the brightness is set/adjusted to max brightness. -
Page 62: Trouble-Shooting
Reference: DOC207939-1 The tool described in this chapter is available directly from Support at Hatteland Technology. In order to receive a copy of the software (Windows 10 only) and the appropriate matching OS image to your exact product model, please have a complete unit’s Type number and Serial number ready prior to contacting Support at Hatteland Technology (or... - Page 63 5. Wait for the “Success” message to appear and a dialog box will appear. Press OK. 6. You have now completed creating the USB Recovery Stick. Please disconnect the USB from the PC using the “Safe Removal” feature. Hatteland Technology AS | www.hattelandtechnology.com | Enterprise no: NO974533146 Page 5 of 7 Appendix...
- Page 64 This solution does not support “Legacy” BIOS, only UEFI is supported. 1.3.2 How-to-use Boot into your USB-stick, by pressing “F7”-key during start-up of your Hatteland Technology Panel Computer. Some of our computer models uses “F11”-key to access boot menu. You will see a list of bootable devices, select your USB-stick.
- Page 65 Yrjan Rein 2021.02.04 Morten Mæland Updated Pictures. Removed chapter that is not relevant to the function of “recovery only”. Updated name of the USB setup executable. Hatteland Technology AS | www.hattelandtechnology.com | Enterprise no: NO974533146 Page 7 of 7 Appendix IND100077-222...
-
Page 66: How To Activate Windows Recovery Environment On Os Drive
How to activate Windows Recovery Environment on OS Drive Reference: DOC208258-1 Products delivered before Q1-2021 from Hatteland Technology may not have Windows Recovery Environment present. DOC208258-1 - Revision 01 The Windows Recovery Environment must be manually activated before it can be used. Please follow the steps below. -
Page 67: Watchdog Timer Function
WatchDog functions provided by Third-Party: The following link provides documentation, SDK, Code Examples and tools to access the unit's WatchDog function: Chip is F81846. Please visit third-party link: http://www.fintek.com.tw/index.php/supports/sw-developkitdl https://www.hattelandtechnology.com/support-archive?main_category=Marine%20&%20Offshore!sub_category=Panel%20 Computer!lower_category=HATTELAND%C2%AE%20Series%20X%20G2!status=Active!details=OFF Fintek Software Development Kit Windows Software Programming Guide v1.18... -
Page 68: Pinout Assignments
Pinout Assignments Connectors illustrated here are either standard by factory default or may be available (through factory customization). Note that some combinations may not be possible due to space restrictions. List also valid for customized models. All pin out assignments are seen from users Point of View (POV) while looking straight at the connector. Please review the dedicated datasheet or technical drawings for your actual unit to identify and determine the presence of desired connector. - Page 69 Pinout Assignments 20-pin DisplayPort (DP) Female 10+10 pin RS-422 / RS-485 NMEA Module Type Number “PCA200828-1 / PCA100293-1” 19 17 15 13 11 9 7 5 3 1 6 7 8 9 1 0 6 7 8 9 1 0 1 2 3 4 5 1 2 3 4 5 20 18 16 14 12 10 8 6 4 2...
- Page 70 Pinout Assignments 4+4 pin CAN I/O Module, 2 channels CAN H Type Number “ZIA0001310-B / ZIA0001310-SLCAN” 120Ω 120Ω CAN L CAN1 CAN Node CAN Node CAN Node Cable Stub Length CAN H CAN H CAN H CAN L CAN L CAN L Note: 110/120Ω...
-
Page 71: Iec62368 Policy For Hatteland Technology Products
IEC62368 policy for Hatteland Technology products Introduction According to the requirements of EN 62368-1:2014. The tables below refers to the policies for opening, servicing and installation of the unit(s) referred to in this manual. This equipment is designed to be used as a fixed installation and to be sold through special sales channels for professional use. - Page 72 IEC62368 policy for Hatteland Technology products Authority Description Children This equipment is not suitable for use in locations where children are likely to be present. Ordinary person/ Not allowed to open unit. Sailor/End-User Not allowed to install the unit. Not allowed to terminate/connect cables to the unit.
-
Page 73: Declaration Of Conformity
Declaration of Conformity We, manufacturer, Hatteland Technology AS, Eikeskogvegen 52, N-5570 Aksdal, Norway declare under our sole responsibility that the JH MMD, JH MMC, JH STD, JH MIL, HM NMD, HM MIL, HM CMD, HT STD, HD MMD, HD MVD, HM MMD, HM XRD, HM RMD, HT MMC, HD MMC, HT/HTS/HM (Computers), HN G (Network Switches) and HT xxx (Accessories/Peripherals) product ranges is in conformity with the following standards in accordance with the EMC Directive. -
Page 74: Return Of Goods Information
How to issue a Return merchandise authorization (RMA): Hatteland Technology requires a pre-registered CDV number prior to sending goods for return. If you do not have an pre-registered CDV number, please visit the links below on how to get one. -
Page 75: General Terms And Conditions
General Terms and Conditions As of January 2015, Hatteland Technology AS’ “Terms of Sales and Delivery” and “Warranty Terms” have been substituted by the updated ”General terms and conditions for sale of goods and performance of additional services” (the “General Terms and Conditions”). -
Page 76: Pixel Defect Policy
TFT display. Neither the production at LCD-supplier nor the use of an LCD-Monitor after shipment can be influenced by Hatteland Technology. Hence Hatteland Technology cannot be made responsible for such dot failures. -
Page 77: Parts And Recycling
Dismantling of Displays and Panel Computers into its recyclable parts To be able to dispose of the unit in the correct manner, Hatteland Technology bases its requirements on Commissioning Regulation (EU) 2019/2021. For more instructions concerned to the dismantling procedure, please contact Hatteland Technology. -
Page 78: Notes
- License Terms for the installed OEM Operating System (OS) can be found in the following default factory paths: Note: This is a general listing for a varity of OS’s Hatteland Technology can factory install depending on unit. Please check specification for your unit to verify type of OS installed in order to retrieve the license terms. -
Page 79: User Notes
User Notes Appendix IND100077-24... -
Page 80: Revision History
Revised screw details, HD CMB SX2-N1, page 5 Replaced P007032-1 Gasket 24” with P022211, page 9,146 Updated 19 inch Drawings, page 66,72 - ref: https://www.hatteland-display.com/mails/23_2019_ecn.html 06 Jan 2020 General maintenance performed throughout the entire user manual. Revised Contents of Package, remove MEDIA DVD Drivers & Documentation, page 8 - ref: https://www.hatteland-display.com/mails/20_2019_eol.html... - Page 81 Revision History 18 Aug 2021 Revised text and corrected driver package URL links for Multi-Touchscreen, page 19 25 Nov 2021 Added information about WatchDog SDK, page 133 Updated Technical Drawings and related documents affected by new Safety Requirements, ref: https://www.hattelandtechnology.com/product-notifications/series-x-mmd-and-mmc-generation-2-chassis-update 22 Nov 2022 Added RAID chapter page 57-60 Appendix...
- Page 82 Hatteland Technology AS | www.hattelandtechnology.com | Enterprise no: NO974533146...
Need help?
Do you have a question about the X G2 Series and is the answer not in the manual?
Questions and answers