Table of Contents
Advertisement
Advertisement
Table of Contents

Related Manuals for CDA ECP Series


Summary of Contents for CDA ECP Series
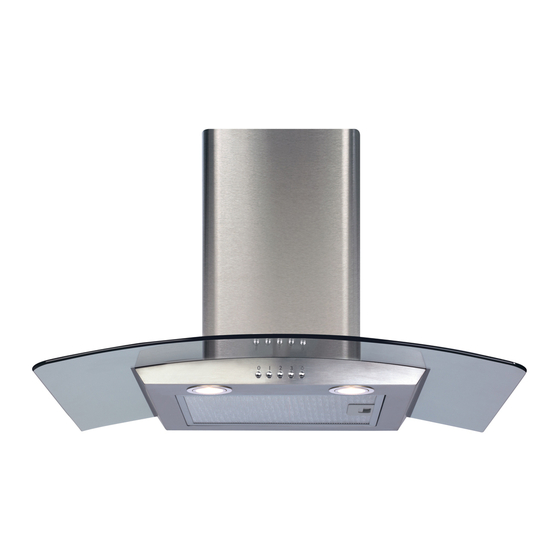
- Page 1 ECP & ECN Extractors Installation, use and maintenance www.cda.eu...
-
Page 2: Table Of Contents
Contents Important information Important notes Using your extractor Care and maintenance Changing the charcoal filter Mains electricity connection Electrical information Troubleshooting Mounting your extractor Installation Ducting Installation diagrams Installation diagrams Energy efficiency information... -
Page 3: Important Information
Appliance information: Please enter the details on the appliance rating plate below for reference, to assist CDA Customer Care in the event of a fault with your appliance and to register your appliance for guarantee purposes. Appliance Model... - Page 4 At the end of its working life, the product must be taken to a special local authority waste collection centre or to a dealer providing appliance recycling services. Disposing of a household appliance separately avoids possible negative consequences for the environment and health. It also enables the constituent materials to be recovered, saving both energy and resources.
-
Page 5: Using Your Extractor
Using your Extractor For best performance, you should switch on the extractor 15 minutes before starting to cook and leave it to run for approximately 15 minutes after the end of cooking. Control Panel A - Power off button B - Speed level buttons C - Light button Fig. -
Page 6: Care And Maintenance
Care and Maintenance IMPORTANT : DO NOT PERFORM MAINTENANCE OR CLEANING OF THE EXTRACTOR WITHOUT FIRST SWITCHING OFF THE ELECTRICITY SUPPLY. Cleaning You should use a nonabrasive cleaner. Fig. 2 Any abrasive cleaner (including Cif) will scratch the surface and could erase the control panel markings. -
Page 7: Changing The Charcoal Filter
prevent damage from other items in the dishwasher. To remove the grease filter, push in the button on the handle and then pull down on the filter at the front as shown in figure 2. When you have released it at the front, then you can pull the filter out completely. After rinsing and drying, reassemble the grease filter to the hood by reversing the removal process. -
Page 8: Mains Electricity Connection
Mains Electricity Connection THIS APPLIANCE MUST BE CONNECTED TO THE MAINS SUPPLY BY A COMPETENT PERSON, USING FIXED WIRING VIA A DOUBLE POLE SWITCHED FUSE SPUR OUTLET AND PROTECTED BY A 3A FUSE. We recommend that the appliance is connected by a qualified electrician, who is a member of the N.I.C.E.I.C. - Page 9 Assembly and electrical connection should be carried out by specialised personnel. When installing this product we recommend you seek the help of another individual. DOUBLE POLE SWITCHED FUSED SPUR OUTLET USE A 3 AMP FUSE...
-
Page 10: Electrical Information
1. Check that the mains supply has not been switched off. 2. Check that the fuse in the spur has not blown. Contact CDA Customer Care A: Customer Care Department, The CDA Group Ltd, Harby Road, Langar, Nottinghamshire, NG13 9HY T: 01949 862 012 F: 01949 862 003 E: customer.care@cda.eu... -
Page 11: Mounting Your Extractor
Mounting your Extractor When the extractor is to be installed above an electric hob, the minimum distance between the hob and extractor must exceed 600mm (650mm is recommended). When the extractor is to be installed above a gas hob, the minimum distance Gas: 750mm recommended. -
Page 12: Installation
IN THE ABSENCE OF ANY INSTRUCTIONS SUPPLIED WITH THE GAS HOB, THE MINIMUM DISTANCE BETWEEN THE HOB AND EXTRACTOR MUST BE AT LEAST 760mm. The width of any hob must not be greater than the width of the extractor installed above it. Installation The metal casing of this appliance has been coated with a preservative to protect it during transport and storage. - Page 13 Tools required Mark wall as required (see table 2) Figu re 2 - M ar k wal l as req ui red (see ta bl e 1) Fig. 5 Fig. 6 Drill holes Fit wall fixings and top screws - Ensure Figu re 3 - D rill h oles that any fixings you use are appropriate for the wall type.
- Page 14 Figu re 10 - Adj ust an d s ecure the chim ne y Fig. 14 Fig. 13 E & O E. All instructions, dimensions and illustrations are provided for guidance only. CDA reserve the right to change specifications without prior notice.
-
Page 15: Energy Efficiency Information
60.0 60.0 71.4 (D) 71.4 (D) 76.7 (C) Hood 118 (A) 118 (A) 118 (A) Hood E & O E. All instructions, dimensions and illustrations are provided for guidance only. CDA reserve the right to change specifications without prior notice. - Page 16 For more information please contact: The Sales Department on 01949 862 010 or email sales@cda.eu Customer Care Department. The CDA Group Ltd, Harby Road, Langar, Nottinghamshire, NG13 9HY 01949 862 012 F: 01949 862 003 E: customer.care@cda.eu www.cda.eu...
Need help?
Do you have a question about the ECP Series and is the answer not in the manual?
Questions and answers
I have recently installed a ECP92SS but, while the **** maks pleanty of noise, it doesan't actjally seem to extract to any significant extent.
The CDA ECP92SS may not be extracting air effectively despite making noise due to several possible reasons:
1. Blocked or Saturated Charcoal Filter – If the extractor is in recirculating mode, the charcoal filter may need replacing.
2. Incorrect Ducting – If the ducting is too long, has too many bends, or is of insufficient diameter (less than 125mm), it can reduce airflow and increase noise.
3. Obstructed Ventilation – Blockages in the ducting or external vent can restrict airflow.
4. Improper Installation – If the extractor is installed too high above the hob or with incorrect ducting, efficiency may be reduced.
5. Fan or Motor Issues – A faulty motor or fan may cause noise without effectively moving air.
Checking and addressing these factors can improve extraction performance.
This answer is automatically generated