Table of Contents
Advertisement
Quick Links
Advertisement
Table of Contents

Related Manuals for CDA EVQ71


Summary of Contents for CDA EVQ71
- Page 1 EVQ71 Extractor Installation, use and maintenance www.cda.eu Cod:0103085718...
-
Page 2: Table Of Contents
Contents: Important Dimension drawing Important information Using your extractor Care and maintenance Troubleshooting 10 - 13 Installation Installation - height Installation - preparation and ducting Installation - mounting the extractor Mains electrical connection Energy efficiency information... -
Page 3: Important
Appliance information: Please enter the details on the appliance rating plate below for reference, to assist CDA Customer Care in the event of a fault with your appliance and to register your appliance for guarantee purposes. Appliance Model... -
Page 4: Important Information
safety (LVD) and Electromagnetic interference compatibility (EMC). IMPORTANT INFORMATION FOR CORRECT DISPOSAL OF THE PRODUCT IN ACCORDANCE WITH EU DIRECTIVE 2012/19/EU. At the end of its working life, the product must be taken to a special local authority waste collection centre or to a dealer providing appliance recycling services. - Page 5 Please note: • Under no circumstances should the extractor be connected to any gas ventilation system, flue system or hot air ducting system. • Do not vent the extractor into an attic or loft space. • Only house the extractor in rooms with adequate ventilation.
-
Page 6: Using Your Extractor
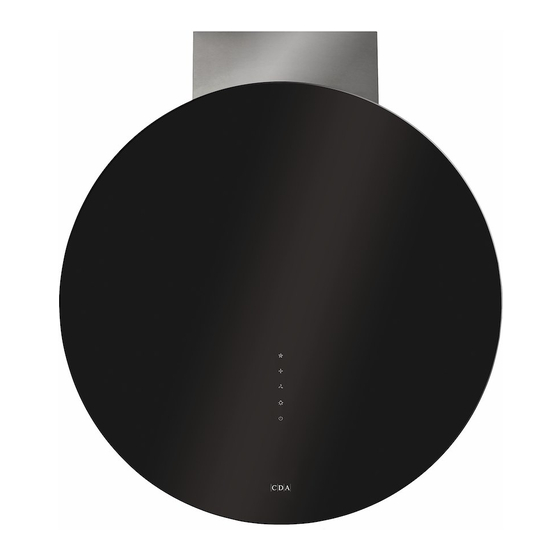
Using your extractor For best performance, you should switch on the extractor 15 minutes before starting to cook and leave it to run for approximately 15 minutes after the end of cooking (you can use the timer function for the latter). Control Panel A - Speed 3 key B - Speed 2 key... -
Page 7: Care And Maintenance
Care and maintenance IMPORTANT: DO NOT PERFORM MAINTENANCE OR CLEANING OF THE EXTRACTOR WITHOUT FIRST SWITCHING OFF THE ELECTRICITY SUPPLY. Cleaning You should use a nonabrasive cleaner. Any abrasive cleaner (including Cif) will scratch the surface and could erase the control panel markings. - Page 8 To ensure best performance of your extractor, you should replace the charcoal filters every four to six months, depending on use. The charcoal filters are an optional accessory. These are available from the CDA Sales team on 01949 862010 under code CHA33. To attach the charcoal filters: •...
-
Page 9: Troubleshooting
3. Check that the control panel is clean and free from grease Contact CDA Customer Care A: Customer Care Department, The CDA Group Ltd, Harby Road, Langar, Nottinghamshire, NG13 9HY T: 01949 862 012 F: 01949 862 003 E: customer.care@cda.eu... -
Page 10: Installation - Height
Installation - height When the extractor is to be installed above a CDA electric hob, the minimum distance between the hob and extractor must exceed 600mm. When the extractor is to be installed above a CDA gas hob, the minimum distance between the hob and extractor must exceed 700mm. -
Page 11: Installation - Preparation And Ducting
Installation - preparation and ducting The metal casing of this appliance has been coated with a preservative to protect it during transport and storage. This should be removed during installation by using a non-abrasive stainless steel cleaner. Always follow the instructions given with the cleaner being used. -
Page 12: Installation - Mounting The Extractor
Installation - mounting the extractor The first thing to do is to remove the grease filter as per page 7. The extractor body is held in place by four screws. The positions of these screws, relative to the centre line of the body, are shown in Fig. 5 on page 10. - Page 13 Insert two screws into the upper two holes of the four that have been prepared for the extractor body. Carefully, with the help of another, lift the extractor into place and guide it onto these screws. Tighten these screws, from inside the appliance, if possible. Insert two screws into the two lower wall holes through the pre-drilled holes in the extractor body (from the inside).
-
Page 14: Mains Electrical Connection
Mains electrical connection THIS APPLIANCE MUST BE CONNECTED TO THE MAINS SUPPLY BY A COMPETENT PERSON, USING FIXED WIRING VIA A DOUBLE POLE SWITCHED FUSE SPUR OUTLET AND PROTECTED BY A 3A FUSE. We recommend that the appliance is connected by a qualified electrician, who is a member of the N.I.C.E.I.C. - Page 15 Note: Use a 3A Fuse. Assembly and electrical connection should be carried out by specialised personnel. The isolation switch and fuse for this appliance should be easily accessible after installation is complete. Electrical information Mains electrical voltage: 230-240Vac Total rated power consumption:...
- Page 16 NOTES:...
-
Page 17: Energy Efficiency Information
0.388 standby 0.335 mode Sound power level 69.8 (D) Hood c i f 82.5 (A) Hood E & O E. All instructions, dimensions and illustrations are provided for guidance only. CDA reserve the right to change specifications without prior notice.
Need help?
Do you have a question about the EVQ71 and is the answer not in the manual?
Questions and answers