Advertisement
Quick Links
Advertisement

Related Manuals for CDA ECA SERIES


Summary of Contents for CDA ECA SERIES
- Page 2 EU Declarations of Conformity: This appliance has been designed, constructed and marketed in compliance with safety requirements of EU Directive 2014/35/EU (Low voltage) and requirements of EU Directive 2014/30/EU (EMC). IMPORTANT INFORMATION FOR CORRECT DISPOSAL OF THE PRODUCT IN ACCORDANCE WITH EC DIRECTIVE 2012/19/EU.
- Page 4 • Steam cleaners must not be used when cleaning this appliance. • The performance of your extractor will vary depending on a number of factors. These include: type of extraction, length of ducting, room volume, ventilation available and cleanliness of the filters. Note: For best performance, you should switch on the extractor 15 minutes before starting to cook and leave it to run for approximately 15...
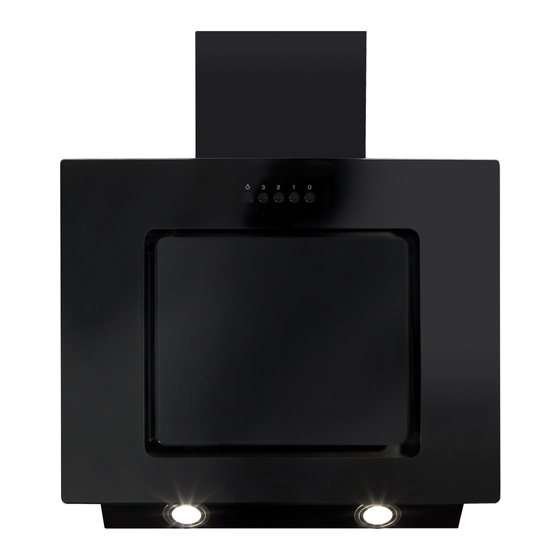
- Page 5 Using Your Extractor (ECA Range) Control Panel A - Light button B - Speed level buttons C - Power off button Fig. 1 To switch the extractor light on or off: • Press button “A”. To switch on the extractor or to change the speed at any time when the extractor is running: •...
-
Page 7: Care And Maintenance
Fig. 4 a shine with a clean cloth, for example the CDA E-Cloth. Cleaning the grease filter The grease filter should be kept clean to minimise the risk of fire. - Page 8 In re-circulating mode, air is vented back into the kitchen through the opening in the cooker hood. This method is advised if you are not using your hob intensively. Re-circulated air requires the use of charcoal filters to remove odours.
-
Page 10: Mains Electricity Connection
Mains Electricity Connection THIS APPLIANCE MUST BE CONNECTED TO THE MAINS SUPPLY BY A COMPETENT PERSON, USING FIXED WIRING VIA A DOUBLE POLE SWITCHED FUSED SPUR OUTLET AND PROTECTED BY A 3A FUSE. DOUBLE POLE We recommend that the appliance is SWITCHED FUSED SPUR OUTLET connected by a qualified electrician,... - Page 11 114W...
-
Page 12: Mounting Your Extractor
550mm. This instruction Gas: 550mm minimum overrides the instructions supplied with Electric: 550mm minimum the CDA hob. (The height should be measured from the top of the hotplates or burners). Fig. 6 Where the extractor is to be installed... -
Page 13: Installation
Installation The metal casing of this appliance has been coated with a preservative to protect it during transport and storage. This should be removed during installation by using a non-abrasive stainless steel cleaner. Always follow the instructions given with the cleaner being used. When correctly installed, your product meets all safety requirements laid down for this type of product. - Page 15 Fix ducting and seal joints. Fit the ducting adaptor. Fit ducting adaptor Fix ducting (seal joint) Fig. 12 Fig. 11 Fig. 11 Fig. 12 Adjust and secure the chimney. Mount the chimney. Mount the lower chimney Adjust and secure the upper chimney Fig.
- Page 16 NOTES...
- Page 17 NOTES...
- Page 18 NOTES...
- Page 19 Measured power consumption 0.47 Sound power level 37 (G) 37 (G) Hood 132.5 (A) 75 (A) Hood E & O E. All instructions, dimensions and illustrations are provided for guidance only. CDA reserve the right to change specifications without prior notice.
Need help?
Do you have a question about the ECA SERIES and is the answer not in the manual?
Questions and answers