Advertisement
Quick Links
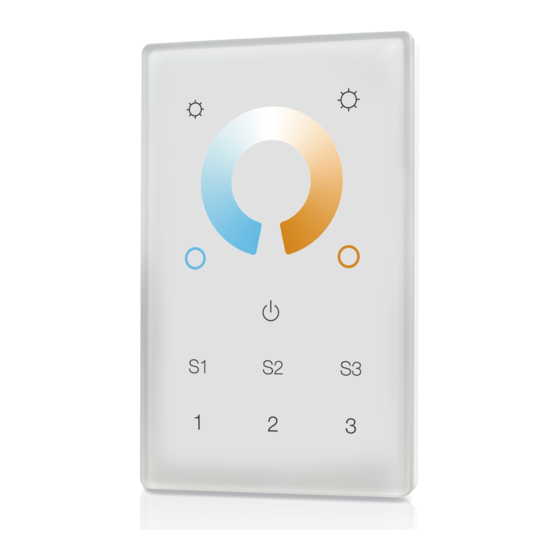
Z-Wave Wall Controller SR-ZV9002T3-CCT-US
Safety & Warnings
•
DO NOT install with power applied to device.
• DO NOT expose the device to moisture.
Quick Start
How to install:
• Step 1: turn on your wall controller.
• Step 2: activate inclusion mode on your Z-Wave controller.
• Step 3: activate inclusion mode of your wall controller by pressing the
"inclusion/exclusion" button or long press "ALL ON/OFF" button over 3 seconds.
Product Description
The Wall controller is a Security Enabled Z-Wave Plus device that can both control other
Z-Wave devices and activate scenes in Gateways. The wall controller can be included
and operated in any Z-Wave network with other Z-Wave certified devices from other
manufacturers and/or other applications. All non‐battery operated nodes within the
network will act as repeaters regardless of vendor to increase reliability of the network.
Although it is controlling other devices, the device cannot act as Z-Wave network
controller (primary or secondary), so a security enabled controller is needed for take full
advantage of all functionally for the device. It also supports the Over The Air (OTA)
feature for the product's firmware upgrade.
The wall controller has following functions:
1.Control of groups of other Z-Wave devices using 'ON', 'OFF', Dim and Color Control
commands.
2. Activation of scenes in Gateways.
The encryption modes that the wall controller supports are S0, S2 Unauthenticated.
When the wall controller is being included into a Z-Wave network, you can use your
primary controller/gateway to enable one encryption mode or disable encryption. (The
primary controller/gateway shall support encryption mode configuration).
Product Data
Z-Wave Frequency
Power Supply
Power Consumption
Operating temperature
Relative humidity
908.42 MHz (US)
100-240VAC, 50/60Hz
< 0.5W
0 to 40°C
8% to 80%
Advertisement

Summary of Contents for Sunricher SR-ZV9002T3-CCT-US
- Page 1 Z-Wave Wall Controller SR-ZV9002T3-CCT-US Safety & Warnings • DO NOT install with power applied to device. • DO NOT expose the device to moisture. Quick Start How to install: • Step 1: turn on your wall controller. • Step 2: activate inclusion mode on your Z-Wave controller.
- Page 2 Dimensions 75x120x29.1mm Material Tempered glass panel with capacitive touch buttons Brief introduction of buttons Decrease whole brightness Increase whole brightness 50% PWM1 +50% PWM2 Color Wheel for adjusting relative LED indicator brightness between PWM1 and PWM2 0% PWM1 + 100% PWM2 100% PWM1 + 0% PWM2 0% PWM1 + 100% PWM2 100% PWM1 + 0% PWM2...
- Page 3 size wall boxes. ATTENTION: Only authorized technicians under consideration of the country specific installation guidelines/norms may do works with 100-240V mains power. Prior to the assembly of the product, the voltage network has to be switched OFF and ensured against re-switching. Inclusion (Add the device to a Z-Wave network) 1.
- Page 4 Note: Factory reset is not recommended for exclusion, please use this procedure only if the primary controller/gateway is missing or otherwise inoperable. How to check whether the wall controller already included to a network Operate any button to check if there is indication from the LED indicator, and no LED indication means the wall controller does not belong to any network.
- Page 5 temperature by using color wheel. 2. Short press Scene button S1/S2/S3, direct control of associated devices using Scene Activation Set, Scene ID = 0x10 / 0x20 / 0x30. Launch 1 3. Press and hold down Scene button S1/S2/S3, direct control of associated devices using Scene Conf Set, Scene ID = 0x10 / 0x20 / 0x30.
- Page 6 Class ASSOCIATION” or “Command Class Multi Channel Association” 2. Set association by operating the wall controller and devices to be controlled: To control a Z-Wave device from the Wall Controller the node ID of this device needs to be assigned to one of the four association groups. This is a three-step process: 1.
- Page 7 Choose the objects you would like to control: • Short press Group number button 1, all associated devices of Association Group 2 are the objects which the command will be sent to. • Short press Group number button 2, all associated devices of Association Group 3 are the objects which the command will be sent to.
- Page 8 Up to 100 m outside, on average up Wireless Range to 40 m inside buildings 6.71.01 Explorer Frame Support Device Type Wall Controller Generic Device Class Wall Controller Specific Device Class Basic Wall Controller Routing FLiRS Z-Wave Plus Info Parameter Value Z-Wave Plus Version Role Type...
- Page 9 COMMAND_CLASS_SUPERVISION COMMAND_CLASS_MANUFACTURER_SPECIFIC COMMAND_CLASS_VERSION COMMAND_CLASS_ASSOCIATION_GRP_INFO COMMAND_CLASS_MULTICHANNEL_ASSOCIATION COMMAND_CLASS_CENTRAL_SCENE COMMAND_CLASS_ASSOCIATION COMMAND_CLASS_POWERLEVEL COMMAND_CLASS_DEVICE_RESET_LOCALLY COMMAND_CLASS_FIRMWARE_UPDATE_MD COMMAND_CLASS_MARK COMMAND_CLASS_SWITCH_MULTILEVEL COMMAND_CLASS_SWITCH_COLOR COMMAND_CLASS_SCENE_ACTIVATION COMMAND_CLASS_SCENE_ACTUATOR_CONF Wiring diagram Installation Z-Wave Controller SR-ZV9002T3 -CCT-US PRI: Uin=100-240VAC Iin=15mA MAX Out=Z-Wave Signal AC Power 50/60Hz AC 100-240V...


Need help?
Do you have a question about the SR-ZV9002T3-CCT-US and is the answer not in the manual?
Questions and answers