Table of Contents
Advertisement
™
Table of Contents
Section Code
Section
1
1
1
1
1
1
1
1
1
1
1
1
1
Mechanical Procedures
2
3
4
Part Replacement
5
6
7
8
9
10
11
12
13
14
15
16
17
18
19
Nautilus, Inc., www.NautilusInc.com, 5415 Centerpoint Parkway, Groveport, OH 43125 U.S.A. - Customer Service: North America (800) 605-3369, csnls@nautilus.com | outside U.S.
www.nautilusinternational.com | © 2019 Nautilus, Inc. | Nautilus, the Nautilus logo, Bowflex and Schwinn are trademarks owned by or licensed to Nautilus,Inc., which are registered or
otherwise protected by common law in the United States and other countries. | ORIGINAL DOCUMENT - ENGLISH VERSION ONLY
8024502.121521.G
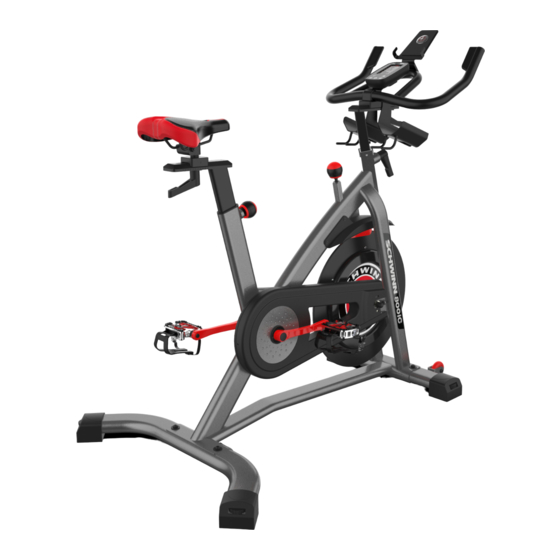
Schwinn
IC4 / IC8 / 800IC and Bowflex
™
Service Manual
1
C6 Bike
™
Page Number
2
3
3
4
5
6
6
7
8
9
10
12
13
14
18
21
25
28
32
36
43
46
51
53
61
65
71
74
79
83
91
Service Manual
8024500.121521.G
Advertisement
Table of Contents

Related Manuals for Nautilus Schwinn 800IC


Summary of Contents for Nautilus Schwinn 800IC
-
Page 1: Table Of Contents
Nautilus, Inc., www.NautilusInc.com, 5415 Centerpoint Parkway, Groveport, OH 43125 U.S.A. - Customer Service: North America (800) 605-3369, csnls@nautilus.com | outside U.S. www.nautilusinternational.com | © 2019 Nautilus, Inc. | Nautilus, the Nautilus logo, Bowflex and Schwinn are trademarks owned by or licensed to Nautilus,Inc., which are registered or otherwise protected by common law in the United States and other countries. -
Page 2: Important Safety Instructions
Nautilus, Inc., www.NautilusInc.com, 5415 Centerpoint Parkway, Groveport, OH 43125 U.S.A. - Customer Service: North America (800) 605-3369, csnls@nautilus.com | outside U.S. www.nautilusinternational.com | Printed in China | © 2019 Nautilus, Inc. | Nautilus, the Nautilus logo, Bowflex and Schwinn are trademarks owned by or licensed to Nautilus, Inc., which are registered or otherwise protected by common law in the United States and oth- word mark and logos are registered trademarks owned by Bluetooth SIG, Inc., and any use of such marks by Nautilus, Inc. -
Page 3: Safety Warning Labels And Serial Number
SAFETY WARNING LABELS AND SERIAL NUMBER WARNING! • Injury or death is possible if caution is not used while using this machine. • Keep children and pets away. • Read and follow all warnings on this machine. • Refer to the Owner’s Manual for additional warnings and safety information. -
Page 4: Specifications
SPECIFICATIONS Maximum User Weight: 150 kg (330 lbs.) Machine Weight without Dumbbells: 48.1 kg (106 lbs.) Weight of Dumbbells (supplied with IC4): 2.7 kg (6 lbs.) 131.6 cm (51.8 in) Total Surface Area (footprint) of equipment: 6667 cm (1033.3 in Power Requirements (Power Adapter): Input Voltage:... -
Page 5: Maintenance
MAINTENANCE Read all maintenance instructions fully before you start any repair work. In some conditions, an assistant is required to do the necessary tasks. Equipment must be regularly examined for damage and repairs. The owner is responsible to make sure that regular maintenance is done. -
Page 6: Moving/Storing The Machine
ADJUSTMENTS / OPERATIONS Moving and Storing the Machine The machine may be moved by one or more persons depending on their physical abilities and capacities. Make sure that you and others are all physically fit and able to move the machine safely. Remove the dumbbells, any media devices, or water bottles from the bike before moving it. -
Page 7: Heart Rate Armband
This fitness machine has integrated Bluetooth connectivity which allows it to work with a number of fitness ® apps. For our latest list of supported apps, please visit: www.nautilus.com/partners Bluetooth Heart Rate Enabled ® Your fitness machine is equipped to be able to receive a signal from a Bluetooth Heart Rate Sensing device. -
Page 8: Adjustments
Seat Adjustment Correct seat placement encourages exercise efficiency and comfort, while reducing the risk of injury. 1. With a Pedal in the forward position, place the heel of your foot to the lowest part of it. Your leg should be bent slightly at the knee. 2. -
Page 9: Locking The Flywheel For Storage
4. Practice engaging and disengaging from the Pedals before starting your workout. To disengage (release) the cleats from the pedals, push the heels outward and lift. If the body weight of a user is very low, the user may have difficulty with operation of the engagement/release mechanism in the Pedals. -
Page 10: Troubleshooting
Troubleshooting Condition/Problem Things to Check Solution No display/partial display/ Check electrical (wall) Make sure unit is plugged into a functioning wall outlet. unit will not turn on outlet Check connection at front Connection should be secure and undamaged. Replace adapt- of unit er or connection at unit if either are damaged. - Page 11 Condition/Problem Things to Check Solution Console shuts off (enters Check electrical (wall) Make sure unit is plugged into a functioning wall outlet. sleep mode) while in use outlet Check connection at front Connection should be secure and undamaged. Replace adapt- er or connection at unit if either are damaged.
-
Page 12: Maintenance Parts Exploded View
Maintenance Parts A Adjustment Handle Dumbbell Rack (Dumbbells only Drive Pulley supplied with the IC4 machine) B Adjustment Handle, Seat Slider M Adjustment Handle, Handlebar Cover, Drive Belt Post C Seat Brake Assembly Crank Arm D Seat Post O Flywheel Crank Cap E Seat Post Adjustment Knob Power Inlet... -
Page 13: Replacement Procedure Skill Level
REPLACEMENT PROCEDURE SKILL LEVEL Level I : Low - very little mechanical knowledge or exposure. Level II : Intermediate - some experience with mechanical procedures Level III : Advanced - knowledgeable about mechanical procedures Disconnect all power to the machine before you service it. When disposing of old parts, obey the applicable local and provincial requirements. -
Page 14: Adjust The Belt Tension
Nautilus, Inc., www.NautilusInc.com, 5415 Centerpoint Parkway, Groveport, OH 43125 U.S.A. - Customer Service: North America (800) 605-3369, csnls@nautilus.com | outside U.S. www.nautilusinternational.com | Printed in China | © 2019 Nautilus, Inc. | Nautilus, the Nautilus logo, Bowflex and Schwinn are trademarks owned by or licensed to Nautilus, Inc., which are registered or otherwise protected by common law in the United States and other countries. - Page 15 Note: Your machine may not match the images provided exactly. Unplug the AC Adapter from the wall outlet and machine. Keep the flywheel stable during this procedure. Do not turn the crank arms. Flywheel movement can pull fingers in and cause injury. To test the Drive Belt tension, sit on the bike and use the pedals Crank Arm at approximately 20 RPM.
- Page 16 Using a #2 Phillips screwdriver, remove the indicated hardware from the Drive Belt Cover. Carefully remove the Drive Belt Cover and set it safely aside for reassembly. Note: The oval indicates the two machine screws with washers. Drive Belt Cover Note: Please disregard the Right Crank Arm in the above image.
- Page 17 10. Reinstall the right Crank Arm and Pedal. Installation does not require the use of the crank puller. Be sure the Crank Arms are connected at 180° from each other. 11. Get on the bike and check the movement of the Drive Belt by rocking back and forth on the pedals.
-
Page 18: Calibrate The Magnetic Resistance Sensor
Nautilus, Inc., www.NautilusInc.com, 5415 Centerpoint Parkway, Groveport, OH 43125 U.S.A. - Customer Service: North America (800) 605-3369, csnls@nautilus.com | outside U.S. www.nautilusinternational.com | Printed in China | © 2020 Nautilus, Inc. | Nautilus, the Nautilus logo, Bowflex and Schwinn are trademarks owned by or licensed to Nautilus, Inc., which are registered or otherwise protected by common law in the United States and other countries. - Page 19 With the Console activated and in Power-Up mode, push the START/ENTER button. ™ Current position value Within 5 seconds of completing Step 1, push and hold down the Reset and Increase buttons for 3 seconds. The Console is now in Service Mode.
- Page 20 Push the START/ENTER button to set this value as the new 100% Configured Value. The Console will update the displayed value. 10. Unplug the machine from the power adapter for 5 minutes, and then plug it back into the machine. The Console will activate with the Magnetic Resistance Sensor calibrated to the new positions.
-
Page 21: Install The Handlebar Bushing Kit
Nautilus, Inc., www.NautilusInc.com, 5415 Centerpoint Parkway, Groveport, OH 43125 U.S.A. - Customer Service: North America (800) 605-3369, csnls@nautilus.com | outside U.S. www.nautilusinternational.com | Printed in China | © 2020 Nautilus, Inc. | Nautilus, the Nautilus logo, Bowflex and Schwinn are trademarks owned by or licensed to Nautilus, Inc., which are registered or otherwise protected by common law in the United States and other countries. - Page 22 Note: Your machine may not match the images provided exactly. Unplug the AC Adapter from the wall outlet and machine. Fully turn the Resistance Knob clockwise to lock the Flywheel into Resistance Knob place. Remove the Dumbbells from the Handlebars if they are in place on the Dumbbell Rack.
- Page 23 Using a 32mm Open Faced Wrench or an Adjustable Wrench, remove the Threaded Cap from the Frame Assembly. Threaded Use the small standard screwdriver to remove the Wedge Bushing exposed behind the Threaded Cap from the Frame Assembly, or safely tilt the machine until the Wedge Bushing falls from the Frame Assembly.
- Page 24 10. Re-install all remaining parts that were removed in reverse order. 11. Final Inspection Inspect your machine to ensure that all hardware is tight and components are properly assembled. Do not use until the machine has been fully assembled and inspected for correct performance in accordance with the Owner’s Manual.
-
Page 25: Replace The Emergency Brake Pad
Nautilus, Inc., www.NautilusInc.com, 5415 Centerpoint Parkway, Groveport, OH 43125 U.S.A. - Customer Service: North America (800) 605-3369, csnls@nautilus.com | outside U.S. www.nautilusinternational.com | Printed in China | © 2019 Nautilus, Inc. | Nautilus, the Nautilus logo, Bowflex and Schwinn are trademarks owned by or licensed to Nautilus, Inc., which are registered or otherwise protected by common law in the United States and other countries. - Page 26 Note: Your machine may not match the images provided exactly. Unplug the AC Adapter from the wall outlet and machine. Using a #2 Phillips screwdriver, loosen and remove the hardware that attaches the Fender to the Main Frame. Set the Fender and hardware safely aside for reassembly.
- Page 27 Install the new Emergency Brake Pad into the Brake Assembly. Be sure to install the Emergency Brake Pad so that the thicker part of the Emergency Brake Emergency Brake Pad is toward the front of the bike. Front of bike NOTICE: Do not crimp the cable.
-
Page 28: Replace The Brake / Resistance Knob Assembly
Nautilus, Inc., www.NautilusInc.com, 5415 Centerpoint Parkway, Groveport, OH 43125 U.S.A. - Customer Service: North America (800) 605-3369, csnls@nautilus.com | outside U.S. www.nautilusinternational.com | Printed in China | © 2019 Nautilus, Inc. | Nautilus, the Nautilus logo, Bowflex and Schwinn are trademarks owned by or licensed to Nautilus, Inc., which are registered or otherwise protected by common law in the United States and other countries. - Page 29 Note: Your machine may not match the images provided exactly. Unplug the AC Adapter from the wall outlet and machine. Keep the flywheel stable during this procedure. Do not turn the crank arms. Flywheel movement can pull fingers in and cause injury.
- Page 30 Pull quickly and sharply up on the Resistance Knob to pop the plastic top cap out of the steel tube and remove the Resistance Knob and Shaft. Note the spring and some spacers may remain in the square steel Resistance Knob tube.
- Page 31 Using a 10mm open end wrench and a 5mm hex wrench, remove the hardware (indicated by arrows) from both sides of the machine. Resistance Nut 10. Installation is the reverse procedure. Carefully turn the new Resistance Knob clockwise to install it through the Top Spacer, Spring and Square Spacer inside the mount tube.
-
Page 32: Replace The Crank Arm
Nautilus, Inc., www.NautilusInc.com, 5415 Centerpoint Parkway, Groveport, OH 43125 U.S.A. - Customer Service: North America (800) 605-3369, csnls@nautilus.com | outside U.S. www.nautilusinternational.com | Printed in China | © 2019 Nautilus, Inc. | Nautilus, the Nautilus logo, Bowflex and Schwinn are trademarks owned by or licensed to Nautilus, Inc., which are registered or otherwise protected by common law in the United States and other countries. - Page 33 Note: Your machine may not match the images provided exactly. Unplug the AC Adapter from the wall outlet and machine. Loosen and remove the Pedal. Set it safely aside for reassembly. Note: The Left Pedal is reverse-threaded. Orientation is based from a seated position on the bike.
- Page 34 Using a 16mm socket and wrench, remove the Crank Nut under the threaded Cap. Crank Nut Thread the 25mm Crank Puller into the Crank Arm. When the Crank Puller is in the correct position, only 1-2 threads on the outer portion (CP2) of the Crank Puller should show.
- Page 35 10. Apply Loctite 242 (or equivalent) to the Pedal threads. ® 11. To reinstall a Pedal, start the Pedal by hand. If you feel resistance and the Pedal does not turn smoothly into the Crank Arm, make sure that the threads are aligned correctly. Be sure that the Pedal is going on straight into the Crank Arm.
-
Page 36: Replace The Drive Belt
Nautilus, Inc., www.NautilusInc.com, 5415 Centerpoint Parkway, Groveport, OH 43125 U.S.A. - Customer Service: North America (800) 605-3369, csnls@nautilus.com | outside U.S. www.nautilusinternational.com | Printed in China | © 2019 Nautilus, Inc. | Nautilus, the Nautilus logo, Bowflex and Schwinn are trademarks owned by or licensed to Nautilus, Inc., which are registered or otherwise protected by common law in the United States and other countries. - Page 37 NOTICE: At the end of this procedure, make sure that the Drive Belt tension is correct. Refer to the “Adjust the Belt Tension” procedure. Note: Your machine may not match the image. For reference only. Unplug the AC Adapter from the wall outlet and machine. Keep the flywheel stable during this procedure.
- Page 38 Using a 15mm wrench, turn the inner portion (CP3) of the Crank Puller clockwise. The Crank Arm will slide off as it is tightened. Resistance Knob 6. Using a #2 Phillips screwdriver, loosen and remove the hardware that attaches the Fender to the Main Frame. Set the hardware safely aside for reassembly.
- Page 39 10. Using a 10mm open end wrench and a 5mm hex wrench, remove the hardware (indicated by arrows) from both sides of the machine. Resistance Nut 11. Using a 3.5mm hex wrench, remove the hardware (indicated by ovals) that attaches the Brake Assembly to the Resistance Nut from both sides of the machine.
- Page 40 13. Mark the position of the Flywheel Axle Nut on the Flywheel Bracket. Also record the number of threads showing on the Tensioner Eyebolt on each side of the Tensioner Support Bracket. 14. To loosen the Flywheel hardware, use a 15mm crescent wrench to hold the Flywheel Axle Nut on one side steady and loosen the Flywheel Tensioner Eyebolt Axle Nut on the opposite side with a 15mm socket and wrench.
- Page 41 18. Remove the old Drive Belt from the Flywheel Pulley and Drive Pulley to the outside. Set the old Drive Belt safely aside. Be sure to keep fingers clear of all pinch hazards as you turn the Drive Pulley and Flywheel. 19.
- Page 42 24. Add Loctite 272 (or equivalent) to the inner threads of the Crank ® Nut. Do not to apply the Loctite 272 to the Crank Shaft. ® Crank Nut 25. Install the Crank Nut onto the Crank Shaft, and fully tighten it. 26.
-
Page 43: Replace The Drive Belt Cover
Nautilus, Inc., www.NautilusInc.com, 5415 Centerpoint Parkway, Groveport, OH 43125 U.S.A. - Customer Service: North America (800) 605-3369, csnls@nautilus.com | outside U.S. www.nautilusinternational.com | Printed in China | © 2020 Nautilus, Inc. | Nautilus, the Nautilus logo, Bowflex and Schwinn are trademarks owned by or licensed to Nautilus, Inc., which are registered or otherwise protected by common law in the United States and other countries. - Page 44 Note: Your machine may not match the image. For reference only. Unplug the AC Adapter from the wall outlet and machine. Fully turn the Resistance Knob clockwise to lock the Flywheel into place. Resistance Knob Using a flathead screwdriver, remove the threaded Cap from the Right Crank Arm.
- Page 45 Using a #2 Phillips screwdriver, remove the indicated hardware from the Drive Belt Cover. Note: The oval indicates the two machine screws with washers. Drive Belt Cover Note: Please disregard the Right Crank Arm in the above image. It was removed during an earlier step. Using a #2 Phillips screwdriver, attach the new Drive Belt Cover to the Frame Assembly.
-
Page 46: Replace The Drive Pulley
Nautilus, Inc., www.NautilusInc.com, 5415 Centerpoint Parkway, Groveport, OH 43125 U.S.A. - Customer Service: North America (800) 605-3369, csnls@nautilus.com | outside U.S. www.nautilusinternational.com | Printed in China | © 2021 Nautilus, Inc. | Nautilus, the Nautilus logo, Bowflex and Schwinn are trademarks owned by or licensed to Nautilus, Inc., which are registered or otherwise protected by common law in the United States and other countries. - Page 47 NOTICE: At the end of this procedure, make sure that the Drive Belt tension is correct. Refer to the “Adjust the Belt Tension” procedure. Note: Your machine may not match the image. For reference only. Unplug the AC Adapter from the wall outlet and machine. Keep the flywheel stable during this procedure.
- Page 48 Repeat the last three steps on the left side of the bike. Using a #2 Phillips screwdriver, remove the indicated hardware from the Drive Belt Cover. Carefully remove the Drive Belt Cover and set it safely aside for reassembly. Note: The oval indicates the two machine screws with washers. Drive Belt Cover Note: Please disregard the Right Crank Arm in the above image.
- Page 49 To remove the Drive Belt from the Drive Pulley, slightly pull the Drive Belt outward while safely rolling the Drive Pulley. The Drive Belt will come off of the Drive Pulley. Set the Drive Belt safely aside. Be sure to keep fingers clear of all pinch hazards as you turn the Drive Pulley.
- Page 50 14. Reassembly of the Drive Pulley procedure is the reverse of the removal. NOTICE: Put the Drive Belt around the edge of the Drive Pulley. Slowly turn the Drive Pulley and carefully walk the Drive Belt onto the Drive Pulley. Make sure the Drive Belt is aligned on the Flywheel Pulley and Drive Pulley.
-
Page 51: Replace The Fender
Nautilus, Inc., www.NautilusInc.com, 5415 Centerpoint Parkway, Groveport, OH 43125 U.S.A. - Customer Service: North America (800) 605-3369, csnls@nautilus.com | outside U.S. www.nautilusinternational.com | Printed in China | © 2019 Nautilus, Inc. | Nautilus, the Nautilus logo, Bowflex and Schwinn are trademarks owned by or licensed to Nautilus, Inc., which are registered or otherwise protected by common law in the United States and other countries. - Page 52 Note: Your machine may not match the images provided exactly. Unplug the AC Adapter from the wall outlet and machine. Loosen and remove the hardware (indicated by ovals on this side of the machine) that attaches the Fender to the Main Frame. Set the hardware safely aside for re-assembly.
-
Page 53: Replace The Flywheel Assembly
Nautilus, Inc., www.NautilusInc.com, 5415 Centerpoint Parkway, Groveport, OH 43125 U.S.A. - Customer Service: North America (800) 605-3369, csnls@nautilus.com | outside U.S. www.nautilusinternational.com | Printed in China | © 2019 Nautilus, Inc. | Nautilus, the Nautilus logo, Bowflex and Schwinn are trademarks owned by or licensed to Nautilus, Inc., which are registered or otherwise protected by common law in the United States and other countries. - Page 54 NOTICE: At the end of this procedure, make sure that the Drive Belt tension is correct. Refer to the “Adjust the Belt Tension” procedure. Note: Your machine may not match the images provided exactly. Unplug the AC Adapter from the wall outlet and machine. Resistance Knob Fully turn the Resistance Knob clockwise to lock the Flywheel into place.
- Page 55 7. Using a #2 Phillips screwdriver, loosen and remove the hardware (indicated on one side by ovals) that attaches the Fender to the Main Frame. Set the hardware safely aside for reassembly. Resistance Knob NOTICE: Hold the Fender so that it does not fall. Remove the Fender from the front of the machine after noting how Fender the Resistance Cable routes through it.
- Page 56 12. Using a 10mm open end wrench and a 5mm hex wrench, remove the hardware (indicated by arrows) from both sides of the machine. 13. Using a 3.5mm hex wrench, remove the hardware (indicated by ovals) that attaches the Brake Assembly to the Resistance Nut from both sides of the machine.
- Page 57 15. Mark the position of the Flywheel Axle Nut on the Flywheel Bracket. Also record the number of threads showing on the Tensioner Eyebolt on each side of the Tensioner Support Bracket. 16. To loosen the Flywheel hardware, use a 15mm crescent wrench to hold the Flywheel Axle Nut on one side steady and loosen the Flywheel Tensioner Eyebolt Axle Nut on the opposite side with a 15mm socket and wrench.
- Page 58 20. Remove the Drive Belt from the Flywheel Pulley to the outside. Remove the Thin Nut from the right end of the Axle and set it safely aside for reassembly. NOTICE: This step may require two people. Speed Sensor and Spacer 21.
- Page 59 25. Re-install all remaining parts that were removed in reverse order. NOTICE: Do not crimp any cables. Install the Flywheel Tensioners at the position that you recorded in step 15. Make sure the Flywheel can turn easily. Verify that the Speed Sensor and Speed Sensor Magnet on the Flywheel do Speed Sensor not touch.
- Page 60 28. Install the Crank Nut onto the Crank Shaft, and fully tighten it. 29. Replace the threaded Cap onto the Crank Arm. 30. Final Inspection Inspect your machine to ensure that all hardware is tight and components are properly assembled. Do not use until the machine has been fully assembled and inspected for correct performance in accordance with the Owner’s Manual.
-
Page 61: Replace The Flywheel Tensioners
Nautilus, Inc., www.NautilusInc.com, 5415 Centerpoint Parkway, Groveport, OH 43125 U.S.A. - Customer Service: North America (800) 605-3369, csnls@nautilus.com | outside U.S. www.nautilusinternational.com | Printed in China | © 2020 Nautilus, Inc. | Nautilus, the Nautilus logo, Bowflex and Schwinn are trademarks owned by or licensed to Nautilus, Inc., which are registered or otherwise protected by common law in the United States and other countries. - Page 62 NOTICE: At the end of this procedure, make sure that the Drive Belt tension is correct. Refer to the “Adjust the Belt Tension” procedure. Note: Your machine may not match the images provided exactly. Unplug the AC Adapter from the wall outlet and machine. Resistance Knob Fully turn the Resistance Knob clockwise to lock the Flywheel into place.
- Page 63 Using a #2 Phillips screwdriver, remove the indicated hardware from the Drive Belt Cover. Carefully remove the Drive Belt Cover and set it safely aside for reassembly. Note: The oval indicates the two machine screws with washers. Drive Belt Cover Note: Please disregard the Right Crank Arm in the above image.
- Page 64 10. Using a 10mm wrench, loosen and remove the outer Flywheel Retainer Nut from the Tensioner Eyebolt. Remove the Tensioner Eyebolt and Inner Retaining Nut from the Flywheel Axle and Tensioner Support Bracket. 11. Place the inner Retaining Nuts in the same location on the new Tensioner Eyebolts.
-
Page 65: Replace The Handlebar And Seat Post Bushing
Nautilus, Inc., www.NautilusInc.com, 5415 Centerpoint Parkway, Groveport, OH 43125 U.S.A. - Customer Service: North America (800) 605-3369, csnls@nautilus.com | outside U.S. www.nautilusinternational.com | Printed in China | © 2020 Nautilus, Inc. | Nautilus, the Nautilus logo, Bowflex and Schwinn are trademarks owned by or licensed to Nautilus, Inc., which are registered or otherwise protected by common law in the United States and other countries. - Page 66 Note: Your machine may not match the images provided exactly. Unplug the AC Adapter from the wall outlet and machine. Fully turn the Resistance Knob clockwise to lock the Flywheel into Resistance Knob place. Dumbbell Remove the Dumbbells from the Handlebars if they are in place on Rack the Dumbbell Rack.
- Page 67 Using a 32mm Open Faced Wrench or an Adjustable Wrench, remove the Threaded Cap from the Frame Assembly. Note: If the Threaded Cap will not come loose, it may be set with a thread lock compound. Using a Heat Gun, safely heat the Threaded Cap until it can be removed.
- Page 68 10. On the right-rear side of the Handlebar Post, there is a small opening (indicated by oval) where the Handlebar Bushing Tab is secured. Place the end of a small standard screwdriver into the opening, and push the tab in while pivoting upward the Bushing. Handlebar Post Bushing Handlebar Post 11.
- Page 69 15. Being prepared to support the Seat Post Assembly, loosen the Seat Post Adjustment Knob and remove the Seat Post Assembly from the Frame Assembly. Set the Seat Post Assembly safely aside away from the Seat Post work area. Adjustment Knob 16.
- Page 70 19. Install the new Seat Post Bushing into the Frame Assembly. Be sure to orient the new Seat Post Bushing so the securing tab is to the left side and will set into the small opening. 20. Re-install all remaining parts that were removed in reverse order. 21.
-
Page 71: Replace The Pedals
Nautilus, Inc., www.NautilusInc.com, 5415 Centerpoint Parkway, Groveport, OH 43125 U.S.A. - Customer Service: North America (800) 605-3369, csnls@nautilus.com | outside U.S. www.nautilusinternational.com | Printed in China | © 2020 Nautilus, Inc. | Nautilus, the Nautilus logo, Bowflex and Schwinn are trademarks owned by or licensed to Nautilus, Inc., which are registered or otherwise protected by common law in the United States and other countries. - Page 72 Note: Your machine may not match the images provided exactly. Unplug the AC Adapter from the wall outlet and machine. Loosen and remove the Pedal. Note: The Left Pedal is reverse-threaded. Orientation is based from a seated position on the bike. The Left Pedal has an “L”, the Right Pedal an “R”.
- Page 73 Start the Pedal by hand. If you feel resistance and the Pedal does not turn smoothly into the Crank Arm, make sure that the threads are aligned correctly. Be sure that the Pedal is going on straight into the Crank Arm. If the Pedal is not in-line with the opening, remove the Pedal and start again.
-
Page 74: Replace The Power Inlet
Nautilus, Inc., www.NautilusInc.com, 5415 Centerpoint Parkway, Groveport, OH 43125 U.S.A. - Customer Service: North America (800) 605-3369, csnls@nautilus.com | outside U.S. www.nautilusinternational.com | Printed in China | © 2020 Nautilus, Inc. | Nautilus, the Nautilus logo, Bowflex and Schwinn are trademarks owned by or licensed to Nautilus, Inc., which are registered or otherwise protected by common law in the United States and other countries. - Page 75 Note: Your machine may not match the images provided exactly. Unplug the AC Adapter from the wall outlet and machine. Fully turn the Resistance Knob clockwise to lock the Flywheel into Resistance Knob place. Remove the Console Cable Grommet from the Frame Assembly. Console Cable Console Cable Grommet...
- Page 76 Gently push the Console Cable into the Frame Assembly up to where the Resistance Cable joins it, which is about 2.5cm (1”). Resistance Cable Console Cable Using a 14mm Open Faced Wrench, remove the securing ring from the Power Inlet. Securing Ring Power Inlet...
- Page 77 Remove the Power Inlet Grommet that is on the other side of the Frame Assembly from the Power Inlet. Power Inlet Power Inlet Grommet From the Power Inlet Grommet opening, gently pull the Power Inlet Cable from the Frame Assembly. Remove the old Power Inlet Cable from the Power Input Connection, and replace with the new Power Inlet Cable.
- Page 78 12. Replace the Console Cable Grommet. NOTICE: Do not crimp the Cable. 13. Final Inspection Inspect your machine to ensure that all hardware is tight and components are properly assembled. Do not use until the machine has been fully assembled and inspected for correct performance in accordance with the Owner’s Manual.
-
Page 79: Replace The Resistance Sensor And Sensor Magnet
Nautilus, Inc., www.NautilusInc.com, 5415 Centerpoint Parkway, Groveport, OH 43125 U.S.A. - Customer Service: North America (800) 605-3369, csnls@nautilus.com | outside U.S. www.nautilusinternational.com | Printed in China | © 2020 Nautilus, Inc. | Nautilus, the Nautilus logo, Bowflex and Schwinn are trademarks owned by or licensed to Nautilus, Inc., which are registered or otherwise protected by common law in the United States and other countries. - Page 80 Note: Your machine may not match the images provided exactly. Unplug the AC Adapter from the wall outlet and machine. 2. Using a #2 Phillips screwdriver, loosen and remove the hardware (indicated on one side by ovals) that attaches the Fender to the Main Frame.
- Page 81 Re-install all remaining parts that were removed in reverse order. NOTICE: Do not crimp any cables. Re-install the Fender, making sure the Resistance Cable is routed between the Frame and the top of the Fender. Resistance Cable Fender Plug the AC Adapter from the wall outlet to the machine. With the Console activated and in Power-Up mode, push the START/ ENTER button.
- Page 82 14. The Console will now flash the 100% Configured Value. The 100% Configured Value is the previously calibrated position for the 100% Resistance Value. With one hand on the front of the Flywheel, slightly turn the Flywheel while turning the Resistance Knob clockwise. Immediately stop turning the Resistance Knob when the Flywheel is unable to turn.
-
Page 83: Replace The Speed Sensor
Nautilus, Inc., www.NautilusInc.com, 5415 Centerpoint Parkway, Groveport, OH 43125 U.S.A. - Customer Service: North America (800) 605-3369, csnls@nautilus.com | outside U.S. www.nautilusinternational.com | Printed in China | © 2019 Nautilus, Inc. | Nautilus, the Nautilus logo, Bowflex and Schwinn are trademarks owned by or licensed to Nautilus, Inc., which are registered or otherwise protected by common law in the United States and other countries. - Page 84 NOTICE: At the end of this procedure, make sure that the Drive Belt tension is correct. Refer to the “Adjust the Belt Tension” procedure. Note: Your machine may not match the images provided exactly. Unplug the AC Adapter from the wall outlet and machine. Resistance Knob Fully turn the Resistance Knob clockwise to lock the Flywheel into place.
- Page 85 7. Using a #2 Phillips screwdriver, loosen and remove the hardware (indicated on one side by ovals) that attaches the Fender to the Main Frame. Set the hardware safely aside for reassembly. Resistance Knob NOTICE: Hold the Fender so that it does not fall. Remove the Fender from the front of the machine after noting how Fender the Resistance Cable routes through it.
- Page 86 12. Using a 10mm open end wrench and a 5mm hex wrench, remove the hardware (indicated by arrows) from both sides of the machine. Resistance Nut 13. Using a 3.5mm hex wrench, remove the hardware (indicated by ovals) that attaches the Brake Assembly to the Resistance Nut from both sides of the machine.
- Page 87 15. Mark the position of the Flywheel Axle Nut on the Flywheel Bracket. Also record the number of threads showing on the Tensioner Eyebolt on each side of the Tensioner Support Bracket. 16. To loosen the Flywheel hardware, use a 15mm crescent wrench to hold the Flywheel Axle Nut on one side steady and loosen the Flywheel Tensioner Eyebolt Axle Nut on the opposite side with a 15mm socket and wrench.
- Page 88 18. Pull the Lower Rubber Grommet out of the Left Frame Upright to expose the wire connector. Lower Rubber Grommet Speed Sensor Cable 19. Disconnect the Speed Sensor Cable from the wire harness, being careful not to push wire harness connector back into the Left Frame Upright.
- Page 89 24. Put the Drive Belt around the edge of the Drive Pulley. Slowly turn the Drive Pulley and carefully walk the Drive Belt onto the Drive Pulley. Make sure the Drive Belt is aligned on the Flywheel Pulley and Drive Pulley.
- Page 90 Re-install the Fender, making sure the Resistance Cable is routed between the Frame and the top of the Fender. Installation does not require the use of the Crank Puller. Be sure the Crank Arms are connected at 180° from each other. Resistance Cable 28.
-
Page 91: Replace The Wiring Harness
Nautilus, Inc., www.NautilusInc.com, 5415 Centerpoint Parkway, Groveport, OH 43125 U.S.A. - Customer Service: North America (800) 605-3369, csnls@nautilus.com | outside U.S. www.nautilusinternational.com | Printed in China | © 2020 Nautilus, Inc. | Nautilus, the Nautilus logo, Bowflex and Schwinn are trademarks owned by or licensed to Nautilus, Inc., which are registered or otherwise protected by common law in the United States and other countries. - Page 92 Note: Your machine may not match the images provided exactly. Unplug the AC Adapter from the wall outlet and machine. Fully turn the Resistance Knob clockwise to lock the Flywheel into Resistance Knob place. Console Cable Connector Console Cable Grommet Disconnect the Console Cable from the Console Cable Connector.
- Page 93 Remove the Resistance Cable from the Brake Assembly. Zip-Tie and Resistance Cable Grommet Note: If present, remove any adhesive used to secure the Cable. Resistance Cable Using a pair of clippers or scissors, cut the Zip-Tie that secures the Resistance Cable to the Frame Assembly. Note: Be sure not to cut the Cable.
- Page 94 12. Attach a string to the end of the Speed Sensor Connection. NOTICE: Do not crimp the Cable. 13. Using a 14mm Open Faced Wrench, remove the securing ring from the Power Inlet. Securing Ring Power Inlet...
- Page 95 14. Remove the Power Inlet Grommet that is on the other side of the Frame Assembly from the Power Inlet. Power Inlet Power Inlet Grommet 15. From the Power Inlet Grommet opening, gently pull the Power Inlet Cable from the Frame Assembly. 16.
- Page 96 17. Attach the second string to the Power Input Connection. NOTICE: Do not crimp the Cable. 18. Gently pull the old Wiring Harness from the Frame Assembly while guiding the Speed Sensor and Power Input Connection into the Frame Assembly. Continue pulling until the strings are fully routed through the Frame Assembly, and stop pulling when both ends of each string are exposed.
- Page 97 23. Connect the Power Inlet Cable to the Power Input Connector of the Wiring Harness. 24. Gently pivot the Power Inlet Cable into place on the Frame Assembly, and secure it to the Frame Assembly with the securing ring. 25. Gently pull the slack of the Console and Resistance Cables upward out of the Frame Assembly, gradually feeding the Power Inlet and Speed Sensor Connectors into the Frame Assembly.
Need help?
Do you have a question about the Schwinn 800IC and is the answer not in the manual?
Questions and answers