Table of Contents
Advertisement
™
Table of Contents
Section Code
Section
1
1
1
1
1
1
1
1
1
1
2
3
4
5
6
7
8
9
10
11
12
13
14
15
16
Nautilus, Inc., www.NautilusInc.com, 5415 Centerpoint Parkway, Groveport, OH 43125 U.S.A. - Customer Service: North America (800) 605-3369, csnls@nautilus.com | outside U.S.
www.nautilusinternational.com | © 2018 Nautilus, Inc. | Schwinn and the Schwinn Quality logo are trademarks owned by or licensed to Nautilus,Inc., which are registered or otherwise
protected by common law in the United States and other countries. Polar® is a trademark of its owner. | ORIGINAL DOCUMENT - ENGLISH VERSION ONLY
8018887.050119.B
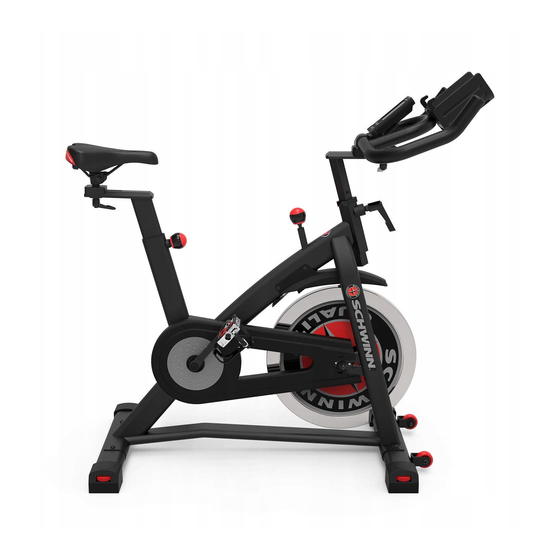
Schwinn
IC3 / IC7 Bikes
™
Service Manual
Page Number
2
3
3
4
5
5
6
7
8
9
10
10
13
15
19
19
21
23
26
28
31
34
37
41
47
53
59
Service Manual
8018628.050119.B
Advertisement
Table of Contents

Subscribe to Our Youtube Channel
Related Manuals for Nautilus Schwinn IC3


Summary of Contents for Nautilus Schwinn IC3
-
Page 1: Table Of Contents
Nautilus, Inc., www.NautilusInc.com, 5415 Centerpoint Parkway, Groveport, OH 43125 U.S.A. - Customer Service: North America (800) 605-3369, csnls@nautilus.com | outside U.S. www.nautilusinternational.com | © 2018 Nautilus, Inc. | Schwinn and the Schwinn Quality logo are trademarks owned by or licensed to Nautilus,Inc., which are registered or otherwise protected by common law in the United States and other countries. -
Page 2: Important Safety Instructions
Nautilus, Inc., www.NautilusInc.com, 5415 Centerpoint Parkway, Groveport, OH 43125 U.S.A. - Customer Service: North America (800) 605-3369, csnls@nautilus.com | outside U.S. www.nautilusinternational.com | © 2018 Nautilus, Inc. | Schwinn and the Schwinn Quality logo are trademarks owned by or licensed to Nautilus, Inc., which are registered or otherwise protected by common law in the United States and other countries. Polar® is a trademark of its owner. -
Page 3: Safety Warning Labels And Serial Number
Safety Warning Labels and Serial Numbers WARNING! • Injury or death is possible if caution is not used while using this machine. • Keep children and pets away. • Read and follow all warnings on this machine. • Refer to the Owner’s Manual for additional warnings and safety information. -
Page 4: Maintenance
Maintenance Read all maintenance instructions fully before you start any repair work. In some conditions, an assistant is required to do the necessary tasks. Only manufacturer supplied components can be used to maintain and repair the equipment. in US/Canada, contact Customer Service for replacement labels. If purchased outside US/Canada, contact your local distributor for them.. -
Page 5: Leveling The Machine
To test the Drive Belt tension, sit on the bike and use the pedals at approximately 20 RPM. Then accelerate quickly (speed burst) to your maximum ability and feel whether the Drive Belt slips. If the pedals move normally with no skipping (slip), the tension is correct. -
Page 6: Troubleshooting
Troubleshooting Condition/Problem Solution Console will not power up/ Check batteries. Make sure batteries are installed correctly. If batteries are turn on/start correctly installed, replace with a set of new batteries. Check data cable integrity All wires in cable should be intact. If any are visibly crimped or cut, replace cable. -
Page 7: Changing Unit Measures
Condition/Problem Solution Unit rocks/does not sit Check level adjustment Levelers may be turned to level machine. level Check surface under unit Adjustment may not be able to compensate for extremely un- even surfaces. Move machine to level area. Check pedal to crank Pedal should be tightened securely to crank arm. -
Page 8: Maintenance Parts Exploded View
Maintenance Parts A Console Crank Arm Q Leveler B Handlebar Pedal w/Foot Restraint Speed Sensor Magnet C Adjustment Handle Seat Speed Sensor D Adjustment Handle, Handlebar Seat Post Drive Belt Post E Brake/Resistance Knob M Seat Post Adjustment Knob Drive Pulley F Brake Assembly Front Stabilizer Data Cable... -
Page 9: Replacement Procedure Skill Level
REPLACEMENT PROCEDURE SKILL LEVEL Level I : Low - very little mechanical knowledge or exposure. Level II : Intermediate - some experience with mechanical procedures Level III : Advanced - knowledgeable about mechanical procedures Disconnect all power to the machine before you service it. For instructions to replace the following parts, please refer to the Assembly Manual for your bike: •... -
Page 10: Mechanical Procedures
Nautilus, Inc., www.NautilusInc.com, 5415 Centerpoint Parkway, Groveport, OH 43125 U.S.A. - Customer Service: North America (800) 605-3369, csnls@nautilus.com | outside U.S. www.nautilusinternational.com | Printed in China | © 2018 Nautilus, Inc. | Schwinn and the Schwinn Quality logo are trademarks owned by or licensed to Nautilus, Inc., which are registered or otherwise protected by common law in the United States and other coun- tries. - Page 11 Disconnect the data cable from the console before you service this machine. Note: Your machine may not match the image. For reference only. 1. Using a #2 Phillips screwdriver, loosen and remove the hardware that attaches the Fender to the Main Frame. Set the Fender and hardware safely aside for reassembly.
- Page 12 5. Saturate the Brake Pad felt (D) with silicone lubricant. Wipe off the excess lubricant to prevent drips and stains. 6. Reinstall the Brake Pad (B). NOTICE: Do not crimp the cable. 7. Reinstall the Fender. NOTICE: Do not crimp the cable. Adjust the Resistance Knob (A) as necessary.
-
Page 13: Brake Adjustment
Nautilus, Inc., www.NautilusInc.com, 5415 Centerpoint Parkway, Groveport, OH 43125 U.S.A. - Customer Service: North America (800) 605-3369, csnls@nautilus.com | outside U.S. www.nautilusinternational.com | Printed in China | © 2018 Nautilus, Inc. | Schwinn and the Schwinn Quality logo are trademarks owned by or licensed to Nautilus, Inc., which are registered or otherwise protected by common law in the United States and other coun- tries. - Page 14 Disconnect the data cable from the console before you service this machine. Note: Your machine may not match the image. For reference only. Using a #2 Phillips screwdriver, loosen and remove the hardware that attaches the Fender to the Main Frame. Set the Fender and hardware safely aside for reassembly.
-
Page 15: Belt Tension Adjustment
Nautilus, Inc., www.NautilusInc.com, 5415 Centerpoint Parkway, Groveport, OH 43125 U.S.A. - Customer Service: North America (800) 605-3369, csnls@nautilus.com | outside U.S. www.nautilusinternational.com | Printed in China | © 2018 Nautilus, Inc. | Schwinn and the Schwinn Quality logo are trademarks owned by or licensed to Nautilus, Inc., which are registered or otherwise protected by common law in the United States and other coun- tries. - Page 16 Disconnect the data cable from the console before you service this machine. Note: Your machine may not match the image. For reference only. To test the Drive Belt tension, sit on the bike and use the pedals at approximately 20 RPM. Then accelerate quickly (speed burst) to your maximum ability and feel whether the Drive Belt slips.
- Page 17 Remove the hardware that attaches the Drive Belt Cover to the Drive Belt Inside, and set it safely aside for reassembly. Carefully remove the Drive Belt Cover and set it safely aside for reassembly. Use a 15 mm open end wrench to hold the Axle Nut (D) on one side steady and loosen the Axle Nut on the opposite side with a 15 mm socket and wrench.
- Page 18 10. Get on the bike and check the movement of the Drive Belt by rocking back and forth on the pedals. The Pedals and Flywheel (G) should move as one. Adjust the Drive Belt tension again if necessary. 11. Tighten the Axle Nuts (D) when the Drive Belt tension is correct. NOTICE: Make sure the Flywheel (G) is aligned with the Frame.
-
Page 19: Part Replacement
Nautilus, Inc., www.NautilusInc.com, 5415 Centerpoint Parkway, Groveport, OH 43125 U.S.A. - Customer Service: North America (800) 605-3369, csnls@nautilus.com | outside U.S. www.nautilusinternational.com | Printed in China | © 2018 Nautilus, Inc. | Schwinn and the Schwinn Quality logo are trademarks owned by or licensed to Nautilus, Inc., which are registered or otherwise protected by common law in the United States and other coun- tries. - Page 20 Disconnect the data cable from the console before you service this machine. Note: Your machine may not match the image. For reference only. 1. Loosen and remove the old Pedals. Discard the old Pedals. Note: The Left Pedal is reverse-threaded. Orientation is based from a seated position on the bike.
-
Page 21: Console
Nautilus, Inc., www.NautilusInc.com, 5415 Centerpoint Parkway, Groveport, OH 43125 U.S.A. - Customer Service: North America (800) 605-3369, csnls@nautilus.com | outside U.S. www.nautilusinternational.com | Printed in China | © 2018 Nautilus, Inc. | Schwinn and the Schwinn Quality logo are trademarks owned by or licensed to Nautilus, Inc., which are registered or otherwise protected by common law in the United States and other coun- tries. - Page 22 Disconnect the data cable from the console before you service this machine. Note: Your machine may not match the image. For reference only. 1. Be sure the Console Data Cable is disconnected from the Data Cable in the frame. Loosen and remove the screws from the back of the console. Remove the Console from the Console Bracket.
-
Page 23: Handlebars And Handlebar Post
Nautilus, Inc., www.NautilusInc.com, 5415 Centerpoint Parkway, Groveport, OH 43125 U.S.A. - Customer Service: North America (800) 605-3369, csnls@nautilus.com | outside U.S. www.nautilusinternational.com | Printed in China | Schwinn and the Schwinn Quality logo are trademarks owned by or licensed to Nautilus, Inc., which are registered or otherwise protected by common law in the United States and other countries. | ORIGINAL DOCU- MENT - ENGLISH VERSION ONLY This icon means a potentially hazardous situation which, if not avoided, could result in death or serious injury. - Page 24 Disconnect the data cable from the console before you service this machine. Note: Your machine may not match the image. For reference only. 1. Be sure the Console Data Cable is disconnected from the Data Cable in the frame. Loosen and remove the screws from the back of the console. Remove the Console from the Console Bracket, and set it safely aside for reassembly.
- Page 25 3. Loosen and remove the Adjustment Handle (A) that attaches the aside for reassembly. 4. Loosen and pull the Adjustment Handle (B) that holds the Handlebar Post in position in the Main Frame. 5. Remove the Handlebar Post from the Main Frame. 6.
-
Page 26: Fender
Nautilus, Inc., www.NautilusInc.com, 5415 Centerpoint Parkway, Groveport, OH 43125 U.S.A. - Customer Service: North America (800) 605-3369, csnls@nautilus.com | outside U.S. www.nautilusinternational.com | Printed in China | © 2018 Nautilus, Inc. | Schwinn and the Schwinn Quality logo are trademarks owned by or licensed to Nautilus, Inc., which are registered or otherwise protected by common law in the United States and other coun- tries. - Page 27 Disconnect the data cable from the console before you service this machine. Note: Your machine may not match the image. For reference only. Loosen and remove the hardware that attaches the Fender to the Main Frame. Set the hardware safely aside for reassembly. NOTICE: Hold the Fender so that it does not fall.
-
Page 28: Brake Pad Assembly And Brake/Resistance Knob Assembly
Nautilus, Inc., www.NautilusInc.com, 5415 Centerpoint Parkway, Groveport, OH 43125 U.S.A. - Customer Service: North America (800) 605-3369, csnls@nautilus.com | outside U.S. www.nautilusinternational.com | Printed in China | Schwinn and the Schwinn Quality logo are trademarks owned by or licensed to Nautilus, Inc., which are registered or otherwise protected by common law in the United States and other countries. | ORIGINAL DOCU- MENT - ENGLISH VERSION ONLY This icon means a potentially hazardous situation which, if not avoided, could result in death or serious injury. - Page 29 Disconnect the data cable from the console before you service this machine. Note: Your machine may not match the image. For reference only. Using a #2 Phillips screwdriver, loosen and remove the hardware that attaches the Fender to the Main Frame. Set the Fender and hardware safely aside for reassembly.
- Page 30 6. Remove the acorn nut (D) and hex nut (E) at the end of the Resis- tance Knob rod (A1). 7. Loosen the Resistance Knob (A) to release the square spacer (F), spring (G), and top spacer (I) from the square mount (H) on the Frame. 8.
-
Page 31: Crank Arm
Nautilus, Inc., www.NautilusInc.com, 5415 Centerpoint Parkway, Groveport, OH 43125 U.S.A. - Customer Service: North America (800) 605-3369, csnls@nautilus.com | outside U.S. www.nautilusinternational.com | Printed in China | © 2018 Nautilus, Inc. | Schwinn and the Schwinn Quality logo are trademarks owned by or licensed to Nautilus, Inc., which are registered or otherwise protected by common law in the United States and other coun- tries. - Page 32 Disconnect the data cable from the console before you service this machine. Note: Your machine may not match the image. For reference only. Loosen and remove the Pedal. Set it safely aside for reassembly. Note: The Left Pedal is reverse-threaded. Orientation is based from a seated position on the bike.
- Page 33 Using a 16mm socket and wrench, remove the Flange Nut (C) under the threaded Cap (B). Thread the Crank Puller into the Crank Arm (A). When the Crank Puller is in the correct position, only 1-2 threads on the outer portion (CP2) of the Crank Puller should show.
-
Page 34: Drive Belt Cover
Nautilus, Inc., www.NautilusInc.com, 5415 Centerpoint Parkway, Groveport, OH 43125 U.S.A. - Customer Service: North America (800) 605-3369, csnls@nautilus.com | outside U.S. www.nautilusinternational.com | Printed in China | © 2018 Nautilus, Inc. | Schwinn and the Schwinn Quality logo are trademarks owned by or licensed to Nautilus, Inc., which are registered or otherwise protected by common law in the United States and other coun- tries. - Page 35 Disconnect the data cable from the console before you service this machine. Note: Your machine may not match the image. For reference only. right Crank Arm (A). Pedal not shown Using a 16mm socket and wrench, remove the Flange Nut (C) under the threaded Cap (B).
- Page 36 Remove the hardware that attaches the Drive Belt Cover to the Drive Belt Inside, and set it safely aside for reassembly. Carefully remove the Drive Belt Cover and set it safely aside for reassembly. Installation is the reverse procedure. Installation does not require the use of the crank puller.
-
Page 37: Flywheel Tensioners
Nautilus, Inc., www.NautilusInc.com, 5415 Centerpoint Parkway, Groveport, OH 43125 U.S.A. - Customer Service: North America (800) 605-3369, csnls@nautilus.com | outside U.S. www.nautilusinternational.com | Printed in China | © 2018 Nautilus, Inc. | Schwinn and the Schwinn Quality logo are trademarks owned by or licensed to Nautilus, Inc., which are registered or otherwise protected by common law in the United States and other coun- tries. - Page 38 NOTICE: At the end of this procedure, make sure that the Drive Chain tension is correct. Refer to the “Adjust the Chain Tension” procedure. Disconnect the data cable from the console before you service this machine. Note: Your machine may not match the image. For reference only. right Crank Arm (A).
- Page 39 Remove the hardware that attaches the Drive Belt Cover to the Drive Belt Inside, and set it safely aside for reassembly. Carefully remove the Drive Belt Cover and set it safely aside for reassembly. brackets (E) on the Frame. Record the number of threads showing on the Tensioner eyebolt on each side of the Tensioner support (E1) on the bracket.
- Page 40 To loosen the Flywheel hardware, use a 15 mm open end wrench to hold the Axle Nut (G) on one side steady and loosen the Axle Nut on the opposite side with a 15 mm socket and wrench. Remove the Axle Nuts from the Flywheel axle (H).
-
Page 41: Drive Belt
Nautilus, Inc., www.NautilusInc.com, 5415 Centerpoint Parkway, Groveport, OH 43125 U.S.A. - Customer Service: North America (800) 605-3369, csnls@nautilus.com | outside U.S. www.nautilusinternational.com | Printed in China | © 2018 Nautilus, Inc. | Schwinn and the Schwinn Quality logo are trademarks owned by or licensed to Nautilus, Inc., which are registered or otherwise protected by common law in the United States and other coun- tries. - Page 42 NOTICE: At the end of this procedure, make sure that the Drive Belt tension is correct. Refer to the “Adjust the Belt Tension” procedure. Disconnect the data cable from the console before you service this machine. Note: Your machine may not match the image. For reference only. right Crank Arm (A).
- Page 43 5. Using a #2 Phillips screwdriver, loosen and remove the hardware that attaches the Brake Cover to the Main Frame. Set the hardware safely aside for reassembly. NOTICE: Hold the Brake Cover so that it does not fall. Carefully remove the Brake Cover and set it safely aside for reassembly.
- Page 44 Loosen and remove the hardware that attaches the Drive Belt Cover to the Drive Belt Inside. Carefully remove the Drive Belt Cover and set it safely aside for reassembly. brackets (H) on the Frame. Record the number of threads showing on the Tensioner eyebolt on each side of the Tensioner support (H1) on the bracket.
- Page 45 11. To loosen the Flywheel hardware, use a 15 mm crescent wrench to hold the Axle Nut (I) on one side steady and loosen the Axle Nut on the opposite side with a 15 mm socket and wrench. Remove the Axle Nuts from the Flywheel axle (J).
- Page 46 18. Put the Drive Belt (N) around the edge of the Drive Pulley (O). Slowly turn the Drive Pulley and carefully walk the Drive Belt onto the Drive Pulley. Make sure the Drive Belt is aligned on the Flywheel pulley (L1) and Drive Pulley.
-
Page 47: Flywheel Assembly
Nautilus, Inc., www.NautilusInc.com, 5415 Centerpoint Parkway, Groveport, OH 43125 U.S.A. - Customer Service: North America (800) 605-3369, csnls@nautilus.com | outside U.S. www.nautilusinternational.com | Printed in China | © 2018 Nautilus, Inc. | Schwinn and the Schwinn Quality logo are trademarks owned by or licensed to Nautilus, Inc., which are registered or otherwise protected by common law in the United States and other coun- tries. - Page 48 NOTICE: At the end of this procedure, make sure that the Drive Belt tension is correct. Refer to the “Adjust the Belt Tension” procedure. Disconnect the data cable from the console before you service this machine. Note: Your machine may not match the image. For reference only. right Crank Arm (A).
- Page 49 5. Using a #2 Phillips screwdriver, loosen and remove the hardware that attaches the Brake Cover to the Main Frame. Set the hardware safely aside for reassembly. NOTICE: Hold the Brake Cover so that it does not fall. Carefully remove the Brake Cover and set it safely aside for reassembly.
- Page 50 Loosen and remove the hardware that attaches the Drive Belt Cover to the Drive Belt Inside. Carefully remove the Drive Belt Cover and set it safely aside for reassembly. brackets (H) on the Frame. Record the number of threads showing on the Tensioner eyebolt on each side of the Tensioner support (H1) on the bracket.
- Page 51 11. To loosen the Flywheel hardware, use a 15 mm crescent wrench to hold the Axle Nut (I) on one side steady and loosen the Axle Nut on the opposite side with a 15 mm socket and wrench. Remove the Axle Nuts from the Flywheel axle (J).
- Page 52 the hardware from steps 11 and 12 on each end of the Flywheel axle. NOTICE: Do not crimp any cables. 19. Put the Drive Belt (P) around the edge of the Drive Pulley (Q). Slowly turn the Drive Pulley and carefully walk the Drive Belt onto the Drive Pulley.
-
Page 53: Speed Sensor
Nautilus, Inc., www.NautilusInc.com, 5415 Centerpoint Parkway, Groveport, OH 43125 U.S.A. - Customer Service: North America (800) 605-3369, csnls@nautilus.com | outside U.S. www.nautilusinternational.com | Printed in China | © 2018 Nautilus, Inc. |Schwinn and the Schwinn Quality logo are trademarks owned by or licensed to Nautilus, Inc., which are registered or otherwise protected by common law in the United States and other coun- tries.. - Page 54 NOTICE: At the end of this procedure, make sure that the Drive Belt tension is correct. Refer to the “Adjust the Belt Tension” procedure. Disconnect the data cable from the console before you service this machine. Note: Your machine may not match the image. For reference only. right Crank Arm (A).
- Page 55 5. Using a #2 Phillips screwdriver, loosen and remove the hardware that attaches the Brake Cover to the Main Frame. Set the hardware safely aside for reassembly. NOTICE: Hold the Brake Cover so that it does not fall. Carefully remove the Brake Cover and set it safely aside for reassembly.
- Page 56 Loosen and remove the hardware that attaches the Drive Belt Cover to the Drive Belt Inside. Carefully remove the Drive Belt Cover and set it safely aside for reassembly. brackets (H) on the Frame. Record the number of threads showing on the Tensioner eyebolt on each side of the Tensioner support (H1) on the bracket.
- Page 57 11. To loosen the Flywheel hardware, use a 15 mm crescent wrench to hold the Axle Nut (I) on one side steady and loosen the Axle Nut on the opposite side with a 15 mm socket and wrench. Remove the Axle Nuts from the Flywheel axle (J).
- Page 58 18. Put the Drive Belt (P) in position on the Flywheel pulley (L1). Align hardware from steps 11 and 12 on each end of the Flywheel axle. NOTICE: Do not crimp any cables. 19. Put the Drive Belt (P) around the edge of the Drive Pulley (Q). Slowly turn the Drive Pulley and carefully walk the Drive Belt onto the Drive Pulley.
-
Page 59: Crank Axle Wave Washer
Nautilus, Inc., www.NautilusInc.com, 5415 Centerpoint Parkway, Groveport, OH 43125 U.S.A. - Customer Service: North America (800) 605-3369, csnls@nautilus.com | outside U.S. www.nautilusinternational.com | Printed in China | © 2018 Nautilus, Inc. | Schwinn and the Schwinn Quality logo are trademarks owned by or licensed to Nautilus, Inc., which are registered or otherwise protected by common law in the United States and other coun- tries. - Page 60 Note: Your machine may not match the image. For reference only. left Crank Arm (A). Using a 16mm socket and wrench, remove the Flange Nut (C) under the threaded Cap (B). Thread the 25mm Crank Puller into the Crank Arm (A). When the Crank Puller is in the correct position, only 1-2 threads on the outer portion (CP2) of the Crank Puller should show.
- Page 61 Remove the plastic cover from the Crank axle, and set it safely aside for reassembly. Using the circlip pliers, remove the C-clip (D) from the Crank axle. NOTICE: If there is already a Wave Washer under the C-clip on the Crank axle, remove it. Put the new Wave Washer (E) on the Crank axle.
Need help?
Do you have a question about the Schwinn IC3 and is the answer not in the manual?
Questions and answers