Advertisement
Quick Links
HIM-16036
Document No.
1
S19618
0
S16611
Rev.
ECN
Confidential C
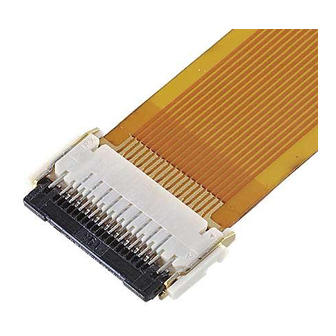
MINIFLEX
(0.175mm pitch FPC Conn.)
Part No.20622-0**E-02
Instruction Manual
October 3, 2019
September 14, 2016
Date
175-ST
®
R.Morita
T.Masunaga
Prepared by
I-PEX Inc.
1 / 13
T.Masunaga
T.Kurachi
Checked by
QKE-DFFDE09-03 REV.8
H.Ikari
J.Tateishi
Approved by
Advertisement

Related Manuals for I-PEX MINIFLEX 175-ST


Summary of Contents for I-PEX MINIFLEX 175-ST
- Page 1 ® (0.175mm pitch FPC Conn.) Part No.20622-0**E-02 Instruction Manual S19618 October 3, 2019 R.Morita T.Masunaga H.Ikari S16611 September 14, 2016 T.Masunaga T.Kurachi J.Tateishi Rev. Date Prepared by Checked by Approved by Confidential C I-PEX Inc. QKE-DFFDE09-03 REV.8 1 / 13...
- Page 2 Document No. MINIFLEX 175-ST Instruction Manual HIM-16036 弊社製 FPC コネクタ MINIFLEX175-ST の取り扱いに際して、本コネクタを安全に御使用頂くことを目的とし、 コネクタの取り扱い上の注意点を記述致します。 御査収の程、宜しく御願い申し上げます。 This manual provides cautions to handle our FPC connector MINIFLEX175-ST properly and safely. ◆コネクタ/connector 名称/Product Name : MINIFLEX175-ST 型番/Part No. : 20622-0**E-02 “ ** ”には各芯数番号が入ります。 “ ** ” part shows the number of the connector position.
- Page 3 Document No. MINIFLEX 175-ST Instruction Manual HIM-16036 1. コネクタ実装状態(FPC 挿入前)/Connector mounting state (Before FPC insertion) アクチュエータ開放状態での納入となりますので、FPC を挿入する前にアクチュエータを操作する必要はありません。 Connectors are delivered with actuator open. There is no need to operate the actuator before FPC insertion. エンボス納入時よりアクチュエータは開放状態です。 The actuator is open when delivered in the embossed tape packaging.
- Page 4 Document No. MINIFLEX 175-ST Instruction Manual HIM-16036 2. FPC 挿入方法/FPC Insertion Method FPC をコネクタに対して真っ直ぐに挿入して下さい。 FPC がしっかり奥まで挿入出来ているか、確認して下さい。 Please insert FPC straight in the connector. Please confirm FPC is inserted into the end of mating part fully. 図 3. FPC 挿入方法 (OK) / Fig.3 FPC insertion (OK) ≪注意/Caution≫...
- Page 5 Document No. MINIFLEX 175-ST Instruction Manual HIM-16036 ★FPC の切欠きのラインと、HOUSING のラインを比較する事で、容易に FPC の挿入状態を確認できます。 FPC の切欠きのラインが HOUSING のラインの内側に位置していれば、挿入完了です。 You can confirm the insertion state of the FPC easily by comparing the notch line of the FPC and HOUSING line. If the notch line of the FPC is located inside HOUSING line, it is insertion completion.
- Page 6 Document No. MINIFLEX 175-ST Instruction Manual HIM-16036 ・コネクタ間口付近にて FPC を上から押さえつけないで下さい。 コンタクト接点部が FPC へダメージを与え、コンタクトの変形、導通不良になる恐れがあります。 Please do not suppress FPC near a connector. Contact gives damage to FPC and contact is damaged. It becomes the electrical connection NG. 図 8. FPC 挿入方法 (NG) / Fig.8 FPC insertion (NG) 3.
- Page 7 Document No. MINIFLEX 175-ST Instruction Manual HIM-16036 ≪注意/Caution≫ ・アクチュエータをクローズする際、アクチュエータを上から押さえつけないで下さい。 アクチュエータが破損し、機能を損なう恐れがあります。 Please do not press an actuator from a top. Actuator is damaged and a function is not satisfied. 図 10. アクチュエータのクローズ方法 (NG) / Fig.10 To close actuator (NG) ・アクチュエータの片端部で操作をしないで下さい。 アクチュエータの破損や不完全クローズ(半クローズ)になる恐れがあります。...
- Page 8 Document No. MINIFLEX 175-ST Instruction Manual HIM-16036 ・クローズ後に上面のコンタクトを爪などで押さえつけないで下さい。 コンタクトが変形する恐れがあります。 Please do not press contact on top by a nail etc. after a close actuator. Contacts are damaged. 図 12. アクチュエータのクローズ方法 (NG) / Fig.12 To close actuator (NG) ・クローズ後にハウジング上面やアクチュエータを押さえつけないで下さい。 コネクタ破損や FPC へダメージを与え、導通不良になる恐れがあります。...
- Page 9 Document No. MINIFLEX 175-ST Instruction Manual HIM-16036 4. アクチュエータの解除方法/To release actuator アクチュエータの中央部を上に軽く跳ね上げる様に引き上げて下さい。 Raise the center of actuator upwards lightly. 操作部/Operation area 図 14. アクチュエータの解除方法 (OK) / Fig.14 To release actuator (OK) 解除操作が困難な場合は、下記のような JIG を使用し、アクチュエータの中央部を上に軽く跳ね上げる様に引き上げて下さい。 When release actuator is difficult, raise the center of actuator upwards lightly using the following JIG.
- Page 10 Document No. MINIFLEX 175-ST Instruction Manual HIM-16036 ≪注意/Caution≫ ・アクチュエータを解除する際、FPC 嵌合側に押さえつけないで下さい。 アクチュエータの破損やコンタクトの変形が発生する恐れがあります。 Please do not press to the direction of FPC mating side. Actuator and contacts are damaged. 図 16. アクチュエータの解除方法 (NG) / Fig.16 To release actuator (NG) ・アクチュエータの片端部で操作をしないで下さい。 アクチュエータが破損する恐れがあります。 Please do not operate side of an actuator.
- Page 11 Document No. MINIFLEX 175-ST Instruction Manual HIM-16036 5. FPC の抜去方法/To withdraw FPC ・アクチュエータ解除状態で真っ直ぐ FPC を抜去して下さい。 Please withdraw FPC straight in the connector with actuator release condition. 図 18. FPC の抜去方法 (OK) / Fig.18 To withdraw FPC (OK) ≪注意/Caution≫ ・FPC を斜めに抜去しないで下さい。コネクタ及び FPC を破損させる原因となります。...
- Page 12 Document No. MINIFLEX 175-ST Instruction Manual HIM-16036 ダメージ無し ダメージ Damag 図. 21(a) アクチュエータクローズ状態で抜去した場合(b) 正常抜去した場合 Fig.21 In case withdrawing FPC with (a) actuator close condition or (b) actuator release condition ※図 21 の様に FPC がダメージを受けると、FPC 保持力が低下致しますので新しい FPC に交換してください。 If FPC receives damage like Fig.21, FPC retention force will be down, please exchange to new FPC.
- Page 13 Document No. MINIFLEX 175-ST Instruction Manual HIM-16036 7. 実装後の基板の反りに関して/ Regarding board warp after mounting. 90mm 幅の PCB の反りが 0.5mm 以下となるように注意してください。過剰な反りを加えるとコネクタが破損する恐れがあります。 (参照規格:JEITA ED-4702C) Be careful that warp of 90mm width PCB is 0.5mm or less. If excessive warp is applied, Connector is damaged.
Need help?
Do you have a question about the MINIFLEX 175-ST and is the answer not in the manual?
Questions and answers