urmet domus iPercom VOG 5+ 1761 Installation Handbook
Hide thumbs
Also See for iPercom VOG 5+ 1761:
- Configuration booklet (64 pages) ,
- Quick manual for use (52 pages) ,
- Instructions manual (64 pages)
Table of Contents
Advertisement
Available languages
Available languages
Quick Links
Mod.
1761
DS 1761-032
LBT 21074
VIDEOCITOFONO IP 5"
IP 5" VIDEO DOOR PHONE
MONITEUR IP 5"
VIDEOINTERFONO IP 5"
VIDEOSPRECHANLAGE IP 5"
VIDEO-INTERCOM IP 5"
Sch./Ref. 1761/15
(nero / black / noire / negro / schwarz / zwart)
Sch./Ref. 1761/16
(bianco / white / blanc / blanco / weiß / wit)
LIBRETTO DI INSTALLAZIONE
INSTALLATION HANDBOOK
NOTICE D'INSTALLATION
MANUAL DE INSTALACIÓN
INSTALLATIONSANLEITUNG
INSTALLATIEHANDLEIDING
Advertisement
Table of Contents

Subscribe to Our Youtube Channel
Related Manuals for urmet domus iPercom VOG 5+ 1761


Summary of Contents for urmet domus iPercom VOG 5+ 1761
- Page 1 Mod. 1761 DS 1761-032 LBT 21074 VIDEOCITOFONO IP 5” IP 5” VIDEO DOOR PHONE MONITEUR IP 5” VIDEOINTERFONO IP 5” VIDEOSPRECHANLAGE IP 5” VIDEO-INTERCOM IP 5” Sch./Ref. 1761/15 (nero / black / noire / negro / schwarz / zwart) Sch./Ref. 1761/16 (bianco / white / blanc / blanco / weiß...
- Page 2 ITALIANO ATTENZIONE! Per il funzionamento del dispositivo è necessario che la versione del firmware del sistema Ipercom sia la 2.2 o superiore. L’aggiornamento della versione del firmware del sistema Ipercom è disponibile sul sito Urmet alla sezione Download/Software (previa registrazione). I videocitofoni Sch.
-
Page 3: Installazione
2. INSTALLAZIONE ATTENZIONE! Per un corretto funzionamento dei comandi gestuali (Gesture), non installare il dispositivo in luoghi in cui può essere esposto direttamente ai raggi solari, in quanto il sensore IR è sensibile alla luce. • Murare la scatola incasso Mod. 503 o la scatola a incasso Ø 60 mm all’altezza indicata nel disegno seguente. -
Page 4: Descrizione Dei Morsetti
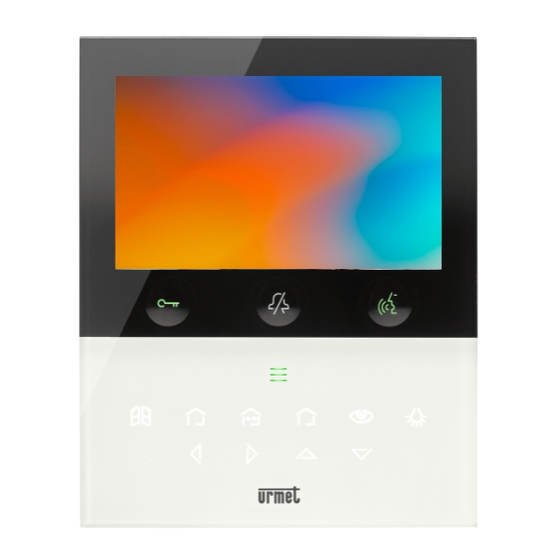
2.1. DESCRIZIONE DEI MORSETTI Ripetizione di chiamata Allarme panico PANIC Chiamata al piano 3. ISTRUZIONI DI CABLAGGIO Cavo Ethernet con connettore RJ45 Il sistema Ipercom è sviluppato per il funzionamento con lo standard EIA/TIA 568B. • Inserire il cavo su uno dei connettori RJ45 con logo Urmet. •... -
Page 5: Caratteristiche Tecniche
4. CONFIGURAZIONE DISPOSITIVO Per la configurazione del dispositivo consultare il manuale tecnico di sistema scansionando il seguente QR Code con la fotocamera del proprio smartphone o tablet. 5. RIAVVIO DEL DISPOSITIVO Per effettuare il riavvio del dispositivo inserire un attrezzo appuntito nel foro in cui e presente il pulsante di riavvio (11), premere e tenere premuto il pulsante per 8 secondi. - Page 6 ENGLISH IMPORTANT The firmware version of the Ipercom system must be 2.2 or higher for the operation of the device. The firmware version update of the Ipercom system is available on the Urmet website in the Download/Software section (registration required). Ref.
-
Page 7: Installation
2. INSTALLATION IMPORTANT For the correct operation of gesture commands, do not install the device in places exposed to direct sunlight because the IR sensor is sensitive to light. • Embed the flush-mounting box Mod. 503 in the wall or the flush-mounting box Ø 60 at the height shown in the following drawing. -
Page 8: Wiring Instructions
3. WIRING INSTRUCTIONS RJ45 Ethernet Cable The Ipercom system has been designed to work with the EIA/TIA 568B standard. • Plug the cable into one of the RJ45 connectors with the Urmet logo. • Insert the wire in its guide, according to the provided colour code (Standard T568B). Grey sheath Wire Cable colour... -
Page 9: Device Configuration
4. DEVICE CONFIGURATION To configure the device, see the technical system manual by scanning the following QR Code with the camera of your smartphone or tablet. 5. RESTART THE DEVICE To restart the device, insert a pointed tool into the hole where the restart button (11) is located, press and hold the button down for 8 seconds. - Page 10 FRANÇAIS ATTENTION ! Pour le fonctionnement du dispositif, il est nécessaire que la version micrologicielle du système Ipercom soit 2.2 ou supérieure. La mise à jour de la version micrologicielle du système Ipercom est disponible sur le site Web d’Urmet, dans la section Download/Software (après enregistrement). Le moniteur Ref.
- Page 11 2. INSTALLATION ATTENTION ! Pour un fonctionnement correct des commandes gestuelles (Gesture), ne pas installer le dispositif dans des endroits où il pourrait être exposé aux rayons directs du soleil, car le capteur IR est sensible à la lumière. • Emmurer le boîtier d’encastrement Mod.
-
Page 12: Description Des Bornes
2.1. DESCRIPTION DES BORNES Répétition d’appel Alarme panique PANIC Appel à l’étage 3. INSTRUCTIONS DE CÂBLAGE Câble Ethernet RJ45 Le système Ipercom est développé pour fonctionner sous le standard EIA/TIA 568B. • Brancher le câble à un des connecteurs RJ45 marqué du logo Urmet. •... -
Page 13: Configuration Du Dispositif
Le raccordement entre le moniteur IP et le commutateur POE doit être réalisé à l’aide d’un seul câble, sans utiliser de cordons de raccordement supplémentaires. 4. CONFIGURATION DU DISPOSITIF Pour configurer l’appareil, consultez le manuel technique du système en scannant le QR Code suivant avec l’appareil photo de votre smartphone ou tablette. - Page 14 ESPAÑOL ¡ATENCIÓN! Para el funcionamiento del dispositivo es necesario que la versión del firmware del sistema Ipercom sea la 2.2 o superior. La actualización de la versión del firmware del sistema Ipercom se encuentra en el sitio Urmet, en la sección Download/Software (después de registrarse). Los videointerfonos Ref.
-
Page 15: Instalación
2. INSTALACIÓN ¡ATENCIÓN! Para un funcionamiento correcto de los mandos gestuales (Gesture), no instalar el dispositivo en lugares donde quede expuesto directamente a los rayos solares, ya que el sensor IR es sensible a la luz. • Fijar a la pared la caja empotrada mod. 503 o la caja empotrada Ø 60 a la altura indicada en el dibujo siguiente. -
Page 16: Instrucciones De Cableado
3. INSTRUCCIONES DE CABLEADO Cable de Ethernet RJ45 El sistema Ipercom se desarrolló para trabajar con el estándar EIA/TIA 568B. • Introduzca el cable en uno de los conectores RJ45 con el logo de Urmet. • Introduzca el conductor en la guía, respetando los colores indicados (estándar T568B). Vaina gris Conductor Color del cable... -
Page 17: Configuración Del Dispositivo
4. CONFIGURACIÓN DEL DISPOSITIVO Para configurar el dispositivo consulte el manual técnico del sistema escaneando el siguiente Código QR con la cámara de su smartphone o tablet. 5. REINICIAR EL DISPOSITIVO Para reiniciar el dispositivo, inserte una herramienta puntiaguda en el orificio donde se encuentra el botón de reinicio (11), presione y mantenga presionado el botón durante 8 segundos. - Page 18 DEUTSCH ACHTUNG! Für die Funktionsweise des Geräts ist es erforderlich, dass die Firmware-Version des Ipercom- Systems 2.2 oder höher vorliegt. Die Aktualisierung der Firmware-Version des Ipercom-Systems steht auf der Website von Urmet im Bereich Download/Software zur Verfügung (nach Anmeldung). Die Videosprechanlagen BN 1761/15 oder /16 sind für den Einsatz des Ipercom-Systems in Video- Türsprechanlagen bestimmt.
- Page 19 2. INSTALLATION ACHTUNG! Für eine korrekte Funktionsweise der Gestensteuerungen (Gesture) das Gerät nicht an Orten installieren, an denen es direkter Sonneneinstrahlung ausgesetzt sein kann, da der IR-Sensor lichtempfindlich ist. • Die Unterputzdose Mod. 503 oder die Unterputzdose Ø 60 auf der in der nachstehenden Zeichnung angegebenen Höhe vermauern.
- Page 20 3. VERKABELUNGSANLEITUNG RJ45-Ethernetkabel Das Ipercom-System ist für einen Betrieb nach dem Standard EIA/TIA 568B konzipiert. • Das Kabel an einem der RJ45-Steckverbinder mit Urmet-Logo einstecken. • Den Leiter unter Berücksichtigung der genannten Farbgebungen (Standard T568B) in die Führung einführen. Grauer Mantel Leiter Nr.
-
Page 21: Technische Daten
4. GERÄTEKONFIGURATION Konsultieren Sie zur Konfiguration des Geräts das technische Handbuch des Systems, indem Sie den folgenden QR-Code mit der Kamera Ihres Smartphones oder Tablets scannen. 5. STARTEN SIE DAS GERÄT NEU Führen Sie zum Neustarten des Geräts ein spitzes Werkzeug in das Loch ein, in dem sich die Neustarttaste (11) befindet, und halten Sie die Taste 8 Sekunden lang gedrückt. - Page 22 NEDERLANDS OPGELET! Het toestel kan alleen werken als de firmwareversie van het Ipercom-systeem 2.2 of hoger is. U kunt de firmware-versie van het Ipercom-systeem bijwerken op de site van Urmet in het gedeelte Download/Software (mits u eerst registreert). De video-intercoms Sch.
- Page 23 2. INSTALLATIE OPGELET! Voor een correcte werking van de gebarenherkenning (Gesture control) mag u het toestel niet installeren op plaatsen waar het wordt blootgesteld aan directe zon omdat de IR-sensor lichtgevoelig is. • De inbouwdoos Mod. 503 of de inbouwdoos Ø 60 inbouwen op de op de volgende tekening aangeduide hoogte.
- Page 24 3. AANWIJZIGINGEN VOOR DE BEDRADING Ethernetkabel RJ45 Het Ipercom-systeem is ontwikkeld om te functioneren met de standaard EIA/TIA 568B. • Plaats de kabel op een van de RJ45 stekkers met het Urmet-logo. • Steek de stekker in de geleiding, met inachtneming van de kleurcode (Standaard T568B) Grijze kabelmantel Stekker nr.
-
Page 25: Technische Kenmerken
4. CONFIGURATIE VAN HET TOESTEL Om het apparaat te configureren, raadpleegt u de technische handleiding van het systeem door de volgende QR-code te scannen met de camera van uw smartphone of tablet. 5. HERSTART HET APPARAAT Om het apparaat opnieuw op te starten, steekt u een puntig stuk gereedschap in het gat waar de herstartknop (11) zich bevindt en houdt u de knop 8 seconden ingedrukt. - Page 26 ITALIANO DIRETTIVA 2012/19/UE DEL PARLAMENTO EUROPEO E DEL CONSIGLIO del 4 luglio 2012 sui rifiuti di apparecchiature elettriche ed elettroniche (RAEE) Il simbolo del cassonetto barrato riportato sull’apparecchiatura o sulla sua confezione indica che il prodotto alla fine della propria vita utile deve essere raccolto separatamente dagli altri rifiuti. L’utente dovrà, pertanto, conferire l’apparecchiatura giunta a fine vita agli idonei centri comunali di raccolta differenziata dei rifiuti elettrotecnici ed elettronici.
- Page 27 DEUTSCH RICHTLINIE 2012/19/EU DES EUROPÄISCHEN PARLAMENTS UND DES RATES VOM 4. Juli 2012 über Elektro- und Elektronik-Altgeräte (WEEE) Das Symbol der durchgestrichenen Abfalltonne auf Rädern auf dem Produkt oder dessen Verpackung gibt an, dass das Produkt nicht zusammen mit dem Hausmüll entsorgt werden darf. Es liegt daher in Ihrer Verantwortung, Ihre Altgeräte zu entsorgen, indem Sie diese bei einer geeigneten Sammelstelle für das Recycling für Elektro- und Elektronik-Altgeräte abgeben.
- Page 28 DS 1761-032 LBT 21074 URMET S.p.A. Area tecnica 10154 TORINO (ITALY) servizio clienti +39 011.23.39.810 VIA BOLOGNA 188/C http://www.urmet.com Telef. +39 011.24.00.000 (RIC. AUT.) e-mail: info@urmet.com +39 011.24.00.300 - 323 MADE IN CHINA...
Need help?
Do you have a question about the iPercom VOG 5+ 1761 and is the answer not in the manual?
Questions and answers