Advertisement
Quick Links
Advertisement

Related Manuals for Elegoo MARS 4 Series


Summary of Contents for Elegoo MARS 4 Series
- Page 1 MARS 4 Series 3D Printer User Manual...
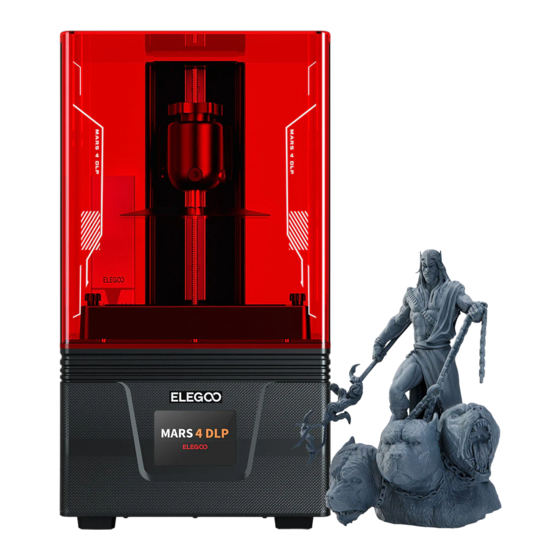
- Page 2 Thank you for purchasing ELEGOO MARS 4 series 3D printer. series This manual is a general user manual for MARS 4 printers. The content below is based on the MARS 4 DLP printer. Please unbox and inspect the printer upon receiving it.
- Page 3 If you need technical support, please contact us at 3dp@elegoo.com. Please keep the Mars 4 series 3D printer and its accessories out of the reach of children. When you use the printer for the first time, you would need to level the build platform before printing.
-
Page 4: Packing List
Packing List Build Platform Resin Tank Mask U Disk Gloves Scraper User Manual Funnel Tool Kit MARS 4 Series 3D Printer Backup Screws Adapter Air Purifier... -
Page 5: Printer Components
Printer Components Screw Knob Z Axis Build Platform Screw Knob Touch Screen Anti-UV Cover Extension Port Resin Tank... - Page 6 Mars 4 DLP Printer Tech Specs System: EL3D-3.0.2 Operation: 3.5 Inch Touch Screen Printing Parameter Slicer Software: Voxeldance Tango Connectivity: USB Technology: DLP Photocuring Light Source: Imported wick (wavelength 405nm) XY Resolution: 0.05mm (2560*1440) Z-axis Accuracy: 0.01mm Printing Specification Layer Thickness: 0.01-0.2mm Printing Speed: 30-70mm/H Power Requirements: 100-240V 50/60 Hz 12V 1.5A 18W...
- Page 7 Leveling 1. Take out the printer carefully and tear off the plastic film. 2. Power on the printer. 3. Please insert the build platform, fasten the screw knob and loosen the fixing screws. (See Picture 1) (Picture 1) 4. Remove the resin tank, place a leveling paper between the build platform and the tempered glass, and click "Move Z axis to zero"...
- Page 8 5. Since the distance between the printing platform and the tempered glass will change during the process of tightening the build platform screws, if you find that the MARS 4 DLP leveling paper can be pulled out without resistance, please click the "down"...
- Page 9 (See Picture 8) On the tempered glass of the MARS 4 DLP printer, the first image, can fully expose the pattern of "ELEGOO TECHNOLOGY www.elegoo.com"; the second image, can fully expose the "square frame" pattern; the third image, can perform full-screen exposure (can be used to clean the resin tank).
-
Page 10: Test Printing
Test Printing 1. Model Printing Install the resin tank back in place and tighten the screw knobs. Wear a mask and gloves (avoid direct contact of resin with your skin), then slowly add resin to the MAX line of the resin tank. Plug the USB air purifier into the USB port with the front side facing outwards, (the green light is on during printing,... - Page 11 (See Picture 10) (Picture 10) 1. Install Voxeldance Tango ELEGOO Voxeldance Tango software is saved in the U Disk. Choose the right version and install it on your computer, or you can download the latest version from www.elegoo.com/pages/3d-printing-user-support...
- Page 12 2. How to Use Voxeldance Tango 2.1 Once the installation is complete, run the Voxeldance Tango software, select "Activate your license" - "Activate with printer hardware code" XXXXXXXXXX (See Picture12); Press "Settings" - "System" on the machine to view the machine "ID" (See Picture 11), and fill in the 10-digit "ID"...
- Page 13 3) Long press the right mouse button and rotate to see different perspectives of the model. 3. Voxeldance Tango Setting 3.1 Click "Parameter Settings" and choose ELEGOO MARS 4 DLP as your default printer. (See Picture 13) (Picture 13) (Picture 14)...
- Page 14 3.3 Resin Parameter (See Picture 15) Resin Density: 1.1g/ml Resin Cost: You can input the cost of the resin, and after slicing you will see how much it costs for your model. 3.4 Parameters (See Picture 15) Layer Height: The thickness of each printed layer, the recommended height is 0.05mm, but you can set it from 0.01-0.2mm.
- Page 15 Bottom Wait After Lift: When printing the bottom layer, the time difference between the build platform starting stationary and starting to return to the printing surface after lifting, the default setting is 0 seconds. Bottom Wait Before Cure: When printing the bottom layer, after the build platform moves to the printing surface, the time difference between the build platform starting stationary and the start of exposure, the default setting is 1 seconds.
- Page 16 (Picture 15) 4. Save the Model After setting up all parameters, click "Slice", and once it's done, click "export sliced files to U Disk or SD Card"; then insert the U disk or SD card into your printer, and start printing.
- Page 17 1. Model doesn't stick to the build platform The bottom layer exposure time is too short, please add more time. The model bottom layer has very small contact with the build platform, please add a bottom raft. Leveling is not well set and it will cause the first layer too thick, or one side is very thick while the other is very thin.
- Page 18 4. Maintenance 1. If the Z-axis keeps making friction noises, please add some lubricant to the lead screw. 2. Please do not use sharp or pointy tools to scrape the resin tank to avoid damaging the release liner film. 3. Be careful when you remove the build platform in case you may damage the tempered glass or screen.
-
Page 19: Warranty Statement
Warranty Statement 1. From the date of purchase, ELEGOO printer is entitled to 1-year free warranty service, except for consumables of the LCD screen and the release film. 2. The LCD screen enjoys a 6-month free warranty service, and the DLP printer enjoys a 1-year free warranty service. - Page 20 Email Support Discussion Forums Help Articles...
Need help?
Do you have a question about the MARS 4 Series and is the answer not in the manual?
Questions and answers