Table of Contents
Advertisement
Advertisement
Table of Contents

Related Manuals for Brother S-7180A


Summary of Contents for Brother S-7180A
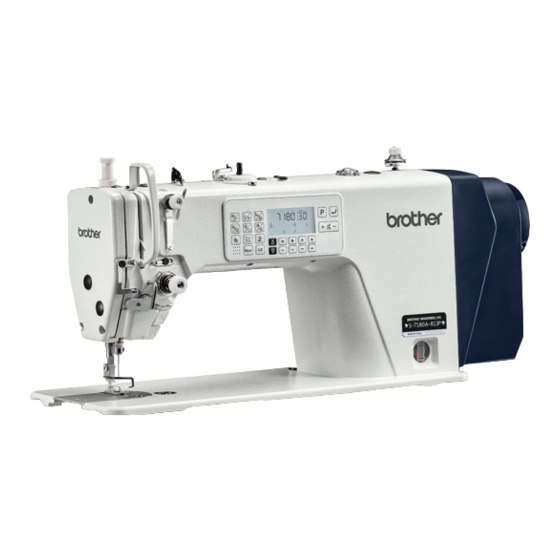
- Page 1 S-7180A Instruction Manual Please read this manual before using the product. Please keep this manual in a place where it can be easily removed whenever necessary. SINGLE NEEDLE DIRECT DRIVE LOCK STITCHER WITH THREAD TRIMMER, ELECTRIC FEEDING SYSTEM AND PRESSER FOOT LIFTER...
- Page 2 Aiming for a more affluent environment. Thank you for your cooperation. Thank you very much for your patronage of Brother products. Brother Industries, Ltd. has established an environmental policy based "environmentally conscious manufacturing, from product development to disposal," so that this earth will be a green land forever.
- Page 3 Thank you for purchasing our Brother Industrial Sewing Machine. Before use, thoroughly read [Safety Precautions] and the instruction manual. Due to its nature, industrial sewing machines are operated immediately before moving parts, such as needles and thread take-up lever, which always pose a risk of injury in these areas. Obtain the knowledge of safety work and instruction of operation by a skilled person/instructor to use the product correctly.
- Page 4 Keep it out of the reach of children. Incomplete ground connection may cause electric shock or malfunction. When fixing the cord, do not forcibly bend the cord or press it too much with a staple. This may cause a fire and electrical shock. S-7180A...
- Page 5 If you need to make adjustments while the power switch is turned on, use extreme safety precautions. Modification To prevent accidents and malfunctions, do not modify the sewing machine (including the control unit). We are not responsible for accidents or failures caused by modification. S-7180A...
- Page 6 High temperature caution display Please connect to the Earth. Incomplete ground connection may cause electric shock or malfunction. Display of rotation direction * Safety protection (A)Finger guard device: (B)Balance cover (C) Motor cover S-7180A...
- Page 7 Oil tank S-7180A...
-
Page 8: Table Of Contents
3-6. How to set up condensation sewing ..... 28 3-6-1. Additional setting of condensation sewing . 28 3-6-2. Condense edit mode ........29 3-7. How to set the main part design stitch ....30 3-7-1. Design stitching of main section....30 S-7180A... - Page 9 S-7180A...
-
Page 10: Specifications Of The Sewing Machine
1. Specifications of the sewing machine 1. Specifications of the sewing machine S-7180A-81■P Applications For medium Thick material -813P -815P Maximum sewing 5,000sti/min 4,000sti/min Sewing speed End backtack. 3,200sti/min Max. stitch length 5mm* Thread trimming method Double action thread trimming mechanism... -
Page 11: How To Install
1342D How to return the sewing machine 1. Place a tool, etc., from near the table hole. 2. Slowly return the sewing machine head with your right hand while holding the face plate part with your left hand. 1343D S-7180A... -
Page 12: How To Install
・ The table should be 40mm thick and strong enough to accommodate the weight and vibration of the sewing machine. ・ Drill holes as shown in the illustration. 2-2. How to install 1.Connecting rod (1) Connecting rod (2) Nut S-7180A... - Page 13 ・ Place the pillow (3) firmly into the table as far as it will go. ・ If it is not inserted to the end, it is dangerous because poor stability when the sewing machine head is tilted. Power cord and step on Connecting the SI unit. S-7180A...
- Page 14 (backlash) of the knee pad (4). 5. After this adjustment is made, tighten the nut (3) firmly. 6. Adjust so that the presser foot (7) is within 15mm of the needle plate when the knee pad is pressed fully. There 15mm S-7180A...
-
Page 15: Lubrication Method
When lubricating oil is filled above the baseline (2) above the oil window. <When to Supply Lubricant> When the oil level drops below the baseline (3) in the oil window, be sure to supply oil. S-7180A... -
Page 16: Connecting The Cord
2-4-1. Connecting the cord 1. Code (1) Power cord (2) Tread unit Connecting the Power Cord and Step Unit 2. Ground wire (1) Ground wire (2) Tightening screw [Note] ・ For safety, be sure to connect the ground wire securely. S-7180A... -
Page 17: Operation Panel
Press and hold to switch the needle stop position (needle up/needle down) after sewing. Normal Click to set the sewing pattern to normal sewing. sewing/fixed sewing key Press and hold to set the sewing pattern to inching fixed sewing. S-7180A... - Page 18 Press and hold to continuously increase or decrease the pitch. Click to increase the sewing speed. Acceleration key Press and hold to increase sewing speed continuously. Click to decrease the sewing speed. Deceleration key Press and hold to continuously reduce the sewing speed. S-7180A...
-
Page 19: Icon Functions
Lights up when the feeding frame lifting operation is present immediately after the upper shaft stops. Lights when the thread cutting function is enabled. Lights when the automatic sewing function is enabled. Lights when the slow start function is enabled. Lights when the fixed sewing. Lights when the sewing pattern is normal sewing. S-7180A... - Page 20 Lights up when the sewing pattern consists of up to 15 steps. Lights up when the sewing pattern is a step sewing consisting of 4 steps. Lights up when the sewing pattern is a step sewing consisting of 7 steps. Lights up when the sewing pattern consists of 8 steps. S-7180A...
-
Page 21: How To Set The Memory Switch
[Precaution] If the key is pressed without pressing the key, the set value is not confirmed. Exiting Operator Memory Switch To exit the memory switch setting mode for the operator and return to Setting Mode the home screen, press the key. S-7180A... -
Page 22: Mechanic Memory Switch Setting Mode
Memory Switch Selecting a Number Use the keys in the second to fourth columns to select the memory switch number (P01 to P256). Then press the key to display the setting value of the corresponding memory switch number. S-7180A... - Page 23 [Precaution] If the key is pressed without pressing the key, the set value is not confirmed. Exiting the mechanic memory To exit the mechanic memory switch setting mode and return to the switch setting mode home screen, press the key. S-7180A...
-
Page 24: How To Set The Sewing Pattern
Normal sewing pitch setting The pitch of the normal sewing is set with the key. Setting the normal sewing speed The normal sewing speed is set with P01 on the memory switch. Sewing is performed while the treadle is held down. S-7180A... -
Page 25: Fixed Stitch
Setting the speed of inching sewing Use P09 of the memory switch to set the inching sewing speed. If you continue to step on the treadle, sewing of the set number of stitches E is performed and the machine stops. S-7180A... -
Page 26: Continuous Backtack Stitching
Set the number of repetitions of Press the key to display the number of repetitions E. continuous stop stitching Press the key in the first and second row to set the number of repetitions Press the key to confirm the number of repetitions E. S-7180A... - Page 27 Just by stepping on the treadle, after sewing one cycle of the set number of stitches, thread trimming is performed automatically and stops on the needle. e.g., ABC when E is 3 ABCDCD when E is 6 S-7180A...
-
Page 28: Step Sewing With Common Pitch
The speed of the step sewing is set with P09 of the memory switch. The number of stitches and pitch are set in "Step edit mode of common pitch". Step stitching is performed at a common pitch when the treadboard treadle is stepped S-7180A... -
Page 29: Common Pitch Step Editing Mode
Pressing the key with the step sewing of common pitch selected switches to Common Pitch the step editing mode of common pitch. Pitch setting Use the key to set the pitch (0.0 to 5.0). The pitch is common to all steps. S-7180A... - Page 30 ・ Set the number of stitches H (00 to 99) with the keys of the third and fourth columns. ※When 0 hand is set, only that step is invalid. End of common step sewing editing When you have finished making sets, press the key to return to the home screen. S-7180A...
-
Page 31: Step Stitching With Arbitrary Pitch
The speed of the step sewing is set with P09 of the memory switch. The number of stitches and pitch can be set in the "Step edit mode with arbitrary pitch". Step sewing is performed at the pitch set for each step when the treadle is stepped on. S-7180A... -
Page 32: Step Edit Mode With Arbitrary Pitch (Number Of Stitches)
・ Set the number of stitches H (00 to 99) with the keys of the third and fourth columns. ※When 0 hand is set, only that step is invalid. End of step editing mode (number of When the setting is completed, press the key to return to the home stitches) of arbitrary pitch screen. S-7180A... -
Page 33: Step Edit Mode With Arbitrary Pitch
・ Use the key to set the pitch (0.0 to 5.0) corresponding to the step number. End of step editing mode (pitch) of When the setting is completed, press the key to return to the home arbitrary pitch screen. S-7180A... -
Page 34: How To Set The Sewing Speed
※ The target speed is the speed currently selected. Normal sewing speed (P01)/Continuous stop sewing speed (P06)/Inching sewing speed (P09)/Design stitch sewing speed (P69) ※ When you change the value, the value of the corresponding memory switch (P01/P06/P09/P69) is also automatically changed. S-7180A... -
Page 35: How To Set The Front/Rear And Backtack Stitches
Setting the number of stitches Press the keys in the third and fourth columns to set the corresponding number of for stitching after stopping stitches (C and D). ※The sewing speed for the post-stop sewing is set with P05 on the memory switch. S-7180A... - Page 36 3. Operation panel Pitch setting of post-stop The pitch of the post-stop sewing is set with the key. stitching S-7180A...
-
Page 37: How To Set Up Condensation Sewing
・ The sewing speed of the condensation at the start of sewing is set with P107 of the memory switch. ・ The sewing speed of the condensation at the end of sewing is set with P154 of the memory switch. S-7180A... -
Page 38: Condense Edit Mode
・ Use the key to set the pitch (0.0 to 5.0). Setting Confirmation When you have finished making sets, press the key to confirm. Returns to " " or " ". Exiting Condense Edit Mode When the setting is completed, press the key to return to the home screen. S-7180A... -
Page 39: How To Set The Main Part Design Stitch
With the key, select the design stitch number (n1 to n9). ・ Design stitch registration is set in "Design stitch editing mode of main part". ・ The design stitch sewing speed of the main part is set with P69 of the memory switch. S-7180A... -
Page 40: Design Stitch Editing Mode In The Main Section
In the fourth row, select the design stitch number (n-01 ~ n-09). Selecting a group number Press the key to select the group number (01 to 10). Move to group editing Next, press the key to switch to the group edit mode. S-7180A... - Page 41 Ending Group Editing When the setting is completed, press the key to return to the design stitch editing mode in the main section. Finishing Design Stitch Editing in Press the key to return to the home screen. the Main Section S-7180A...
-
Page 42: How To Set The Stitch For The Sewing Stop Design
・ In the fourth row of keys, select the design stitch number (1 to 9) for the post-stop stitch. ・ Design stitch registration is set in "Design stitch editing mode for sewing stop". ・ The sewing speed at the front stop follows P04, and the sewing speed at the rear stop follows P05. S-7180A... -
Page 43: Design Stitch Editing Mode For Sewing Stops
In the fourth row, select the design stitch number (H-01 ~ H-09). Selecting a group number Press the key to select the group number (01 to 10). Move to group editing Next, press the key to switch to the group edit mode. S-7180A... - Page 44 Ending Group Editing After the setting is completed, press the key to return to the design stitch editing mode of the sewing stop. End of Design Stitch Editing of Stitch Press the key to return to the home screen. Sewing Section S-7180A...
-
Page 45: Checking Method Of The Production Counter
3-12. How to set head specifications In P70 the following -3:-3 Specification -5:-5 Specification -7:7 mm Specification [Precaution] If you change the value of P70 and press the key, the settings other than P92 will return to the factory default settings. S-7180A... -
Page 46: Data Initialization Method
C:In the mechanic memory switch mode, select P70 and press the key to initialize data other than P92 to the factory default settings. ※Initialization is performed only when the value of P70 is changed. Therefore, after changing to a value other than the desired value, it is necessary to return to the desired value. S-7180A... -
Page 47: Memory Switch
Correction when Stitching P33 when the stop stitching operation is performed. 0:Pedal operation is possible, and any stop and start are possible. P12 Pedal operation mode. 1:A series of sewing operations is performed automatically when the pedal is lightly touched S-7180A... - Page 48 1: Real speed ratio of sewing speed over 4000 is set. and actual speed (The setting of N09 below becomes effective.) Ratio of set speed to actual When the set velocity is 4000 sti/min or more, 10-100 speed (%) Actual speed is set to 4000+100*. S-7180A...
- Page 49 Also, the length of C of the stop stitch will be longer. 0-200 stop sewing Increasing the value increases the length of D for the post- stop sewing. Also, the length of C of the stop stitch will be shortened. S-7180A...
- Page 50 0:Thread wiping operation Strength of thread presser 1:Thread wiping operation 0-11 foot at sewing start 2~11:The larger the value, the stronger the operation force of the thread retainer. Invalid P41 Production counter 0-9999 You can view and edit production counters. S-7180A...
- Page 51 Other information: Contact CKD for details. Invalid ~ Reverse motor control Reverse motor control version (currently 183) version Bobbin thread counter (10 Displays the current bobbin thread counter. needle units) ※Counting rules and defaults follow P165, P166. S-7180A...
- Page 52 The value stored in P72 is displayed. P58 Needle up stop position 0-359 ※You cannot change the value here. The value stored in P73 is displayed. P59 Needle down stop position 0-359 ※You cannot change the value here. S-7180A...
- Page 53 Needle down stop position 88 back position (numerical value) can be saved as the needle 0-359 adjustment lower stop position. and forth [Precaution] The displayed value is the current reading. Use P59 to check the set value. S-7180A...
- Page 54 Half-depressed operating 10-900 Half-depressed operating time (ms) time (ms) P94 Invalid P95 - 10-100 Do not change. P96 - 0-20 Do not change. P97 - 0-10 Do not change. Invalid ~ P100 S-7180A...
- Page 55 Provided, however, that the following shall be excluded. Restoring the Factory P124 0000-9999 0000 P17- Default Settings N04、P18、P19、P25、P26、P32、P33、P58、P59、 P70、P74、P75、P92、P129、P144、P145、P177~P2 00、P235~P242 P125 Invalid ~ P128 Home position correction of P129 -500 ~ 500 Home position correction of the reversing motor the reversing motor P130 Invalid S-7180A...
- Page 56 (P166) is reached, "E51" is displayed and sewing is suspended. Press the key to clear the bobbin thread counter and cancel the error. 4:Decrement the bobbin thread counter. When it reaches 0, "E51" is displayed and sewing stops. S-7180A...
- Page 57 Do not change. P184 - 0-2000 Do not change. P185 - Do not change. 0-2000 P186 - 0-2000 Do not change. P187 - 0-2000 Do not change. P188 - 0-2000 Do not change. P189 - 0-2000 Do not change. S-7180A...
- Page 58 P244 - Do not change. P245 - 0-8.0mm 5.5mm Do not change. P246 - 200-3000 1800 Do not change. P247 - -100~100 Do not change. P248 - -100~100 Do not change. P249 - 50-1000 Do not change. P250 Invalid S-7180A...
- Page 59 3. Operation panel Parts Initial Item Range Description value P253 P254 - -100~100 Do not change. P255 - -100~100 Do not change. P256 Invalid S-7180A...
-
Page 60: List Of Error Codes
2)The pre-tread pedal makes the sewing machine perform thread pinching and reinforcement sewing. If there is an alarm, turn off the S-7180A... - Page 61 ② Check whether the detection setting of the handpiece protection switch is correct. Falling of the sewing machine head was ③ If it still does not work, replace the control box or panel and contact detected. after-sales service. S-7180A...
- Page 62 Encoder positioning signal error of ③ Check if the raster code disc has oils. Clean and replace any oil reverse motor before restarting the system. ④ If it still does not work, replace the control box or reversing motor and contact after-sales service. S-7180A...
- Page 63 Abnormal rotation of reverse motor connector of the reverse motor are not loose or disconnected, and restart the system after returning to the normal condition. ② If it still does not work, replace the control box or reversing motor and contact after-sales service. S-7180A...
-
Page 64: About Usb Ports
When not using the USB port, be sure to cover the USB port with the connector cover. Failure to do so may cause dust to enter the product. The USB port is located at the following location: Remove the connector cover before use. USB port S-7180A... -
Page 65: Care
Lower 2. Return the machine head. 3. Replace the needle if it is bent or the needle tip is crushed. 4. Check that the needle thread is correctly threaded. 5. Perform a trial sewing. S-7180A... -
Page 66: Standard Adjustment
(1) to the left. (The amount of thread on the balance is increased.) ・ When sewing a thin object, move the arm thread guide 1434D R (1) to the right. (The amount of thread on the balance is reduced.) S-7180A... -
Page 67: Height Of Presser Foot
7. Adjust the presser foot pressure with the presser foot adjusting screw (4) and tighten the nut (3). [Precaution] After adjustment, turn the sewing machine pulley and confirm that the needle is lowered to the center of the groove of the presser foot. S-7180A... -
Page 68: Feed Dog Height
5. Standard adjustment 5-3. Feed dog height 1. Turn on the power. 2. Set the feed pitch to 5mm. (Panel-set for S-7180A) <-813> 0.9mm <-815> 1.2mm *The standard height when the feed dog (1) is raised most from the top surface of the needle plate is 0.9mm for the-813 specification and 1.2mm for the-815 specification. -
Page 69: Height Of The Needle Bar
5-6. Timing of needle and feed 1. Turn on the power. <-815> <-813> 2. Set the feed pitch to 5mm. (Panel-set for S-7180A) Approx. Approx. *When the feed dog (1) is moved down from the uppermost position and coincides with the top surface of the needle plate (2), the needle tip is at the standard position as shown in the figure on the left. -
Page 70: Timing Of The Needle And The Hook
2. Loosen setscrews (5) [3 pieces] and align hook blade tip (3) with the center of needle (4). At this time, the clearance between the tip of the hook (3) and the needle (4) should be 0 to 0.05mm. 3. Securely tighten the set screws (5) [3 pcs.]. S-7180A... -
Page 71: Adjusting The Amount Of Oil Supply To The Hook
3. Check the amount of lubrication referring to "Checking the amount of lubrication" above. [Precaution] Repeat adjusting the oil adjusting screw (3) and checking the oil supply until the proper oil level is achieved. 4. Check the lubrication amount again after sewing for approx. 2 hours. S-7180A... -
Page 72: Adjusting The Upper Shaft Lubrication Amount
5. Standard adjustment 5-9 Adjusting the Upper Shaft Lubrication Amount Remove the face plate and turn the upper shaft lubrication screw (1) to adjust the amount of lubrication. Most With Most With less In large numbers S-7180A... -
Page 73: Thread Trimmer
(max. 0.3mm). (The screw head of the fastening screw (7) is countersunk, so the upper knife (8) can be tilted around this screw.) Be careful not to tilt the upper knife too much, as it may get under the lower knife and be damaged. 1449D S-7180A... - Page 74 9. Tighten the screw (2) of the thread trimmer lever (1). * Be careful not to rattle the thread trimmer lever (1) and forked shaft (13) in the thrust direction. *Loosen this bolt (14) to fine-tune the amount of engagement. (14) S-7180A...
- Page 75 3. Check that the end face of the thread trimmer cam (2) and the roller shaft (4) do not come into contact when the roller shaft (4) is returned to the right. ([B] diagram) * Tighten the set screws (5) [2 pcs.] with approx. 4N·m. 0.5mm - 1.0mm No contact 1450D S-7180A...
-
Page 76: In The Following Cases
Adjust the strength of the thread take-up spring. ・ Check that the timing of the needle and the hook are correct. Adjust the height of the needle bar. Adjust the gap between the needle and the hook tip. 0470M S-7180A... - Page 77 Adjust the presser foot pressure. ・ Is the sewing speed too fast? Set the maximum sewing speed slower in small increments on the operation panel. ・ Is the inclination of the feed dog appropriate? Keep the feed tooth slightly down. 0978M S-7180A...
- Page 78 Install an anti-slip spring. ・ Are there bad slippage of the bobbin? If slippage is poor, replace the bobbin. ・ Is the bobbin made of a light alloy specified by Brother? 0751M Replace with the specified bobbin. 10 The needle thread and ・...
- Page 79 Securely insert the cable. 17 Illumination goes dark or ・ Depending on the power supply environment, the lighting may flickers for a moment become dim or flicker momentarily when the sewing machine is started or stopped. This is not a malfunction. S-7180A...
- Page 80 * Due to product improvements, some of the contents of this manual may differ from the products you purchased. http://www.brother.co.jp/ 〒448-0803 5 TEL 1, Kitajizozan, Noda-cho, Kariya City: 566-95-0085 S-7180A © 2021 Brother Industries, Ltd. All Rights Reserved. I1031562 Z 2021.03.Z(1)
Need help?
Do you have a question about the S-7180A and is the answer not in the manual?
Questions and answers
How to solve error 82 in brother s-7180a-813p sewing machine
To fix error 82 on the Brother S-7180A-813P sewing machine, follow these steps:
1. Turn off the power to the system.
2. Check if the encoder connector of the reversing motor is loose or disconnected, and reconnect if needed.
3. Check if the grating is installed correctly:
- Ensure the grating screws are securely fastened.
- Make sure the grating is centered in the encoder head.
4. Check the raster code disc for oil. Clean and remove any oil before restarting.
5. If the problem persists, replace the control box or reversing motor.
This answer is automatically generated
S-7180A_813P (Error 87)