Table of Contents
Advertisement
Quick Links
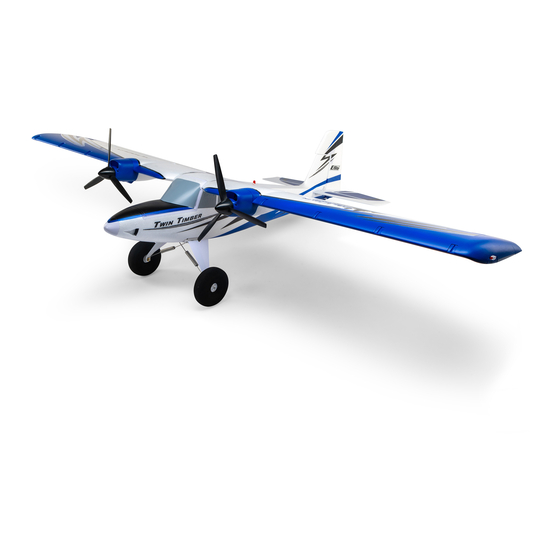
Twin Timber 1.6m
Scan the QR code and select the Manuals and Support quick links from the
product page for the most up-to-date manual information.
Scannen Sie den QR-Code und wählen Sie auf der Produktseite die Quicklinks
Handbücher und Unterstützung, um die aktuellsten Informationen zu Handbücher.
Scannez le code QR et sélectionnez les liens rapides Manuals and Support sur la
page du produit pour obtenir les informations les plus récentes sur le manuel.
Scannerizzare il codice QR e selezionare i Link veloci Manuali e Supporto dalla
pagina del prodotto per le informazioni manuali più aggiornate.
EFL23850
EFL23875
Instruction Manual
Bedienungsanleitung
Manuel d'utilisation
Manuale di Istruzioni
Created 12/22
Advertisement
Table of Contents

Subscribe to Our Youtube Channel
Related Manuals for Horizon Hobby E-flite Twin Timber


Summary of Contents for Horizon Hobby E-flite Twin Timber
- Page 1 Twin Timber 1.6m Scan the QR code and select the Manuals and Support quick links from the product page for the most up-to-date manual information. Scannen Sie den QR-Code und wählen Sie auf der Produktseite die Quicklinks Handbücher und Unterstützung, um die aktuellsten Informationen zu Handbücher. Scannez le code QR et sélectionnez les liens rapides Manuals and Support sur la page du produit pour obtenir les informations les plus récentes sur le manuel.
- Page 2 This product is not intended for use by children without direct adult supervision. Do not use with incompatible components or alter this product in any way outside of the instructions provided by Horizon Hobby, LLC. This manual contains instructions for safety, operation and maintenance.
-
Page 3: Table Of Contents
Registration Specifications Wingspan 63.58in (1615mm) Register your product today to join our mailing list and keep Length 43.0in (1092mm) up to date with product updates, offers and E-flite news. ® Without Battery: 79.65oz (2258g) Weight With Recommended 4S 3200mAh Flight Battery: 91.29oz (2588g) Included Equipment Spektrum ™... -
Page 4: Transmitter Setup
Transmitter Setup IMPORTANT: After you set up your model, always rebind the transmitter and Computerized Transmitter Setup receiver to set the desired failsafe positions. (DX6e‡, DX6‡, DX7, DX7S, DX8, DX8e, DX9, DX10t, IMPORTANT: Flap to elevator mix values, control throws, dual rates, exponential, DX18, DX20, iX12, iX14, iX20, NX6, NX8, and NX10) CG range are recommended as STARTING POINTS and should be adjusted for Start all transmitter programming with a blank ACRO model (do a model reset),... -
Page 5: Aircraft Assembly
Aircraft Assembly Landing Gear Installation 1. Insert the left landing gear assembly into the pocket on the side of the fuselage as shown. The landing gear legs mount to the flat spot of the aluminum block which can pivot in the pocket. 2. - Page 6 Horizontal Stabilizer Installation 1. Slide the 4mm x 300mm (0.60mm wall) horizontal stabilizer tube through the hole in the rear of the fuselage, approximately centering the tube side to side. TIP: Flex the elevators up and down several times to loosen the hinge. 2.
- Page 7 Propeller Adapter and Propeller Installation The Twin Timber uses counter-rotating propellers. The propeller adapters are threaded in opposite directions and are color-coded to ensure they are installed on the correct motor. • The red anodized propeller adapter is threaded normally and must be installed on the left motor.
- Page 8 Wing Installation 1. Insert the 12.8mm x 500mm (2.5mm wall) wing joiner tube and slide the left and right wing halves together, as shown. 2. Secure the wing together using the wing bracket. TIP: If it is necessary to remove the wing from the aircraft during transportation or storage, you can seperate the wing panels and store the wing tube in the storage clip between the motor connectors inside the fuselage.
-
Page 9: Battery Installation And Esc Arming
Battery Installation and ESC Arming The E-flite Twin Timber is compatible with a range of LiPo batteries, from 3S ® 11.1V or 4S 14.8V, and 2200-5000mAh, with an EC3 ™ or IC3 ® connector. The optimum range is a LiPo battery of 3S or 4S and 3200-4000mAh. IMPORTANT: When using smaller 2200mAh batteries it is critical to check the center of gravity before attempting flight, as well as to monitor the current draw. -
Page 10: General Binding Tips And Failsafe Bnf
General Binding Tips and Failsafe BNF • The included receiver has been specifically programmed for operation of this • Once bound, the receiver will retain its bind settings for that transmitter until aircraft. Refer to the receiver manual for correct setup if the receiver is replaced. you re-bind. -
Page 11: Integrated Esc Telemetry
Integrated ESC Telemetry BNF: This aircraft includes telemetry between the ESC and receiver, which can Telemetry Setup provide information including RPM, voltage, motor current, throttle setting (%), and 1. Begin with the transmitter bound to the receiver. FET (speed controller) temperature. 2. -
Page 12: Control Surface Centering
Control Surface Centering After assembly and transmitter setup, confirm that the control surfaces are centered. The model must be powered on and bound to the transmitter, with the throttle at the lowest setting. IMPORTANT: Control surface centering must be done with SAFE mode OFF. 1. -
Page 13: Dual Rates And Control Throws
Dual Rates and Control Throws Program your transmitter to set the rates and control throws to the values given. High Rate (100%) Low Rate (70%) These values have been tested and are a good starting point to achieve successful Travel (mm) Expo Travel (mm) Expo... -
Page 14: Post Flight
Repairs Thanks to the EPO material in this aircraft, repairs to the foam can be made NOTICE: Use of CA accelerant on your aircraft can damage paint. DO NOT handle using virtually any adhesive (hot glue, regular CA, epoxy, etc). When parts are not the aircraft until accelerant fully dries. -
Page 15: Control Horn And Servo Arm Settings
Control Horn and Servo Arm Settings The table to the right shows the factory settings for the control horns and servo Control Horns Servo Arms arms. Fly the aircraft at factory settings before making changes. NOTICE: If control throws are changed from the factory settings, the AR637T Elevator gain values may need to be adjusted. -
Page 16: Float Installation (Optional)
Float Installation (Optional) Float Assembly 1. Install the 2 cross members (A) to the left and right floats as shown. 2. Install the front and rear float struts to the floats and secure the assembly together using the included 4 float plates (B) and M2.5 x 25mm machine screws (C). -
Page 17: Flying Off Water
Flying Off Water Takeoff Flying off water poses a higher risk because piloting errors or water conditions can cause the aircraft to become stranded. Only fly from the water when a level of To lift off from the water, set the flaps to the takeoff position, hold up elevator and comfort has been achieved flying the aircraft from the ground. -
Page 18: Troubleshooting Guide As3X Bnf
Troubleshooting Guide AS3X BNF Problem Possible Cause Solution Damaged propeller or spinner Replace propeller or spinner Imbalanced propeller Balance the propeller Motor vibration Replace parts or correctly align all parts and tighten fasteners as needed Oscillation Loose receiver Align and secure receiver in fuselage Loose aircraft controls Tighten or otherwise secure parts (servo, arm, linkage, horn and control surface) Worn parts... -
Page 19: Replacement Parts
Replacement Parts Recommended Items Part # Description Part # Description EFL105255 Landing Gear Retainer SPMX324S50 3200mAh 4S 14.8V Smart G2 50C; IC3 EFL23876 Fuselage SPMR6775 NX6 6 Ch Transmitter Only EFL23877 Wing Set SPMXC2080 Smart S1100 G2 AC Charger, 1x100W EFL23878 Wing Slat Set Optional Items... -
Page 20: Ama National Model Aircraft Safety Code
(iii) modification of or to any part process found on our website or call Horizon to obtain a Return Merchandise of the Product, (iv) attempted service by anyone other than a Horizon Hobby authorized Authorization (RMA) number. Pack the Product securely using a shipping carton. -
Page 21: Contact Information
Radio Equipment Directive 2014/53/EU; RoHS 2 Directive 2011/65/EU; RoHS 3 Directive - Amending 2011/65/EU Annex II 2015/863. EU Importer of Record: Twin Timber 1.6m PNP (EFL23875); Hereby, Horizon Hobby, LLC declares that the Horizon Hobby, GmbH device is in compliance with the following: EU EMC Directive 2014/30/EU; RoHS Hanskampring 9 2 Directive 2011/65/EU;... - Page 22 E-flite, Avian, DSM, DSM2, DSMX, Bind-N-Fly, BNF, the BNF logo, Plug-N-Play, AS3X, SAFE, the SAFE logo, ModelMatch, IC3, EC3, and the Horizon Hobby logo are trademarks or registered trademarks of Horizon Hobby, LLC. The Spektrum trademark is used with permission of Bachmann Industries, Inc.
Need help?
Do you have a question about the E-flite Twin Timber and is the answer not in the manual?
Questions and answers