Table of Contents
Advertisement
Quick Links
Advertisement
Table of Contents

Summary of Contents for AVMATRIX HVS0401U
- Page 1 MICRO 4-CH HDMI VIDEO SWITCHER...
- Page 2 USING THE UNIT SAFELY Before using this unit, please read below warning and precautions which provide important information concerning the proper operation of the unit. Besides, to assure that you have gained a good grasp of every feature of your new unit, read below manual. This manual should be saved and kept on hand for further convenient reference.
- Page 3 Please select the best installation position ※ Do not cover the air inlet and outlet of the unit, make sure that there is sufficient space around the ventilation holes on both sides to avoid blockage of ventilation. ※ To avoid falling or damage, please do not place this unit on an unstable cart, stand, or table. Make sure install this unit on a very stable horizontal surface for use.
-
Page 4: Table Of Contents
CONTENT 1.BRIEF INTRODUCTION ..........................1 1.1 Overview ..............................1 1.2 Main Features ............................1 2. INTERFACES ..............................2 3. SPECIFICATION ............................3 4.FRONT CONTROL PANEL .......................... 4 5.OPERATION INSTRUCTION ........................5 6.USB CAPTURE .............................. 5 7.PIP MODE ............................... 6 8.TRANSITION EFFECT ..........................6 8.1 WIPE ................................. -
Page 5: Brief Introduction
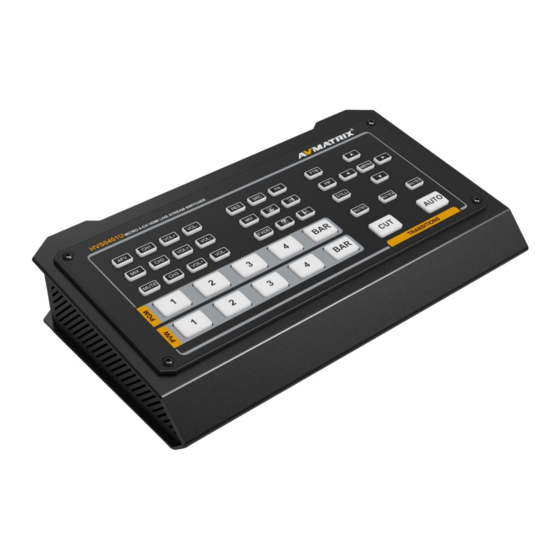
1.BRIEF INTRODUCTION 1.1 Overview The HVS0401U is a 4-Channel HDMI/DP multi-format video switcher with a compact and robust metal housing design for video switching, audio mixing and different conversion effects. The input signal is automatically detected, the PGM output is scalable and compatible with a wide range of devices for convenience and flexibility, and the USB output can be connected directly to a PC for video capture. -
Page 6: Interfaces
2. INTERFACES 2.1. Interface Overview × 1 IN1~IN3: HDMI×3; IN4: HDMI / Display Port PGM OUT × 2 MULTIVIEW OUT × 1 LAN port (For live streaming and upgrade) DC 12V IN GPIO (For tally) LINE OUT × 1 MIC × 2 RCA(L/R) ×1 USB TYPE-C (For capturing on PC) POWER ON/OFF... -
Page 7: Specification
3.SPECIFICATION CONNECTION Video In IN1~IN3: HDMI type-A ×3; IN4: HDMI type-A/ Display Port ×1 PGM: HDMI type-A×2 Video Out Multiview: HDMI type-A×1 USB Capture: USB type-C ×1 MIC/ Line ×2 (3.5mm audio) Audio In RCA(L/R) ×1 (stereo audio) Tally Port DB-15 ×1 Power In DC 12V IN ×1... -
Page 8: Front Control Panel
Power supply(12V 2A ) ×1, USB cable(type A-C) ×1, Standard Accessories Tally connector(DB-15) ×1 Optional Accessories Handbag ×1, Tally cable ×1 4.FRONT CONTROL PANEL Selecting the signal source for Preview Selecting the signal source for Program User can configure the audio of each channel in this area, including AFV or audio mix mode, audio source selecting, adjust volume + &... -
Page 9: Operation Instruction
RATE Three levels of transition speed rates AUTO Performs an automated switch between Program and Preview Performs a simple immediate switch between Program and Preview TRANSITION MIX, FADE & WIPE transition effects MIX: Selects a basic A/B dissolve for the next transition EFFECT WIPE: Transition from one source to another FADE: Gradual transition that transitions from one source to another... -
Page 10: Pip Mode
Use a third-party Video Media Player software like OBS, PotPlayer, VLC, Windows Media Player to play and store the captured video content. 7.PIP MODE When press PIP, there will be a small image display on the top left corner of PVW window as below image. And the menu will enter an interface as below image for PIP settings. -
Page 11: Mix
: Upward wipe transition effects : Leftward wipe transition effects : Downward wipe transition effects : Rightward wipe transition effects 8.2 MIX Press the MIX button and press the AUTO button to perform the MIX transition effect.In addition, different transition rates can be switched by pressing the RATE1/RATE2/RATE3 buttons on the panel. 8.3 FADE Select the FADE button and press the AUTO button to execute the FADE transition effect (as shown in the image below). -
Page 12: Main Menu Settings
9.2 Main Menu Settings When STATUS menu is not selected, press the MENU button to enter the Main Menu directly. When the STATUS menu is selected, adjust the selected item to the top, and press UP button to exit and become unselected. Press MENU button to enter the Main Menu. -
Page 13: System Settings
Master Adjust the total volume in the Audio Settings menu via the UP/DOWN button on the control panel. Mute Mute on/off, control PGM mute or you can turn it on/off by pressing the MUTE button from the control panel. -
Page 14: Network Settings
Fan RPM Setting the cooling fan speed to control the temperature and noise of the switcher. There are 5 options, AUTO/ OFF/ HIGH/MEDIUM/LOW. The default setting of the fan is in AUTO mode that the speed of the fan is adjusted automatically depending on the switcher’ s operating temperature. If the working environment requires special quiet for a special application, the user can turn off the fan manually from the menu. -
Page 15: Firmware
10.2 Time Setting Connect video switcher to a PC via LAN port and download a time setting software from AVMATRIX official website www.avmatrix.cn. Open the software and click Scan to search and connect the device, then the clock time will be changed to same time to the PC’s time.


Need help?
Do you have a question about the HVS0401U and is the answer not in the manual?
Questions and answers