Table of Contents
Advertisement
Quick Links
Advertisement
Table of Contents

Related Manuals for AVMATRIX PVS0403U


Summary of Contents for AVMATRIX PVS0403U
- Page 1 ALL IN ONE MICRO 4-CH SDI&HDMI LIVE STREAM MULTI-FORMAT VIDEO SWITCHER...
- Page 2 USING THE UNIT SAFELY Before using this unit, please read below warning and precautions which provide important information concerning the proper operation of the unit. Besides, to assure that you have gained a good grasp of every feature of your new unit, read below manual. This manual should be saved and kept on hand for further convenient reference.
-
Page 3: Table Of Contents
CONTENTS 1. BRIEF INTRODUCTION ........................1 1.1. Overview ..............................1 1.2. Main Features .............................1 2. INTERFACES ............................ 2 2.1. Interface Overview ............................. 2 2.2. Tally PIN Definition ............................ 2 3. SPECIFICATION ..........................3 4. FRONT CONTROL PANEL ......................4 5. POWER ON/ OFF ..........................5 6. - Page 4 10.2. LOGO ...............................19 11. OUTPUT SETTING ........................19 11.1. Output Interfaces ........................... 19 11.2. Multiview Out ............................20 11.3. PGM Out ..............................20 11.4. USB Out ..............................20 11.5. Output Format Setting ...........................21 11.6. FTB ................................22 12. AUDIO SETTING ........................... 22 12.1.
-
Page 5: Brief Introduction
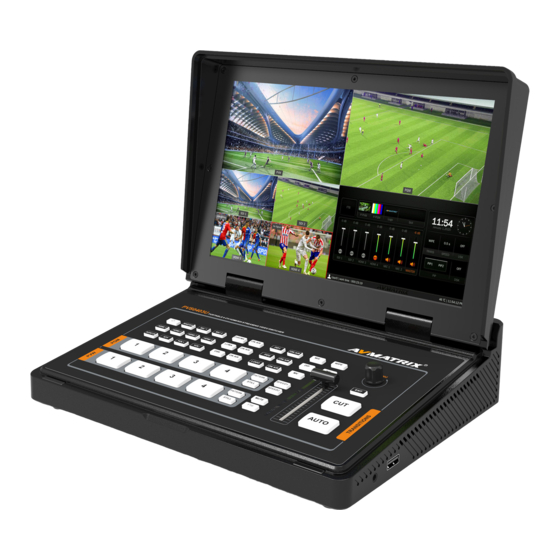
1. BRIEF INTRODUCTION 1.1. Overview PVS0403U is a 2-channel HDMI&SDI multi-format video Switcher with a 10.1 inch FHD IPS LCD monitor. It supports various functions including video switching, audio mixing, PGM/ multiview/ Aux out, different transition effects, Luma Key Chroma Key, DSK, LOGO, PIP/ POP, media library, pattern and color generator, etc. -
Page 6: Interfaces
2. INTERFACES 2.1. Interface Overview MIC/Line level IN × 2 SDI IN × 2 HDMI IN × 2 PGM(AUX) OUT × 2 MULTIVIEW(AUX) OUT × 1 USB OUT × 1 (for live streaming on PC) LAN port for PC software control GPIO (for tally) DC 12V IN ×... -
Page 7: Specification
3. SPECIFICATION CONNECTION Video In HDMI type-A ×2, SDI×2 HDMI type-A PGM ×2 HDMI type-A Multiview ×1 Video Out USB2.0 type C ×1 (Streaming on PC) Assignable SDI 1~2, HDMI3~4,PGM, Clean PGM, PVW, Color bar, Multiview Audio In MIC/ Line level (3.5mm stereo audio) ×2 PC Control Port LAN×1(For PC remote control) Media Library... -
Page 8: Front Control Panel
1080i 60/59.94/50 720p 60/59.94/50/30/29.97/25/24/23.98 625i 50 PAL, 525i 59.94 NTSC SDI Color Space USB Capture Out MJPG, Up to 1080p 60 USB disk format support: FAT32, Ext3, Ext4, up to 256GB Image format support: png, bmp, jpg, gif, jpeg, ppm, pbm, tif, jps, mpo, tga Media Format Logo format support: png, bmp, jpg, gif, jpeg, ppm, pbm, tif, jps, mpo, tga Logo size support: 10×10 pixel to 600×600 pixel... -
Page 9: Power On/ Off
Selecting the signal source for Preview. PVW:1-4 PATTERN for setting a pattern to PVW (Refers to Part 13.1), STILL for freezing the input source (Refers to Part 7.2). User can configure the audio of each channel in this area, including AFV or AUDIO audio mix mode, audio source selecting, adjust volume + &... -
Page 10: Multiview
the switcher, select YES in the prompt box to shut down the system. 6. MULTIVIEW The switcher has three HDMI outputs (2PGM/Multiview). The three HDMI ports are both the AUX out that user can define it as output of SDI1/ SDI2/ HDMI3/ HDMI4/ PGM/ Clean PGM/ PVW/ Color Bar/ Multiview (Refer to part 11). - Page 11 The information of user name, working time, USB connection, CPU working temperature, system time keeps displaying in the bottom of the Status/Menu page. The information on the status page will be updated in real time as the settings changed. It’s clear and visible for user to know the current situation and settings.
-
Page 12: Layouts
6.2. Layouts There are two Multiview layouts which can be switch between the horizontal layout and vertical layout from menu as below images. - Horizontal layout: - Vertical Layout: 6.3. Audio Meter There are audio meters in each windows of Multiview, including SDI 1-2 ,HDM3-4, PGM and MIC to show the audio status of each audio. -
Page 13: Input Information
the right or left of each window. See below image. 6.4. Input Information There is an overlay in each window of the SDI1-2,HDMI3-4. The overlay shows the resolution and frame rate of HDMI input. User can turn on/off overlay in each input window. Besides, user can set the overlay Opacity (50%, 75%, 100%), Size (Small/Medium/Large), Position X&Y (1-100), Text color and Background Color. -
Page 14: Umd Settings
6.5. UMD Settings The default UMD of the four inputs are SDI1, SDI2, HDMI3, HDMI4. User can turn on/off the UMD in each window. Besides, user can set the overlay Opacity (50%, 75%, 100%), Size (Small/Medium/Large), Position X & Y (1-100), Text color and Background Color. See below image. The UMD string content for 2SDI and 2HDMI inputs can be set from menu. -
Page 15: Pgm Pvw Switching
7. PGM PVW SWITCHING 7.1. PGM PVW Channel Selection Choose PGM and PVW source from PGM, PVW row and PATTERN (different pattern can be configured on menu, refers to Part 13.1) in the front panel. The selected button for PGM will turn on to red LED, and the selected button for PVW will turn on to green LED. -
Page 16: Transition Effect
depends on the speed of the manual switch. 8. TRANSITION EFFECT The video switcher provides various transition effects and types for user’s choice, including WIPE, DIP, MIX. 8.1. WIPE Press the WIPE button to perform the wipe transition effect. User can choose different style of WIPE through menu;... -
Page 17: Mix
DIP to Black (fade out): DIP to White (fade out): 8.3. MIX Press the MIX button to perform the MIX transition effect. 8.4. Transition Speed Setting User can set two speed of transition on menu, and the defined speed value will be saved and corresponds to Speed 1 and Speed 2 button. - Page 18 Luma keys provide a way to composite a Text clip over a background clip based on the luminance levels in the video. Turn on the Luma Key, a color from the key source will be removed, revealing another background image behind it. Switching a video with background to PVW window, and turn on the Luma Key.
-
Page 19: Chroma Key
Mask: Configure the Mask for the Key area 9.2. Chroma key Chroma Key is a visual-effects and post-production technique for compositing (layering) two images or video streams together based on color hues (chroma range). The technique has been used in many fields to remove a background from the subject of a photo or video, particularly the newscasting, motion picture, and video game industries. -
Page 20: Pip & Pop
OFF/ KEY (PVW)/ ON AIR (PGM)/ KEY Chroma Status & ON AIR Black/ Color Bar/ Color 1/ Color 2/ SDI 1/ Key Source Image SDI 2/ HDMI 3/ HDMI 4/ Image Key Color R 0~255 Key Color G 0~255 Key Color B 0~255 Fetch Color Upstream Key Chroma Key... -
Page 21: Downstream Key
Border Width 0~15 OFF/ KEY (PVW)/ ON AIR (PGM)/ PIP1 Status KEY & ON AIR Black/ Color Bar/ Color 1/ Color 2/ PIP1 Source SDI 1/ SDI 2/ HDMI 3 /HDMI 4/ SDI 1 Image PIP1 Size 1/2 1/4 1/8 PIP1 Position X 0~100 PIP1 Position Y 0~100 OFF/ KEY (PVW)/ ON AIR (PGM)/... - Page 22 Downstream keys are the last layers of keying, so they overlay all video switched to the main program output. They operate independently to what’s selected as the “background”, whatever you place on a Downstream key is going to stay on screen, no matter what you are doing with your transitions. Downstream key is ideal for bringing animated bugs or logos on screen.
-
Page 23: Logo
OUTPUT SETTING 11.1. Output Interfaces PVS0403U has 4 output interfaces. They are default as 2PGM Out, Multiview Out and USB Out. All the 3 outputs also can be defined as an AUX OUT from SDI1, SDI2, HDMI3, HDMI4, PVW, PGM, Clean... -
Page 24: Multiview Out
PGM, Color Bar and Multiview out. 11.2. Multiview Out The defaulted output of multiview port is the Multiview, the LED indicator of MV button in the front panel is green. User can connect it to an additional LCD display to monitor the inputs, PVW, PGM and status interface clearly. -
Page 25: Output Format Setting
• Under Audio inputs and outputs: USB Capture Audio Besides, the video source of USB not only can be the PGM output but also can be SDI1, SDI2, HDMI3, HDMI4, PVW or Clean PGM output. It means that user can capture any source for live streaming in various applications. -
Page 26: Ftb
space of the output is YUV. 11.6. FTB FTB (Fade to black) feature is usually for some emergent situation when user the switcher for an event. When press FTB button the PGM will be faded to black screen to hide all other layers, and the FTB button will keep flashing until user press the button again to stop the FTB. -
Page 27: Audio On (Mix)
the master audio or adjust audio volume. 12.2. Audio On (MIX) There is total 6 audios as the audio source, including 2SDI&2HDMI embedded audios and 2 MIC audio inputs. User can turn on/off or adjust volume for each audio of SDI 1, SDI 2, HDMI 3, HDMI 4, MIC 1 and MIC 2 independently. -
Page 28: Mic
12.5. MIC The switcher has two MIC inputs that user can connect it with a line-level or a microphone device, and turn on/off, adjust the audio volume and delay level. 12.6. Earphone The switcher has an earphone output for monitoring each audio. User can choose one audio source for Earphone from Master audio, 2SDI &... -
Page 29: Audio Keyboard Configuration
12.7. Audio Keyboard Configuration The audio not only can be configured by the menu but also can be configured by the keyboard control of the switcher. The keyboard includes two parts as below image. Part A is for selecting one audio to be configured, including Master, MIC 1, MIC 2, SDI 1, SDI 2, HDMI 3 and HDMI 4. -
Page 30: Mute
12.8. Mute The switcher has a MUTE button in the row of PVW keyboard. It is quick and easy for user to press the button to make the Master audio turn off. When MUTE turns on the LED indicator keeps flashing which means the PGM audio is being mute. - Page 31 The default images are the images preset in the switcher. User can use rotary button to select one of images from the Default Image as the source for PVW or PGM pattern. Total 39 default images for choice. 13.3.2. Local Image The local images are the images which you upload from USB disk.
-
Page 32: System Setting
OS computer via LAN port to have remote control. The software user manual downloaded from website: https://www.avmatrix.net/download/ , or through scanning below QR code in the menu. 14.5. Version Check the switcher’s Software Version, FPGA Version, MCU Version, PCB Version. 14.6. Time Setting 14.6.1. Setting Time Manually User can set Year/ Month/ Day/ Hour/ Minute directly through the Menu. -
Page 33: Network Setting
14.6.2. Time Synchronization Connect video switcher to a PC (windows OS) via LAN port and use the control software to search the video switcher. The time will be automatically synchronized once the video switcher be searched on the network. 14.7. Network Setting There is a switch for DHCP from the menu. - Page 34 keyboard from the menu. 14.8.2. Rename Rename the current user account name. 14.8.3. Switch Switch to another saved user account to have the saved settings easily and quickly. Meanwhile, the User name will be updated in the bottom of the Status/Menu page after switching. 14.8.4.
Need help?
Do you have a question about the PVS0403U and is the answer not in the manual?
Questions and answers