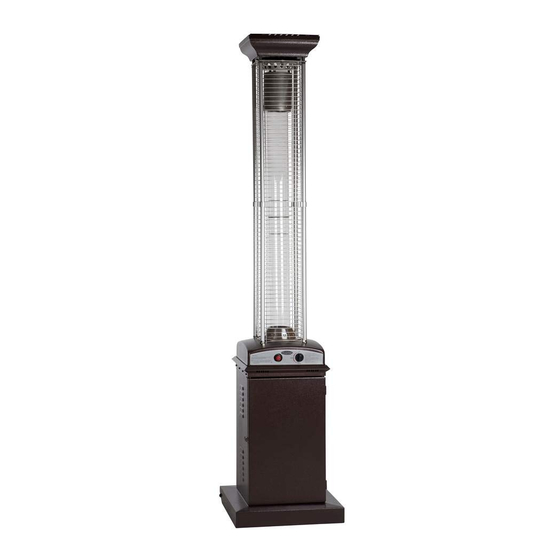
Fire Sense KLD7003SB Assembly / Care & Use Instructions

Fire Sense KLD7003SB Assembly / Care & Use Instructions

Infrared patio flame heater

Advertisement

Comfort, Quality & Style since 1998
ATTACH YOUR RECEIPT
Keep a copy of your proof of
purchase/order confirmation. You will
need it for warranty claims and
replacement part assistance.
PURCHASE DATE:___________________
Questions, problems, missing parts?
Before returning your item, our Florida-based customer service team can help. Hablamos español.
Call toll-free
Email
Chat support
INFRARED PATIO FLAME HEATER
IMPORTANT, RETAIN FOR FUTURE REFERENCE: READ CAREFULLY
DANGER
FOR YOUR SAFETY:
If you smell gas:
1. Shut off gas at the source.
2. Extinguish any open flames.
3. If odor continues, keep away
from the appliance and
immediately call your gas
supplier or fire department.
DANGER
DANGER indicates an imminently
hazardous situation which, if not
avoided, will result in death or
serious injury.
DANGER
Failure to comply with the
precautions and instructions
provided with this heater can
result in death, serious bodily
injury, and property loss or
damage from hazards of fire,
explosion, burn, asphyxiation,
and/or carbon monoxide
poisoning. Only persons who can
understand and follow the
instructions should use or service
this heater.
WARNING
FOR OUTDOOR USE ONLY.
(866) 985-7877
cservice@welltraveled.net
www.balkenehome.com
ITM./ART. 62224 / KLD7003SB
ASSEMBLY / CARE & USE INSTRUCTIONS
This product can expose you to
chemicals including Carbon
Monoxide, Lead, Chromium
(hexavalent compounds), Di(2-
ethylhexyl) phthalate (DEHP) and
Diisononyl phthalate (DINP),
which are known to the State of
California to cause cancer and
birth defects or other
reproductive harm. For more
information, go to
www.P65Warnings.ca.gov.
Do not store or use gasoline or
other flammable vapors and
liquids in the vicinity of this or
any other appliance. An LP-
cylinder not connected for use
shall not be stored in the vicinity
of this or any other appliance
Improper installation, adjustment,
alteration, service or maintenance
can cause property damage, injury
or death. Read the installation,
operation and maintenance
instructions thoroughly before
installing or servicing this
equipment.
9 a.m. – 9 p.m., EST
9 a.m. – 6 p.m., EST, Mon-Fri
WARNING
WARNING
.
WARNING
03202023

Advertisement

Table of Contents
loading
Need help?

Need help?

Do you have a question about the KLD7003SB and is the answer not in the manual?

Questions and answers

Subscribe to Our Youtube Channel

Summary of Contents for Fire Sense KLD7003SB

  • Page 1 Comfort, Quality & Style since 1998 INFRARED PATIO FLAME HEATER ITM./ART. 62224 / KLD7003SB ASSEMBLY / CARE & USE INSTRUCTIONS IMPORTANT, RETAIN FOR FUTURE REFERENCE: READ CAREFULLY WARNING DANGER This product can expose you to FOR YOUR SAFETY: chemicals including Carbon...
  • Page 2: Table Of Contents

    BEFORE YOU BEGIN TABLE OF CONTENTS TOPIC PAGE Before You Begin Safety Information Package Contents Hardware Contents Assembly Operating Instructions 10-13 Care & Maintenance Troubleshooting Warranty Information BEFORE YOU BEGIN Please read and understand this entire manual before attempting to assemble, operate, or install this appliance.
  • Page 3: Safety Information

    SAFETY INFORMATION DANGER DANGER: WARNING Indicates a hazardous situation that, if not FOR OUTDOOR USE ONLY • This product is fueled by liquid propane avoided, WILL cause death or serious injury. gas (LPG). LPG is invisible, odorless, and CARBON MONOXIDE HAZARD flammable.
  • Page 4: Package Contents

    PACKAGE CONTENTS PART DESCRIPTION Cap Plate Reflector Cap Emitter Plate Emitter Upper Support Post Protection Guard Guard Bracket Lower Support Post Glass Flame Tube Flame Tube Connector Base Handle Cylinder Bracket Emitter Bracket HARDWARE CONTENTS Bolt M8x12 Bolt M6x12 Qty: 4 Qty: 3 Packed w/ cylinder bracket...
  • Page 5: Assembly

    ASSEMBLY Estimated assembly time: 60 minutes PREPARATION Required for assembly (not included): Before beginning assembly of this appliance, make sure all parts and hardware are present. Compare contents with the • Phillips screwdriver w/ medium blade list on page 4. Įf any part is missing or damaged, do not •...
  • Page 6 ASSEMBLY Attach the Reflector Cap B. Slide the holes at each corner over the tops of the Posts. Secure using a Nut 3 on each Post. Tighten with wrench. Snap the Cap Plate A into place on top of the Reflector Cap.
  • Page 7 ASSEMBLY Įnstall the Protection Guards F. HINT: The shorter "legs" of the Guards should insert into the Guard Brackets F near the center of the assembled Support Posts. Begin with the lower guards, attach the Protection Guards to the assembled Posts E/H.
  • Page 8 ASSEMBLY Attach the Handle L to the Base K using 4 Bolts 1. Hardware: 1 M6x12 Bolt x4 Install the Cylinder Bracket M inside the Base K using 3 Bolts 2. NOTE: Make sure the tank retainer Bolt 5 faces toward the door. Hardware: 2 M8x12 Bolt x3 Contact us for assistance: (866) 985-7877 | www.balkenehome.com...
  • Page 9 ASSEMBLY Attach the regulator with hose to the end of the hose extending from the burner assembly. Screw the two hoses together, being careful not to cross-thread. Hand- tighten, then fully tighten using a wrench. Use only a standard 20 lb. propane tank (not included).
  • Page 10: Operating Instructions

    OPERATING INSTRUCTIONS CAUTION WARNING Before attempting to operate this appliance: • Perform all leak tests outdoors. • Extinguish all open flames before leak-testing. • Read and understand all safety • NEVER leak test while smoking. information in this manual • Do not use heater until all connections have been leak tested and show •...
  • Page 11 OPERATING INSTRUCTIONS A minimum supply pressure of 14 in. W.C./0.5 PSI is required for the purpose of input adjustment of propane gas. The minimum gas supply pressure of 11 in. W.C./0.4 PSI is required for the purpose of hose adjustment. The minimum input rating for a heater for automatic operation rating less than full input rating is 1500 BTU.
  • Page 12 OPERATING INSTRUCTIONS LIGHTING WARNING FOR YOUR SAFETY NOTE: Install one AAA battery behind the igniter button to operate the Be careful when attempting to electronic ignition. The anode (+) end of the battery should face out. manually light this heater. Holding in the control knob NOTE: For the initial start, or after any cylinder change, depress the control knob for more than 10 seconds...
  • Page 13 OPERATING INSTRUCTIONS PRE-OPERATION CHECKLIST: WARNING For a safe and pleasant heating experience, perform this check before FOR YOUR SAFETY each use: Heater head will be extremely hot after use. Handle with extreme caution. BEFORE OPERATING: • I am familiar with the entire owner's manual and understand all precautions noted.
  • Page 14: Care & Maintenance

    CARE AND MAINTENANCE To enjoy years of outstanding performance from your heater, make sure to WARNING perform the following maintenance activities on a COLD HEATER regularly: FOR YOUR SAFETY • Do NOT touch or move the KEEP EXTERIOR SURFACES CLEAN. heater for at least 45 1.
  • Page 15: Troubleshooting

    TROUBLESHOOTING PROBLEM POSSIBLE CAUSE CORRECTIVE ACTION Gas valve is off Turn gas valve on Fuel tank is low/empty Refill LPG tank Orifice is blocked Clean orifice Purge air from lines: open gas lines and Air in supply system or recently swapped cylinder depress control knob for up to 2 minutes Burner will not light...
  • Page 16: Warranty Information

    an additional year Before returning 9 a.m. – 6 p.m., EST, Mon – Fri...

This manual is also suitable for:

62224

Table of Contents