
Subscribe to Our Youtube Channel
Related Manuals for K-array KR102


Summary of Contents for K-array KR102
- Page 1 KR PORTABLE SYSTEM Ver. 1.0 KR102 / KR102 I KR202 / KR202 I KR402 / KR402 I KR802 USER GUIDE English KR102 / KR102 I KR202 / KR202 I KR402 / KR402 I KR802...
-
Page 2: Table Of Contents
6.2 KR202 .................... 11 6.3 KR402 .................... 13 6.4 KR802 7. SYSTEM SETUP ..............15 ..................15 7.1 KR102 SETUP ............... 19 7.2 KR202, KR402, KR802 SETUP 8. AMPLIFIER ................24 ..................24 8.1 AC POWER ..............24 8.2 VOLTAGE REQUIREMENTS .............. -
Page 3: Introduction
USB or RS485, again, conveniently on a standard XLR. The Mark I version is the newest version of the KR102, KR202 and KR402 systems, featuring new auto range amplifiers, new codecs that reduce the signal/noise ratio, a 5v dc power connector on the rear amplifier panel and enhanced functionality for creating presets. -
Page 4: Safety Information
KR PORTABLE SYSTEM Ver. 1.0 4. SAFETY INFORMATION Read these instructions - Keep these instructions - Heed all warnings Warning: Failure to follow these safety instructions could result in fire, shock or other injury or damage to the device or other property. The lighting flash with arrowhead symbol within an equilateral triangle is intended to alert the This symbol alerts the user to the presence of... - Page 5 KR PORTABLE SYSTEM Ver. 1.0 WARNING • Since the device is a CLASS I apparatus, it must be only connected to an AC three-wire grounding outlet. If your outlet isn’t grounded, contact a licensed electrician to replace it with a property grounded outlet.
-
Page 6: Unpacking
5. UNPACKING Each K-array speaker is built to the highest standard and thoroughly inspected before leaving the factory. Upon arrival, carefully inspect the shipping carton, then examine and test your new amplifier. -
Page 7: System Components
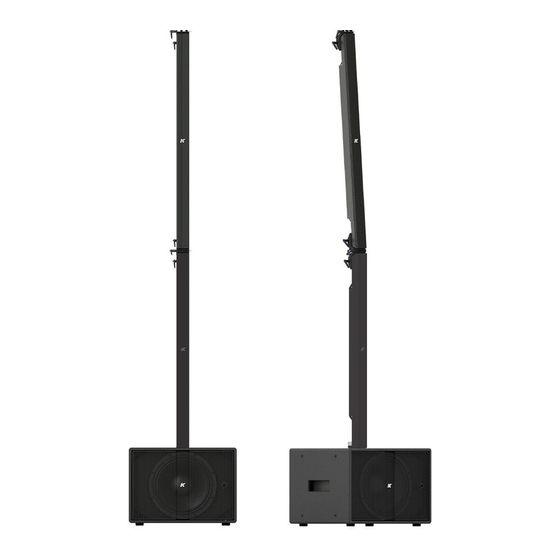
6. SYSTEM COMPONENTS 6.1 KR102 The KR102 is composed of 2 x KMT12 12’’ subwoofers + 2 x KK102K plastic cases with 1 x KK102 Kobra loudspeaker and the mounting hardware. The power cables for the subwoofers and the Speakon cables to connect the subwoofers to the mid-high elements are also included. - Page 8 KR PORTABLE SYSTEM Ver. 1.0 2,3in 58,5mm 3,2in 81,1mm 12,8in 17,0in 326mm 433mm...
-
Page 9: Kr202
KR PORTABLE SYSTEM Ver. 1.0 6.2 KR202 This system is composed of 2 x KMT18 18’’ subwoofers + 2 x KK202K plastic cases with 2 x KK102 Kobra loudspeakers and the mounting hardware. The power cables for the subwoofers and the Speakon cables to connect the subwoofers to the mid-high elements are also included. - Page 10 KR PORTABLE SYSTEM Ver. 1.0 3,2in 81,1mm 23,5in 18,3in 596,5mm 465mm...
-
Page 11: Kr402
KR PORTABLE SYSTEM Ver. 1.0 6.3 KR402 This system is composed of 2 x KMT21 21’’ subwoofers + 2 x KP102K plastic cases each with 1 x KP102 Python loudspeaker and 1 x K-JOINT2 + 2 x KP102KF plastic cases with 1 x KP102 Python loudspeaker, 1 x K-JOINT2 and 1 x K-FOOT2. - Page 12 KR PORTABLE SYSTEM Ver. 1.0 21,9in 30,1in 555mm 763,5mm...
-
Page 13: Kr802
KR PORTABLE SYSTEM Ver. 1.0 6.4 KR802 This system is composed of 2 x KMT218 dual 18’’ subwoofers + 2 x KY102K plastic cases each with 1 x KY102 Kayman loudspeaker and 1 x K-JOINT2 + 2 x KY102KF plastic cases with 1 x KY102 Kayman loudspeaker, 1 x K-JOINT2 and 1 x K-FOOT2. - Page 14 KR PORTABLE SYSTEM Ver. 1.0 5,3in 4,6in 134,3mm 116mm 37,4in 23,6in 949mm 600mm...
-
Page 15: System Setup
KR PORTABLE SYSTEM Ver. 1.0 7. SYSTEM SETUP 7.1 KR102 SETUP In this section, we demonstrate how to setup one side of the system. Follow the same procedure to setup the other side. 1. Adjust the length of the extendable pole and screw it in on the KMT12 subwoofer. - Page 16 KR PORTABLE SYSTEM Ver. 1.0 2. Connect the foot to the speaker with the 8 x 40 piston pin provided. Secure it with the security block then insert the bracket to set the angles and secure it with the two 5 x 30 piston pins provided.
- Page 17 KR PORTABLE SYSTEM Ver. 1.0 Insert the speaker in the stand, adjust the orientation and tighten the screw on the foot. Follow the same instructions if you use the K-FOOT2 set screw instead of the extendable pole...
- Page 18 KR PORTABLE SYSTEM Ver. 1.0 4. Adjust the angle of the speaker. 4. Connect the KK102 speaker to the KMT12 subwoofer using the provided Speakon cable.
-
Page 19: Kr202, Kr402, Kr802 Setup
KR PORTABLE SYSTEM Ver. 1.0 7.2 KR202, KR402, KR802 SETUP In this section, we demonstrate how to setup one side of the system. Follow the same procedure to setup the other side. The mounting procedure for the KR402 and KR802 is not dissimilar. Tighten the K-FOOT2 set screw into the subwoofer. - Page 20 KR PORTABLE SYSTEM Ver. 1.0 Insert the bracket to set the angles and secure it with the two 5 x 30 piston pins provided. 5 x 30 piston pin • Check that the security sphere of the piston pin is visible at the opposite end and cannot accidentally fall out.
- Page 21 KR PORTABLE SYSTEM Ver. 1.0 5. Connect the next unit, following the same indications of Steps 2-3. Adjust the orientation and tighten the screw on the foot.
- Page 22 KR PORTABLE SYSTEM Ver. 1.0 Each joint allows the adjustment of the angles from -10° to + 10°. We recommend not to tilt the top speaker inward, since this would compromise the performace of the system.
- Page 23 KR PORTABLE SYSTEM Ver. 1.0 8. Connect the mid-high speakers together using the short Speakon cable provided. Connect the bottom mid-high speaker to the subwoofer using the provided long Speakon cable. Short Speakon cable Long Speakon cable...
-
Page 24: Amplifier
For best performance, voltage drops should not exceed 10% at 100 V or 10% at 230 V. The minimum electrical service amperage required by a K-array loudspeakers system is the sum of their maximum continuous RMS current. K-array recommends allowing an additional 30% above the minimum amperage... -
Page 25: Protection Circuitry
KR PORTABLE SYSTEM Ver. 1.0 8.4 PROTECTION CIRCUITRY Both the power supply and the amplifier sections are equipped with several protection circuits. The power supply protections aim to isolate a faulty section in the electrical power system from the rest of the device in order to prevent the furtherance of the fault and limit device damage. -
Page 26: Rear Panel Settings: Kmt12 I, Kmt18 I, Kmt21 I
KR PORTABLE SYSTEM Ver. 1.0 8.5 REAR PANEL SETTINGS: KMT12 I, KMT18 I, KMT21 I, KMT218 5.5 A 2.9 A 14 A 16 A... - Page 27 Power switch. Turns the KMT system on and off. AC Input. PowerCon input for AC power. AC Link. PowerCon output for feeding AC mains power to additional K-array components with a PowerCon AC input socket. Power On LED. Indicates the system is ON.
-
Page 28: Rear Panel Settings: Kmt12, Kmt18, Kmt21
KR PORTABLE SYSTEM Ver. 1.0 8.6 REAR PANEL SETTINGS: KMT12, KMT18, KMT21... - Page 29 Power switch. Turns the KMT system on and off. AC Input. PowerCon input for AC power. AC Link. PowerCon output for feeding AC mains power to additional K-array components with a PowerCon AC input socket. Power On LED. Indicates the system is ON.
-
Page 30: Rs485 Network
The RS485 Link Input and the RS485 Link Output on the rear panel allow the creation a network of K-array devices that users can manage with a PC running the K-Framework software. All devices can be linked with standard XLR cable. -
Page 31: Touch Screen Functions
KR PORTABLE SYSTEM Ver. 1.0 9. TOUCH SCREEN FUNCTIONS 9.1 TOUCH SCREEN FUNCTIONS: KMT12 I, KMT18 I, KMT21 I, KMT218 The main functions of the onboard DSP can be managed with the integrated touch screen. Functions are grouped into six pages, shown as icons on the Home page. HOME PAGE To reach the Home Page from any other page, touch the Home button. - Page 32 If necessary, the system can be dismounted and the subwoofer can be used to drive different K-array passive speakers. In this case, go to the Configuration Page and press the SETUP button. Insert the model and the number of speakers connected to the Speaker Out.
- Page 33 KR PORTABLE SYSTEM Ver. 1.0 PRESET The Preset Page allows users to load presets stored onboard. INFO The Info Page contains information about the current software and firmware, the current preset loaded and the Board ID of the device. The Board ID is a number which identify the device when it is connected in a K-framework network (see Paragraph 7.6).
-
Page 34: Touch Screen Functions: Kmt12, Kmt18, Kmt21
KR PORTABLE SYSTEM Ver. 1.0 9.2 TOUCH SCREEN FUNCTIONS: KMT12, KMT18, KMT21 HOME PAGE The main functions of the onboard DSP can be managed with the integrated touch screen. Functions are grouped into six pages, shown as icons on the Home Page. To reach the Home Page from any other page, touch the Home button. - Page 35 KR PORTABLE SYSTEM Ver. 1.0 INFO PAGE The Info Page contains information about the current software and firmware, and the Logical ID of the KMT module. Make sure that each device in the network has a different ID number. DELAY PAGE The Delay Page allows users to independently set the delays for the speaker system (subwoofer and speaker output).
-
Page 36: Service
9. SERVICE To obtain service: 1) Contact the official K-array distributor in your country. Your local distributor will direct you to the appropriate service center. 2) If you are calling for service, please have the serial number(s) of the unit(s) available for reference.
Need help?
Do you have a question about the KR102 and is the answer not in the manual?
Questions and answers