
Related Manuals for Air Techniques Mojave Mobile


Summary of Contents for Air Techniques Mojave Mobile
- Page 1 Mojave Mobile Installation and Operating Instructions ATH7100005L29 *ATH7100005L29* ATH7100005...
-
Page 3: Table Of Contents
Contents Contents Remove the transport locks ..Electrical safety when making connections ....17 Important information Connecting the unit to the mains About this document . - Page 4 18 Maintenance ..... 18.1 Mojave Mobile ....18.2 VS 300 S .
-
Page 5: Important Information
Follow these measures to avoid the ❯ Air Techniques shall not be held liable and danger. offers no guarantees of the safe and The signal word differentiates between different... -
Page 6: Copyright Information
Caution: Federal law restricts this device only be carried out with the written approval of to sale by or on the order of a Doctor. Air Techniques. Comply with the guidelines, laws, rules and ❯ regulations applicable at the site of operation when you use this unit. -
Page 7: Specialist Personnel
Dürr Dental. and repair work must be carried out either by The use of any other accessories may Air Techniques personnel or by a suitably quali- ❯ result in increased electromagnetic fied person approved by Air Techniques. -
Page 8: Essential Performance Charac
Only the original packaging ensures optimum protection for the unit during transport. If necessary, the original packaging for this unit can be ordered from Air Techniques. Air Techniques cannot be held responsi- ble for any damage resulting from trans- port in unsuitable packaging, even during the warranty period. -
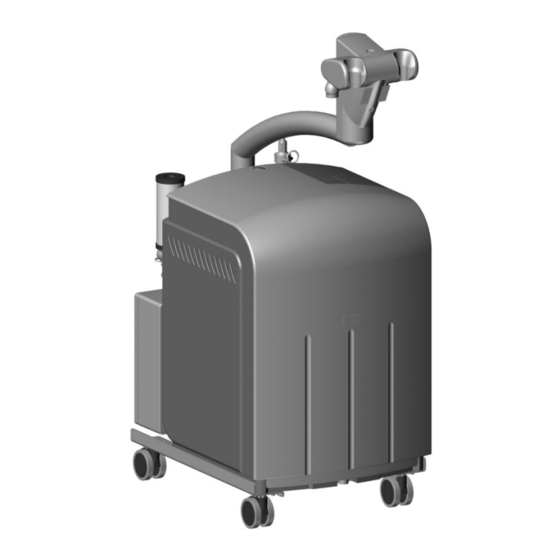
Page 9: Product Description
Product description Product description Overview Mojave Mobile Line Cord ATH7100005L29 2011V004... -
Page 10: Scope Of Delivery
Mojave Mobile ..ATH7100200 (VMA1-S) Name Order num- Mojave Mobile ..ATH7200100 (VM1) Mojave Mobile ..ATH7200200 (VM1-S) Mojave Mobile ATH7100100 VMA1 –... - Page 11 Product description Name Order num- Prophylaxis 0700-058-50 070005850 cannula d=16 mm, grey (4 pieces) Disposable 7110-033-00 MMREP amalgam con- tainer Disposable MMREC amalgam con- tainer and Recycling Kit Recycling Kit MMKIT ATH7100005L29 2011V004...
-
Page 12: Technical Data
Type of protection IP20 Protection class Duty Cycle 100 (S1) Main plug 1/N/PE General technical data Mojave Mobile Dimensions (H x W x D) 900 x 365 x 640 35.43 x 14.37 x 25.20 Weight max. 43 max. 95 Water temperature °C... - Page 13 Product description Electromagnetic compatibility (EMC) Interference emission measurements Electromagnetic interference radiation Group 1 CISPR 11:2015/AMD1:2016 Class B Intermittent interference voltage at the power supply con- Group 1 nection Class B CISPR 14-1:2016 Emission of harmonics Compliant IEC 61000-3-2:2018 Voltage changes, voltage fluctuations and flicker emis- Compliant sions IEC 61000-3-3:2013/AMD1:2017...
- Page 14 Product description Electromagnetic compatibility (EMC) Interference immunity measurements on supply input Immunity to interference, line-conducted disturbances induced by high-frequency fields – AC voltage grid IEC 61000-4-6:2013 0.15 - 80 MHz Compliant ISM frequency bands 6.765 - 6.795 MHz 13.553 - 13.567 MHz 26.957 - 27.283 MHz 40.66 - 40.70 MHz 80% AM at 1 kHz...
-
Page 15: Model Identification Plate
Product description Model identification plate Mojave Mobile The type plate is located on the rear of the unit. Type plate VSA 300 S The type plate is located on the noise reduction hood. Type plate Hose manifold The type plate of the hose manifold is located under the filter element cover. -
Page 16: Approvals
Product description Function Classification Medical Device Class Approvals VSA 300 S Separation method compliant with ISO 11143 stand- Type 1 Centre of Competence in Civil Engineering, Berlin Test number Z-64.1-15 Disposable filter Rinsing tube Bacteria filter On/off switch Mains AC power connection Fluid container Display panel (optional) Hose manifold... - Page 17 Product description Units with amalgam separation have a display panel displaying the filling level of the amalgam collecting container integrated in the cover of the mobile treatment unit. ATH7100005L29 2011V004...
-
Page 18: Installation
Installation Installation Installation Setting up the unit Where a waste water connection is available, Requirements ❯ conduct the fluids directly via the waste water hose into the waste water outlet. Installation/setup room Secure the unit against rolling away. ❯ The room chosen for set up should fulfil the fol- lowing requirements: –... -
Page 19: Electrical Safety When Making Connections
Installation Connecting the unit to the Remove the protective cover. ❯ Removing the transport locks. ❯ mains supply Requirements: ü There is a properly installed power outlet close to the unit (max. length of power cord 2.5 m / 98.42 in). ü... -
Page 20: Electrical Installation
Installation Electrical installation Overview of connection Hose manifold Display panel VSA 300 S Suction unit On / off switch Mains power connection with fuses Hose manifold Terminal strip Microswitch ATH7100005L29 2011V004... -
Page 21: Vs 300 S
Installation VS 300 S Mains AC power connection Motor connection Control connection 24 V AC / max. 80 mA Control signal output 24 V AC / max. 20 mA VSA 300 S SD Socket T3,15AH H3 H2 (24V AC) (24V AC) Start U1/Z2 T8,0AH... - Page 22 Installation Ground contact to the housing of the unit Display panel SD card holder (for Micro SD) Connection of the hall sensor for speed monitoring Ground contact to the housing of the unit Main fuse Brake fuse Main fuse Rinsing unit Display green (as with display panel) Display red (as with display panel) Display yellow (as with display panel)
-
Page 23: Description Of The Service Program
Installation Every time the service key is pressed, the sedi- Description of the service ment filling level is checked. If a test container is used, the 95% and 100% filling level can be program visualized on the display panel. Wear protective equipment to avoid any Motor start - motor brake risk of infection (e.g. -
Page 24: Service Program Vsa 300 S
Installation 10 Service program VSA 300 S ATH7100005L29 2011V004... -
Page 25: Commissioning And First Start-Up
Installation 11 Commissioning and first start-up NOTICE Short circuit due to the build-up of condensation Do not switch on the unit until it has ❯ warmed up to room temperature and is dry. In various countries medical devices and electrical equipment are subject to regular checks at set intervals. -
Page 26: Usage
Usage Operation of the rotary adaptor, suction hand- Usage piece and ball joint 12 Operation 12.1 Switching the unit on/off To use the unit, switch it on using the on/off ❯ switch. 360° 15° steps Rotary adaptor Suction handpiece Ball joint A rotary adaptor (1) can be attached to the ❯... -
Page 27: Display Panel (For Vsa 300 S)
Usage 13 Display panel (for VSA 300 Once the maximum filling level has been ❯ reached, empty the fluid container. GREEN LED RED LED Audible signal/melody Reset/service key YELLOW LED 13.1 Ready for use Green LED lights up 13.2 Amalgam collecting container is 95% full Yellow LED lights up Green LED lights up... -
Page 28: No Amalgam Collecting Container Inserted
Usage 13.6 Brake monitoring Red LED flashes Red LED and Audible signal melody is issued green LED flash alternately – At a filling level of 100% the signal melody can Audible signal no longer be switched off by pressing the reset button. -
Page 29: 14 Disinfection And Cleaning
Do not use any solvents like acetone. ❯ Disinfect and clean the surface of the unit with ❯ Air Techniques recommends for disinfection and a compatible surface disinfectant, e. g. Mon- cleaning: arch Surface Disinfection Wipes, or a compara- – Monarch CleanStream Evacuation Sys- ble product. -
Page 30: Weekly And Before Extended Treatment Pauses
Usage Rinse with approx. 2 liters of water after the Add 60 ml Monarch CleanStream Evacuation ❯ ❯ exposure time. System Cleaner to the water placed in the unit. Place the rinsing tube onto the connector in ❯ 14.5 Weekly and before extended the cover of the fluid container and secure it treatment pauses with the clip. -
Page 31: Surface Of The Unit
Usage Connect the waste water connection to the Remove the rinsing tube from the fluid con- ❯ ❯ rinsing tube. tainer and clean and disinfect it using a suitable instrument disinfectant. Re-attach the waste water hose to the emptied ❯ and disinfected fluid container. -
Page 32: Processing Of The Suction Handpiece
Usage 15 Processing of the suction Important information! The reprocessing instructions in accord- handpiece ance with ISO 17664 have been inde- pendently tested by the manufacturer for 15.1 Risk analysis and classifica- the preparation of the device and its com- tion ponents for their reuse. -
Page 33: Preparation At The Operating Location
Usage The reprocessing method was validated as fol- Only use distilled or de-ionized water with a low ❯ lows: bacterial count (at least drinking water quality) – Pre-cleaning that is free from facultatively pathogenic micro- – Monarch Surface Disinfection Wipes organisms (e.g. -
Page 34: Clean Manually, Perform A Final
Cleaning agents or combined cleaning and disin- fection agents with the following properties must be used for manual cleaning: – only cleaning and disinfection products approved by Air Techniques – no aggressive or abrasive cleaning agents For further information, see "General informa- tion". -
Page 35: Check For Function
Usage For more information: "General information". NOTICE Selection of the machine cleaning agents and Damage to equipment due to disinfectants improper sterilization The following properties are required: Product damage may be caused if the – Material compatibility with the product sterilization process is not performed –... -
Page 36: Reprocessing Of The Cannula
Usage 16 Reprocessing of the can- Important information! The reprocessing instructions in accord- nula ance with FDA Guidance "Reprocessing Medical Devices in Health Care Settings - 16.1 Risk analysis and classifica- Validation Methods and Labeling" have tion been independently tested by the manu- A risk analysis and classification of medical devi- facturer for the preparation of the device ces that are common in dentistry must be per-... -
Page 37: Preparation At The Operating Location
Usage The reprocessing method was validated as fol- Only use distilled or de-ionized water with a low ❯ lows: bacterial count (at least drinking water quality) – Pre-cleaning that is free from facultatively pathogenic micro- – Monarch Surface Disinfection Wipes organisms (e.g. -
Page 38: Clean Manually, Perform A Final
– only cleaning and disinfection products For further information, see "General informa- approved by Air Techniques tion". – no aggressive or abrasive cleaning agents For further information, see "General informa- Automatic cleaning and disinfecting tion". -
Page 39: Storage
Usage 17 Replace the amalgam col- NOTICE lecting container Damage to equipment due to improper sterilization WARNING Product damage may be caused if the Contamination hazard if the amalgam sterilization process is not performed collecting container is reused if the correctly. -
Page 40: Container
Usage 17.1 Disposal of amalgam collect- ing container The contents of the amalgam collecting container are contaminated with heavy metals and must not be disposed of as household waste or into the environment! – Waste pick-up and disposal by a waste man- agement company specialized in surgery waste. -
Page 41: Maintenance
❯ and mouth and nose protection). Prior to working on the unit or in case of danger, disconnect it from the mains. 18.1 Mojave Mobile Maintenance interval Maintenance work Weekly ❯ Change the yellow disposable filter in the hose manifold. - Page 42 Usage Maintenance interval Maintenance work Annually ❯ Check the inlet and outlet hoses for signs of deposits/blockage or cracks and replace them where necessary. * ❯ Check the outflow valve and replace it if necessary. * May be done by Service Technicians only ATH7100005L29 2011V004...
-
Page 43: Grease The Seal
Usage Open the cover of the filter element and ❯ 18.4 Grease the seal change the yellow disposable filter. Grease the seal if required. ❯ 18.6 Changing the suction hose The suction hoses are subject to wear and tear. Check the suction hoses regularly for kinks, ❯... -
Page 44: Lubricating The O-Rings
Usage 18.7 Lubricating the O-rings The suction handpieces, suction hoses etc. are easier to handle when the O-rings are lubricated with Vaseline. Disassemble the suction handpieces regularly ❯ and lubricate the O-rings. Protective strainer 18.9 Replacing the bacteria filter Two labels are included in the scope of delivery of the bacteria filter. - Page 45 Usage 18.10 Tests WARNING Infection due to contaminated unit Clean and disinfect the suction system ❯ before working on the unit. Wear protective equipment during your ❯ work (e. g. impermeable gloves, pro- tective goggles and mouth and nose protection). In some countries the owner is required to keep an operating handbook.
- Page 46 Troubleshooting Troubleshooting 19 Tips for operators and service technicians Any repairs above and beyond routine maintenance may only be done by suitably qualified per- sonnel or by one of our service technicians. WARNING Infection due to contaminated unit Clean and disinfect the suction system before working on the unit. ❯...
- Page 47 Troubleshooting Error Possible cause Remedy Device does not start-up No mains voltage ❯ Check the mains supply volt- age. * ❯ Check the fuses and replace them, if necessary. * Undervoltage ❯ Measure the supply voltage; call an electrician if necessary. No start signal ❯...
- Page 48 Troubleshooting Error Possible cause Remedy May be done by Service Technicians only ATH7100005L29 2011V004...
- Page 49 Appendix Appendix 20 Handover record This document confirms that a qualified handover of the medical device has taken place and that appropriate instructions have been provided for it. This must be carried out by a qualified adviser for the medical device, who will instruct you in the proper handling and operation of the medical device. Product name Order number (REF) Serial number (SN)
- Page 52 For over 50 years, Air Techniques has been a leading innovator and manufacturer of dental products. Our priority is ensuring complete satisfaction by manufacturing reliable products and providing excel- lent customer and technical support. Whether the need is digital imaging, utility room equipment or merchandise, Air Techniques can provide the solution via our network of authorized professional deal- ers.
Need help?
Do you have a question about the Mojave Mobile and is the answer not in the manual?
Questions and answers