
Related Manuals for Air Techniques ProVecta S-Pan


Summary of Contents for Air Techniques ProVecta S-Pan
- Page 1 Pa n o r a m i c X- r a y S y s t e m Pa n o r a m i c C e p h a l o m e t r i c X- Ra y S y s t e m Software Installation &...
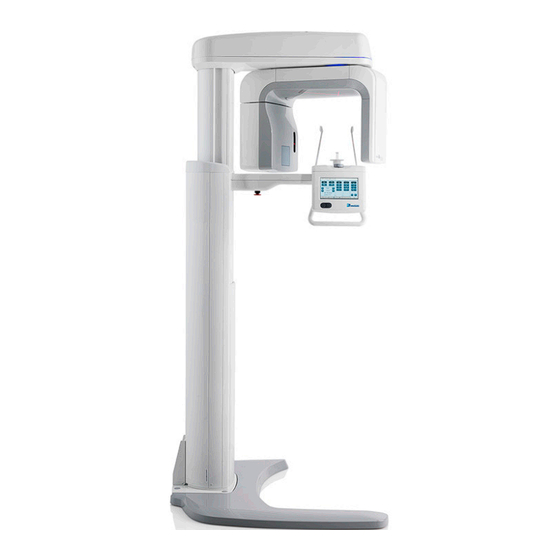
- Page 3 This document provides the instructions necessary to set up the software used to operate the ProVecta S-Pan and the ProVecta S-Pan Ceph X-ray units. The ProVecta S-Pan and the ProVecta S-Pan Ceph are hereafter referred to as ProVecta throughout this document. Review and follow the instructions to ensure that the ProVecta gives the highest level of service.
- Page 4 OK button to exit. Power savings mode for the network adapter has been disabled. Control Panel Device Manager All Control Panel Window Items Window Device Manager Network Adapters Gigabit Network Connection Installed for ProVecta S-Pan Start Button Power Management Un-check Page 4 Air Techniques, Inc.
- Page 5 Follow the on-screen instructions to complete the software installation, clicking Next or Install to advance the installation. b. Make sure that the ProVecta S-Pan check box is checked and use all default settings. c. From the Installation completed window, click Finish to complete the installation.
- Page 6 3.a. From the start menu, select the CrongIPC item from the Air Techniques−>ProVecta S-Pan submenu.. 3.b. With the Gigabit Ethernet card installed only for ProVecta S-Pan operation selected, Click the Set to CRONG client IP button and perform steps 3.c thru 3.g to configure the client IP.
- Page 7 3.e. When the program finishes the setting check, click the Test to CRONG connection button. 3.f. Click OK in the Test passed window and note the successful status. 3.g. Repeat steps 3.b, 3.c and 3.d above to ensure that the CRONG client IP is correctly reset after the test. Air Techniques, Inc. Page 7...
- Page 8 3. Observe the download progress and verify the successful status notation in the lower left Log View. 4.e. Make sure that each selected file for ProVecta S-Pan with Ceph or without Ceph was successfully downloaded and close the Calibration Downloader window.
- Page 9 5.h. Click the drop down arrow and select ProVecta S-Pan from the list. 5.j. Click the Read Image button to start the ProVecta image capture software. 5.k. Observe that the ProVecta S-Pan window opens. Check the ProVecta front panel to ensure the device is ready. Proceed with image capture.
- Page 10 NOTES Page 10 Air Techniques, Inc.
-
Page 11: Table Of Contents
There- fore the user must refer to the individual software manufacturer user documentation for all information specific to installing the application and its subsequent operation. Air Techniques, Inc. Page 11... -
Page 12: Apteryx/Xrayvision Version
6.1d. Observe that the Image Capture window opens. Choose the Scanned X-ray tab. 6.1e. Select the ProVecta S-Pan 8 Bit from the drop down menu and choose OK tab. 6.1f. Observe that the ProVecta S-Pan 8 Bit window opens. Choose the OK tab. - Page 13 6.1h. Choose the OK tab. Observe that a splash screen flashes briefly and the ProVecta S-Pan image acquire window opens. 6.1j. Refer to the ProVecta S-Pan Operating Instructions as necessary and acquire an im- age. 6.1k. Observe that the Modify Tooth Association window opens. Modify information as needed and choose the OK tab to complete the activity.
-
Page 14: Apteryx/Xrayvision Lite Version
6.2e. Choose the Take An Image For All Teeth command 6.2f. Observe that the what type of image you would like to capture window opens along with a capture selection drop down menu. 6.2a 6.2b 6.2c 6.2d 6.2e Page 14 Air Techniques, Inc. - Page 15 THIRD PARTY IMAGING APPLICATION SETUP 6.2g. Select the ProVecta S-Pan 8 Bit from the drop down menu and choose OK tab. 6.2h. Observe that the ProVecta S-Pan image acquire window opens. Refer to the ProVecta S-Pan Operating Instructions as necessary and acquire an image.
-
Page 16: Dexis
6.3a. Start the application and observe that the Program Information window opens. Click OK and observe that the Preferences window opens. 6.3b. Select the DEXray tab. Select the ProVecta S-Pan 16 Bit from the scanner drop down menu. 6.3c. Click Done and observe that the DEXIS Administration window opens. - Page 17 6.4a. Start the application and observe that the Program Information window opens. Click OK and observe that the Preferences window opens. 6.4b. Select X-ray Acquisition from the list on the left. Select the ProVecta S-Pan 16 Bit from the scanner drop down menu.
-
Page 18: Eaglesoft
2. Check “use scanner default interface” check box. 3. Select Scanner tab 6.5c. Observe that the Select Source pop up window opens. 6.5d. Highlight ProVecta S-Pan 16 Bit 1.40 (32-32) from the source list and click the Select button to select it as the source module. 6.5a 6.5b... - Page 19 6.5f. From the main program window, select Patient or click on the chair to open the Per- sons List window. 6.5g. Select or add a patient and observe that an exam window opens. 6.5e 6.5f 6.5g Air Techniques, Inc. Page 19...
- Page 20 Image Template List pop up window displays. 6.5j. Scroll down the list to Panoramic and select the Edit button which opens an Edit Image Template pop up window. 6.5h Scroll Down 6.5j Page 20 Air Techniques, Inc.
- Page 21 6.5k. Verify that Scanner is the default source selected on the Edit Image Template pop up window. Click the OK button to return to the exam window. 6.5l. Select Panoramic as a template. 6.5m. Select Acquire to get an image via ProVecta S-Pan as configured. 6.5k 6.5m 6.5l Air Techniques, Inc.
- Page 22 6.6f. Select the Flatbed Scanner w/o Transparency Adapter radio button from the list. 6.6g. Click Next and observe that the Acquisition Hardware window changes to display video camera hardware configuration options. 6.6a 6.6c 6.6b Important: Call For A Module Activation Code. 6.6e 7.6f 6.6d 6.6g Page 22 Air Techniques, Inc.
- Page 23 6.6p. Observe that the Tigerview Patient window opens. Select, add or modify patient information as needed and use Tigerview normally to acquire an image via ProVecta S-Pan as configured. 6.6h 6.6j 6.6k 6.6l 6.6m 6.6n 6.6p Air Techniques, Inc. Page 23...
-
Page 24: Visix
6.7b. Click Next and observe that the Module Configuration window opens. 6.7c. Install the Flatbed Scanner module and Click Next. 6.7d. Observe that the Visix Imaging Patient List window opens. Operate Visix normally to acquire an image via ProVecta S-Pan as configured. 6.7a 6.7c 6.7b... -
Page 25: Vixwin2000
6.8b. Select Optical Scanner Select from the list and observe that the Select Source window opens. 6.8c. Highlight ProVecta S-Pan 16 Bit 1.40 (32-32) from the source list and click the Select button to select it as the source and return to the VixWin2000 window. - Page 26 DDIPS Software. Perform the following steps to adjust the picture setting filters used in ProVecta S-Pan image processing. 7.1a. Open the start menu and select the DDIPS item from the Air Techniques−>ProVecta S-Pan menu. 7.1b. Observe that the DDIPS window opens 7.1c.
- Page 27 7.1g. Observe that the preview of the generated levels of the selected RAW file displays. There are 1 to 5 levels with level 3 being the default Confirm Button 7.1e Notice of 7.1f Image Level Generation 7.1g Preview Generated Level Select Air Techniques, Inc. Page 27...
- Page 28 Now click on the Simulation button to simulate the image with the new settings. 7.1k. Observe that the image is processed and another level is added (level S red dot). Brightness Control 7.1h 7.1j Simulation Button Level S Red Dot Preview 7.1k Page 28 Air Techniques, Inc.
- Page 29 7.1n. Once a desired level is found (Level 1-5 or Level S), it must be saved. This is done by clicking the Apply button and selecting OK from the pop up message window to verify the apply action. 7.1l 7.1m Preview Generated Initialization Level Select Button 7.1n Apply Button Air Techniques, Inc. Page 29...
- Page 30 7.1q. Rename the old ZeusPano2.ini located in the C:\ProgramData\Air Techniques\ ProVecta\SettingFiles directory to ZeusPano2_old.ini. 7.1r. Then save the new file ZeusPano2.ini in the same folder. All future ProVecta S-Pan images will be processed using the filter settings of this new ZeusPano2.ini file. Navigate to the C:\ProgramData\Air Techniques\ProVecta\SettingFiles 7.1p...
- Page 31 ADVANCED PROCEDURES Important: Since the ProVecta S-Pan only holds the last image acquired in RAM as long as it is turned on, image retrieval is only successful when the device has been continually turned on. 7.2. Recover image via the TWAIN third party application.
- Page 32 7.3. Recover image via DICOM viewing application. 7.3a. Open the start menu and select the MicroDicom item from the Air Techniques−>ProVecta S-Pan menu. 7.3b. On the MicroDicom window, select Open from the from the FILE drop down menu.
- Page 33 (or parked) for future import into a third party application . This location can be the Desktop or any storage device such as a flash drive. 7.3d 7.3e 7.3f Destination Path for File Export Button Air Techniques, Inc. Page 33...
- Page 34 10.42.43.15 for the IP address and 255.255.255.0 for the Subnet as shown. 7.4f. Check the connection to the ProVecta S-Pan by pinging 10.42.43.10. This is done via the command console: Start > run > cmd and entering ping 10.42.43.10.
- Page 35 ADVANCED PROCEDURES Properties 7.4c Properties 7.4d Button Internet Protocol 7.4e IP address: 10.42.43.15 Subnet: 255.255.255.0 Button Air Techniques, Inc. Page 35...
- Page 36 For over 50 years, Air Techniques has been a leading innovator and manufacturer of dental products. Our priority is ensuring complete satisfaction by manufacturing reliable products and providing excellent cus- tomer and technical support. Whether the need is digital imaging, utility room equipment or merchandise, Air Techniques can provide the solution via our network of authorized professional dealers.
Need help?
Do you have a question about the ProVecta S-Pan and is the answer not in the manual?
Questions and answers