Table of Contents
Advertisement
Quick Links
Advertisement
Table of Contents

Related Manuals for Daewoo DAPD15REG-EB


Summary of Contents for Daewoo DAPD15REG-EB
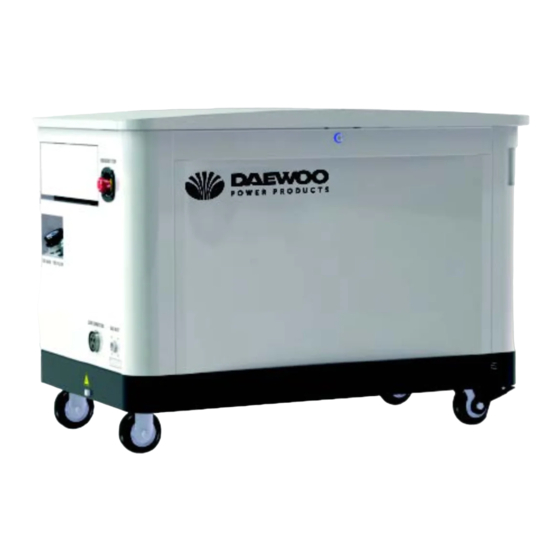
- Page 1 DAPD REG-EB Gas generator/ USER'S MANUAL www.daewoopowerproducts.com...
-
Page 2: Table Of Contents
INDEX 1. TECHNICAL FEATURES...........................4 2. MAINTENANCE OF GENERATOR......................3. SAFETY RULES............................22 4. LUBRICATION SYSTEM ........................5. INSTALLING AND CONNECTING GAS LINES..................6. GENERATOR ELECTRICAL CONNECTION..................7. TECHNICAL SPECIFICATIONS......................8. SPARE PARTS LIST..........................WARRANTY ............................... 66... - Page 3 ATTENTION! Follow all safety precautions and instructions as outlined in this manual in its entirety. If any portion of this manual is not completely understood, please contact an authorized service dealer near you for installation, starting, operating and servicing procedures or contact us at No..
- Page 4 Users must operate in accordance with all requirements; otherwise it could damage the engine and genset. This manual contains the following International ISO Graphical Symbols: Nota Save These Instructions – The manufacture suggest that these rules for safe operation be copied and posted in potential hazard areas.
-
Page 5: Technical Features
1. TECHNICAL FEATURES I. Technical Features of the Single Phase Dual-Fuel Generator This gas generator is Dual-fuel and able to utilize both Natural Gas (NG) and Liquid Propane (LPG). It is a versatile multi-fuel engine. Based on our standards, we have designed this unit to operate in an environmentally safe and user friendly manor: 1. - Page 6 N'employezjamais à l'intérieurd'unemaisonou d'un garage, MÊME SI les portes et les fenêtresson- touvertes. Employezseulement EN DEHORS et loin des fenêtresouvertes, des portes, et des passages. Risquetoxique de vapeurs. Les moteurs courants dégagent le carbone oxyde, un gaztoxiqueinodore qui peut causer la nausée, l'évanouissement, ou la mort. Ne mettez pas enmarcheou ne courez pas le moteur à...
- Page 7 3. Servicing the Exhaust System. Hot parts can cause severe injury. Do not touch hot engine parts. The engine and exhaust system components become extremely hot during operation. 4. Servicing the Engine. Hot parts can cause personal injury or property damage. Install (optional feature, sold separately) engine block heater for extreme cold weather before connecting it to power (See separate installation instructions).
- Page 8 6. Gas Vapors and Fuel Leaks. Explosive fuel vapors can cause severe injury or death. Fuel leaks can cause an explosion. Use digital gas leak detector on all gas connections for no less than 1 minuet per connection. Leak detector not included with generator. Contact Service provider. 7.
- Page 9 II. Operating System Functions and Definitions Depending on the generator unit model, control button functions may vary significantly. Refer to the following functions: 1. Operating System Power Switch : Function :The power switch controls the entire generator set control system. If this switch is placed in the OFF (O push in down mode) position, the internal electrical control circuit of the unit will not have any electrical power.
- Page 10 Circuit Breaker: Function :The circuit breaker controls the ON/OFF functions of the generators electrical power output. When this switch is in the up (ON) position, electrical power output will be produced and flow normally. When this switch is placed in the down (OFF) position, electrical power output will be broken, or turned off.
- Page 11 Temperature Recommended Oil Grade Below 32° F (0° C) SAE 10W or 15W-40 32° to 80° F (-1° to 27° C) SAE 20W or 15W-40 Above 80° F (27° C) SAE 30W or 15W-40 - Place funnel in engine oil inlet. - First time operation will require 4 liters or (4.25qts) of oil.
- Page 12 a. Liquid propane (lp vapor) in engines set up to run on liquid propane, please check the fuel supply pressure, lower or higher pressure range will result in equipment failure. inlet pressure 1.7kpa to 3.5kpa, and gas line should be no longer than 16 feet or 5 meters, the inner diameter shall not be less than (0.63”) or 16mm. Pressure Meter Pressure Relief Valve It is strictly prohibited to remove high pressure gas lines during maintenance, service and repair.
- Page 13 - Loosen positive battery clip. Connect positive terminal fully and adjust direction. Tighten terminal nut on battery clip and place red rubber cover over terminal. - Follow the same steps for negative or black battery lead, then place rubber cover over terminal. The battery represents a risk of high short circuit current.
- Page 14 Check-lists: - Check for fluid and coolant leaks. - Inspect inside and out of the radiator to ensure no excessive dirt is present. - Check the radiator coils and ensure no dust, dirt or foreign debris exists. - Check hoses to ensure it is not blocked. Add additional coolant to recommended levels.
- Page 15 4) Other Problems requiring shutting down of the Generator You should shut down the engine if the following circumstances happen. - The engine speed is hunting ( inconsistently speeding up and down) - An abnormal noise is heard coming from the generator or engine. - The engine exhaust suddenly turns dark grey or black.
-
Page 16: Maintenance Of Generator
6. Check all wires and hose connections. 7. Install battery connecting positive lead first and then negative lead. 8. Reconnect gas line and check for leaks using a digital gas detector. 9. Start engine to make sure operation is normal. 10. - Page 17 higher-level oil. After 30 hours of running new engine, the oil must be replaced. Only maintain and replace the amount of oil according to the requirement, this will ensure long dependable engine life. Recom- mended oil: Shell, Mobil 1, Valvoline or similar oil quality. Do not mix different grades and detergents of oil.
- Page 18 - Twist new filter to the right to tighten into place with a firm hand. Do not over or under tighten filter. - Start generator and run for several minutes. Check for leaks. Shut down unit and check oil level using dipstick. Oil level should read between point A and point B on dipstick. If needed add additio- nal oil.
- Page 19 outlined below: - Place pan under pre plumed coolant or water line pipe. See photo below. - Open coolant or water line pipe valve and allow it to drain completely. - Remove or wipe any old excess water. - Close coolant or water drain pipe line valve. - Refill radiator cooling system and reservoir until full.
- Page 20 - Stop the engine. - Use thumb to press on the belt between pulley wheels. - If the tightness is not correct, adjust it by relaxing the tension wheel to the acceptable degree. Replace the water pump belt when it is cracked, missing pieces of rubber or singes of considerable wear.
- Page 21 LIMITATIONS: This limited warranty does not cover product failures resulting from: - Inappropriate use relative to designated power rating. - Inappropriate use relative to application guidelines. - Non-conformance to applicable industry standards for installation. - Normal wear and tear. - Improper and/or unauthorized installation. - Owner’s or operator’s negligence, accidents or misuse.
-
Page 22: Safety Rules
3. SAFETY RULES Save These Instructions – The manufacturer suggests that these rules for safe operation be copied and posted near the unit’s installation site. Safety should be stressed to all operators and potential operators of this equipment. Study these SAFETY RULES carefully before installing, operating or servicing this equipment. Become familiar with this Owner’s Manual and with the unit. - Page 23 - Inspect the generator regularly, and contact the nearest Dealer for parts needing repair or replace- ment. - Before performing any maintenance on the generator, disconnect battery cables to prevent acci- dental start up. Disconnect the cable from the battery post indicated by a NEGATIVE, NEG or (–) first, then remove the POSITIVE, POS or (+) cable.
- Page 24 Possible Explosion Hazards! - Do not smoke around the generator. Wipe up any fuel or oil spills immediately. Ensure that no combustible materials are left in the generator compartment, or on or near the generator, as FIRE or EXPLOSION may result. Keep areas surrounding the generator clean and free from debris. - Gaseous fluids such as natural gas (NG) and liquid propane gas (LPG) are extremely EXPLOSIVE.
- Page 25 tion panel. The Transfer Switch provided will accept AFCI’s. Siemens P/N. Q115AF - 15A or Q120AF - 20A can be obtained from a local electrical wholesaler and will simply replace any of the single pole circuit breakers supplied in the Transfer Switch distribution panel.
- Page 26 about 4 to 6 inches, longer and wider than the footprint of the generator. Place wooden frame in whole leaving approximately 2” above ground. Place polyurethane film in the bottom and fill with pea gravel or crushed stone. Level and pack gravel or stone evenly. The concrete pad is now ready to be poured.
-
Page 27: Lubrication System
4. LUBRICATION SYSTEM IMPORTANT NOTE! Unit is not shipped with engine oil or coolant from Factory!! After installment of generator, fill engine with recommended oil weight based on ambient temperatu- re shown below and add radiator coolant. Prior to initial start-up, replace all service panels and close lid. - Page 28 Fuel Selection and Conversion from NG to LPG 1. Most generators are configured for natural gas operation at the factory. Switching over to LP Vapor is a simple procedure Fuel Conversion These fuels are flammable and explosive materials. Do not operate around open flames. 1.
-
Page 29: Installing And Connecting Gas Lines
NG-OUT LPG-IN LIQUID PROPANE (LP VAPOR) In engines set up to run on Liquid propane, please check the fuel supply pressure, lower or higher pressure range will result in equipment failure. Inlet pressure 1.7kPa to 3.5kPa, and gas line should be no longer than 16 feet or 5 meters, the inner diameter shall not be less than (0.63”) or 16mm. - Page 30 6. After checking and testing gas pressure regulator, close the main shutoff valve. Single Phase External Power Connections and Wiring Diagram...
- Page 31 Three Phase External Power Connections and Wiring Diagram 1. Locate area where electrical conduit will enter structure and drill 1.75” hole. Feed conduit through hole, sealing both exterior and interior with caulk. 2. Seal the hole with silicone caulk. Don’t forget to caulk the hole inside the house as well. 3.
- Page 32 Initial Battery Connection and Controller Activation 1. When battery power is applied to the generator during the installation process, the controller will light up. However, the generator still needs to be activated before it will automatically run in the event of a power outage. 2.
-
Page 33: Generator Electrical Connection
2) Use tools with insulated handles, 3) Wear rubber gloves, apron, eye protection and boots, 4) Do not lay tools or metal parts on top of batteries, Make sure the generator set is grounded. Check grounding strap to make sure the generator set ground terminal. - Page 34 Controller Key Functions Operation Stop running generator in Auto/Manual mode; Lamp test (press at least 3 Stop/Reset seconds); Reset alarm if alarm occurs; During stopping process, press this button again to stop generator immediately. Start Start genset in Manual/Test mode. Pressing this key will set the module into Manual mode.
- Page 35 BASIC PARAMETER SETTINGS Start the controller, then press to enter into the parameters setting menu, see fig 1 below: Fig1 1. Set Parameters 2. Information 3. Language 4. Time and Date Parameters Settings When entering password interface, input correct password (default: 1234) can set all of the parame- ter items in Form 1.
- Page 36 Automatic Start Sequence: 1. When “Remote Start” is active, “Start Delay” timer is initiated; 2. “Start Delay” countdown will be displayed on LCD; 3. When start delay is over, preheat relay energizes (if configured), “preheat delay XX s” information will be displayed on LCD; 4.
- Page 37 NOTE: In order to maintain separation of circuits, the DC control wires must be separated from the AC control wires. Wrap insulation over the AC wires OR the DC wires, but not both, from the wire landing area to the outside of the generator. Use cable lock to hold the insulation in place. An improperly connected control wire can damage the generator control board.
- Page 38 CAUTION! Expand relay with high capacity start and fuel output is recommend. CAUTION! Expand relay must be used in generator closed outputs. Single Phase ATS Wiring Diagram...
- Page 39 Three Phase ATS Wiring Diagram...
- Page 40 Controller Wiring Diagram...
- Page 41 Description of terminal connection: For more complete info reference Controller Owner’s Manual Function Cable Size Remarks 2.5mm Connected with negative of starter battery Connected with positive of starter battery. Max. 20A 2.5mm fuse is recommended. EM. Stop 1.5mm Connected with B+ via emergency stop button Fuel 1.0mm Fuel relay output;...
- Page 42 The Connection between Controller and Genset SmartGen Controller Specifications Items Contents Operating Voltage DC8.0V to DC35.0V, Continuous Power Supply. Standby: 2W Power Consumption Working: <8W (When driving stepper motor is regulating) Alternator Input Range 3-Phase 4-Wire AC15V - AC360V (ph-N) 2-Phase 3-Wire AC15V - AC360V (ph-N) Single-Phase 2-Wire...
- Page 43 Automatic Transfer Switch(ATS) Installation - Before beginning any installation, make sure power is shut OFF to the main distribution panel and carefully read the ATS Owner’s Manual that came with the system. - All wiring must be the correct size and type, and must conform to all codes, standards and regula- tions.
- Page 44 (one above the other) in the transfer switch. That will assure that the two hot wires are on separate phases and will maintain their relationship to neutral. - Choose a circuit to be backed up and remove the power lead from the breaker. - Using UL Listed wire nuts, reconnect the power lead to a matching breaker in the transfer switch.
- Page 45 - The connection receptacle is located on the back side of control panel inside the standby genera- tor. Remove rear panel to view the connection, from ATS. The wire will go out through the wire outlet on the enclosure, passing harness through wire access in standby. - When all priority circuits have been moved to the transfer switch, close the main breaker to restore utility power and make sure utility voltage at the transfer switch is correct.
- Page 46 23. Refer to Smart Gen Controller Owner’s Manual – Setting Automatic Exercise Function to comple- te the installation. Circuit Coverage for Whole House and Small Commercial 1. If the generator will be backing up all electrical loads within the panel, the amperage rating of the transfer switch must be equal to or greater than the amperage rating of the normal utility service.
- Page 47 B). Neutral wires from both the utility and the generator are connected to the same neutral bar in the switch. ATS Grounding Bar Lug Generator Grounding Bar Lug C). Connect the control wires from the generator to the designated locations. D).
- Page 48 6. Locate the transfer handle; insert the metal end into the slot in the main contactor assembly. Pull the handle DOWN to move the main contacts to the standby power (generator) position. NEVER OPERATE THE TRANSFER SWITCH MANUALLY WHEN LOADS ARE CONNECTED. 7.
- Page 49 19. CAUTION! Even though generator sounds and runs smoothly, a drop in gas pressure will barely be adequate to supply the system’s needs. Changes in the electrical loads or additional gas demand by other appliances will affect the generator’s performance. Verify gas pressure and pipe sizing. Turn off the gas, unhook the manometer and re-install port plug.
- Page 50 Oil Filter Replacement The oil filter must be replaced when the engine is cooled. The replacement cycle should be accor- ding to the maintenance cycle. Steps for replacement - Use the oil filter spanner to take of the oil filter - Coat the gasket surface with a thin layer of oil to adapt the new oil filter.
- Page 51 - Locate pre-plumed coolant line with drain cock. Open drain cock and allow coolant to drain. Coolant Line -Close drain cock securely. - Refill with approved coolant and distilled water. -Start genset without load for 1 minute. Allow air pockets to dissipate. Stop generator. - Add cooling liquid to the radiator full level.
- Page 52 Air Filter Maintenance Take out the air filter cartridge and clean it based on the maintenance table (on page 39). The steps are as follows: -Remove air filter cover, take out air filter element. - Blow off dust on the air filter element with compressed. IMPORTANT. Blow air from the inside out of the element.
- Page 53 Correct park plug gap is 0.9-1.1mm - Insert new spark plugs by hand first, then tighten with spark plug socket - Re-install ignition wires to correct cylinders. Engine Maintenance Utilize the following table to maintain the engine system. This will ensure many years of dependable service.
- Page 54 Additional system maintenance - Keep the generator clean. - Add lubrication oil and anti-rust at the frictional position - Check all the screws loosen or not, and tighten them Common Faults and Repair Methods of Engine Trouble Shooting Symptoms Possible Solutions Check starting batteries;...
- Page 55 Number Fault Check Electrical System Fault 1. Low battery with not enough power; 2. Check battery for loose terminals; 3. Starting dynamo fault; 4. Ignition system fault; 5. Spark plug carbon deposit and tarnish; 6. Improper gap of spark plugs; 7.
- Page 56 Number Fault Fault judge and eliminate 1. Low pressure pipe buckled or too long; ( settle) Engine with not enough power, 2. Ignition system with not enough ignition power; power, tumbling, 3. Ignition wires and FBT is not connected correctly; consumption of fuel 4.
- Page 57 Number Fault Fault judge and eliminate Temperature of the 1. Check around engine compartment for leaks; engine oil is too high 2. Too much engine load; Reduce load; 3. Too much or not enough engine oil; 4. Down exhaust is too much; Dealing methods for Item 4: replace the piston ring or the cylinder sleeve.
- Page 58 Number Fault Fault judge and eliminate Muffler with blue 1. Check engine oil level, if too much, drain excess oil; smoke 2. Replace piston ring; 3. Overhaul or replace piston and ring. Muffler with white 1. Engine preheating; smoke 2. Water in the cylinder, check head gasket, overhaul the engine cylinder if needed.
-
Page 59: Technical Specifications
7. TECHNICAL SPECIFICATIONS Models DAPD15REG-EB FUEL TYPE NG.LPG OUTPUT RATED POWER (GASOLINE) RATED POWER (LPG) 18.7 kVA RATED POWER (NG) 17.5 kVA RATED VOLTV 230 V RATED CURRENT (GASOLINE) RATED CURRENT (LPG) 65,2 RATED CURRENT (NG) 60,8 PHASE SINGLE (THREE) Engine/Alternatorm 3000 rpm POWER FACTOR 1.0 [0.8]... - Page 60 GOVERNOR TYPE ELECTRON No load to full load frequency regulation SYNCHRONISM Steady frequency adjustment ± 0.5% CONTROLER CONTROLER LOCATION SIDE OF CANOPY MANUFATURER/PART# HSC940 AUTO/MANUAL/SHUT DOWN ALTERNATOR VOLTAGE DETECTION MAINS VOLTAGE DETECTION LOW OIL PROTECTION OVER FREQUENCY PROTECTION LOW FREQUENCY PROTECTION ENCLOSURE CANOPY Powder coating...
-
Page 61: Spare Parts List
8. SPARE PARTS LIST... -
Page 67: Warranty
WARRANTY CARD Product model Date of sale Company Serial number Client's signature Username The product is in good conditions and fully complete. Read and agree the terms of the warranty. GUARANTEE The warranty period starts from the date of sale of the products and covers 1 year for all power products. During the warranty period, free failures caused due to the use of poor-quality materials in the production and manufacturer workmanship admitted fault are removed. - Page 68 ................................................................................................................................................................................
- Page 69 (LPG) (NG)
- Page 73 ON/OFF ° F ( ° C) W or ° ° F (- ° to ° C) W or ° F ( ° C) W or...
- Page 74 (LPG) (NG)
- Page 75 (ATS)
- Page 78 "...
- Page 79 API SE SP SG...
- Page 82 "FULL"...
- Page 83 kgf( lbs)
- Page 85 AUTO/OFF/MANUAL...
- Page 86 (ATS) AFCI...
- Page 89 ° F ( ° C) ° ° F (- ° ° C) ° F ( ° C) qts)
- Page 90 (LPG). (NG) LPG-...
- Page 91 UL Listed...
- Page 96 Controller AUTO Close Gen...
- Page 97 WTH STOP by cool XX s "Safety On"...
- Page 98 ". Fail to stop AWG = AWG = - - AWG = AWG = AWG = - - AWG =...
- Page 101 Three Phase ATS Wiring Diagram...
- Page 103 EM. Stop ; B+ Aux. Aux. Aux. Aux. Aux. (B-) Aux. (B-) Aux. (B-) Aux. (B-) Aux. (B-) (B-) (B-) (B-) Gens AC Gens AC Gens AC Gens AC...
- Page 104 V DC V - AC V (ph-N) V - AC V (ph-N) V - AC V (ph-N) V - AC V (ph-ph) Hz/ Hz V to V (RMS) Hz (max.) A DC A DC A DC A DC A DC A DC <...
- Page 105 (ATS).
- Page 107 AUTO...
- Page 109 NFPA...
- Page 110 MANUAL AUTO...
- Page 111 N.M-...
- Page 112 !!!!!!
- Page 113 "FULL"...
- Page 114 º/...
- Page 115 Ever Ever Ever Ever New Genset Items Remarks Every Hour Replace Filter Element Check Coolant Level and Leakage Occurs Clean radiator Check the fan running Cooling condition System Check radiator hose connection Change the coolant Check/adjust Check the gas line for damage Line Check to see if there...
- Page 120 DAPD REG-EB NG.LPG (LPG) (NG) ) (LPG) (NG) ECM IGNITION × mm×mm (CCA) POLE ±...
- Page 121 ± , ft ( M) dB (A) m /hr kg/hr × × × × × × × ×...
- Page 128 ration, Korea...
- Page 129 Manufactured under license of Daewoo International Corporation, Korea...
Need help?
Do you have a question about the DAPD15REG-EB and is the answer not in the manual?
Questions and answers