Table of Contents
Advertisement
Quick Links
Advertisement
Table of Contents

Related Manuals for Veilux VP-FDNC36X


Summary of Contents for Veilux VP-FDNC36X
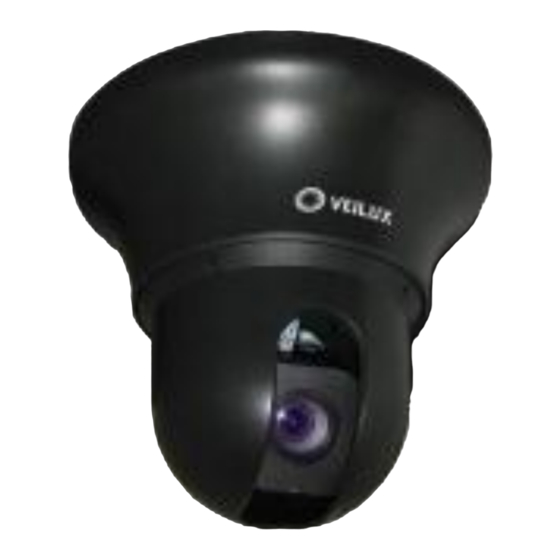
- Page 1 INSTALLATION & USER MANUAL Auto Tracking / High Speed PTZ Camera i / iii...
- Page 2 Thank You for Choosing Our PTZ Camera! When you open the box: Check that the packing and the contents are not visibly damaged. Contact the retailer immediately if any parts are either missing or damaged. Make sure if the contents are all included as per the packing list. ...
-
Page 3: Table Of Contents
2.1. Features ..............................2 2.2. Functions ..............................2 2.3. Technical Parameters ..........................4 2.3.1. SONY Modules & Veilux Modules ....................4 Installation ................................. 5 3.1. DIP Switch Setting ........................... 5 3.2. Installation ............................... 5 3.2.1. Wall Mount Installation ......................... 5 3.2.2. -
Page 5: Safety Notes
1. SAFETY NOTES --- IMPORTANT!!! The following important notes must be followed carefully to run the PTZ camera and respective accessories in total safety. The camera and relative accessories are called video system in this section. Use the instructions correctly and fully Read all safety rules and instructions carefully before starting to run the video system. -
Page 6: About The Product
2. ABOUT THE PRODUCT The tracking PTZ is based on our unique motion tracking technology with high position resolution, high speed, low price and selectable communication protocols. It is widely used in surveillance system as unattended CCTV device. 2.1. FEATURES ... - Page 7 memory. W hen necessary dome calls these parameters and adjusts Pan/Tilt and camera to that position. User can save and call presets easily and promptly by using keyboard controller or infrared controller. The camera supports up to 256 presets. Lens Control Zoom control User can adjust zoom wide or tele by controller to get desired image.
-
Page 8: Technical Parameters
A set window can be saved so that it is the only blanked tilt area of the scene. All other parts of the tilt area of the scene will be visible. Windows blanking is only available for Sony Modules at present. 2.3. TECHNICAL PARAMETERS 2.3.1. SONY & VEILUX MODULES Model # VP-F18X (18X) VP-AT18X (18X) VP-ATDN18X (18X) -
Page 9: Installation
3. INSTALLATION This section contains detailed instructions for installing the camera. These instructions assume that the installer has a good knowledge of installation techniques and is capable of adopting safe installation methods. 3.1. DIP SWITCH SETTING Before installing the camera drive, check the DIP switches; configure the receiver address, communication protocol, and baud rate setting. - Page 10 To install the ptz camera with no power box, install the bracket directly onto the wall and then go to Pic 6. Pic. 4 Pull the cables (of video, alarm, control etc.) through the cable hole of the power box and do necessary connections. The cables are supplied by user.
-
Page 11: In-Ceiling Mount Installation
Pic. 8 Set the DIP switches for SW1 and SW 2 at the bottom of the dome drive for the appropriate receiver address, communication protocol, and baud rate. Refer to the labels on the dome drive or DIP SWITCH SET at the beginning of this manual. - Page 12 Step 1. Prepare In-ceiling Pic. 13 Locate the center point of the in-ceiling mounting location. Insert the compass tool into the hole. Draw a circle on the ceiling using the compass tool and a pencil. See Pic. 14 (Left). Cut the circle out of the ceiling tile. See Pic. 14 (Right). Pic.
- Page 13 Pic. 17 Pull Cables into the back box throughthe plastic panel. Cannect cables to hole of pin. See Pic. 18 Pic. 18 Insert the hole of pin inside the back box. Wh en finished, close the door to the back box and turn on the power. The LED will light up.
-
Page 14: Surface Mount Installation
Pic. 21 Step 4. Install lowe r dome Pic. 22 Take out a screw from lower dome. Link cables, screw, and lower dome. See Pic. 22. Pic. 23 Line up the snaps on trim ring with the mounting screws on the back box. Snap the trim ring into the plastic snap washers on the mounting screws. -
Page 15: Pole Mount Installation
Pic. 26 Pull cables into the back box into the plastic panel. Connect cables to hole of pin. Insert the hole of pin inside the back board. W hen finished, close the door to the back board and turn on the power. The LED will light up. See Pic. 26. ... -
Page 16: Operation Guide
4. OPERATION GUIDE 4.1. OPERATION AT POWER UP The camera employs the default settings the first time it is switched on. Changes to the settings will be permanently stored and will be made available the next time the camera is switched on. You can return to the default settings by means of the appropriate menu option at any time. -
Page 17: Control Keypad Command Types
Key command syntax The syntax used in this manual for controls using keys consists of various elements (words and three digit numbers). Each command is always in braces and each element is separated by commas. Each word or decimal digit used in the syntax is identified by a corresponding key on our control panel. -
Page 19: Zoom
magnification used to obtain the best frame. Panning (horizontal) Tip the joystick rightwards to turn the camera horizontally clockwise and tip it leftwards to turn it anticlockwise. If no advanced options are set (e.g. range limits set enabled), the camera can be turned continuously without interruptions. -
Page 20: Preset Positions Programming And Recalling
automatic IRIS opening option is enabled (the default setting is on). In this case, the opening will be controlling automatically again. Refer to the specific section for additional details on IRIS opening adjustment 4.4.5. PRESET POSITIONS PROGRAMMING AND RECALLING The camera can store up to 256 panning, tilting and zooming configurations (called preset positions) which can be recalled at any time. -
Page 21: Product Information
Select the password digits by moving the joystick in the horizontal direction. Symbol “▲” indicates the digit which will be entered. Press OPEN to enter the selected digit. The entered numbers will be replaced by a “*” symbol on the screen for privacy. Select ENTER and press OPEN to access the first level menu after entering all the digits correctly. -
Page 22: Label Position
DISPLAY SETUP PRESET LABEL ZONE LABEL ZOOM P/T DEG DOME LABEL <LABEL POSITION> TEMPERATURE BACK Screen 4: Display Menu Option Value Explanation PRESET LABEL ON/OFF Show or hide presetting labels (max. 64). ZONE LABEL ON/OFF Show or hide zone labels. ZOOM ON/OFF Show or hide zoom labels. - Page 23 Screen 6: Dome Settings 1 Option Value Explanation CAMERA Camera parameter programming submenu (refer to Section 4.5.3.1) MOTION Camera motion parameter programming submenu (refer to Section 4.5.3.2) POWER UP Power up parameter submenu (refer to Section 4.5.3.3) PRESETS Preset parameter submenu (refer to Section 4.5.3.4) PATTERNS Pattern parameter submenu (refer to Section 4.5.3.5) ZONES...
- Page 24 CAMERA For Veilux Model #'s VP-F18X, VP-AT18X, VP-ATDN18X, VP-ATDN36X, & VP-FDNC36X Only! The first level of this menu contains the following options grouped as shown in the following table. Please note that the camera menu below is for the following Veilux model #'s VP-F18X, VP-AT18X, VP-ATDN18X, VP-ATDN36X, VP-FDNC36X.
- Page 25 In this mode: The shutter opening time may be varied as programmed in the “LOW LIGHT LIMIT” menu. SHUTTER Auto IRIS opening is automatically adjusted. Gain control is automatic (AGC ON). In this mode: The IRIS opening time is fixed to 1/50 second. IRIS The auto IRIS opening is manually varied in the “IRIS LEVEL”...
- Page 26 LOW LIGHT LIMIT IRIS LEVEL AGC LEVEL BRIGHT LEVEL ADDITIONAL sub-menu - Other program settings. ADDITIONAL IR SW MODE AUTO IR STATUS COLOR AUTO IRIS SHARPNESS SHARPNESS LEVEL 5 AUTO WHITE BALANCE AUTO R GAIN B GAIN BACK Screen 9: Additional Sub-Menu Option...
- Page 27 The Following is the OSD of the camera menu only under Dome setting 1 for the Veilux 27X Module 23 / 43...
- Page 28 24 / 43...
- Page 29 25 / 43...
- Page 30 26 / 43...
- Page 31 27 / 43...
- Page 32 28 / 43...
- Page 33 29 / 43...
- Page 34 30 / 43...
- Page 35 31 / 43...
- Page 36 32 / 43...
- Page 37 33 / 43...
- Page 38 34 / 43...
- Page 39 MOTION 4.5.3.2. MOTION AUTO FLIP PROPORTIONAL PAN PARK TIME PARK ACTION NONE SCAN SPEED<DEG/S> <SET SCAN> <MANUAL LIMIT> <SET AZIMUTH ZERO> <CLEAR AZIMUTH ZERO> BACK Screen 10: Motion Sub-Menu Option Value Explanation When this option is on, the movements of a subject moving underneath the camera can be followed by moving the AUTO FLIP ON/OFF...
- Page 40 Table 8 SET SCAN submenu This includes a number of settings related to the programming of horizontal FRAME SCAN limits. Press “►” on “SET SCAN STOPS”. Press OPEN to confirm. Go to the required position with the joystick to set the left scanning limit. Press OPEN to confirm.
-
Page 41: Preset Number
PRESETS PRESET NUMBER …PRESET NOT DEFINED… <EDIT PRESET LABEL> <EDIT PRESET POSITION> <CLEAR CURRENT PRESET> BACK EXIT Screen 12: Presets Option Value Explanation This option is used to select a presetting for entering a descriptive label. This operation is allowed for up to 64 presets. - Page 42 Select the required pattern and press OPEN. Position the cursor under ”PROGRAM PATTERN” option and press the OPEN button. The number of actions available (including zoom operations) for programming the Pattern is shown in percentage form on the screen while they are each being programmed. 100 operations are available for each pattern. 4.5.3.6.
-
Page 43: Secondary Programming Menu (Dome Settings 2)
CLEAR SET CLEAR ZONES CLEAR PRESETS CLEAR PATTERNS RESTORE FACTORY DEFAULT BACK EXIT Screen 17: Clear Set Sub-Menu This menu is used to delete the settings of several elements at one time. Option Value Explanation CLEAR ZONES This option is used to delete all the zone settings. CLEAR PRESETS This is used to delete all the Presets. - Page 44 ALARMS ALARM NUMBER SEQUENCE(SECS) ALARM ACT CRUISE ACTIVATE AUX <CLEAR SET> DWELL TIME<SECS>1 DWELL TIME<SECS>2 BACK EXIT Screen 19: Alarms Sub-Menu The camera has 4 alarm inputs and 2 alarm outputs. The actions defined by the user may be associated to an alarm. Option Value Explanation...
-
Page 45: Password
ADDR SETTING ADDR TYPE HARD ADDR SOFT ADDR HARD BACK EXIT Screen 20: Alarm Settings The soft address is the address programmed by built-in software. The hard address is the address programmed by the hardware SW ITCH 2. Option Value Explanation This option is used to program the type of address in current application. -
Page 46: Windows Blanking
WINDOWS BLANKING Windows blanking is only available for the following Veilux model #'s VP-F18X, VP-AT18X, VP-ATDN18X, VP- ATDN36X, VP-FDNC36X. The camera can be used to define up to eight privacy zones which blank out certain areas of the screen concealing them from the operator’s sight. - Page 47 -5º~45º 15º~92º -5º~55º 25º~92º -5º~65º 35º~92º -5º~75º 45º~92º -5º~85º 55º~92º -5º~95º 70º~92º Table 19 The coordinates shown on the monitor refer to the central point of the monitor (where the diagonals meet). SET WINDOWS submenu This includes the operations needed to position and configure the privacy zones. SET WINDOWS WINDOWS NUMBER <EDIT WINDOW LOCATION>...
-
Page 48: Heater Setting
Privacy zones can be programmed (and therefore the menu can be opened) in optical zoom situations only. The privacy zone works also in digital zoom conditions. The privacy zone rectangle will move on the screen when panning and tilting. Zooming will expand and contract the rectangle. -
Page 49: Tracking Setting
CRUISE DWELL TIME<SECS> PRESET LIST 1 ON 0 OFF 1234567890 <PRESET 1-10> 0110010111 BACK EXIT Screen 28: Cruise The CRUISE function is used to make the camera run a cycle consisting of up to 30 preset positions. This menu item is used to enable each of the preset positions used in the cruise cycle. For the cruise cycle to be effective, the preset positions must be actually stored. - Page 50 This option determines the maximum zoom value that the ZOOM SETTING OFF, 1 ~ 18 camera may use for tracking the object. 5, 10, 15, 20, 25, This option determines the time which must elapse before WAIT TIME 30, 35, 40 SECONDS performing Lost Act after losing a motion in frame.
-
Page 51: Dome Label
General warnings The tracking function should mainly be used in indoor environments. Provide the best lighting possible in the detection zone: in poor lighting conditions, the inevitable presence of noise on the image makes gray scale variations extremely critical. In poor lighting conditions, the camera may easily lose the tracked object. -
Page 52: Special Control Panel Commands
This submenu allows deleting the label associated to the CLEAR DOME LABEL camera (see below). Table 25 EDIT DOME LABEL submenu The operations needed to associate a label to a camera are: Use the joystick to point the cursor to the ”EDIT DOME LABEL” option. Press OPEN. -
Page 53: Trouble Shooting
5. TROUBLE SHOOTING Problem Possible Reason Solution Wrong wire connections Check and reconnect wires Wrong or bad power source Change power source Power on normally but no video signal Fuse broken. Change fuse Power cable is disconnected Reconnect power wiring Address, protocol, and baud rate is not Check and set the parameters Pan/Tilt... -
Page 54: Annex
6. ANNEX 6.1. DIP SWITCH CHART DESCRIPTION USER PELCO-P COMM PTOL PELCO-D DESCRIPTION 1200 2400 BAUD 4800 RATE 9600 (BPS) 19200 … Reserved for future use Table 28: SWITCH1 SETTING ADDRESS 50 / 43... - Page 55 51 / 43...
- Page 56 52 / 43...
- Page 57 53 / 43...
- Page 58 54 / 43...
-
Page 59: Osd Menu Diagram
OSD MENU DIAGRAM (Under Camera Option for all Veilux 27X please see pages 23- Please see the next two page of the OSD lay out for all Veilux PTZ’s below. Please not the Camera option listed below id for the Sony 18X & 36X option only. - Page 60 SYSTEM INFORMATION 2400,N,8,1 ADDRESS PROTOCOL PELCO-D PRESETS LANGUAGE ENGLISH TEMPERATURE 36°C SOFTWARE VERSION V4.3.3 ZONE DOME PRESET BACK EXIT SAVE PROGRAM AE CONTROL RESET P/T DEG ZOOM MAIN MENU AE MODE AUTO LOW LIGHT MODE AUTO < SYSTEM INFORMATION > DISPLAY SETUP PRESET LOW LIGHT LIMIT 1/50 <...
- Page 61 DOME SETTINGS 2 ALARMS <ALARMS> ALARM NUMBER <ADDR SETTING> SEQUENCE(SECS) <PASSWORD> ALARM ACT CRUISE <WINDOWS BLANKING> ACTIVATE AUX <HEATER SETTING> <CLEAR SET> <CRUISE SETTING> DWELL TIME<SECS>1 <TRACKING SETTING> DWELL TIME<SECS>2 BACK BACK EXIT EXIT ADDR SETTING ADDR TYPE HARD ADDR SOFT ADDR HARD BACK EXIT...
Need help?
Do you have a question about the VP-FDNC36X and is the answer not in the manual?
Questions and answers