Table of Contents
Advertisement
Quick Links
Advertisement
Table of Contents

Related Manuals for Veilux VDIP-2L316


Summary of Contents for Veilux VDIP-2L316
- Page 1 ’ ’ Website: www.Veilux.net Phone# 1-800-510-6528 Rev.1.0 (Jan. 2010)
- Page 2 ’ ’ Directions Be careful not to cause any physical damage by dropping or throwing Veilux VDIP-2L316. Especially keep the device out of reach from children. Do not disassemble Veilux VDIP-2L316. No After Service is assumed when disassembled. Use only the power adapter provided with Veilux VDIP-2L316.
- Page 3 Revision History Date Revision Details 2010-01-08 First manual revision creation. 2010-04-19 Addition of windows vista and 7 in trouble shooting Website: www.Veilux.net Phone# 1-800-510-6528 Rev.1.0 (Jan. 2010)
-
Page 4: Table Of Contents
Contents ................... 4 1. Introduction ................... 5 1.1. Overview ....................5 1.2. Specification ....................6 1.3. Applications of Veilux VDIP-2L316 ..............8 2. Product Description................. 9 2.1. Contents ....................9 2.2. Product Preview ..................10 2.3. Physical description .................. 11 2.4. -
Page 5: Introduction
It enables real time transmission of synchronized video of up to 2 M pixels and audio data. Remote clients can connect to Veilux VDIP-2L316 for the real time video/audio data through various client solutions running on PC, PDA or mobile phones. Real time 2-way communication is available through bidirectional audio communication feature. -
Page 6: Specification
Remote administration over IP network Web Viewer Simple viewing over internet explorer Client & Viewer NVR-Pro Standard CMS software 3rd Party CMS Ask Veilux for details Dynamic IP support DDNS support Supported Video/Audio stream encryption Security ID and Password protection Website: www.Veilux.net... - Page 7 Sync to PC Synchronize to PC Manual Manual time setting Time management Internet Time Server Synchronize to Time Server Day light saving Active-X SDK support HTTP Source filter Website: www.Veilux.net Phone# 1-800-510-6528 Rev.1.0 (Jan. 2010)
-
Page 8: Applications Of Veilux Vdip-2L316
’ ’ 1.3. Applications of Veilux VDIP-2L316 Security surveillance (buildings, stores, manufacturing facilities, parking lots, banks, government facilities, military, etc.) Remote monitoring (hospitals, kindergartens, traffic, public areas, etc.) Teleconference (Bi-directional audio conference). Remote Learning, Internet broadcasting ... -
Page 9: Product Description
’ 2. Product Description 2.1. Contents The product package contains followings : Contents Description Remarks Veilux VDIP-2L316 IP camera Veilux VDIP-2L316 main unit Default built in standard PoE module 12VDC Adaptor Power Adaptor (IEEE802.3af) (Optional item) Embedded Mounting bracket Standard ceiling mount bracket (Optional item) Software &... -
Page 10: Product Preview
’ ’ 2.2. Product Preview 2.2.1. Preview CMS Software Veilux VDIP-2L316 IP-Installer (NVXR-64) PC software to view and record the A/V streaming data transmitted PC software to allocate an IP (Megapixel) IP Camera from IP camera. address to the IP Camera... -
Page 11: Physical Description
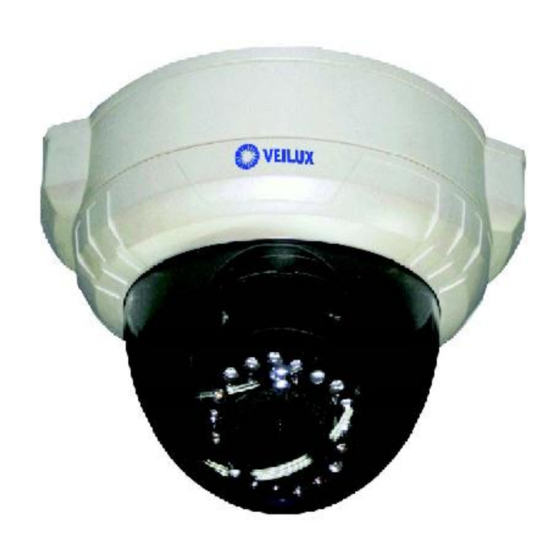
’ ’ 2.3. Physical description 2.3.1. External View Figure 2-1. External view of Veilux VDIP-2L316 2.3.2. Rear panel Sensor In Relay Out Video Out Serial (pin 1 Mic/Line In Line Out DC In at leftmost) Figure 2-2. Rear panel of Veilux VDIP-2L316 Website: www.Veilux.net... -
Page 12: Functional Description
’ 2.4. Functional Description DC 12V : Power input for supplying 12V DC power. Caution: If Veilux VDIP-2L316 is powered by PoE, do not plug in DC Jack with active DC power into DC power connector. MIC/LINE IN Connect external audio source or microphone. - Page 13 CVBS GND Relay Out CVBS Out Sensor In - Sensor In Figure 2-3 ALARM IN/OUT and Composite Video Output Terminal of Veilux VDIP-2L316 Used for connecting P/T device, sensor, and composite video output. Pin assignments are as follows. Description Misc.
- Page 14 Factory Default Switch A switch provided for returning the IP camera to factory default state. Open the dome cover to access the switch. Press the switch for a few seconds while power is applied. Website: www.Veilux.net Phone# 1-800-510-6528 Rev.1.0 (Jan. 2010)
- Page 15 ’ ’ Figure 2-6 Factory Default switch of Veilux VDIP-2L316 Caution: Restoring the factory default will erase all settings. Website: www.Veilux.net Phone# 1-800-510-6528 Rev.1.0 (Jan. 2010)
-
Page 16: On Site Installation
. Open the cover and apply a screw through the hole indicated by the arrow to prevent the camera from rotation. . Place the cover. Website: www.Veilux.net Phone# 1-800-510-6528 Rev.1.0 (Jan. 2010) -
Page 17: Embedded Mount Bracket
. Open the cover and apply a screw through the hole indicated by the arrow to prevent the camera from rotation. . Place the cover. Note 1 : Aligning “Mounting Knobs” and “Mounting knob Holes” Website: www.Veilux.net Phone# 1-800-510-6528 Rev.1.0 (Jan. 2010) - Page 18 Make sure to align the positions of the “mounting knobs” and “mounting knob holes” when you plug in the IP camera into the mounting bracket. Once it is firmly plugged in, twist the IP camera to the right until it is locked. Website: www.Veilux.net Phone# 1-800-510-6528 Rev.1.0 (Jan. 2010)
-
Page 19: Getting Started
Brief information for first time operation of Veilux VDIP-2L316 is provided in this chapter. 4.1. PC Requirement Audio/Video streaming data received from Veilux VDIP-2L316 can be displayed or stored in a PC running client programs. Minimum requirement of the PC is described below:... -
Page 20: Quick Installation Guide
1) Prepare a PC to run programs for the installation and video connection (PC is needed to assign IP address to Veilux VDIP-2L316) 2) In case of using PoE, connect the PC and Veilux VDIP-2L316 to the network using one of the following ways. - Page 21 Check at the box and fill the empty field with mgmt.net-video.net in ⑦ . Register the IP camera on DDNS. Visit http://www.net-video.net for the registration. If you don’t have an account on www.net-video.net, open an account and register the IP camera after login. Website: www.Veilux.net Phone# 1-800-510-6528 Rev.1.0 (Jan. 2010)
- Page 22 3. Remote video connection to Veilux VDIP-2L316 1) Connection through Web Viewer Web Viewer offers simplest way of video connection to Veilux VDIP-2L316. For video connection, enter the IP address of Veilux VDIP-2L316 in the URL window of Internet Explorer as : Can be omitted the [e.g.] Port 80...
- Page 23 It is needed to enter ID and password of the administrator. Default ID and password are root, admin. It is highly recommended to change the ID and password to prevent illegal access to the IP camera. Website: www.Veilux.net Phone# 1-800-510-6528...
-
Page 24: Trouble Shooting
If PoE is not applied, the power and network connection should be made through separate cables. It is recommended to use DC adaptor supplied by Veilux for the feeding of the power. In case of replacing the DC power supply, make sure that the power supply meets with the power requirement of the IP camera to prevent damage or malfunction. -
Page 25: Cannot Connect To The Video
Try connection to the video again. If the problem persists, or refer to other trouble shooting notes. If “Request timed out” message is returned. ( in the figure below), the network connection or network setting is not in normal state. Check the network cable and settings. Website: www.Veilux.net Phone# 1-800-510-6528 Rev.1.0 (Jan. 2010) -
Page 26: Windows Vista Or Windows 7
3) Uncheck “Use UAC to help protect your computer” 2. Privilege Level Control 1) Select “NVR-64” icon on the desktop 2) Click right mouse button and select “Properties” 3) Check “Privilege Level” in “Compatibility” tab Website: www.Veilux.net Phone# 1-800-510-6528 Rev.1.0 (Jan. 2010) - Page 27 ’ ’ <Windows 7> 1. UAC (User Access Control) configuration 1) Double-click “User Accounts” in control panel 2) Double-click “Change User Account Control setting” 3) Set to “Never notify” Website: www.Veilux.net Phone# 1-800-510-6528 Rev.1.0 (Jan. 2010)
- Page 28 ’ ’ 2. Privilege Level Control 1) Select “NVXR-64” icon on the desktop 2) Click right mouse button and select “properties” 3) Check “Privilege Level” in “Compatibility” tab Website: www.Veilux.net Phone# 1-800-510-6528 Rev.1.0 (Jan. 2010)
-
Page 29: Technical Assistance
If you need any technical assistance, please contact your dealer. For immediate service please provide the following information. 1. Model name 2. MAC address and Registration number 3. Purchase date 4. Description of the problem 5. Error message Website: www.Veilux.net Phone# 1-800-510-6528 Rev.1.0 (Jan. 2010)
Need help?
Do you have a question about the VDIP-2L316 and is the answer not in the manual?
Questions and answers