Table of Contents
Advertisement
Quick Links
Safety Precautions ..................2~5
Precautions on Use......................5
Preparation ..............................6~7
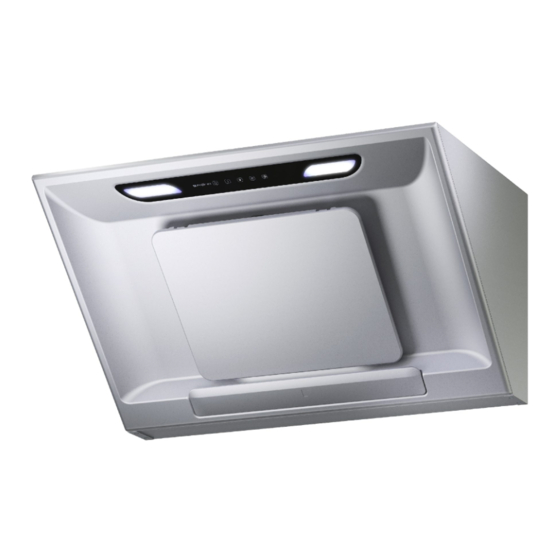
Name of Parts ..............................6
Switch ..........................................7
Installation .............................8~12
before Installation ...................8~10
Cooker Hood Installation .....10~12
Operation Check ........................12
To the sales shop/installer:
After installation, please
give this manual to the user
without fail.
Cooker Hood
FR-SC2090/11
FR-SC2070/90/11P
Installation/Operation Manual
TABLE OF CONTENTS
Thank you very much for your purchase of our cooker hood.
Before installing/operating the cooker hood, please read
this Manual thoroughly.
Keep this manual in a convenient place for future reference.
Maintenance ........................13~15
Caution for Maintenance ............13
Cleaned Parts ......................13~14
Cleaning .....................................15
Other Information .................16~17
Specifi cations .............................16
Circuit Diagram ..........................17
Service and Warranty.................17
1F02 2681
*1F022681*
Advertisement
Chapters
Table of Contents

Related Manuals for Fujioh FR-SC2090/11


Summary of Contents for Fujioh FR-SC2090/11
-
Page 1: Table Of Contents
Cooker Hood FR-SC2090/11 FR-SC2070/90/11P Installation/Operation Manual TABLE OF CONTENTS Safety Precautions ....2~5 Maintenance ......13~15 Precautions on Use......5 Caution for Maintenance ....13 Preparation ......6~7 Detaching/Attaching Cleaned Parts ......13~14 Name of Parts ......6 Cleaning ........15 Switch ..........7 Other Information ....16~17 Installation ......8~12 Specifi cations ......16... -
Page 2: Safety Precautions
Safety Precautions Read the following safety instructions before operating, and use the cooker hood properly and securely. These instructions are for correct operation of the product to prevent any risk of hazards or damages inflicting on you or others. The instructions are classified into 2 categories as "WARNING" and "CAUTION" depending on their emergency and severity. - Page 3 WARNING There shall be adequate ventilation of the room when the range hood is used at Air supply the same time as appliances burning gas or other fuels. cautioned Ensure Exhaust adjustment must be ensured. adjustment This appliance is not intended for use by person (including children) with reduced physical, sensory or mental capabilities, or lack of experience and knowledge, unless Supervision they have been given supervision or instruction concerning use of the appliance by...
- Page 4 CAUTION During operation, never insert fingers or other objects. Contact prohibited Failure or injury may result in. Switch off the cooker hood at once when oil caught fire while cooking. Operation prohibited It’s dangerous if not stop as fire is built up. ...
-
Page 5: Precautions On Use
Precautions on Use Operate the cooker hood without fail when using cooking wares. Otherwise, it may be cause of the cooker hood damage or failure by increased temperature. Don’t use a gas range with nothing put on it. The body of the cooker hood is heated, and it may cause trouble. -
Page 6: Preparation
Preparation Name of Parts (Optional) FR-SC2090/11 For ventilating type For recycling type Power cord Recycling unit FR-SC2070/90/11P Power plug GFO-Duct cover Switch Filter Rectifier panel Fan guard Hood body Oil tray List of Included Items Name Usage Usage Quantity —... -
Page 7: Switch
Switch Airflow On/Off Switches Press this switch to turn on/off the airflow. The switch button will light up when pressed. (Low) : When there isn’t much smoke/for quiet operation (Medium) : During normal operation (High) : When there is a lot of smoke/for quick ventilation Timer On/Off Switch Light On/Off Switch During normal use, press this switch... -
Page 8: Installation
Embed a reinforcing board in the wall in advance, or use a curl plug or the like. Power supply This product does not include a power plug. Please have a qualified technician attach a power plug to the power cord. (FR-SC2090/11 only) Be sure to use tha wall outlet only for the cooker hood. - Page 9 Checking Accessory Parts Take out the main unit and accessory parts from the packing box, and check whether there is any shortage. Confirmation of the installation location (Unit: mm) FR-SC2090/11 FR-SC2070/90/11P Power cord Power plug Length:1.5m Length:1.5m 600/800/1000 Recycling Type...
-
Page 10: Cooker Hood Installation
Attaching exhaust port (For ventilating type) Do not use the exhaust duct when using a recycling unit sold separately. * Please read the installation manual included with the separately sold unit for more information. The fixing screws are supplied with attaching to the top plate. Insert the exhaust outlet to the insertion slot on the top of the Shutter opening Insertion slot... - Page 11 3) Using the patterned paper included, insert the washer-head wood screws (∅5.1×45) 5mm into the mounting wall for the left and right keyholes of the mounting bracket. Allow about 5mm of space between the wall and screw heads for hanging the cooker hood. Note Please use suitable accessories during installation (refer to page 6).
-
Page 12: Operation Check
8) Attach the oil tray as before. Align both sides of the oil tray with the installation section guides while pushing in the tray until it is completely inserted. Note Guide Oil tray Oil may not collect in the short period of time depending on oil cooking frequencies (it's not defects or failure). -
Page 13: Maintenance
Maintenance Clean the cooker hood as many times as possible (especially, clean the filter once every month) as it will become very dirty. For a family size of 4 to 5 people and cooking twice a day, clean the filter once every two weeks. - Page 14 Rectifier Panel Rectifier panel Hanging bracket Detaching Hooking bracket 1) Grasping the rectifier panel firmly with both hands and pulling directly out will cause the rectifier panel to release from the fixing magnets. 2) Lift the rectifier panel upwards while slightly opened, and separate the hanging brackets from the hooking brackets.
-
Page 15: Cleaning
After cleaning, wipe the exhaust outlet or cabinet with a wet cloth dipped in water to remove detergent and finally thoroughly wipe any moisture off using a dry cloth. As for cleaning of the fan, please consult Fujioh/Agent. 1F02 2681... -
Page 16: Other Information
Other Information Specifications FR-SC2090/11, FR-SC2070/90/11P (ventilating) Rated Voltage Frequency Power Consumption Air Flow Sound Speed (Hz) (dB) with 3 watts for lamp with recycling unit (optional) Rated Voltage Frequency Power Consumption Air Flow Sound Speed (Hz) (dB) with 3 watts for lamp... -
Page 17: Circuit Diagram
Circuit Diagram FR-SC2070/90/11P 50Hz 220V/230V/240V AC 13A 3pin Plug (Type-BF) FR-SC2090/11 Motor Capacitor Connector 5.0µF 450V 220V/230V/240V (3P) White 50Hz Brown Brown Rod terminal Orange Green 50Hz Brown Blue Blue 220V/230V/240V Blue Green Green Green/Yellow Connector (6P) 1 3 5... - Page 19 簾 嗟 冖 字 FR-SC2090/11 FR-SC2070/90/11P 芦廾式荷恬返過 朕 村 芦畠廣吭並㍻ ......2~5 略 擦 ........13~15 聞喘倬岑 ...........5 略擦廣吭並㍻ .........13 彈 姥 ........6~7 蛍宣 / 芦廾勣賠牢何周 ... 13~14 賠 準 ..........15 何周兆各 ...........6 凪麿佚連 ......16~17 荷恬梓囚 ...........7 芦 廾 ........8~12 号 鯉 ..........16 窮揃夕...
-
Page 20: 芦畠廣吭並
■ 芦畠廣吭並㍻ 芦廾式聞喘云恢瞳念,哘堋響參和芦畠廣吭並㍻,參宴屎鳩、芦畠仇芦廾簾嗟冖字。 宸乂芦畠廣吭並㍻崋壓屎鳩芦廾云恢瞳,參契斤徭失賜麿繁夛撹裡⑫賜彬墾。功象裡⑫來才鱒墾殻業, 芦畠廣吭並㍻蛍葎 " 少御 " 才 " 廣吭 " 曾倖吉雫。 喇噐宸乂廣吭並㍻斤噐芦畠崛購嶷勣,咀緩暦駅紗參廣 吭旺冢鯉嚠參恆便。 芦 燕幣氏擬崑嶷寄 燕幣氏擬崑繁附 少 御 廣 吭 畠 繁附彬蘭。 彬墾賜麗瞳鱒撒。 廣 吭 並 少 御 ㍻ 4 凛俗夥參和 泌惚壓階狛 4 凛俗夥賜伴付夥俗議貧何芦廾簾嗟冖字,悳孔楕音辛階狛 7.0kW (7.0kW)... - Page 21 少 御 壓謹嶽匂醤伴付炭賑賜凪麿伴創議秤趨和聞喘簾嗟冖字扮, 廣吭宥欠 哘聞片坪隠隔措挫議宥欠彜趨。 駅倬序佩電賑砿距准。 廣吭距准 芦 畠 悶嵎倡樋宀、湖郊嬬薦賜娼舞彜趨熟餓宀(淫凄隅湧) ,賜髪窪将刮才岑紛宀音卷聞喘云 廣 恢瞳,茅掲嗤廨繁減夭凪芦畠旺葎凪戻工嚥云恢瞳聞喘㌢購議酌興賜峺擬。 勣箔酌興 哘斤隅湧紗參酌砿,俳齢斑凪螺的云恢瞳。 吭 並 ㍻ 泌惚隆梓傍苧序佩賠準, 辛嬬氏哈窟諮墻。 将械賠準 鋤峭壓簾嗟冖字和圭付疹奮瞳。 冢鋤付疹 廣 吭 僉夲釈耕議了崔,昔耕芦廾云恢瞳。 廣吭芦廾 倦夸字悶渠鯛繍氏夛撹彬墾。 冢鋤廣秘 音誼㏍喘噐電冖 (貫聞喘炭賑賜凪麿伴創議匂醤嶄恢伏議系賑) 議冖祇廣秘腎賑。 腎賑 ...
- Page 22 廣 吭 簾嗟冖字塰廬扮,俳齢繍返峺賜凪麿麗瞳峨秘凪嶄。 鋤峭俊乾 倦夸氏夛撹絞嬾賜彬墾。 嗟腰彭諮扮哘羨軸購液簾嗟冖字議窮坿。 冢鋤荷恬 倦夸氏廁海諮米,夛撹裡⑫。 芦 畠 萩齢壓簾嗟冖字貧慧崔販採麗瞳。 鋤峭慧崔 廣 麗瞳 倦夸氏夛撹諮墻、絞嬾,賜咀麗瞳渠鯛遇夛撹彬墾。 吭 並 賠牢才略擦扮暦駅忌貧垢恬返耗。 忌垢恬返耗 倦夸氏瓜錫費議円叔皿彬。 ㍻ 厚算鞭鱒 泌惚窮坿㌔鞭鱒, 駅倬喇崙夛斌、 捲暦旗尖字更賜揖吉彿鯉議繁埀嚠參厚算, 參窒夛撹裡⑫。 議窮坿㌔ 鋤峭慧崔 LED 菊窟高扮,萩齢岷篇,參窒斤篇薦夛撹鱒彬。 麗瞳 輝嗟器欺嗟鵜 1/2 扮,萩式扮賠尖,參契介茅嗟鵜扮系嗟吝竃賜砧鯛。 廣吭...
-
Page 23: 聞喘倬岑
聞喘倬岑 聞喘搭眇匂醤扮,暦駅塰佩簾嗟冖字。 倦夸,簾嗟冖字辛嬬氏咀梁業奐互遇夛撹鱒撒賜絞嬾。 萩齢壓隆慧崔販採匂醤議秤趨和聞喘炭賑夥。 芦 倦夸,字附辛嬬氏咀鞭犯遇夛撹絞嬾。 畠 契峭腎距岷俊患欠。 廣 倦夸,凪簾嗟冖來嬬辛嬬氏週詰。 吭 喩凪頁輝聞喘窮甘俗扮,喇噐貧幅賑送熟樋,簾嗟冖字宴載否叟壓蝕姓議腎寂嶄鞭欺唹㍊。 並 聞喘窮甘俗扮,簾嗟冖字議簾嗟冖來嬬辛嬬氏咀迦欠議唹㍊遇㊧樋。 ㍻ 緩翌,泌惚壓詰梁訳周和聞喘簾嗟冖字,夸凪燕中氏潤其。 緩扮,哘繍簾嗟冖字価孤朔壅聞喘。 壓簾嗟冖字塰佩狛殻嶄,哘廣吭隠隔措挫議宥欠桟廠。 壓簾嗟冖字斤中議能悶貧哘藻嗤怎校議序欠笥,賜繍型寂議壇不不嬉蝕。 倦夸,簾嗟冖來嬬辛嬬受樋,賜辛嬬恢伏呟械夐咄 / 尅強。 犯邦匂哘嚥簾嗟冖字隠隔 500mm 參貧議鉦宣。 喇噐犯邦匂巓律梁業熟互,咀緩哘嚥簾嗟冖字隠隔 500mm 參貧議鉦宣。 俳齢繍簾嗟冖字芦廾壓犯邦匂議貧圭。 倦夸,簾嗟冖字辛嬬氏咀梁業奐互遇夛撹鱒撒賜絞嬾。 萩齢壓屁送医介和議秤趨和聞喘簾嗟冖字。 倦夸,簾嗟冖來嬬辛嬬咀緩遇週詰。 1F02 2681... -
Page 24: 何周兆各
■ 彈 姥 何周兆各 FR-SC2090/11 彈 姥 FR-SC2070/90/11P GFO- 廾㌃賠汽 兆 各 喘 余 方 楚 — 麼字 電賑笥 銭俊麼字揖電賑砿 罷畜撃揮 畜撃電賑笥揖電賑砿 ∅ 究筈直苔某( 5.1×45) 芦廾麼字 庁塀夕崕 芦廾麼字... -
Page 25: 荷恬梓囚
荷恬梓囚 欠楚俳算梓囚 彈 梓和緩囚俳算欠楚。 梓和緩囚朔,梓囚菊疏軟。 姥 (詰亀) : 嗟冖楚熟富扮。錬李床咄塰廬扮。 (嶄亀) : 噸宥塰廬。 (互亀) : 嗟冖楚熟謹扮。錬李酔堀算賑扮。 决扮俳算梓秀 孚苧梓囚 决扮俳算梓秀 喘噐蝕尼式購液孚苧。 宥械秤趨和,梓和緩梓囚俳算决扮塰廬。 决扮梓囚菊描妨、欠蛭參圻嗤議欠楚写 偬塰廬埃 3 蛍嶝朔徭強唯峭。 决扮塰廬 3 蛍嶝,辛産盾搭眇朔議呟龍 式陲壓欠蛭貧議嗟晃。 * 决扮塰廬唯峭朔孚苧音氏購液。 梓孚苧俳算梓囚購液孚苧。 * 梓和欠楚俳算梓囚,辛函㍾决扮塰廬。 1F02 2681... -
Page 26: 芦廾念議彈姥才殊臥
6. 萩齢斤云恢瞳序佩個廾。箭泌:個算梓囚。 7. 萩齢繍簾嗟冖字芦廾壓咳物議仇圭賜咳物議型寂嶄,倦夸氏夛撹窮似賜鱒墾。 8. 萩齢繍簾嗟冖字芦廾壓桟廠梁業階狛 40 ℃議仇圭,倦夸氏夛撹絞嬾。 9. 芦廾簾嗟冖字扮,勣忌挫垢恬返耗,參窒彬式褒返。 10. 泌惚窮坿㌔鞭鱒,駅倬喇崙夛斌、捲暦旗尖字更賜揖吉彿鯉議繁埀嚠參厚算,參窒夛撹裡⑫。 殊臥芦廾燕中議膿業 芦廾燕中駅倬嗤怎校議膿業栖屶嚇簾嗟冖字。 哘繍簾嗟冖字芦廾壓嬬校昔耕隔消仇屶嚇凪嶷楚議了崔。 [ 恢瞳嶷楚 19kg(FR-SC2070) ,21kg(FR-SC2090/90P) ,23kg(FR-SC2011/11P)] 壓医能貧芦廾 泌惚能謁議搾業階狛 20mm,辛岷俊壓能謁貧芦廾簾嗟冖字。 泌惚能謁議搾業弌噐 20mm,哘托秘奐膿医,壅繍簾嗟冖字芦廾噐緩医貧。 芦廾壓詞蹄輿 / 管廩能貧 壓能坪圓托奐膿医,賜聞喘本創湯嬪砿賜窃貌巣何周。 窮坿峨遊 • 云恢瞳音淫凄窮坿峨遊。萩嗤彿鯉議室宝繁埀俊挫窮坿峨遊嚥窮坿㌔。 (叙㍉ FR-SC2090/11) • 暦駅聞喘簾嗟冖字廨喘議能謁峨恙。... - Page 27 殊臥現周 貫淫廾歳嶄函竃麼字才現周,殊臥現周頁倦馴畠。 鳩範芦廾了崔 (汽了:mm) 芦 FR-SC2090/11 FR-SC2070/90/11P 廾 :1.5m :1.5m 600/800/1000 700/900/1100 2- 9 1F02 2681...
-
Page 28: 芦廾簾嗟冖字
芦廾電賑笥(翌電侏) 聞喘総僉塘議儉桟狼由廾崔扮,涙俶聞喘電賑砿。 * 萩堋響芦廾返過,凪嶄嗤厚謹総僉塘廾崔議佚連。 芦廾苔某現噐競医貧。 繍電賑笥峨秘簾嗟冖字競何議峨秘笥, 壅喘 2 薪芦廾苔某紗參耕協。 芦 壅律彭電賑笥怪挫現揮議罷畜撃揮。 廾 廣 吭 芦廾電賑笥扮,哘廣吭飢賑医議蝕尼圭㏍。 屎 鳩 危 列 泌惚芦廾嗤列,辛嬬氏夛撹電賑音芥、呟 械夐咄吉。 芦廾簾嗟冖字 1) 介和嗟鵜。 2) 介和廾崔競何耕協嗟医喘議 3 薪苔某,壅介和嗟医。... - Page 29 3) 歌深現揮議庁塀夕崕,繍究筈直苔某( ∅ 5.1×45)邸秘芦廾能中, 喘噐芦廾屶尺議恣嘔迄迅。 能中才苔某競何寂哘藻嗤 5mm 議寂篭,喘噐喜航簾嗟冖字。 廣 吭 芦廾扮萩喘栽癖議現周(歌堋 6 匈) 。 芦 4) 繍簾嗟冖字議迄迅喜航壓厮芦廾議究筈直苔某貧, 廾 邸諸苔某。 5) 繍 2 功究筈直苔某峨秘簾嗟冖字和何, 廬強迄迅,聞凪蝕笥劾貧參宴耕協字悶。 6) 芦廾嗟医 繍嗟医和何議 2 倖航抗喜航壓簾嗟冖字廾崔貧, 箕軟嗟医、聞凪嚥擬轟撹匯㌔斤馴。 喘化帶 2 嶄介和議 3 薪苔某繍嗟医耕昔。 廣 吭 萩喘薦梓諸嗟医、參契凪渠鯛。 聞喘総僉塘議儉桟狼由廾崔扮,涙俶宸乂化帶。萩写偬 12 匈 議化帶...
-
Page 30: 塰佩殊臥
8) 並枠芦廾嗟鵜 繍嗟鵜曾極嚥芦廾何蛍擬轟斤馴,侮容嗟鵜聞凪頼畠峨秘。 廣 吭 功象艇聞喘議搭眇撞楕音揖,玉扮寂坪辛嬬短嗤鹿嗟 (旺掲呟械賜絞嬾) 。 芦 9) 芦廾屁送医 廾 繍屁送医貧議喜諏昔昔仇喜航壓麼字議航抗貧。 屁送医氏簾現壓了噐麼字久何議曾倖甘鑓貧。 廣 吭 葎閲窒咀耕協音怎遇哈窟議何周用鯛, 萩暦駅隠屬屁送医瓜釈糞耕協。 塰佩殊臥 1) 萩芦廾昧字現揮議嗟鵜。 2) 嬉蝕僅窮匂、殊臥嗟冖字頁倦屎械塰佩。 • 云簾嗟冖字塰廬扮,光亀欠蛭頁倦屎械垢恬。 • 頁倦窟竃呟械夐咄式呟械尅強。 窮坿 委窮坿峨遊峨秘能貧議峨恙(220V/230V/240V AC) 。... -
Page 31: 略擦廣吭並
略 擦 喇噐簾嗟冖字載否叟持壗嗟麟,咀緩哘将械賠準簾嗟冖字(喩凪頁謹迅狛陀利,哘崛富耽埖賠準匯 肝) 。斤噐耽爺恂曾禽傾議 4 欺 5 笥社優遇冱,哘崛富耽曾巓賠準匯肝狛陀利。 泌惚簾嗟冖字海扮寂音賠準,繍氏持詔寄楚嗟麟,侘撹載佃肇茅議嗟妛啣翠。 略擦廣吭並㍻ 略 • 賠準簾嗟冖字念,暦駅貫峨恙貧偉和窮坿峨遊,賜購液僅窮匂。 • 葎芦畠軟需,賠準狛陀利吉何周扮,哘兵嶮忌挫〟什返耗。 擦 • 冢鋤繍邦特欺窮強字、蝕購、俊峨周岻窃議窮賑何周貧。 • 萩齢壓窮賑何周貧島備販採窃侏議牢脚卑匣。倦夸氏夛撹絞嬾。 • 萩齢喘幗泌蓮瞥質岻窃議卑質、廿嗟、砺高頚吉賠準嗟那燕中、擦中医吉, 倦夸氏聞宸乂何周払肇高夾賜夛撹肯裁。 • 萩齢喘啣谷泡岻窃議麗瞳賠牢光何周,倦夸氏聞何周鞭鱒。 蛍宣 / 芦廾勣賠牢何周 萩梓孚嚥介亢扮㌢郡議化帶斤光倖巣何周序佩芦廾。 嗟 鵜 蛍 宣 糧耕仇箕軟嗟鵜曾極,隠隔凪邦峠蓑岷俊性竃。 廣 吭 功象艇聞喘議搭眇撞楕音揖,... - Page 32 屁送医 蛍 宣 1) 褒返昔昔燐廖屁送医、岷俊性強, 屁送医氏貫耕協甘鑓貧用宣。 2) 不不箕軟屁送医,聞屁送医議喜諏嚥航抗蛍宣。 廣 吭 序佩隠劍才略擦扮,弌伉齢聞屁送医議航抗才喜諏延侘。 倦夸,辛嬬涙隈屎鳩芦廾屁送医。 略 葎契峭屁送医渠鯛,哘喘褒返繍凪燐諸。 倦夸,辛嬬氏咀屁送医用鯛夛撹繁埀鞭彬、何周蝕叢賜淀爆吉。 擦 賠準屁送医扮,暦駅繍凪貫麼字貧介和。 倦夸,氏咀屁送医用鯛夛撹繁埀鞭彬、何周鱒撒吉。 芦 廾 屁送医芦廾 繍屁送医貧議喜諏昔昔仇喜航壓麼字議航抗貧。 屁送医氏簾現壓了噐麼字久何議曾倖甘鑓貧。 廣 吭 葎閲窒咀耕協音怎遇哈窟議何周用鯛, 萩暦駅隠屬屁送医瓜釈糞耕協。 謹迅狛陀利 蛍 宣 ㏍貧錆強諏迄,揖扮燐廖狛陀利議弌委返繍凪介和。 ㏍貧箕軟狛陀利,葎契峭凪用鯛揖扮喘返燐廖, 壅貫麼字和何議 2 倖航抗侃介和。 ...
-
Page 33: 賠 準
賠 準 字 附 萩聞喘嶄來牢脚質才罷下賠準。 萩齢聞喘嗤字卑質。牢昌朔,喘婪邦物下徙聾価昌字悶孛參閲窒牢脚質議火藻,恷朔壅喘孤下範寔価昌邦徼。 嗟鵜 / 屁送医 / 謹迅狛陀利 萩聞喘嶄來牢脚質才罷下賠準。 萩齢聞喘嗤字卑質。牢昌朔,萩喘賠邦徙聾牢昌參閲窒牢脚質議火藻,恷朔壅喘孤下範寔価昌邦徼。 略 廣 吭 哘壓峠鵡議燕中賠準屁送医,參窒窟伏延侘。 擦 電欠笥 / 釜国 萩協扮賠牢屁送医 / 謹迅狛陀利參窒嗟麟貫電欠笥葺竃。 泌惚電欠笥巓律賜釜国嗤嗟麟,萩枠聞喘嶄來牢脚質才罷下価蔽。 萩齢聞喘嗤字卑質。 隼朔,壅聞喘孤昌議物下価蔽參閲窒牢脚質火藻。 恷朔壅喘孤下繍火藻邦徼価茅。 欠蛭 欠蛭賠準,萩徂儂源平司 / 旗尖斌。 1F02 2681... -
Page 34: 凪麿佚連
凪麿佚連 号 鯉 FR-SC2090/11, FR-SC2070/90/11P(翌電侏) 駆協窮儿 (V) 亀了 駆協撞楕 (Hz) ㍾債孔楕 (W) 欠楚 (m 夐蕗 (dB) 互亀 嶄亀 詰亀 互亀 嶄亀 詰亀 互亀 凪 嶄亀 麿 詰亀 佚 ㍾債孔楕根孚苧菊 3W 連 聞喘儉桟狼由廾崔(坪儉桟侏 / 辛僉塘) 駆協窮儿 (V) 亀了 駆協撞楕 (Hz) ㍾債孔楕... -
Page 35: 窮揃夕
窮揃夕 FR-SC2070/90/11P 50Hz 220V/230V/240V AC (Type-BF) FR-SC2090/11 5.0 µF 450 V 220V/230V/240V (3P) 50Hz 50Hz 220V/230V/240V (6P) 1 3 5 凪 麿 佚 連 (2P) (8P) 俐尖嚥隠俐 賦萩略俐 : 壓荷恬狛殻嶄泌惚窟伏呟械 , 哘羨軸購渠簾嗟冖字序佩殊臥 : 隠⑫某頁倦匪僅阻? 窮坿峨遊嚥峨恙議銭俊頁倦屎鳩? 飛鳩範音頁貧峰諒籾,萩羨軸偉和窮坿峨遊 , 嚥輝兜杭択云字扮議㈹弁斌選狼。 嚥㈹弁斌選狼扮 , 俶傍苧恢瞳侏催式杭択晩豚。...
Need help?
Do you have a question about the FR-SC2090/11 and is the answer not in the manual?
Questions and answers