Table of Contents
Advertisement
Quick Links
Safety Precautions ...............2~5
Maintenance ................................4
Precautions on Use......................5
Preparation ..........................6, 7
Name of Parts ..........................6, 7
Switch ..........................................7
Installation .........................8~14
before Installation ...................8, 9
Cooker Hood Installation ....10~13
Operation Check .......................14
To the sales shop/installer:
A�er installation, please
give this manual to the user
without fail.
Cooker Hood
FR-MT1990V
FR-MT1990R
Installation/Operation Manual
Ventilating Type
TABLE OF CONTENTS
Thank you very much for your purchase of our cooker hood.
Before installing/operating the cooker hood, please read
this Manual thoroughly.
Keep this manual in a convenient place for future reference.
(Ventilating Type)
(Recycling Type)
Recycling Type
Maintenance ......................14~16
Caution for Maintenance ............14
Cleaned Parts ........................15, 16
Cleaning ......................................16
Other Information .............17, 18
Specifications ..............................17
Circuit Diagram ..........................17
Troubleshooting..........................18
Service and Warranty..................18
Advertisement
Table of Contents

Related Manuals for Fujioh FR-MT1990V


Summary of Contents for Fujioh FR-MT1990V
-
Page 1: Table Of Contents
Cooker Hood FR-MT1990V (Ventilating Type) FR-MT1990R (Recycling Type) Installation/Operation Manual Ventilating Type Recycling Type TABLE OF CONTENTS Safety Precautions ....2~5 Maintenance ......14~16 Maintenance ........4 Caution for Maintenance ....14 Precautions on Use......5 Detaching/Attaching Preparation ......6, 7 Cleaned Parts ......15, 16 Name of Parts ......6, 7 Cleaning ........16... -
Page 2: Safety Precautions
Safety Precautions Read the following safety instructions before operating, and use the cooker hood properly and securely. These instructions are for correct operation of the product to prevent any risk of hazards or damages inflicting on you or others. The instructions are classified into 2 categories as "WARNING" and "CAUTION" depending on their emergency and severity. - Page 3 WARNING There shall be adequate ventilation of the room when the cooker hood is used Air supply at the same time as appliances burning gas or other fuels. (Not applicable to cautioned appliances that only discharge the air back into the room.) Ensure Exhaust adjustment must be ensured.
-
Page 4: Maintenance
Caution If you fail to follow the instructions provided in this manual when installing other screws or fixed equipment, it may cause an electrical hazard. Contact FUJIOH or an agent when changing LED lamps in this product. Caution Maintenance Clean the cooker hood as many times as possible (especially, clean the filter once every month) as it will become greasy. -
Page 5: Precautions On Use
Precautions on Use Operate the cooker hood without fail when using cooking wares. Otherwise, it may be cause of the cooker hood damage or failure due to increased temperature. Don’t use a gas range with nothing put on it. The body of the cooker hood is heated, and it may cause trouble. Prevent influence of direct wind from air conditioner. -
Page 6: Preparation
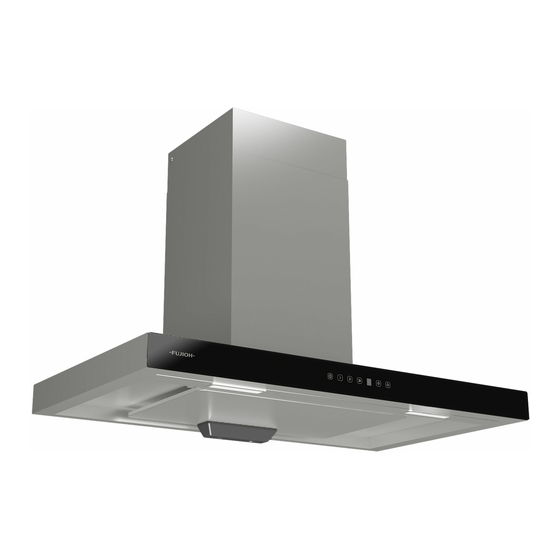
Preparation Name of Parts Recycling type Ventilating type Slide Duct Cover Duct Cover Fixing Bracket (2 pieces) Recycling Device (Recycling type) Hanging Bracket Duct Cover Main unit Fan Guard Filter Rectifier panel Fixing screw Oil tray... -
Page 7: Switch
List of included items FR-MT1990V (Ventilating type) Quantity Name Usage Main unit Rectifier panel Oil tray Duct Cover Slide Duct Cover Hanging Bracket Mounting the main unit Mounting the slide duct cover/duct cover Duct Cover Fixing Bracket Mounting the main unit/slide duct cover/duct cover... -
Page 8: Installation
Installation Preparation and Check before Installation CAUTION 1. Mount the cooker hood carefully and avoid contact with any metal parts (the lath in the wall or the like) of the building. 2. Never embed the body of the cooker hood in the wall.Otherwise, electricity might leak in the wall,which in any case flows to the body of the cooker hood. - Page 9 Confirmation of the installation location(Unit:mm) FR-MT1990V FR-MT1990R Power cord Duct Cover Fixing Bracket 80 80 Hanging Bracket Body mounting hole(seven places)
-
Page 10: Cooker Hood Installation
Cooker Hood Installation Use the appropriate accessories for installation (see page 7). Note Fixing Screw Installation method 1. Remove the fixing screw attached to the front side of the filter. Remove the filter. Filter 2. Remove the fan guard from the 4 mounting screws attached to the fan guard. - Page 11 5. Please ensure that breaker is in "off" position,and then,plug power supply Power supply installation location into the socket. Note When you connect power plug, please be sure to turn off the breaker of switchboard. Duct Cover ST4.2×9.5 6. Assemble the duct cover fixing bracket Fixing Bracket Flat head screws and 2 ST4.2×9.5 flat head flat head screws...
- Page 12 9. Hook the main unit to the hanging bracket. Flexible Tube Duct Note Slide Duct Cover As shown in the figure to the right, the ventilating type is equipped with Duct Cover a flexible tube duct and then it is mounted on the wall.
- Page 13 Fixing Screw 14. Secure the filter with a fixing screw. Filter 15. Install the rectifier panel. A. Put the rectifier panel on two rear hooking brackets of the main unit. B. Turn the rectifier panel horizontally, align it with the le� and right ball catchers,and push it forward towards the main unit.
-
Page 14: Operation Check
Operation Check 1) Please install the oil tray matched with the product. 2) Turn on a breaker and check operation. Check that the fan rotates normally at all speeds during operation. • Check that there are no abnormal sound or vibration. •... -
Page 15: Detaching/Attaching Cleaned Parts
Detaching/Attaching Cleaned Parts Install all parts using the opposite procedure as that for removing the parts. Oil Tray Detaching Hold the rectifier panel with the le� hand,hold and pull the oil tray with the right hand(first pull one side of the oil tray out of the clamp,then pull the other side out of the clamp in accordance to the convenience.) Note... -
Page 16: Cleaning
Do not use an organic solvent. A�er cleaning, wash off with water to remove all remaining detergent,and finally thoroughly wipe any moisture off using a dry cloth. Note When cleaning the rectifier panel, perform it on a flat surface in order not to deform it. As for cleaning of the fan, please consult FUJIOH/Agent. -
Page 17: Other Information
Other information Specifications FR-MT1990V(Ventilating type) Frequency Rated voltage Power consumption Sound Air flow Speed (Hz) (dB) (㎥/h) *With 2×1.5W=3W Watts for lamp FR-MT1990R(Recycling type) Frequency Rated voltage Power consumption Sound Air flow Speed (Hz) (dB) (㎥/h) *With 2×1.5W=3W Watts for lamp... -
Page 18: Troubleshooting
Troubleshooting Before request repairing services,please confirm whether there is the following situation again. Symptom Possible cause Action A�er pressing the Power 1.Brake of the switchboard is"off". 1.Brake of the switchboard is"on". switch,the fan and the 2.Power plug is pulled out. 2.Plug in the power plug. - Page 19 Global Website www.fujioh.com FUJIOH INTERNATIONAL TRADING PTE.LTD. Southeast Asia Regional Headquarters 130 Joo Seng Road #05-05 Singapore 368357 Tel:(65)6286 3286 Fax:(65)6285 3285 E-mail:fit@fujioh.com.sg Rev3 2020...
Need help?
Do you have a question about the FR-MT1990V and is the answer not in the manual?
Questions and answers