Table of Contents
Advertisement
Available languages
Available languages
Advertisement
Table of Contents

Related Manuals for Thrustmaster T.16000M


Summary of Contents for Thrustmaster T.16000M
-
Page 2: Technical Features
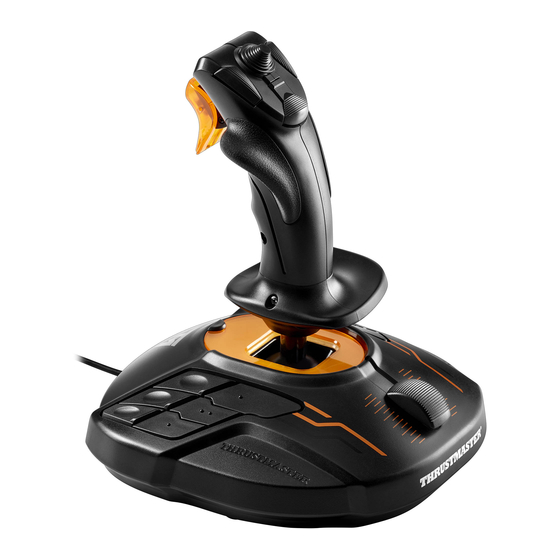
Compatible: PC User Manual TECHNICAL FEATURES Digital trigger Hand rest rotation screw, with right- Multidirectional "Point of View" hat handed or left-handed positions switch Right-handed thumb rest Right-handed screw cover PC USB connector Rudder control via rotating handle with Left-handed thumb rest hand rest Left-handed screw cover Throttle... - Page 3 GETTING TO KNOW YOUR JOYSTICK EXCLUSIVE PRECISION TECHNOLOGY: "H.E.A.R.T™: HallEffect AccuRate Technology" Your T-16000M joystick features technology providing it with a level of precision currently unequaled in the world of gaming joysticks, including: - A 3D (Hall Effect) magnetic sensor on the stick, with a resolution of more than 268 million values over the X and Y axes (16384 x 16384 values), whereas current competing systems (even high-end systems) provide resolutions in the neighborhood of only one million values (1024 x 1024 values).
- Page 4 AMBIDEXTROUS SYSTEM Your T-16000M joystick has the advantage of being fully ambidextrous, allowing it to perfectly adapt to all players, whether they are right-handed or left-handed. To do so, 3 elements can be adjusted: the configuration of the buttons on the base, the hand rest, and the thumb rest.
- Page 5 CONFIGURATION OF BUTTONS IN RIGHT-HANDED MODE To set the positions of the 12 buttons located on the base to right-handed mode, set the selector switch (12) located under the joystick's base to "RIGHT HANDED": RIGHT-HANDED MODE CONFIGURATION 4/12...
- Page 6 CONFIGURATION OF BUTTONS IN LEFT-HANDED MODE To set the positions of the 12 buttons located on the base to left-handed mode, set the selector switch (12) located under the joystick's base to "LEFT HANDED": LEFT-HANDED MODE CONFIGURATION 5/12...
- Page 7 ADJUSTING THE HAND REST FOR RIGHT- OR LEFT-HANDED MODE By default, the hand rest is configured in RIGHT-HANDED MODE. To adjust it to LEFT-HANDED MODE: A) Using a small screwdriver, carefully loosen (without actually removing) the small hand rest rotation screw (7), located on the left of the hand rest. B) Turn the hand rest 180°.
- Page 8 ADJUSTING THE THUMB REST FOR RIGHT- OR LEFT-HANDED MODE By default, the stick's thumb rest is configured in RIGHT-HANDED MODE. To adjust it to LEFT-HANDED MODE: A) Remove the right-handed screw cover (3) located on the right of the stick. B) Using a small screwdriver, unscrew and completely remove the long screw now accessible (on the right of the stick).
- Page 9 D) Position the left-handed thumb rest (10) (included separately in the joystick's box) on the right of the stick. E) Position the long screw in the opening on the left of the stick and completely tighten the screw in order to fasten the left-handed thumb rest in place. F) Position the left-handed screw cover (11) (included separately in the joystick's box) on the left of the stick.
-
Page 10: Important Note
INSTALLATION ON PC 1. Connect the PC USB connector (9) to one of your computer’s USB ports. Windows XP or Vista will automatically detect the new device. 2. The drivers are installed automatically. Follow the on-screen instructions to complete the installation. 3. -
Page 11: Troubleshooting And Warning
TROUBLESHOOTING AND WARNING • My joystick isn't functioning properly or seems to be improperly calibrated: - Power off your computer and disconnect your joystick; then, turn your computer back on, reconnect your joystick and restart your game. - When connecting your joystick: always set the stick and the rudder to their central positions, and avoid moving them (to avoid any calibration problems). -
Page 12: Technical Support
Worldwide, Guillemot Corporation S.A. (“Guillemot”) warrants to the consumer that this Thrustmaster product will be free from material defects and manufacturing flaws for a period of two (2) years from the original date of purchase. Should the product appear to be defective during the warranty period, immediately contact Technical Support, who will indicate the procedure to follow. -
Page 13: Environmental Protection Recommendation
State to State or Province to Province. COPYRIGHT © 2008 Guillemot Corporation S.A. All rights reserved. Thrustmaster® is a registered trademark of Guillemot Corporation S.A. Windows®, XP and Vista are registered trademarks of Microsoft Corporation in the United States and/or other countries. All other trademarks and brand names are hereby acknowledged and are property of their respective owners. -
Page 14: Caractéristiques Techniques
Compatible : PC Manuel de l'utilisateur CARACTÉRISTIQUES TECHNIQUES Gâchette numérique Vis pour rotation du Repose-main avec Croix multidirectionnelle Point de Vue position Droitier ou Gaucher Cache-vis Droitier Repose-pouce Droitier Palonnier par rotation du manche avec Connecteur USB PC Repose-main Repose-pouce Gaucher Manette des gaz Cache-vis Gaucher 15 boutons d’action... -
Page 15: Retro-Eclairage
A LA DECOUVERTE DE VOTRE JOYSTICK TECHNOLOGIE DE PRECISION EXCLUSIVE : « H.E.A.R.T™ : HallEffect AccuRate Technology » Votre Joystick T-16000M a la particularité de disposer d’une technologie qui lui permet une précision inégalée à ce jour dans l’univers des joysticks de jeu avec : - un capteur magnétique 3D (Hall Effect) sur le manche d’une résolution de plus de 268 millions de valeurs sur l’ensemble des axes X et Y (soit 16384 x 16384) alors que les systèmes actuels concurrents (même haut de gamme) varient aux alentours de seulement 1... - Page 16 SYSTEME AMBIDEXTRE Votre joystick T-16000M à l’avantage d’être entièrement ambidextre afin de s’adapter parfaitement à tous les joueurs qu’ils soient droitiers ou gauchers. Pour ce faire, 3 éléments sont ajustables : la disposition des boutons sur la base, le repose- main ainsi que le repose-pouce.
- Page 17 CONFIGURATION DES BOUTONS EN MODE DROITIER Pour ajuster la position des 12 boutons situés sur la base en mode « DROITIER », positionnez le sélecteur (12) situé sous la base du joystick sur « RIGHT HANDED » : CONFIGURATION EN MODE DROITIER 4/12...
- Page 18 CONFIGURATION DES BOUTONS EN MODE GAUCHER Pour ajuster la position des boutons en mode « GAUCHER », positionnez le sélecteur (12) situé sous la base du joystick sur « LEFT HANDED » : CONFIGURATION EN MODE GAUCHER 5/12...
- Page 19 AJUSTER LE REPOSE-MAIN EN MODE DROITIER OU GAUCHER Par défaut, le repose-main du manche est positionné en mode DROITIER. Pour l’ajuster en mode GAUCHER : A) A l’aide d’un petit tournevis, dévissez légèrement (sans la retirer) la petite vis (7) du repose-main situé...
- Page 20 AJUSTER LE REPOSE POUCE EN MODE DROITIER OU GAUCHER Par défaut, le repose-pouce du manche est positionné en mode DROITIER. Pour l’ajuster en mode GAUCHER : A) Retirez le « cache-vis Droitier » (3) situé à droite du manche. B) A l’aide d’un petit tournevis, dévissez et retirez complètement la longue vis désormais accessible (à...
- Page 21 D) Positionnez le repose-Pouce Gaucher (10) (inclus séparément dans la boite du joystick) à droite du manche. E) Positionnez et vissez au maximum la longue vis à gauche du manche afin de fixer le repose-pouce Gaucher. F) Positionnez le cache-vis Gaucher (11) (inclus séparément dans la boite du joystick) à gauche du manche.
- Page 22 INSTALLATION SUR PC 1. Reliez le connecteur USB (9) à l'un des ports USB de votre unité centrale. Windows XP ou Vista détectera automatiquement le nouveau périphérique. 3. L'installation des pilotes est automatique. Suivez les instructions affichées à l'écran pour terminer l'installation. 4.
-
Page 23: Depannage Et Avertissement
DEPANNAGE ET AVERTISSEMENT • Mon joystick ne fonctionne pas correctement ou semble mal calibré : - Eteignez votre ordinateur, déconnectez votre joystick, rebranchez et relancez votre jeu. - Lorsque vous branchez votre joystick : laissez le manche et le palonnier centrés et évitez de les déplacer (pour éviter tout problème de calibration). -
Page 24: Support Technique
Dans le monde entier, Guillemot Corporation S.A. (« Guillemot ») garantit au consommateur que le présent produit Thrustmaster est exempt de défauts matériels et de vices de fabrication, et ce, pour une période de deux (2) ans à compter de la date d’achat d’origine. - Page 25 État/Province à l’autre. COPYRIGHT © 2008 Guillemot Corporation S.A. Tous droits réservés. Thrustmaster® est une marque déposée de Guillemot Corporation S.A. Windows®, XP et Vista sont des marques déposées de Microsoft Corporation aux Etats-Unis et/ou dans d’autres pays. Toutes les autres marques déposées et noms commerciaux sont reconnus par les présentes et sont la propriété...
- Page 26 Kompatibel: PC Benutzerhandbuch TECHNISCHE FEATURES Digitaler Trigger Handstützen-Rotationsschraube mit Multidirektionaler "Point of View rechts- oder linkshändigen Positionen (Panoramasicht)" Kopfschalter Rechtshändige Daumenstütze Rechtshändige Schraubenabdeckung PC USB Stecker Ruderkontrolle via Drehgriff mit Linkshändige Daumenstütze Handstütze Linkshändige Schraubenabdeckung Gashebel Rechts- oder linkshändiger Button- 15 Actionbuttons Wahlschalter 1/12...
- Page 27 LERNEN SIE IHREN JOYSTICK KENNEN EXKLUSIVE PRÄZISIONSTECHNOLOGIE: "H.E.A.R.T™: HallEffect AccuRate Technology" Ihr T-16000M Joystick beinhaltet Technologie, die diesen mit einer Präzisionsstufe ausstattet, die derzeit beispiellos in der Welt der Spiel-Joysticks ist, inklusive: - Einen 3D (Hall Effect) Magnetsensor am Stick, mit einer Auflösung von mehr als 268 Mio. Werten über den X und Y Achsen (16384 x 16384 Werte), wohingegen aktuelle Mitbewerbersysteme (selbst High-End-Systeme) Auflösungen in der Nähe von nur 1 Mio.
- Page 28 BEIDHÄNDIGES SYSTEM Ihr T-16000M Joystick hat den Vorzug vollständig Beidhändig zu sein und somit zu allen Spielern zu passen, egal ob diese Rechts- oder Linkshänder sind. Dafür können 3 Elemente eingestellt werden: Die Konfiguration der Buttons an der Basis, die Handstütze und die Daumenstütze.
- Page 29 KONFIGURATION DER BUTTONS IM RECHTSHÄNDIGEN MODUS Um die Positionen der 12 Buttons an der Basis in den rechtshändigen Modus zu stellen, stellen Sie den Wahlschalter (12) unter der Joystickbasis auf "RECHTSHÄNDIG": KONFIGURATION RECHTSHÄNDIG 4/12...
- Page 30 KONFIGURATION DER BUTTONS IM LINKSHÄNDIGEN MODUS Um die Positionen der 12 Buttons an der Basis in den linkshändigen Modus zu stellen, stellen Sie den Wahlschalter (12) unter der Joystickbasis auf "LINKSHÄNDIG": KONFIGURATION LINKSHÄNDIG 5/12...
- Page 31 EINSTELLEN HANDSTÜTZE FÜR RECHTS- ODER LINKSHÄNDER Werksseitig ist die Handstütze für RECHTSHÄNDER montiert. Um diese für den LINKSHÄNDIGEN Gebrauch einzustellen: A) Benutzen Sie einen kleinen Schraubendreher zum lösen der kleinen Handstützen- Rotationsschraube(7) (ohne diese vollständig zu entfernen), die sich links der Handstütze befindet.
- Page 32 EINSTELLEN DAUMENSTÜTZE FÜR RECHTS- ODER LINKSHÄNDIGEN BETRIEB Werksseitig ist die Daumenstütze für RECHTSHÄNDER montiert. Um diese für den LINKSHÄNDIGEN Gebrauch einzustellen: A) Entfernen Sie rechterhand am Stick die Schraubenabdeckung (3). B) Benutzen Sie einen kleinen Schraubendreher und schrauben die nun zugängliche, lange Schraube, rechts am Stick, los und entfernen diese.
- Page 33 D) Positionieren Sie die linkshändige Daumenstütze ( ) (separat in der Joystickbox enthalten) rechts am Stick. E) Stecken Sie die lange Schraube durch die Öffnung links am Stick und ziehen diese fest an, um die linkshändige Daumenstütze fest zu montieren. F) Setzen Sie die linkshändige Schraubenabdeckung (11) (separat in der Joystickbox enthalten x) links am Stick ein.
- Page 34 INSTALLATION AUF DEM PC 1. Schließen Sie den PC USB Stecker (9) an einen der USB Ports Ihres Computers an. Windows XP oder Vista erkennt automatisch das neue Gerät. 2. Die Treiber werden automatisch installiert. Folgen Sie den Bildschirmanweisungen, um die Installation abschließen zu können. 3.
-
Page 35: Fehlerbeseitigung Und Warnung
FEHLERBESEITIGUNG UND WARNUNG • Mein Joystick funktioniert nicht richtig oder schein falsch kalibriert zu sein: - Schalten Sie Ihren Computer aus und stöpseln Ihren Joystick aus, schalten Sie Ihren Computer wieder ein, stöpseln den Joystick wieder ein und starten Ihr Spiel erneut. - Wenn Sie Ihren Joystick anschließen: Stellen Sie den Stick und das Ruder auf deren mittige Positionen und vermeiden es diese zu bewegen (um jedwede Kalibrierungsprobleme zu vermeiden). -
Page 36: Technischer Support
TECHNISCHER SUPPORT Sollten Sie mit Ihrem Produkt ein Problem haben, besuchen Sie bitte die Seite http://ts.thrustmaster.com und klicken Sie auf Technischer Support. Von dort aus können Sie auf verschiedene Hilfen zugreifen (Fragen und Antworten (FAQ), die neuesten Versionen von Treibern und Software), die Ihnen bei der Lösung Ihres Problems helfen könnten. -
Page 37: Hinweise Zum Umweltschutz
COPYRIGHT © 2008 Guillemot Corporation S.A. Alle Rechte vorbehalten. Thrustmaster® ist ein eingetragenes Warenzeichen der Guillemot Corporation S.A. Microsoft® Windows®, XP und Vista sind eingetragene Warenzeichen der Microsoft Corporation in den Vereinigten Staaten von Amerika und/oder anderen Ländern Alle anderen Warenzeichen und Markennamen werden hiermit anerkannt und sind Eigentum ihrer jeweiligen Eigentümer. -
Page 38: Technische Kenmerken
Compatibel met: pc Handleiding TECHNISCHE KENMERKEN Digitale trigger Draaischroef voor handsteun, instelbaar Multidirectionele "Point of View"-hat- voor rechts- of linkshandig gebruik switch Duimsteun bij rechtshandig gebruik Afdekplaatje bij rechtshandig gebruik USB-connector (voor pc) Roerbediening via draaihendel met Duimsteun bij linkshandig gebruik handsteun Afdekplaatje bij linkshandig gebruik Throttle... - Page 39 DE DIVERSE FUNCTIES VAN DE JOYSTICK EXCLUSIEVE PRECISIETECHNOLOGIE: "H.E.A.R.T™: HallEffect AccuRate Technology" De T-16000M is uitgerust met technologie die garant staat voor ongeëvenaarde nauwkeurigheid: - Een magnetische 3D-sensor (Hall Effect) op de stick, met een resolutie van meer dan 268 miljoen waarden voor de X- en Y-as (16384 x 16384 waarden), terwijl de huidige concurrerende systemen (zelfs de meest geavanceerde) slechts een resolutie bieden van circa 1 miljoen waarden (1024 x 1024 waarden).
- Page 40 SYSTEEM VOOR LINKS- EN RECHTSHANDIG GEBRUIK De T-16000M is instelbaar voor links- of rechtshandig gebruik. Er kunnen 3 elementen worden ingesteld: de configuratie van de knoppen op de voet, de handsteun en de duimsteun. CONFIGURATIE VOOR RECHTSHANDIG GEBRUIK CONFIGURATIE VOOR LINKSHANDIG GEBRUIK 3/12...
- Page 41 CONFIGURATIE VAN DE KNOPPEN VOOR RECHTSHANDIG GEBRUIK Als u de positie van de 12 knoppen op de voet wilt omzetten voor rechtshandig gebruik, stelt u de schakelaar (12) onder de voet van de joystick in op "RIGHT HANDED": CONFIGURATIE VOOR RECHTSHANDIG GEBRUIK 4/12...
- Page 42 CONFIGURATIE VAN DE KNOPPEN VOOR LINKSHANDIG GEBRUIK Als u de positie van de 12 knoppen op de voet wilt omzetten voor linkshandig gebruik, stelt u de schakelaar (12) onder de voet van de joystick in op "LEFT HANDED": CONFIGURATIE VOOR LINKSHANDIG GEBRUIK 5/12...
- Page 43 DE HANDSTEUN INSTELLEN VOOR RECHTS- OF LINKSHANDIG GEBRUIK Standaard is de handsteun geconfigureerd voor RECHTSHANDIG GEBRUIK. Ga als volgt te werk om de steun te configureren voor LINKSHANDIG GEBRUIK: A) Draai met een kleine schroevendraaier voorzichtig de kleine draaischroef voor de handsteun (7) los (zonder de schroef te verwijderen), die zich aan de linkerzijde van de handsteun bevindt.
- Page 44 DE DUIMSTEUN INSTELLEN VOOR RECHTS- OF LINKSHANDIG GEBRUIK Standaard is de duimsteun van de stick geconfigureerd voor RECHTSHANDIG GEBRUIK. Ga als volgt te werk om de steun te configureren voor LINKSHANDIG GEBRUIK: A) Verwijder het afdekplaatje voor rechtshandig gebruik (3) aan de rechterzijde van de stick. B) Schroef met een kleine schroevendraaier de lange schroef die nu zichtbaar is (aan de rechterzijde van de stick) helemaal los en verwijder deze schroef.
- Page 45 D) Plaats de duimsteun voor linkshandig gebruik (10) (los meegeleverd bij de joystick) aan de rechterzijde van de stick. E) Plaats de lange schroef in de opening aan de linkerzijde van de joystick en draai de schroef helemaal vast om de duimsteun voor linkshandig gebruik te bevestigen. F) Plaats het afdekplaatje voor linkshandig gebruik (11) (los meegeleverd bij de joystick) aan de linkerzijde van de stick.
-
Page 46: Belangrijke Opmerking
INSTALLATIE OP DE PC 1. Sluit de USB-connector (9) aan op een van de USB-poorten van de computer. Windows XP of Vista herkent het nieuwe apparaat automatisch. 2. De drivers worden automatisch geïnstalleerd. Volg de aanwijzingen op het scherm om de installatie te voltooien. 3. -
Page 47: Problemen Oplossen En Waarschuwingen
PROBLEMEN OPLOSSEN EN WAARSCHUWINGEN • Mijn joystick werkt niet goed of lijkt niet goed gekalibreerd te zijn: - Zet de computer uit en koppel de joystick los, zet vervolgens de computer weer aan en sluit de joystick opnieuw aan en start de game opnieuw. - Bij het aansluiten van de joystick: plaats de stick en het roer altijd in de middenstand en beweeg de stick en het roer niet (om kalibratieproblemen te voorkomen). -
Page 48: Technische Ondersteuning
(inclusief de aansprakelijkheid voor indirecte schade) zich tot het repareren of vervangen van het Thrustmaster product. De wettelijke rechten van de klant volgens de wetgeving die van toepassing is op de verkoop van consumentproducten, worden op generlei wijze beperkt door deze garantie. - Page 49 COPYRIGHT © 2008 Guillemot Corporation S.A. Alle rechten voorbehouden. Thrustmaster® is een geregistreerd handelsmerk van Guillemot Corporation S.A. Windows®, XP en Vista zijn geregistreerde handelsmerken van Microsoft Corporation in de Verenigde Staten en/of andere landen. Alle overige handelsmerken en merknamen worden hierbij erkend en zijn het eigendom van de respectieve eigenaren. Afbeeldingen zijn niet bindend.
-
Page 50: Caratteristiche Tecniche
PC compatibile Manuale d’uso CARATTERISTICHE TECNICHE Grilletto digitale Vite per la rotazione della zona di riposo Hat switch "Angolo di visuale" per la mano, con posizioni per destrimani multidirezionale o mancini Copri-vite per destrimani Appoggia-pollice per destrimani Controllo del timone tramite Connettore PC USB impugnatura rotante con zona di Appoggia-pollice per mancini... - Page 51 CONOSCERE IL TUO JOYSTICK ESCLUSIVA TECNOLOGIA DI PRECISIONE: "H.E.A.R.T™: HallEffect AccuRate Technology" Il tuo joystick T-16000M è dotato di una tecnologia in grado di garantire un livello di precisione ineguagliabile nel mondo dei joystick per giocare; in particolare: - Un sensore 3D magnetico (Hall Effect) garantisce una risoluzione da oltre 268 milioni da valori per gli assi X e Y (16384 x 16384 valori), mentre gli attuali sistemi concorrenti (perfino i sistemi high-end) offrono risoluzioni prossime ad un solo milione di valori (1024 x 1024 valori).
- Page 52 SISTEMA AMBIDESTRO Il tuo joystick T-16000M ha il vantaggio di essere totalmente ambidestro: si adatta perfettamente a tutti i giocatori, sia destrimani che mancini. Per permettere questa possibilità, vi sono 3 elementi configurabili: i pulsanti presenti nella base, la zona di riposo per la mano e l’appoggia-pollice. CONFIGURAZIONE DESTRIMANE CONFIGURAZIONE MANCINO 3/12...
- Page 53 CONFIGURAZIONE DEI PULSANTI IN MODALITÀ DESTRIMANE Per impostare la configurazione destrimane delle posizioni dei 12 pulsanti della base, sposta l’apposito switch (12), posto sotto la base del joystick, su "RIGHT HANDED": CONFIGURAZIONE MODALITÀ DESTRIMANE 4/12...
- Page 54 CONFIGURAZIONE DEI PULSANTI IN MODALITÀ MANCINO Per impostare la configurazione destrimane delle posizioni dei 12 pulsanti della base, sposta l’apposito switch (12), posto sotto la base del joystick, su "LEFT HANDED": CONFIGURAZIONE MODALITÀ MANCINO 5/12...
- Page 55 IMPOSTAZIONE DELLA ZONA DI RIPOSO PER LA MANO NELLA MODALITÀ DESTRIMANE O MANCINO Per default, la zona di riposo per la mano è configurata in MODALITÀ DESTRIMANE. Per spostarla in MODALITÀ MANCINO: A) Tramite un piccolo cacciavite, allenta accuratamente (senza rimuoverla) la piccola vite di rotazione della zona di riposo per la mano the (7), presente sulla parte sinistra di tale zona.
- Page 56 REGOLAZIONE DELL’APPOGGIA-POLLICE PER LA MODALITÀ DESTRIMANE O MANCINO Per default, l’appoggia-pollice presente sulla leva è posizionato in MODALITÀ DESTRIMANE. Per regolarlo in MODALITÀ MANCINO: A) Rimuovi il copri-vite per destrimani (3) posto sulla parte destra della leva. B) Utilizzando un piccolo cacciavite, svita completamente e rimuovi la lunga vite divenuta ora accessibile (presente sulla parte destra della leva).
- Page 57 D) Colloca l’appoggia-pollice mancino (10) (presente separatamente nella confezione del joystick) sulla parte sinistra della leva. E) Inserisci ed avvita completamente la lunga vite nell’apposita apertura presente nella parte sinistra della leva, in modo tale da fissare in saldamente l’appoggia-pollice mancino. F) Inserisci il copri-vite mancino (11) (presente separatamente nella confezione del joystick) nella parte sinistra della leva.
-
Page 58: Nota Importante
INSTALLAZIONE SU PC 1. Collega il connettore PC USB (9) ad una porta USB del tuo computer. Windows XP, o Vista, individuerà automaticamente la nuova periferica. 2. I driver vengono installati automaticamente. Completa l’installazione seguendo le istruzioni che compaiono sullo schermo. 3. -
Page 59: Risoluzione Dei Problemi E Avvisi
RISOLUZIONE DEI PROBLEMI E AVVISI • Il mio joystick non funziona correttamente o sembra non essere ben calibrato: - Spegni il tuo computer and scollega il tuo joystick; quindi, riaccendi il computer, ricollega il tuo joystick e riavvia il gioco. - Per non imbatterti in problemi di calibrazione, quando colleghi il tuo joystick, lascia sempre la leva e il timone nelle rispettive posizioni centrali, evitando di muoverli. -
Page 60: Assistenza Tecnica
Nel mondo, Guillemot Corporation S.A. (“Guillemot”) garantisce al consumatore che questo prodotto Thrustmaster è privo di difetti nei materiali e nell’assemblaggio per un periodo di due (2) anni dalla prima data di acquisto. Qualora il prodotto presentasse dei difetti durante tale periodo, contatta immediatamente il servizio di Assistenza Tecnica, che ti indicherà... - Page 61 Materiale Elettrico ed Elettronico, è possibile fornire un importante contributo per la salvaguardia dell’ambiente. Per conoscere i punti di raccolta più vicini a te, contatta le autorità locali competenti. FAQ, consigli e driver disponibili sul sito www.thrustmaster.com 12/12...
-
Page 62: Características Técnicas
Compatible: PC Manual del usuario CARACTERÍSTICAS TÉCNICAS Gatillo digital Tornillo de rotación del reposamanos, Hat switch multidireccional "Punto de con posiciones para diestros y zurdos vista" Reposapulgares para diestros Tapa del tornillo en posición diestra Conector USB para PC Control de timón mediante mango Reposapulgares para zurdos giratorio con reposamanos Tapa del tornillo en posición zurda... - Page 63 INTRODUCCIÓN A TU JOYSTICK TECNOLOGÍA DE PRECISIÓN EXCLUSIVA: "H.E.A.R.T™: HallEffect AccuRate Technology" Tu joystick T-16000M incorpora tecnología que le ofrece un nivel de precisión actualmente inigualada en el mundo de los joysticks de juego, que incluye: - Un sensor magnético 3D (Hall Effect) en la palanca, con una resolución de más de 268 millones de valores en los ejes X e Y (16384 x 16384 valores), mientras que los sistemas actuales de la competencia (incluso sistemas de alto nivel) ofrecen resoluciones próximas a sólo un millón de valores (1024 x 1024 valores).
- Page 64 SISTEMA AMBIDEXTRO Tu joystick T-16000M tiene la ventaja de ser totalmente ambidextro, lo que le permite adaptarse a todos los jugadores, tanto si son diestros como zurdos. Para ello, se pueden ajustar 3 elementos: la configuración de los botones de la base, el reposamanos y el reposapulgares.
- Page 65 CONFIGURACIÓN DE BOTONES EN MODO DIESTRO Para fijar las posiciones de los 12 botones situados en la base en el modo diestro, pon el interruptor selector (12) situado debajo de la base del joystick en "RIGHT HANDED": CONFIGURACIÓN DEL MODO DIESTRO 4/12...
- Page 66 CONFIGURACIÓN DE BOTONES EN MODO ZURDO Para f ijar las posiciones de los 12 botones situados en la base en el modo zurdo, pon el interruptor selector (12) sit uado debajo de la base del joyst ick en "LEFT HANDED": CONFIGURACIÓN DEL MODO ZURDO 5/12...
- Page 67 AJUSTE DEL REPOSAMANOS EN MODO DIESTRO O ZURDO De forma predeterminada, el reposamanos está configurado en MODO DIESTRO. Para ajustarlo a MODO ZURDO: ño A) Utilizando un destornillador pequeño, afloja con cuidado (sin llegar a quitarlo) el peque tornillo de rotación del reposamanos (7), situado en la parte izquierda del reposamanos. B) Gira el reposamanos 180°.
- Page 68 AJUSTE DEL REPOSAPULGARES EN MODO DIESTRO O ZURDO De forma predeterminada, el rep osapulgares de la palanca está configurado en MODO DIESTRO. Para ajustarlo a MODO ZURDO: A) Quita la tapa del tornillo en posición diestra (3) situada en la part e derecha de la palanca.
- Page 69 D) Coloca el reposapulgares para zurdos (10) (incluido por separado en la caja del joystick) en la parte derecha de la palanca. E) Coloca el tornillo largo en la abertura de la parte izquierda de la palanca y aprieta totalmente el tornillo para asegurar el reposapulgares para zurdos en su sitio. F) Coloca la tapa del tornillo en posición zurda (11) (incluida por separado en la caja del joystick) en la parte izquierda de la palanca.
- Page 70 INSTALACIÓN EN PC Enchufa el conector USB para PC (9) en uno de los puertos USB de tu ordenador. Windows XP o Vista detectarán automáticamente el nuevo dispositivo. 2. Los controladores se instalan automáticamente. Sigue las instrucciones en pantalla para terminar la instalación. Haz clic en Inicio/Conf iguración/Panel de cont...
-
Page 71: Resolución De Problemas Y Advertencias
RESOLUCIÓN DE PROBLEMAS Y ADVERTENCIAS • Mi joystick no funciona correctamente o parece no estar bien calibrado: - Apaga el ordenador y desconecta el joystick; luego, vuelve a encender el ordenador, vuelve a conectar el joystick y reinicia el juego. - Al conectar el joystick: coloca siempre la palanca y el timón en sus posiciones centrales, y no los muevas (para evitar problemas de calibración). -
Page 72: Soporte Técnico
En todo el mundo, Guillemot Corporation S.A. (“Guillemot”) garantiza al consumidor que este producto de Thrustmaster estará libre de defectos materiales y fallos de fabricación por un periodo de dos (2) años a partir de la fecha de compra original. Si el producto pareciera estar defectuoso durante el periodo de garantía, contacte inmediatamente con el Soporte Técnico, que le indicará... - Page 73 COPYRIGHT © 2008 Guillemot Corporation S.A. Todos los derechos reservados. Thrustmaster® es una marca comercial registrada de Guillemot Corporation S.A. Windows®, XP y Vista son marcas comerciales registradas de Microsoft Corporation en Estados Unidos y/o en otros países. Todas las demás marcas comerciales y nombres de marca se reconocen aquí...
- Page 74 Compatível: PC Manual do Utilizador CARACTERÍSTICAS TÉCNICAS Gatilho digital Parafuso de rotação do descanso, com Hat switch multidireccional de “ponto posições à esquerda ou à direita de vista” Descanso para o polegar direito Tampa direita do parafuso Conector PC USB Leme de direcção controlado via Descanso para o polegar esquerdo rotação da coluna com descanso...
- Page 75 CONHEÇA O SEU JOYSTICK TECNOLOGIA DE PRECISÃO EXCLUSIVA: “H.E.A.R.T™: Hall Effect AccuRate Technology” A tecnologia integrada no seu joystick T-16000M confere-lhe um nível de precisão presentemente sem igual no mundo dos joysticks para jogos, incluindo: - Sensor magnético 3D (Hall Effect) na coluna, com uma resolução superior a 268 milhões nos eixos X e Y (valores de 16.384 x 16.384), ao passo que os sistemas rivais existentes (inclusive os de topo de gama) oferecem resoluções que rondam apenas valores de um milhão (1024 x 1024).
- Page 76 SISTEMA AMBIDESTRO O seu joystick T-16000M tem a vantagem de ser totalmente ambidestro, o que lhe permite adaptar-se na perfeição a todos os jogadores, tanto destros como esquerdinos. Para tal, é possível ajustar três elementos: a configuração dos botões na base, o descanso para as mãos e o descanso do polegar.
- Page 77 CONFIGURAÇÃO DOS BOTÕES NO MODO DESTRO A fim de definir as posições dos 12 botões da base no modo destro, ajuste o selector (12) sob a base do joystick para “RIGHT HANDED”: CONFIGURAÇÃO NO MODO DESTRO 4/12...
- Page 78 CONFIGURAÇÃO DOS BOTÕES NO MODO ESQUERDINO A fim de definir as posições dos 12 botões da base no modo esquerdino , ajuste o selector (12) sob a base do joystick para “LEFT HANDED”: CONFIGURAÇÃO NO MODO ESQUERDINO 5/12...
- Page 79 DESCANSO DAS MÃOS NO MODO DESTRO OU ESQUERDINO Por predefinição, o descanso para as mãos está configurado no MODO DESTRO. Para ajustá-lo para o MODO ESQUERDINO: A) Com uma chave de fendas pequena, desaperte (sem chegar a remover) o pequeno parafuso de rotação do descanso das mãos (7), no lado esquerdo ou direito do descanso.
- Page 80 DESCANSO DO POLEGAR NO MODO DESTRO OU ESQUERDINO Por predefinição, o descanso do polegar está configurado no MODO DESTRO. Para ajustá-lo para o MODO ESQUERDINO: A) Remova a tampa direita do parafuso (3) situada no lado direito da coluna. B) Com uma chave de fendas pequena, desaperte e remova por completo o parafuso comprido que está...
- Page 81 D) Posicione o descanso para o polegar esquerdo (10) (incluído à parte na caixa do joystick) no lado direito da coluna. E) Posicione o parafuso comprido no orifício existente no lado esquerdo da coluna e aperte- o completamente a fim de fixar o descanso para o polegar esquerdo no sítio. F) Posicione a tampa esquerda do parafuso (11) (incluída à...
- Page 82 INSTALAÇÃO NO PC 1. Ligue o conector PC USB (9) numa das portas USB do computador. O Windows XP ou Vista detecta automaticamente o novo dispositivo. 2. Os controladores são instalados automaticamente. Siga as instruções que surgirem no ecrã para concluir a instalação. 3.
-
Page 83: Resolução De Problemas E Aviso
RESOLUÇÃO DE PROBLEMAS E AVISO • O meu joystick não funciona correctamente ou parece estar mal calibrado: - Encerre o computador e desconecte o joystick; em seguida, volte a ligar o computador, conecte novamente o joystick e reinicie o jogo. - Quando ligar o joystick: coloque sempre a coluna e o leme de direcção nas respectivas posições centrais, e evite movê-los (para evitar problemas de calibração). -
Page 84: Suporte Técnico
A Guillemot Corporation S.A. (“Guillemot”) garante ao consumidor, a nível mundial, que este produto Thrustmaster está isento de defeitos de material e de falhas de fabrico durante um período de dois (2) anos a partir da data de compra original. Se o produto apresentar algum defeito dentro do período da garantia, contacte imediatamente o Suporte Técnico,... -
Page 85: Direitos De Autor
DIREITOS DE AUTOR © 2008 Guillemot Corporation S.A. Todos os direitos reservados. Thrustmaster® é uma marca registada da Guillemot Corporation S.A. Windows®, XP e Vista são marcas registadas da Microsoft Corporation nos Estados Unidos e/ou noutros países. Todas as outras marcas comerciais e nomes de marcas são por este meio reconhecidas e pertencem aos respectivos... -
Page 86: Технические Характеристики
Совместим с ПК Руководство пользователя ТЕХНИЧЕСКИЕ ХАРАКТЕРИСТИКИ Цифровое пусковое устройство Вращающийся болт опоры с Многонаправленный миниджойстик положениями для правой и левой руки «Вид обзора» Опора для большого пальца правой Крепление накладки для правой руки руки Разъем USB для ПК Руль направления с поворотной Опора... - Page 87 ДОПОЛНИТЕЛЬНО О ДЖОЙСТИКЕ УНИКАЛЬНАЯ ТОЧНАЯ ТЕХНОЛОГИЯ: – «H.E.A.R.T™ точная технология гальваномагнитного эффекта» Джойстик T-16000M разработан на основе уникальной технологии (не имеющей аналогов в мире игровых джойстиков), которая обеспечивает высокий уровень точности, благодаря таким элементам: - трехмерный (с гальваномагнитным эффектом) магнитный сенсор на рукоятке, с предельным...
- Page 88 Система для правой и левой руки Джойстик T-16000M оснащен специальной системой для правой и левой руки, которая позволяет идеально приспособить устройство как для правшей, так и для левшей. Для этого необходимо выполнить настройку 3 элементов: кнопок на панели, опоры для руки и опоры для большого пальца. НАСТРОЙКИ...
- Page 89 Настройки кнопок В режимЕ правой руки Для настройки 12 кнопок, расположенных на панели, в режиме правой руки, выставьте многопозиционный переключатель (12), расположенный под основой джойстика, в режим «ПРАВАЯ РУКА»: НАСТРОЙКА РЕЖИМА ПРАВОЙ РУКИ 4/12...
- Page 90 НАСТРОЙКА КНОПОК В РЕЖИМЕ ЛЕВОЙ РУКИ Для настройки 12 кнопок, расположенных на панели, в режиме левой руки, выставьте многопозиционный переключатель (12), расположенный под основой джойстика, в режим «ЛЕВАЯ РУКА»: НАСТРОЙКА РЕЖИМА ЛЕВОЙ РУКИ 5/12...
- Page 91 ОТЛАДКА ОПОРЫ ДЛЯ ПРАВОЙ И ЛЕВОЙ РУКИ Опора руки по умолчанию задана в РЕЖИМЕ ПРАВОЙ РУКИ. Для отладки опоры в РЕЖИМЕ ЛЕВОЙ РУКИ выполняйте указанные ниже действия. A) С помощью небольшой отвертки осторожно раскрутите вращающийся болт, который фиксирует опору руки (7) и расположен с левой стороны от опоры. B) Поверните...
- Page 92 ОТЛАДКА ОПОРЫ БОЛЬШОГО ПАЛЬЦА ДЛЯ РЕЖИМА ПРАВОЙ И ЛЕВОЙ РУКИ Опора для большого пальца по умолчанию задана в РЕЖИМЕ ПРАВОЙ РУКИ. Для отладки опоры в РЕЖИМЕ ЛЕВОЙ РУКИ выполняйте указанные ниже действия. A) Снимите крепление накладки для правой руки (3), расположенное с правой стороны от...
- Page 93 D) Расположите опору для большого пальца левой руки (10) (прилагается к комплекту для джойстика отдельно) с правой стороны от рукоятки. E) Поместите удлиненный болт в отверстие с левой стороны от рукоятки и плотно закрутите его, чтобы зафиксировать опору для большого пальца левой руки. F) Расположите...
-
Page 94: Важное Примечание
ПК УСТАНОВКА НА ПК 1. Подключите разъем USB (9) к одному из USB-портов компьютера. Операционные системы Windows XP или Vista автоматически обнаружат новое устройство. 2. Драйверы устанавливаются автоматически. Для завершения процесса установки следуйте инструкциям на экране. 3. Выберите Start (Пуск)/Settings (Настройка)/Control Panel (Панель управления) и двойным... - Page 95 УСТРАНЕНИЕ НЕИСПРАВНОСТЕЙ И ПРЕДУПРЕЖДЕНИЕ • Джойстик работает неправильно или не калибровка не выполнена должным образом: - выключите компьютер и отсоедините джойстик, затем снова включите компьютер, подключите джойстик и запустите игру. - при подключении джойстика всегда располагайте рукоятку и руль в центральном положении...
-
Page 96: Техническая Поддержка
ИНФОРМАЦИЯ О ГАРАНТИИ Во всех странах, корпорация Guillemot Corporation S.A. (“Guillemot”) дает гарантию на изделия Thrustmaster в том, что эти изделия не имеют дефектов материалов или производства на (2) года от даты покупки. При обнаружении дефекта в течение гарантийного срока немедленно свяжитесь со службой технической поддержки, которая... -
Page 97: Авторское Право
АВТОРСКОЕ ПРАВО © 2008 Guillemot Corporation S.A. Все права защищены. Thrustmaster® является зарегистрированной торговой маркой Guillemot Corporation S.A. Windows®, XP и Vista являются зарегистрированными торговыми марками Microsoft Corporation в Соединенных Штатах Америки и/или других странах. Все прочие торговые марки и...
Need help?
Do you have a question about the T.16000M and is the answer not in the manual?
Questions and answers