Table of Contents
Advertisement
Available languages
Available languages
Quick Links
Advertisement
Table of Contents

Subscribe to Our Youtube Channel
Related Manuals for Everlasting TNV Series


Summary of Contents for Everlasting TNV Series
- Page 1 Manuale d’uso e manutenzione Manuale d’uso e manutenzione Use and maintenance manual Use and maintenance manual ARMADIO REFRIGERATO REFRIGERATED CABINET PROFESSIONAL PROFESSIONAL CLASSIC CLASSIC ROLL-IN / THROUGH ROLL-IN / THROUGH PASTRY - ICE PASTRY - ICE Rev.4-22 Matricola / Serial number...
- Page 2 ITALIANO Grazie per aver scelto questo prodotto. Leggere attentamente le avvertenze contenute nel presente manuale in quanto forniscono importanti indicazioni riguardanti la sicurezza, d’uso e di manutenzione. Conservare con cura questo manuale per ogni ulteriore consultazione dei vari operatori. In alcune parti del manuale è presente il simbolo indicante una avvertenza importante da rispettare ai fini della sicurezza.
- Page 3 ITALIANO Di seguito sono elencate le principali norme di sicurezza generali: - Non utilizzare o inserire apparecchi elettrici all’interno dei comparti refrigerati se non del tipo consigliato dal produttore - Non toccare l’armadio frigorifero avendo mani o piedi umidi o bagnati - Non usare l’armadio frigorifero a piedi nudi - Non inserire cacciaviti od altro tra le protezioni o le parti in movimento - Non tirare il cavo di alimentazione per scollegare l’armadio frigorifero dalla rete di alimentazione...
-
Page 4: Capitolo 2 Pulizia Del Frigorifero
ITALIANO 1.2 Indicazioni sulle operazioni di emergenza in caso di incendio - scollegare l’armadio frigorifero dalla presa elettrica oppure interrompere l’alimentazione generale - non utilizzare getti d’acqua - usare estintori a polvere o CO2 CAPITOLO 2 PULIZIA DEL FRIGORIFERO Poiché nell’armadio frigorifero vanno conservati dei prodotti alimentari è necessaria l’operazione di pulizia ai fini dell’igiene e della tutela della salute. -
Page 5: Capitolo 4 Manutenzione Preventiva
ITALIANO CAPITOLO 3 VERIFICHE PERIODICHE DA ESEGUIRE Di seguito vengono elencati i punti o i gruppi dell’armadio frigorifero che necessitano di verifiche periodiche: - integrità ed efficienza delle guarnizioni delle porte - integrità delle griglie a contatto con gli alimenti - integrità... - Page 6 ITALIANO CAPITOLO 6 DIAGNOSTICA Nel caso si verificassero malfunzionamenti o anomalie, verificare la tabella sotto riportata prima di sollecitare l’intervento di un tecnico. DESCRIZIONE GUASTO POSSIBILI CAUSE RIMEDIO l’armadio frigorifero non si accende manca tensione elettrica verificare spina, presa, fusibili, linea altro contattare assistenza tecnica il gruppo frigorifero non parte...
- Page 7 ITALIANO Di seguito vengono elencate le misure adottate per la protezione contro altri rischi: - energia elettrica: L’armadio frigorifero è stato progettato, costruito ed equipaggiato in modo da prevenire i rischi elettrici, nel rispetto della normativa specifica vigente - rumore: L’armadio frigorifero è stato progettato e costruito in modo tale che i rischi dovuti all’emissione di rumore siano ridotti al livello minimo 8.1 dispositivi di sicurezza adottati E’...
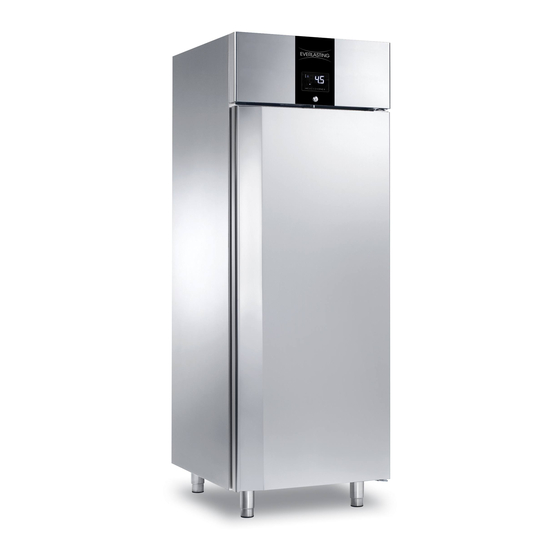
- Page 8 ITALIANO CAPITOLO 9 COMANDI 9.1 Descrizione dei comandi e pulsanti ( Fig. 3) Il pannello di comando è un termoregolatore digitale per il freddo ed è provvisto di 6 pulsanti con funzioni specifiche: HACCP AUX 1 AUX 2 Fig.3 I pulsanti comando di cui è dotato l’armadio frigorifero sono: Display visore di temperatura e dello stato dell’armadio frigorifero.
- Page 9 ITALIANO Legenda segnalazioni LED e indicazioni: ACCESO SPENTO LAMPEGGIANTE - protezione compressore attiva, compressore fermo o in attesa Compressore in funzione compressore fermo - impostazione setpoint in corso Ventilatore dell’evapora- ventilatore dell’evaporatore ventilatore in attesa di accen- tore acceso spento sione luce cella accesa da ingresso Luce cella accesa...
- Page 10 ITALIANO 9.2 INDICAZIONI RELATIVE ALL’USO 9.2.1 Avviamento Prima di effettuare l’avviamento dell’armadio frigorifero è necessario verificare che il collegamento elettrico e l’allacciamento siano stati realizzati come previsto nel capitolo 15. Sequenza d’avviamento (fig.3). ② per 2 secondi il display si accenderà e l’armadio sarà in funzione premere il tasto on-off ►...
- Page 11 ITALIANO 9.2.4 Impostazione temperatura (fig.3) Con tastiera sbloccata (cap.9.2.6) per impostare il set di temperatura desiderato all’interno dei parametri di riferimento procedere come segue: ① Premere il tasto SET e rilasciare ► ④ ③ Scorrere coi tasti UP o DOWN entro 15 secondi e impostare il valore ►...
- Page 12 ITALIANO 9.2.6 Sblocco tastiera (fig.3) Premere per 1 secondo un tasto: il display visualizzerà la label “UnL”. Per bloccare ripetere ► l’operazione o non operare per 30 secondi. 9.2.7 Accensione/spegnimento della luce (fig.3) L’accensione e lo spegnimento della luce sono automatiche all’apertura e chiusura della porta. ►...
- Page 13 ITALIANO Allarmi: allarme bassa temperatura allarme alta temperatura allarme porta aperta allarme power failure ① Toccare il tasto SET ► Il display visualizzerà in sequenza ► Esempio di informazioni riguardanti un allarme di alta temperatura: Tabella sequanza dati il valore critico (temp. della cella/temp. prodotto calcolata) è stato di 8.0 °C/°F l’allarme si è...
- Page 14 ITALIANO 10.5 Telegestione e controllo remoto (Opt.) E’ presente sul termoregolatore una porta TTL MODBUS di collegamento al modulo ed un link per l’utilizzo dell’app EVconnect, EPoCA o BMS. (vedi manuale telegestione e controllo remoto) 10.6 Overcooling (superfreddo) ④ E’ possibile attivare la funzione overcooling premendo il tasto UP Il nuovo set point sarà...
-
Page 15: Capitolo 14 Trasporto E Movimentazione
ITALIANO CAPITOLO 14 TRASPORTO E MOVIMENTAZIONE Il trasporto e la movimentazione dell’armadio frigorifero devono esclusivamente avvenire mantenendo la posizione verticale, rispettando le indicazioni poste sull’imballo. Il fabbricante si esime da qualsiasi responsabilità per inconvenienti dovuti al trasporto effettuato in condizioni diverse da quelle specificate in precedenza. Gli accessori a corredo dell’armadio frigorifero ( guide, griglie, vaschette, vassoi ) sono confezionati a parte e posizionati all’interno del mobile. - Page 16 ITALIANO - rimuovere eventuali accessori a corredo esterni Rimozione del basamento in legno (fig.4): inclinare lateralmente l’armadio frigorifero e svitare le due viti autofilettanti, sollevare e rimuovere il basamento. Fig.4 utilizzare guanti di protezione nel maneggiare l’imballo in legno e il basamento in legno. La presenza di schegge potrebbe causare danni alle mani - rimuovere la pellicola in P.V.C.
- Page 17 ITALIANO 14.2 Armadi REM ( Fig. 7 ) 3x1,5 max 10Amp. Fig.7 - posizionare l’armadio frigorifero come descritto sopra ( Fig. 5 ) - predisporre i due tubi che fuoriescono dall’armadio frigorifero (liquido mandata ø 6 mm, aspirazione ø 10 mm TNBV - ø 12 mm BTV ) per l’allacciamento alle rispettive tubazioni - collegare le tubazioni dell’unità...
- Page 18 ITALIANO CAPITOLO 16 OPERAZIONI DI MESSA A PUNTO E’ importante, per prevenire errori ed incidenti, eseguire una serie di controlli prima di avviare l’armadio frigorifero allo scopo di individuare eventuali danni subiti nelle operazioni di trasporto, movimentazione e allacciamento. Controlli da effettuare: - verificare l’integrità...
- Page 19 ENGLISH Thank you for choosing this product. Please read the warnings contained in this manual carefully, as they provide important information regarding safe operation and maintenance. Make sure to keep this manual for any future reference by the various operators. In some parts of the manual, the symbol appears, indicating an important warning that must be observed for safety purposes.
- Page 20 ENGLISH The main general safety standards are listed below: - Do not use or place electrical devices inside the refrigerated compartments if they are not of the type recommended by the manufacturer - Do not touch the refrigerated cabinet with damp or wet hands or feet - Do not use the refrigerated cabinet barefoot - Do not insert screwdrivers or other objects between the guards or moving parts - Do not pull the power cord to unplug the refrigerated cabinet from the electricity network...
-
Page 21: Chapter 2 Cleaning The Refrigerator
ENGLISH 1.2 Information on emergency operations in the event of fire - disconnect the refrigerated cabinet from the electrical outlet or cut off the main power supply - do not use water jets - use dry chemical or CO2 extinguishers CHAPTER 2 CLEANING THE REFRIGERATOR Since the refrigerated cabinet will be used to store food, cleaning is necessary for hygiene and health protection purposes. - Page 22 ENGLISH CHAPTER 3 PERIODIC CHECKS TO BE CARRIED OUT The following are the points or units of the refrigerated cabinet that require periodic checks: - integrity and efficiency of door seals - integrity of the grilles in contact with food - integrity of the fixing hinges of the doors - integrity of the power cord 3.1 PRECAUTIONS IN CASE OF LONG PERIODS OF INACTIVITY...
- Page 23 ENGLISH CHAPTER 6 TROUBLESHOOTING Problems may occur, in the refrigerated cabinet, identified as shown in the table: TROUBLE DESCRIPTION POSSIBLE CAUSES HOW TO REPAIR IT the refrigerated cabinet does not turn no power supply check the plug, socket, fuses, line other contact technical support the refrigeration unit does not start...
- Page 24 ENGLISH The following are the measures taken to protect against other risks: - electricity: The refrigerated cabinet has been designed, built and equipped so as to prevent risks from electricity, in accordance with the specific legislation in force - noise: The refrigerated cabinet has been designed and built in such a way that risks resulting from the emission of airborne noise are reduced to the minimum level 8.1 safety devices adopted It is absolutely forbidden (Fig.
-
Page 25: Chapter 9 Controls
ENGLISH CHAPTER 9 CONTROLS 9.1 Description of the controls and buttons (Fig. 3) The control panel has a digital temperature controller for cold and has 6 buttons with specific functions: HACCP AUX 1 AUX 2 Fig.3 The control buttons with which the refrigerated cabinet is equipped are: Display display of temperature and state of the refrigerated cabinet. - Page 26 ENGLISH Legend for LED signals and indications: FLASHING - compressor protection active, Working compressor Idle compressor Idle or on-hold compressor - setpoint setting in progress Evaporator fan on evaporator fan turned off Fan waiting for start Turned-on chamber light by Cell light on luce cella spenta microswitch digital input...
- Page 27 ENGLISH 9.2 INSTRUCTIONS FOR USE 9.2.1 Start-up Before starting up the refrigerated cabinet, make sure that the electrical connection and the connection have been made as indicated in Chapter 15. Check the presence of voltage, icon 20 on and display off. Start-up sequence (fig.3).
- Page 28 ENGLISH 9.2.4 Setting the temperature (Fig. 3) With unlocked keyboard (chapter 9.2.6) to set the desired set temperature within the parameters of reference, proceed as follows: ① Push and release the SET ► ④ ③ Scroll with the UP or DOWN keys within 15 seconds to set the value ►...
- Page 29 ENGLISH 9.2.6 Keypad lock (fig.3) Push any key for 1 second: label “UnL” will be displayed. Repeat the operation or do not operate ► for 30 seconds to lock. 9.2.7Turning the light on / off (fig. 3) Light is turned on and off automatically when the door is opened and closed. Touch the LIGHT ►...
- Page 30 ENGLISH For example: low temperature alarm high temperature alarm door open alarm power failure alarm ① Touch the key SET ► The display will sequentially show ► Example of information relating to high temperature alarm: Data sequence chart the critical value (cell temp. / calculated product temp.) was 8.0 ° C / ° F the alarm occurred in 2020 the alarm occurred in March the alarm occurred on March 26, 2020...
-
Page 31: Chapter 12 Noise Level
ENGLISH 10.6 Overcooling It is possible to activate the overcooling function by pushing the UP key. The new set point will be the configured set minus 3°C (R6 parameter), i.e. the cabinet cooling will stop when internal temperature will reach -1°C. This function lasts 60 miutes (R7 parameter), after which the configured setpoint will be resumed. -
Page 32: Chapter 14 Transport And Handling
ENGLISH CHAPTER 14 TRANSPORT AND HANDLING The transport and handling of the refrigerated cabinet must only be done while maintaining the vertical position, observing the markings on the packaging. The manufacturer disclaims any liability for problems resulting from transport performed under conditions other than those specified above. - Page 33 ENGLISH Fig.4 use protective gloves when handling the wooden packaging and the wooden base. The presence of splinters may cause damage to your hands - remove the PVC film applied as a protection to the outer surfaces of the refrigerated cabinet - position the refrigerated cabinet using a level with possible adjustment of the feet of the metal base (Fig.
-
Page 34: Chapter 15 Electrical Wiring And Connections
ENGLISH 14.2 REM cabinets ( Fig. 7 ) 3x1,5 max 10Amp. Fig.7 - position the refrigerated cabinet as described above (Fig. 5) - prepare the two tubes that come out of the refrigerated cabinet (ø 6 mm outlet, ø 10 mm TNBV - ø 12 mm BTV) for the connection to the respective pipes - connect the pipes of the condensing unit to the pipes of the refrigerated cabinet - create a vacuum and then carry out the loading of the coolant... -
Page 35: Chapter 16 Installation Operations
ENGLISH CHAPTER 16 INSTALLATION OPERATIONS It is important, in order to prevent errors and accidents, to perform a series of checks before starting up the refrigerated cabinet in order to identify any damage incurred during transport, handling and connection. Checks to be performed: - check the integrity of the power cord (it must not have suffered abrasions or cuts) - check the solidity of the legs, door hinges, shelf supports - check the integrity of the internal and external parts (pipes, heating elements, fans, electrical... - Page 36 ATTENZIONE! ISTRUZIONI RISERVATE A PERSONALE TECNICO AUTORIZZATO Si avvisano gli utenti che qualsiasi intervento eseguito da personale non tecnico o non autorizzato produrrà la decadenza delle condizioni di garanzia. WARNING! INSTRUCTIONS STRICTLY RESERVED TO AUTHORIZED TECHNICAL PERSONNEL Every intervention executed by a non authorized technical personnel implies a warranty decay.
-
Page 37: Manutenzione Programmata
MANUTENZIONE PROGRAMMATA Conteggio delle ore di funzionamento compressore Lo strumento è in grado di memorizzare fino a 99900 ore di funzionamento compressore, per programmare una manutenzione dopo le ore stabilite dal parametro C10. Alla scadenza delle ore programmate si accenderà l’icona di allarme sul display. Per visualizzare le ore di funzionamento del compressore procedere come segue: ③... - Page 38 PARAMETRI DI CONFIGURAZIONE agg.03-22 PROFESSIONAL - CLASSIC - ROLL IN NB: sono modificabili dal servizio tecnico solamente i parametri evidenziati, gli altri solo dopo consultazione/autorizzazione del nostro servizio tecnico. PAR. TNBV SETPOINT MIN... MAX setpoint r1... r2 PAR. DEF. DEF. INGRESSI ANALOGICI MIN...
- Page 39 soglia evaporazione per conteggio intervallo -99... 99 °C/°F sbrinamento automatico abilita allarme timeout sbrinamento 0 = no 1 = sì tempo consecutivo compressore on per -20... 99 min se valori negativi, durata resistenze gocciola- sbrinamento a gas caldo mento on tempo pre-gocciolamento per sbrinamento a 0...
-
Page 40: Ingressi Digitali
tempo ventole evaporatore off in bassa 0... 240 s umidità tempo ventole evaporatore on in bassa 0... 240 s umidità PAR. DEF. DEF. INGRESSI DIGITALI MIN... MAX. 0 = disabilitato 1 = compressore + ventole evaporatore off 2 = ventole evaporatore off 3 = luce cella on 4 = compressore funzione ingresso micro porta + ventole evap. - Page 41 PAR. DEF. DEF. ENERGY SAVING (se r5 = 0) MIN... MAX. durata massima energy saving 0... 999 min PAR. DEF. DEF. ENERGY SAVING IN TEMPO REALE (se r5 = 0) MIN... MAX. orario energy saving 0... 23 h durata massima energy saving 0...
- Page 42 PARAMETRI DI CONFIGURAZIONE agg.03-22 PASTRY - ICE - ICE ST NB: sono modificabili dal servizio tecnico solamente i parametri evidenziati, gli altri solo dopo consultazione/autorizzazione del nostro servizio tecnico. PAR. TNBV BT-ST SETPOINT MIN... MAX setpoint r1... r2 PAR. DEF. DEF.
- Page 43 0 = ore dispositivo on 1 = ore compressore on 2 = ore modalità conteggio intervallo sbrinamento temperatura evaporatore < d9 3 = adattativo (se P4 = 4, ore dispositivo on) 4 = in tempo reale soglia evaporazione per conteggio intervallo -99...
- Page 44 ritardo ventole condensatore off da com- 0... 240 s se P4 ≠ 1 pressore off tempo ventole evaporatore off in bassa 0... 240 s umidità tempo ventole evaporatore on in bassa 0... 240 s umidità PAR. DEF. DEF. DEF. INGRESSI DIGITALI MIN...
- Page 45 abilita orologio 0 = no 1 = sì PAR. DEF. DEF. DEF. ENERGY SAVING (se r5 = 0) MIN... MAX. durata massima energy saving 0... 999 min ENERGY SAVING IN TEMPO REALE (se r5 PAR. DEF. DEF. DEF. MIN... MAX. = 0) orario energy saving 0...
- Page 46 PLANNED MAINTENANCE Compressor working hour tally The device can store up to 9999 compressor working hours, to schedule maintenance after the hours set by parameter C10. When the scheduled hours expire, the alarm icon on the display will turn on. Proceed as follows to visualize the compressor working hours: ③...
- Page 47 Parameters agg.03-22 PROFESSIONAL - CLASSIC - ROLL IN NB only the highlighted parameters can be modified by maintenance service. The other parameters can be modified only after reference/authorization by our technical department, PAR. TNBV SETPOINT MIN... MAX setpoint r1... r2 PAR.
-
Page 48: Temperature Alarms
enable defrost timeout alarm 0 = no 1 = yes consecutive compressor on time for hot gas -20 ... 99 min if negative values, dripping resistance duration defrost pre-dripping time for hot gas defrosting 0 ... 99 min 0 ... 999 min if compressor on + evaporator temperature <d22 adaptive defrost interval 0 = manual only adaptive defrost threshold (relative to optimal... - Page 49 0 = disabled 1 = energy saving 2 = alarm iA 3 = alarm iSd 4 = multifunction input function load 1 from key on 5 = load 2 from key on 6 = switch on / off device 7 = alarm LP 8 = alarm C1t 9 = alarm C2t multifunction input activation 0 = with closed contact 1 = with open contact 0 ...
- Page 50 enable ON / STAND-BY button 0 = no 1 = yes enable keyboard lock (default 0 in models with 0 = no 1 = yes open-frame user interface) capacitive keyboard sensitivity (available in 60 ... 120 60 = very sensitive models for back panel installation) password -99...
- Page 51 Parameters agg.03-22 PASTRY - ICE - ICE ST NB only the highlighted parameters can be modified by maintenance service. The other parameters can be modified only after reference/authorization by our technical department, PAR. TNBV BT-ST SETPOINT MIN... MAX setpoint r1... r2 PAR.
- Page 52 evaporation threshold for automatic defrost -99... 99 °C/°F interval count enable defrost timeout alarm 0 = no 1 = yes consecutive compressor on time for hot gas -20 ... 99 min if negative values, dripping resistance duration defrost pre-dripping time for hot gas defrosting 0 ...
- Page 53 enable door open alarm storage (not availa- 0 = no 1 = yes if i2 ≠ -1 and after i2 ble on models without clock) 0 = disabled 1 = energy saving 2 = alarm iA 3 = alarm iSd 4 = multifunction input function load 1 from key on 5 = load 2 from key on 6 = switch on / off device 7 = alarm LP 8 = alarm C1t 9 = alarm C2t...
- Page 54 PAR. DEF. DEF. DEF. SAFETY MIN ... MAX. enable ON / STAND-BY button 0 = no 1 = yes enable keyboard lock (default 0 in models 0 = no 1 = yes with open-frame user interface) capacitive keyboard sensitivity (available in 60 ...
- Page 55 MODELLI STANDARD Interfaccia seriale - Serial interface TTL / RS-485 STANDARD MODELS Smartphone Tablet OPTIONAL TTL-MODBUS ALARM LI RS Solo mod. sbrin. GAS CALDO hot gas defrost models only MODELLI RELE’ COMPRESSORE Interfaccia seriale - Serial interface TTL / RS-485 COMPRESSOR RELAY MODELS Smartphone Tablet...
- Page 56 BL - Blue BI - Bianco BI - White GV - Giallo Verde GV - Yellow Green EVERLASTING s.r.l. 46029 SUZZARA (MN) - ITALY - Strada Nazionale della Cisa km.161 Tel.0376/521800 (4 linee r.a.) - Telefax 0376/521794 http://www.everlasting.it - E-mail:everlasting@everlasting.it...
Need help?
Do you have a question about the TNV Series and is the answer not in the manual?
Questions and answers