
Subscribe to Our Youtube Channel
Related Manuals for Everlasting BAKING CAB FL Series


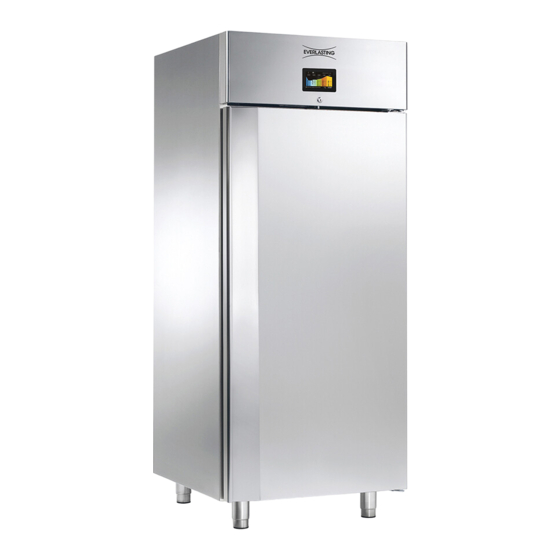
Summary of Contents for Everlasting BAKING CAB FL Series
- Page 1 Use and maintenance manual REFRIGERATED CABINET REFRIGERATED TABLE RETARDER-PROOFER DOUGH-RETARDER Rev.10-6...
- Page 2 ENGLISH Thank you for choosing this product. Please read the warnings contained in this manual carefully, as they provide important information regarding safe operation and maintenance. Make sure to keep this manual for any future reference by the various operators. In some parts of the manual, the symbol appears, indicating an important warning that must be observed for safety purposes.
- Page 3 ENGLISH The main general safety standards are listed below: - Do not use or place electrical devices inside the refrigerated compartments if they are not of the type recommended by the manufacturer - Do not touch the the retarder-proofer/dough retarder refrigerated cabinet and refrigerated table with damp or wet hands or feet - Do notuse the the retarder-proofer/dough retarder refrigerated cabinet and refrigerated table barefoot - Do not insert screwdrivers or other objects between the guards or moving parts...
-
Page 4: Chapter 2 Cleaning
ENGLISH CHAPTER 2 CLEANING Since the retarder-proofer/dough retarder refrigerated cabinet and refrigerated table will be used to store food, cleaning is necessary for hygiene and health protection purposes. The cleaning of the retarder-proofer/dough retarder refrigerated cabinet and refrigerated table have already been carried out at the factory. - Page 5 ENGLISH CHAPTER 3 PERIODIC CHECKS TO BE CARRIED OUT IMPORTANT: The following are the points or units of the retarder-proofer/dough retarder refrigerated cabinet and refrigerated table that require periodic checks: - integrity and efficiency of door seals - integrity of the grilles in contact with food - integrity of the fixing hinges of the doors - integrity of the power cord 3.1 PRECAUTIONS IN CASE OF LONG PERIODS OF INACTIVITY...
- Page 6 ENGLISH CHAPTER 6 TROUBLESHOOTING Problems may occur, in the retarder-proofer/dough retarder refrigerated cabinet and refrigerated table identified as shown in the table: TROUBLE DESCRIPTION POSSIBLE CAUSES HOW TO REPAIR IT the retarder-proofer/dough retarder no power supply check the plug, socket, fuses, line refrigerated cabinet and refrigerated other fuses, line...
- Page 7 ENGLISH The following are the measures taken to protect against other risks: - electricity: The the retarder-proofer/dough retarder refrigerated cabinet and refrigerated table have been designed, built and equipped so as to prevent risks from electricity, in accordance with the specific legislation in force - noise: The retarder-proofer/dough retarder refrigerated cabinet and refrigerated table have been designed and built in such a way that risks resulting from the emission of airborne noise are reduced to the minimum level...
-
Page 8: Useful Suggestions
ENGLISH USEFUL SUGGESTIONS Before starting a RETARDER-PROOFING cycle it is advisable to pre-cool the empty cell at -5 ° C, thus allowing more effective action of the Retarder-proofing action during the introduction of the product (see par.10.6 p. 29) For cycles longer than 48 H increase yeast of 0.5% speeding as possible the loading phase of the product. -
Page 9: Automatic Cycle
ENGLISH AUTOMATIC CYCLE An automatic retarded proofing process consists of 5 steps providing different temperatures, relative humidity, fans speed and different duration which are carried out in sequence as follows: 1. COOLING Phase The block phase is the first phase of the automatic cycle. Temperature adjustment : ACTIVE AND ADJUSTABLE ►... -
Page 10: Chapter 9 Controls
ENGLISH CHAPTER 9 CONTROLS Description of control Panel: The Control Panel consists of a digital capacitive-type temperature controller for coldness with colour 3,5” TFT supplied with user-friendly icons: The Control Panel is supplied with the following buttons: ON / OFF It allows to change the controller’s status MENU It allows to open the pop-up window containing the options for the current screen HOME It allows to go back to the pre-selection screen at any time, cancelling any pro- cessing selected programme. -
Page 11: Starting Process
ENGLISH Active keys are the backlit keys only. 9.2 INSTRUCTIONS FOR USE 9.2.1 Starting process Before starting the Retarder-Proofer Cabinet you need to check if the electrical connections have been made according to what stated in Chapter 14. LOADING... Connect the machine to the power supply: the display will switch on completely for 10’’, then ►... - Page 12 ENGLISH 9.2.2 Clock setting: set date and present time The first operation to be carried out is setting the clock to the present time as follows: Press the MENU key (2) , ► Select with the UP-DOWN keys (9-10) the ►...
- Page 13 ENGLISH 9.2.3 Language setting Proceed as follows: Press the MENU key (2), ► Select with the UP-DOWN keys (9-10) the ► menu SERVICE item and press the SET key (11) OPTIONS LIGHT 22/12/14 18:15 MANUAL DEFROST ALARM LIST INTERNAL VALUES SERVICE Select with the UP-DOWN keys (9-10) the ►...
-
Page 14: Chapter 10 Operation
ENGLISH CHAPTER 10 OPERATION Main menu In the pre-setting page there is the list of the available functions as well as the following data: date, time and cell internal temperature. The 5 “interactive” keys allow you to select: MANUAL CYCLES: i.e. the selection, the setting-up and the implementation of a manual cooling or heating cycle. - Page 15 ENGLISH 10.1 Setting-up and implementation of a MANUAL COOLING or HEATING cycle From this menu you may select all the phases needed to carry out a manual COOLING or HEATING cycle. 10.2 Setting up and running a cycle REFRIGERATION MANUAL: Press key MANUAL (6) ►...
- Page 16 ENGLISH You may view the following list of OPTIONS by pressing the MENU key (2) during a MANUAL COOLING cycle: - SETPOINT - ALARMS LIST - INTERNAL VALUES - MANUAL DEFROSTING (not to be carried out if not necessary) - LIGHT To visualize the defined SETPOINT during a ►...
- Page 17 ENGLISH The screen will display the current alarms list ► ALARM LIST Press the UP-DOWN keys (9-10) to scroll throu- ► Error Pr1 gh the alarms, if the alarm is ON it is active, if it is Error Pr2 Error Pr3 OFF it is not active.
- Page 18 ENGLISH 10.3 Setting-up and implementation of a MANUAL HEATING cycle: Press Key MANUAL (6) ► Press one of the three right keys (9-10-11) to ► execute a MANUAL HEATING cycle Refrigeration Heating Press the UP-DOWN keys (9-10) and select ► the TEMPERATURE parameters.
- Page 19 ENGLISH You may view the following list of OPTIONS by pressing the MENU key (2) during a MANUAL HE- ► ATING cycle: - SETPOINT - ALARMS LIST - INTERNAL VALUES - LIGHT Press the MENU key (2) to display the ►...
- Page 20 ENGLISH The display will show the current alarms list ► ALARM LIST Press the UP-DOWN keys (9-10) to scroll throu- ► Error Pr1 Error Pr2 gh the alarms list, if an alarm is ON it is active. Error Pr3 Error Pr4 Error AH When the operation is over either press the ESC ►...
- Page 21 ENGLISH 10.4 Setting-up and implementation of an AUTOMATIC cycle : The selection of the AUTOMATIC menu allows you to set up a complete retarded proofing process. Press key AUTOMATIC (9) ► Press the + button or the minus button to set ►...
-
Page 22: Temperature Values
ENGLISH Press key (8) to set up the AUTOMATIC ► starting cycle parameters. PHASE -5 °C 04:32 h:m 100 % Press the SET key (10) to modify the parame- ► ters relative to the first “BLOCK” phase of the automatic RETARDED PROOFING CYCLE. PHASE -5 °C - Temperature... - Page 23 ENGLISH Press the SET key (10) to modify the parame- ► ters relative to the third “PROOFING” phase of the automatic RETARDED PROOFING cycle. PHASE - Temperature °C 100 % - Humidity 02:00 h:m 100 % - Duration Press the - and + keys (8-11) to modify values ►...
- Page 24 ENGLISH To save the new set cycle press the ESC key (4) ► END CYCLE Press the SAVE DATA button (11) ► MON 30/12/13 12:00 Press the DOWN key (9) to save the program- ► me with a name already existing in the list then PROGRAMS press the SAVE key (10) or save the programme P01 BREAD 100G...
- Page 25 ENGLISH The display will show the status of the current ► PHASE, the end-of-cycle date and the tempera- END CYCLE THU 08/01 17:47 ture. To deactivate the DELAYED BAKING phase PHASE ► 25 °C press the (8) key At the end of the program the machine stops au- tomatically in STAND-BY During the implementation of an AUTOMATIC CYCLE press the MENU key (2) to view the following options:...
- Page 26 ENGLISH Press the MENU key (2) to view the ALARMS ► LIST during a working AUTOMATIC CYCLE. OPTIONS SETPOINT ALARM LIST Select with the UP-DOWN keys (9-10) the ► INTERNAL VALUES ALARMS LIST item then press the SET key (11) END OF PHASES TIME MANUAL DEFROST LIGHT...
- Page 27 ENGLISH Press the MENU key (2) to view the END-OF- ► PHASES TIME during a running AUTOMATIC OPTIONS CYCLE. SETPOINT ALARM LIST INTERNAL VALUES Press the UP-DOWN keys (9-10) to select the END OF PHASES TIME ► MANUAL DEFROST END-OF-PHASES TIME then press the SET key LIGHT 15:14 07/01/15...
- Page 28 ENGLISH 10.5 PROGRAMS: The PROGRAMS menu allows you to select a retarded proofing cycle among the 10 available programme locations. Press key PROGRAMS (7) ► Press the UP-DOWN keys (9-10) to scroll down ► the list PROGRAMS P01 BREAD 100G P02 BREAD 300G Press the SET key (11) to select the desired ►...
- Page 29 ENGLISH Retarded proofing process already stored ► As an example it has been stored 3 programs : Bread 100 gr., Bread 300 gr., Bread 500 gr. P01 - Bread 100 gr. PHASE 1 PHASE 2 PHASE 3 PHASE 4 PHASE 5 COOLING STORAGE PROOFING...
- Page 30 ENGLISH 10.6 PRE-COOLING CYCLE: The purpose of the pre-cooling cycle is to lead the cell to a defined temperature before selecting and starting a retarded proofing cycle. Once the pre-cooling temperature is reached , the buzzer sounds in an intermittent manner indicating that the machine is ready to perform a cycle.
- Page 31 ENGLISH 10.7 FAVOURITE RUNNING CYCLES : This menu allows you to recall the favourite running cycles promptly, i.e. the last 10 implemented cycles. Press key FAVOURITES (8) ► Press the UP-DOWN keys (9-10) to scroll down ► the list of favourite programs FAVOURITES F01 BREAD 100GM F03 ---...
- Page 32 ENGLISH 10.8 ALARMS This page allows you to enter the ALARMS menu . Premere key MENU (2), ► Select with UP-DOWN keys (9-10) ALARMS ► LIST item then press the SET key (11) OPTIONS LIGHT 22/12/14 18:15 MANUAL DEFROST ALARM LIST INTERNAL VALUES SERVICE Press the UP-DOWN keys (9-10) to scroll...
- Page 33 ENGLISH List of alarms which may occur: ALARM DESCRIPTION CAUSE SOLUTION Cell probe error • Cell probe fails • Replace probe Evaporator probe error • Evaporator probe fails • Replace probe Condenser probe error • Disabled • Disabled Humidity probe error •...
-
Page 34: Manual Defrosting
ENGLISH 10.9 MANUAL DEFROSTING To start a MANUAL DEFROSTING cycle proceed as follows. Premere the key MENU (2), ► Select with the UP-DOWN keys (9-10) the MA- ► NUAL DEFROSTING item then press the SET OPTIONS key (11) LIGHT 22/12/14 18:15 MANUAL DEFROST The defrosting cycle will start if the evaporator ALARM LIST... - Page 35 ENGLISH 10.10 INTERNAL LIGHT SWITCHING-ON ( for cabinets supplied with glass door only) To switch on the internal light proceed as follows. Press key MENU (2), ► Select with the UP-DOWN keys (9-10) the ► LIGHT item then press the SET key (11) OPTIONS LIGHT The machine internal LIGHT will switch on.
- Page 36 ENGLISH 10.11 Detailed description of the icons relative to the Controllers Status During the implementation of a cycle (either Manual or Automatic) the status of the main controllers shall be displayed by means of icons. White ON : compressor is activated ►...
- Page 37 ENGLISH 10.12 USB Host Port By inserting a USB stick you may have the possibility to carry out the following operations: Download the data relative to the cycles performed on the USB stick (historical records) ► Download the saved parameters onto the USB stick (service) ►...
- Page 38 ENGLISH The recorded files have a sequential number accordingly with the number of times they have been unloaded. In this way the name of file could change in “log00n00001.csv”, “log00n00002.csv”, etc. All collected data will be automatically entered in tabular form on a Excel sheet, separated into columns and rows.
-
Page 39: Chapter 13 Transport And Handling
ENGLISH CHAPTER 13 TRANSPORT AND HANDLING The transport and handling of the retarder-proofer/dough retarder refrigerated cabinet and refrigerated table must only be done while maintaining the vertical position, observing the markings on the packaging. The manufacturer disclaims any liability for problems resulting from transport performed under conditions other than those specified above. - Page 40 ENGLISH Polyethylene is dangerous for children - remove any accessories with external connections Removing the wooden base (fig. 4) : tilt the retarder-proofer/dough retarder refrigerated cabinet and refrigerated table sideways and unscrew the two self-tapping screws (cabinet solely) , lift the retarder- proofer/dough retarder refrigerated cabinet and refrigerated table and remove the base.
-
Page 41: Chapter 14 Electrical Wiring And Connections
ENGLISH - insert the grilles for food in the special guides - insert the condensate water drain pan into the special guide rails already fixed under the retarder- proofer/dough retarder table REM. 13.2 Retarder-proofer/dough retarder refrigerated cabinet and refrigerated table REM ( Fig. 7 ) Fig.7 - position the retarder-proofer/dough retarder table REM as described above (Fig. -
Page 42: Chapter 15 Installation Operations
ENGLISH It is essential to correctly connect the retarder-proofer/dough retarder table and cabinet to an efficient earthing system carried out as specified by the applicable provisions of law. 14.1 Connection to the water supply (retarder-proofer solely) All models of retarder-proofer/dough retarder refrigerated table and refrigerated cabinet need to be connected to a water supply to perform the functions of management and control of humidity. - Page 43 ATTENTION! INSTRUCTIONS RESERVED SOLELY TO TECHNICAL PERSONNELL Users are adviced that any work performed by non-technical staff or unauthorized personnel will produce the voiding of the warranty rules.
- Page 44 PARAMETER MODIFICATION DISPLAYING It allows to access the setup parameters of the Control Panel. Press the MENU key (2). ► Select with the UP-DOWN keys (9-10) the ► “SERVICE” menu item then press the SET key OPTIONS (11) 22/12/14 18:15 MANUAL DEFROST ALARM LIST INTERNAL VALUES...
- Page 45 Select with the UP-DOWN keys (9-10) the ► menu item then press the – and + keys (8-11) to PARAMETERS 0° C modify values. 0° C 0° C Either press the ESC key (4) to exit or do not ► work for 60 seconds.
- Page 46 RETARDER PROOFER CABINETS/TABLES AND DOUGH-RETARDER PARAMETERS Par. Min. Mas. Unit Dough Analog inputs Retarder-Proofer ¬25 °C Offset cell probe ¬25 °C Offset evaporator probe ¬25 °C offset condenser probe ¬25 %r.H. offset humidity probe ¬¬¬¬ Type of probe 0 = PTC 1 = NTC ¬¬¬¬...
- Page 47 Cycle time for the starting of the humidifier (only for rU0 = 1, see also uU3) Humidifier starting time within the cycle time uU2 to obtain 100% humidity inside cell (only for rU0 = 1, see also rU2) Enabling of humidification/dehumidification control during the block phases, the preser- ¬¬¬¬...
- Page 48 Time cue at the evaporator fan switching-on Calibration value of the evaporator fan minimum speed Calibration value of the evaporator fan maximum speed °C Temperature for evaporator fan stop Par. Min. Mas. Unit Dough Digital inputs Retarder-Proofer Effect caused by the door opening, i.e. by the micro door input activation 0 = no effect 1 = the compressor, the evaporator fan and the heating resistors will be switched off, ¬¬¬¬...
- Page 49 INTERNAL VALUES DISPLAYING This page will show you all the internal values. Internal values term refers to the temperature values and the appliance active relays that cannot be modified. Press key MENU (2), ► Select with the UP-DOWN keys (9-10) the ►...
-
Page 50: Historical Data Display
Low pressure • Disabled Compressor • Compressor digital output Light • Internal light digital output Humidity • Humidifier digital output Cond Fan • Disabled Defrosting • Defrosting resistance digital output Resistances • Heating resistances digital output Gen Vapour • Disabled Evap Fan •... - Page 51 Select with the UP-DOWN keys (9-10) the “SE- ► TUP LOGGING” item HISTORICAL DATA SETUP RECORDINGS Press the SET key (11) to confirm DELETE RECORDINGS ► Select with the UP-DOWN keys (9-10) the ► menu item then press the SET key (11) to Se- SETUP RECORDINGS lect/Deselect the records of the variable item.
- Page 52 DOWNLOAD OF SAVED PARAMETERS ON A USB STICK It allows you to save the machine parameters on a USB device When it is ON switch the card on STAND-BY ► mode by pressing the ON/OFF key (1) HISTORICAL DOWNLOAD Insert the USB stick in the USB port. DOWNLOAD PARAMETERS ►...
- Page 53 UPLOAD OF SAVED PARAMETERS It allows you to store parameters from a USB device to the machine. When it is ON switch the card on STAND-BY ► mode by pressing the ON/OFF key (1) HISTORICAL DOWNLOAD Insert the USB stick containing the DOWNLOAD PARAMETERS ►...
- Page 54 TASTIERA INTERFACCIA UTENTE KEYBOARD USER INTERFACE porta USB RS485 terra 42 41 40 39 38 37 36 35 34 33 32 31 30 29 28 27 26 25 24 23 22 21 20 MODULO DI CONTROLLO 54 55 57 58 CONTROL MODULE 4 5 6 15 16 17...
- Page 55 Components key: CL Humidifier level control - CP Compressor - EV1 Water inlet electrovalve - IL Light switch - IP Door mi- croswitch - K1 Compressor relay - K5 Defrost relay - K6 Leavening resistance relay - K3 Steam generator relay - L1 Internal light - MS Feeding terminal board - MP Micro door - RB Boiler resistance - RC Condensate water resistance - RP Anticondensate water resistance - RS Defrost resistance - RR Heating resistance - SA Room probe - SC Condenser probe - SL Level probe - SS Evaporator probe - SU Humidity probe - TS Safety thermostate - VC Condenser fan - VE Evaporator fan - KU Umidifier Colours...
- Page 56 R404A BAKING 1570 1110 R404A BAKING 2098 1110 R404A BAKING 2626 1110 R404A 1456 1984 2512 1456 1984 2512 EVERLASTING s.r.l. 46029 SUZZARA (MN) - ITALY - S.S. Cisa km.161 Tel.0376/521800 (4 linee r.a.) - Telefax 0376/521794 http://www.everlasting.it - E-mail:everlasting@everlasting.it...
Need help?
Do you have a question about the BAKING CAB FL Series and is the answer not in the manual?
Questions and answers