
Subscribe to Our Youtube Channel
Related Manuals for Everlasting LoStagionatore STG ALL 700 INOX S ADV


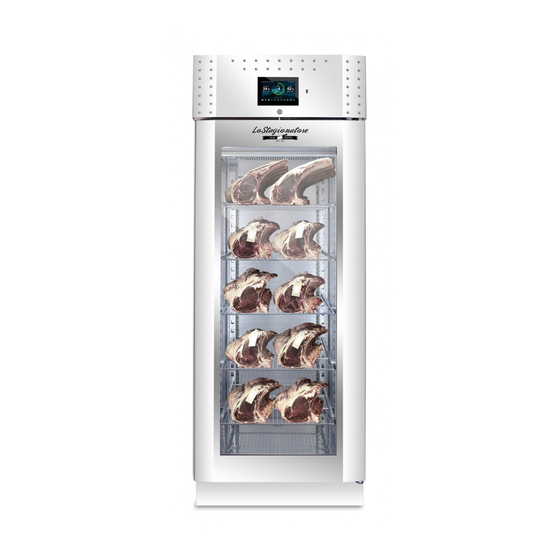
Summary of Contents for Everlasting LoStagionatore STG ALL 700 INOX S ADV
- Page 1 Instruction and maintenance manual Instruction and maintenance manual LoStagionatore SINCE 1956 ALL-IN-ONE ALL-IN-ONE EVERTOUCH EVERTOUCH Rev.11-08...
- Page 2 INDEX Chapter 1 GENERAL RULES AND WARNINGS Pag. 01 1.1 Tests and warranty Pag. 01 1.2 Introduction Pag. 01 1.3 Product description Pag. 02 1.4 General safety regulations Pag. 02 1.5 Client’s responsibilities Pag. 02 1.6 Service requests Pag. 02 1.7 Instructions for spare parts orders Pag.
- Page 3 Chapter 11 SHORTCUTS Pag. 39 11.1 Start_stop Pag. 39 11.2 Defrost Pag. 40 11.3 Air exchange Pag. 41 11.4 Rotation (optional) Pag. 41 11.5 Alarms Pag. 42 11.6 Probes Pag. 44 11.7 Sterilization (optional) Pag. 46 Chapter 12 SETUP Pag. 47 12.1 Date and time Pag.
- Page 4 STAGIONATORE Section 1: GENERAL INSTRUCTIONS 1.1 TESTING AND GUARANTEE The appliance is tested in our works in compliance with established regulations and then shipped ready for use. The guarantee is valid for a full 12 months from the date of delivery of the appliance and it covers the repair or replacement of any defective parts, with the exception of electrical and electronic components.
- Page 5 STAGIONATORE The symbol appears at certain points in the manual to draw the reader’s attention to important safety information. The manufacturer declines any whatsoever responsibility in the case of improper use of the ap- pliance deviating from the reasonably construed intended use, and for all operations carried out that are not in compliance with the instructions laid down in the manual.
- Page 6 STAGIONATORE 1.6 CLIENT SERVICE REQUESTS For all technical problems and any requests for technical service, refer exclusively to your local dealer. 1.7 ORDERING SPARE PARTS Spare parts orders must be made by consulting the relative spare parts catalogue which gives the correct description of the part, the part reference code and the serial number of your appliance.
- Page 7 STAGIONATORE Section 3: INSTALLATION 3.1 TRANSPORT AND HANDLING The appliance must be transported and handled exclusively in a vertical position, in observan- ce of the instructions printed on the packing. This precaution is necessary to avoid contamination of the refrigerant circuit with compressor lube oil with resulting valve and heat exchanger coil failure and problems starting the electric motor.
- Page 8 STAGIONATORE - position the appliance with the help of a spirit level. Adjust the leveling feet on the metal base of the unit if necessary (fig.3) - remove the protective PVC film from the external surfaces of the unit - position the shelf runners in the holes in the uprights (fig.4) - insert the food shelves in the runners - insert the condensate collection tray in the relevant runners located beneath the unit 3.3 WIRING AND ELECTRIC / WATER CONNECTION...
- Page 9 STAGIONATORE Preliminary Checks -check the condition of the power cord (no cuts or chaffing) -check that the feet, door hinges and shelf supports are stable -check the condition of internal and external components (pipelines, heat exchanger elements, fans, electrical components, etc.); check also that all parts are firmly fixed into position -check that the door seals and drawers are not damaged (broken or scratched) and that the doors close and are sealed properly The user must also observe the following instructions to obtain the best operation from the ap-...
- Page 10 STAGIONATORE All uses except authorized uses of the appliance shall be construed as “improper use” for which the manufacturer declines all responsibility. 4.2 SAFETY AND ACCIDENT PREVENTION The appliance embodies various features designed to assure the safety and protect the health of the user.
- Page 11 STAGIONATORE Section 5: ROUTINE AND PROGRAMMED MAINTENANCE The information in this section regards the user, or other non-specialized personnel, and the routi- ne maintenance technician. 5.1 BASIC SAFETY REGULATIONS We summarize the safety regulations already shown in heading 1.5 to ensure that the user or maintenance technician can perform the work in conditions of total safety: - do not touch the unit with wet hands and/or feet - do not use the appliance with bare feet...
- Page 12 STAGIONATORE working with up and down movements (fig.7), remove any dust or fluff that has deposited on the heat exchanger fins. In case of greasy deposits, use a brush soaked in benzene or alcohol. For units with overturning upper front panel, unscrew the fixing screw and turn the upper panel on the top hinges.
- Page 13 STAGIONATORE Section 7: DIAGNOSTIC In case these problems arise, please follow the instructions stated in the following chart: PROBLEM POSSIBLE CAUSE SOLUTION Appliance does not switch on power failure check plug, socket, fuses, electrical line other contact technical service Refrigeration unit does not start set temperature has been reached set new temperature defrosting cycle is in progress...
- Page 14 STAGIONATORE Section 8: SEASONING CABINET Seasoning cabinet has been designed to recreate the necessary and optimal temperature and hu- midity conditions to season salami, cheese or meat, regardless of external weather conditions. For instance, seasoning salami consists in giving a product a set time for resting in suitable climate conditions, so that it can reach the best outcome in terms of organoleptic qualities, aroma and taste in the shortest time possible.
- Page 15 STAGIONATORE Main features: - 7’’ TFT display with high resolution (800x480 WVGA), LED backlighting and capacitive touch screen. - Devices: USB 2.0. - Acoustic signals. - High quality design and icons. - Touch screen interface with gestures, for an even more intuitive control. - Clock and calendar (RTC).
- Page 16 STAGIONATORE Chapter 9: Installation and first startup 9.1 Installation Before starting the refrigerating cabinet, it is necessary to check that all connections have been carried out as per chapter 3.3. 9.2 First start Once the refrigerating cabinet is connected to the power supply, the machine will begin the startup. The display will show the uploading screen of the system software for some seconds, and then the splash screen (fig.
- Page 17 STAGIONATORE ATTENTION: to change LANGUAGE or DATE and TIME, refer to paragraphs 12.1 - 12.2 It can be divided into 4 areas: - AREA 1: The current date and time are displayed; to change the visualization format see paragraph 12.4 The name of the currently running recipe is displayed on the right.
- Page 18 STAGIONATORE - AREA 3: The icons related to the statuses of the digital outputs of Lo Stagionatore are displayed: 1- Air Exchange 2 - Recovery 3 - Humidification 4 - Cooling 5 - Lighting 6 - Alarm 7 - Ventilation 8 - Warming 9 - Defrost 10 - Sterilization...
- Page 19 STAGIONATORE 9.4 Unlocked Home Screen fig.12 The Unlocked Home Screen is an active screen, i.e. has clickable keys, unlike the Locked Home Screen. It can be divided in 4 areas (fig.12): - AREA 1: It displays the current date and time; to change the visualization format see paragraph 12.1. The name of the currently running recipe is displayed on the right.
- Page 20 STAGIONATORE Unlike the Locked Home Screen, the SET T and SET RH keys are clickable and allow for a quick change of temperature and relative humidity Set Points of the running phase. Click on the keys until fully green-coloured. (fig.13) fig.13 The upper box will respectively display the TEMPERATURE and HUMIDITY Set Points of the running phase;...
- Page 21 STAGIONATORE A steel-coloured RUNNING RECIPE KEY can be found inside the circular crown (fig.15). fig.15 The following data is graphically displayed on the Running Recipe Key: 1 - The name of the running phase 2 - The remaining time to the end of the running phase, stated in Day, Hours, Minutes, depending how far in time the end of the phase is.
- Page 22 STAGIONATORE - AREA 4: > slide to lock Sliding on the writing allows the locking of the device to access the Locked Home Screen Capitolo 10 RICETTE Click on the icon on the Unlocked Home Screen to access the Recipe Menu, where all recipes stored in Lo Stagionatore are located.
- Page 23 - AREA 1: On top there is the name of the selected recipe with a padlock next to it, in case it is an Everlasting recipe already present by default in Lo Stagionatore. The recipes belonging to this category cannot be modified;...
- Page 24 STAGIONATORE Then confirming the creation on the corresponding pop-up. - AREA 2: Click on each phase on AREA 1 to display the corresponding PHASE PARAMETERS on AREA 2. Each parameter is clickable and opens a pop-up from which it is possible to change its content. The entry of numeric values or names is carried out by two appearing keyboards, depending on the variable to be modified.
- Page 25 STAGIONATORE PHASE PARAMETERS: PHASE NAME Allows changing the name of the selected phase. Click on the name on the pop-up and type the name of the phase on the appearing keyboard. Push the key to confirm. DURATION Allows setting the duration (expressed in days, hours, minutes) of the selected phase. Click on each value of d h m to open the numeric keyboard and change its content.
- Page 26 STAGIONATORE TEMPERATURE Allows setting the temperature to be kept inside Lo Stagionatore in this phase. The first step is the activation or deactivation of temperature control: In case in this phase of the recipe you wish to control the temperature inside Lo Stagionatore, it is necessary to move the selector next to the TEMPERATURE name to the ACTIVE (green) status.
- Page 27 STAGIONATORE HUMIDITY Allows setting the Relative Humidity degree to be kept inside Lo Stagionatore in this phase. The first step is the activation or deactivation of humidity control: In case in this phase of the recipe you wish to control the relative humidity inside Lo Stagionatore, it is necessary to move the selector next to the HUMIDITY name to the ACTIVE (green) status.
- Page 28 STAGIONATORE WORK-REST Work-Rest is a particular temperature control alternating two conditions: Work period and Rest Period. During Work, Lo Stagionatore can linearly vary the internal temperature from initial Tmax to final Tmin within the set-up Work time, thanks to an algorithm activating the compressor and the heater cables. Then the Rest period starts and Lo Stagionatore restores the temperature from Tmin to Tmax within the set-up rest time.
- Page 29 STAGIONATORE By clicking on the icon it is possible to go from the active to the not active status and vice versa. The Work-Rest control activation implies the deactivation of phase parameter control for Temperature, Humidity and Recovery. Then there are 4 parameters to set: - Tmax: is the start temperature of the Work period and of the end of the Rest period.
- Page 30 STAGIONATORE By clicking on the icon, it is possible to go from the active to the not active condition and vice versa. Then there are 3 parameters to set: - Work: it is the duration of the Work period - Recovery: it is the duration of the Recovery period - Tmax Delta: it is a security threshold to preserve the integrity of products during the Recovery process.
- Page 31 STAGIONATORE VENTILATION fig.18 fig.19 Ventilation control can be of two types depending on if the EVERtouch electronics is installed on a Lo Stagionatore cabinet or on a Lo Stagionatore cold room. In both cases, the speed of the fan blades that move the air inside the appliance is affected. Low Speed: is particularly indicated in the phases in which it is advisable to avoid the product to be exposed to a too intense and direct airflow (for example, in the Cold-cut drying phase to avoid encrustment).
- Page 32 STAGIONATORE 100% corresponds to maximum speed, while 20% corresponds to the minimum settable speed. Once the phase speed is set, push to confirm or to cancel and return to the previous setting. - AREA 3: AREA 3 (fig.17) contains function keys to carry out the following actions: SAVE: allows saving a new recipe or saving an existing recipe that has been modified START: allows starting the selected recipe BACK: allows returning to the Recipe Menu...
- Page 33 STAGIONATORE fig.21 The Unlocked Home Screen with the running recipe will automatically be displayed. 10.3 Creation of New Recipe To create a new recipe, push the key on the Unlocked Home Screen. Select the category folder in which to add the new recipe from the Recipe Menu screen. Push the New icon to access the New Recipe Screen.
- Page 34 STAGIONATORE The new default Recipe has only one phase and each phase parameter is deactivated. Following any changes to the recipe, the SAVE icon will appear in the function keys Once the desired phases are added and all phase parameters are set, push the SAVE key to save the recipe to the archive.
- Page 35 After any change of the recipe, the SAVE saving icon will appear among the function keys. By pushing on the icon, a different pop-up will appear, depending on if the modified recipe is a default Everlasting recipe or a user-created recipe.
- Page 36 By clicking on save as, it is possible to type the name of the new recipe on the keyboard and to confirm with the save key. A new recipe based on an Everlasting recipe is thus created, and it is added to the original recipe folder.
- Page 37 In the delete mode, two types of symbols appear next to each recipe name: PADLOCK to indicate that the corresponding recipe is an Everlasting recipe and cannot be deleted. RECYCLE BIN to indicate that the corresponding recipe is a user-created recipe and can be...
- Page 38 STAGIONATORE Push the recycle bin icon next to the recipe to be deleted. Confirm the deleting on the following pop-up. The recipe has been deleted from the archive and cannot be recovered! Push the CANC function key again to exit the recipe delete mode. 10.6 Running Recipe To access the Running Recipe Screen, push on the steel-coloured RUNNING RECIPE KEY on the Unlocked Home Screen.
- Page 39 The SAVE function is active only if the running recipe is not an Everlasting recipe (identified by the locked padlock next to the recipe name). A warning pop-up requires confirmation by the user.
- Page 40 STAGIONATORE FOLDER RECIPE PHASE DURATION TEMPERATURE HUMIDITY Cold Dehu Humi SetPoint SetPoint Diff Diff Diff Diff Dry-Aging 1 2d 0h 0m Dry-Aging Dry-Aging 2 60d 0h 0m MEAT Refrigerator Refrigerator 0d 0h 0m Hard Cheese Phase 1 20d 0h 0m CHEESE Phase 1 3d 0h 0m...
- Page 41 STAGIONATORE WORK-REST RECOVERY Work Work ON/OFF Tmax Tmin Rest Time ON/OFF Recovery Time Delta T max Low/High Time Time 2h 0 m 0h 30 m 8h 0m 1h 0m 2h 0 m 0h 30 m 8h 0m 1h 0m 2h 0 m 0h 30 m 8h 0m 1h 0m...
- Page 42 STAGIONATORE Chapter 11: SHORTCUTS Click on to access the Shortcut menu from the Unlocked Home Screen. 11.1 START_STOP This key allows stopping a running recipe by pausing it STOP or restarting it START from where it was stopped. During the STOP status Lo Stagionatore cabinet is paused and any function is stopped. During the STOP status, the Unlocked and Locked Home Screen show red-coloured circular crown wedges and the pause symbol on the RUNNING RECIPE KEY to indicate that Lo Stagionatore is not active.
- Page 43 STAGIONATORE From the STOP status, push the START key to recover the recipe from the point in which it was stopped. In case Lo Stagionatore remains in the STOP status for more than 2 ore, the appliance goes to Stand by mode. Standby is an energy saving mode where the display darkens and stays in the STOP condition.
- Page 44 STAGIONATORE 11.3 AIR EXCHANGE This function allows carrying out the exchange of the air circulating in Lo Stag- ionatore for a pre-set time duration. By pushing again the air exchange key before its automatic end, the process is stopped. When air exchange is active, the corresponding icon on the Home Screens and the air exchange key on the Shortcut Screen are green.
- Page 45 STAGIONATORE 11.5 ALARMS This section allows displaying the list of all alarms generated over time on Lo Stagionatore. Each alarm is identified by: Code: Univocal acronym referred to an alarm, as per list on paragraph 13.3. Description: Alarm name Start date and time: when the alarm condition has taken place Stop date and time: when the alarm condition has ended Status: there are three possible alarm statuses, each with a corresponding colour.
- Page 46 STAGIONATORE Red: Lo Stagionatore is in alarm, and the problem is not solved. Yellow: Lo Stagionatore warns that an alarm has taken place, but it has subsided. Blue: Lo Stagionatore warns that an alarm has taken place, and the user has seen it. An alarm goes from Red to Yellow status only when the condition that has generated it is no longer verified.
- Page 47 STAGIONATORE 11.6 PROBES This page allows visualizing the list of the probes on Lo Stagionatore and the corresponding measured values. Complete list of Probes on Lo Stagionatore: Chamber Temperature Chamber Humidity Evaporator Temperature Safety Temperature Core temperature (optional) Weight (optional) PH (optional) Next to the measured value of each probe, an icon allows visualizing graphically the trend...
- Page 48 STAGIONATORE The Diagram Screen displays the Temperature (green line) and Humidity (blue line) trends of Lo Stagionatore on the current date. The continuous line indicates the value measured by the probes, while the dotted line refers to the phase Set Point of the recipe. Use the direction keys to move along the x-axis (time axis).
- Page 49 STAGIONATORE Enter the CALIBRATIONS section and select parameter 56 PH PROBE CORRECTION. Calibrate the value by typing on the numeric keyboard the difference (Positive or Negative) calculated as follows: Difference = nominal Value (7,01 or 4,01 PH) - EVERtouch detected value Confirm the entry and return to the HOME screen.
- Page 50 STAGIONATORE Capitolo 12: SETUP Click on the icon on the Unlocked Home Screen to access the Setup Menu, dedicated to the general settings of Lo Stagionatore. There are four Setup Areas: DATE AND TIME LANGUAGE CONNECTIONS PARAMETERS...
- Page 51 STAGIONATORE 12.1 DATE AND TIME By selecting Date and Time, a Pop-up appears to allow keying in the correct values. Confirm to implement the changes. To set a different date visualization format see the PARAMETERS section, paragraph 12.4 12.2 LANGUAGE The Language screen contains the list of the currently available languages;...
- Page 52 STAGIONATORE 12.3 CONNECTIONS 12.3.1 Transfers: Open the Transfers page and insert the prearranged USB stick in the slot. After inserting the USB stick, the selection boxes next to the corresponding transfer items and the TRANSFER icon in the function keys on the right are displayed. The Export items always have a selection box, whereas the Import items only have it if the corre- sponding file is on the USB stick.
- Page 53 STAGIONATORE fig.23 Carry out the transfer by clicking on the corresponding icon fig.24 At the end of the process, the transfer files will be identified by the icon and it will be possible to remove the USB stick (fig.23). Service Parameter Export: to export all the current Service settings Recipe Export: to export all the recipes of the archive Recorded Data Export: to export in csv format the probe data related to the latest ten carried-out recipes that have not been downloaded by USB transfer yet.
- Page 54 STAGIONATORE ATTENTION: Make sure that the USB stick only contains the folders to be imported/exported, and the firmware image file. In case an unsuitable USB stick is used, a forced system restore of Lo Sta- gionatore will have to be carried out by unplugging and replugging it. 12.3.2 Info: In this page all the hardware codes identifying the electronics on Lo Stagionatore and the installed Firmware version are recorded.
- Page 55 STAGIONATORE WARNING! INSTRUCTIONS STRICTLY RESERVED TO AUTHORIZED TECHNICAL PERSONNEL Every intervention executed by a non authorized technical personnel implies a warranty decay.
- Page 56 STAGIONATORE PARAMETERS This area is protected by password and is intended to authorized technical personnel only.PASS- WORD: 1956...
- Page 57 STAGIONATORE TOUCH CONTROL PARAMETERS STAGIONATORE N° DESCRIPTION VAL. RANGE PROCESS ADJUSTMENT (8b) MIN. temperature differential 1°C +1;+5°C MAX temperature differential 10°C +5;+45°C MAX humidification differential 10;99% Neutral humidification zone 0;50% Neutral dehumidification zone 0;50% Max temperature differential in rest 0;99°C DEFROST (8b) Defrost interval 1;24h...
- Page 58 STAGIONATORE Ambient probe correction 0°C -10;+10°C Humidity probe correction -10;+10% Evaporator probe correction 0°C -10;+10°C Safety probe correction 0°C -10;+10°C Core probe correction 0°C -10;+10°C Weight probe correction -100;100g PH probe correction -1;+1 INPUT CONFIGURATION (8b) Microswitch contact 0=no; 1=nc Remote alarm contact 0=no;...
- Page 59 STAGIONATORE ALARMS The EVERtouch control board warns users about possible failures through alarm codes visualized on the display (by pop-up or in the ‘Alarms’ page) and through an acoustic signal issued from a buz- zer inside the operator Console (if activated). In the case of an alarm condition, one of the following messages will be displayed: ALARM DESCRIPTION...
- Page 60 STAGIONATORE 13.4 REPLACEMENT OF U.V. LAMP All maintenance interventions not described in the previous chapters are to be considered as “Extraordinary Maintenance”. Extraordinary maintenance and repairs are to be carried out only by specialized personnel with the manufacturer’s authorization. Any liability for interventions carried out by the user and by unauthorized personnel, as well as the use of non-original spare parts, is excluded.
- Page 61 STAGIONATORE P4 Opt. P3 P2 230V/1/50-60Hz Opt. OPT. DISPLAY TOUCH CONTROLLO DI LIVELLO TS TS N MP MP LI ES VE1 VE2 RS U RR UVC G LEVEL CONTROL LEGENDA MORSETTIERA LIST OF COMPONENTS - TERRA - GROUND TS - TERMOSTATO SICUREZZA TS - SAFETY THERMOSTAT L1 - INGRESSO ALIMENTAZIONE 230V 50Hz FASE L1 - LINE IN 230V 50Hz PHASE...
- Page 62 STAGIONATORE TABELLA 1 Ingombri armadio Peso netto Peso dell’ Volume Potenze Fluido refrigerante TABLE 1 imballato Net weight armadio depos. Powers Type of coolant Dimensions of the imballato Depos. Potenza frig. Assorb. Tipo packed cabinet Weight of volume Refrig. Absorption Type the packed power...
- Page 63 STAGIONATORE...
- Page 64 STAGIONATORE EVERLASTING s.r.l. 46029 SUZZARA (MN) - ITALY - Strada Nazionale della Cisa km.161 Tel.0376/521800 (4 linee r.a.) - Telefax 0376/521794 http://www.everlasting.it - E-mail:everlasting@everlasting.it...
Need help?
Do you have a question about the LoStagionatore STG ALL 700 INOX S ADV and is the answer not in the manual?
Questions and answers